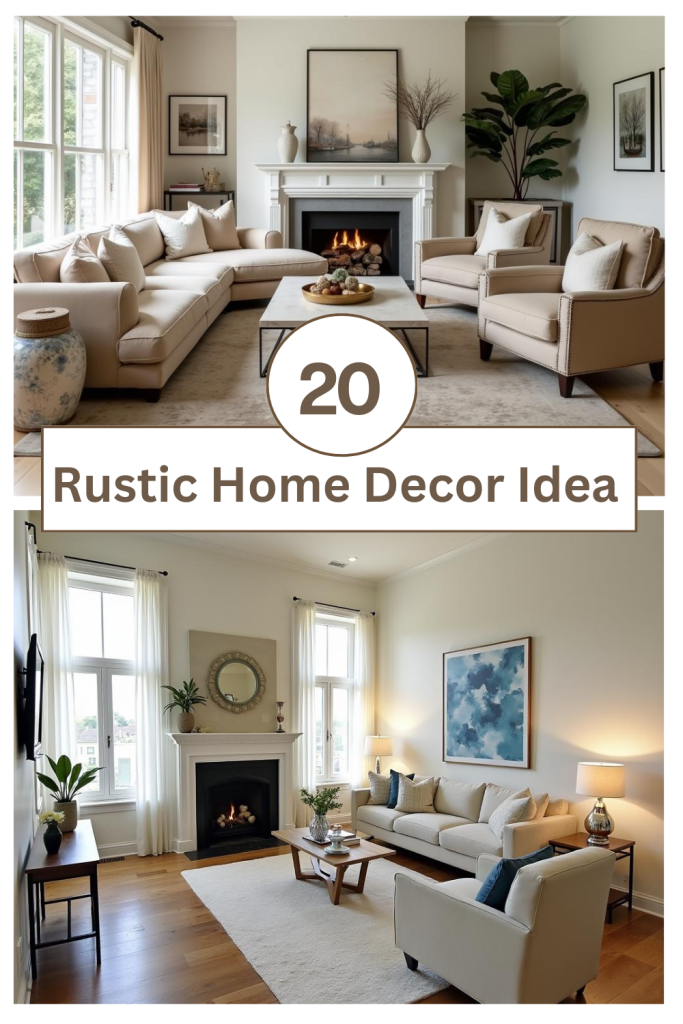
Creating a cozy farmhouse feel in your home is all about embracing rustic charm, vintage accents, and a warm, welcoming atmosphere. Whether you’re looking to redecorate your entire home or add a few touches here and there, these 20 rustic home decor ideas will help you achieve the perfect look.

1. Reclaimed Wood Furniture
Reclaimed wood is a staple of rustic decor. Consider using old barn wood to create tables, shelves, or even bed frames. The natural imperfections add character and authenticity.
Pro Tips:
- Source reclaimed wood carefully from reputable dealers to ensure it’s been properly treated for pests.
- Before buying or building, check the wood’s stability and straightness, as old wood can be warped.
- Seal reclaimed wood with a matte or satin polyurethane to protect the surface without adding a high-gloss shine.
- Clean reclaimed wood gently with a mild soap and water solution; avoid harsh chemical cleaners.
- When making furniture, ensure the piece is structurally sound, especially for items like bed frames or chairs.
- If using reclaimed wood for a dining table, consider adding a glass top to create a smooth, easy-to-clean surface while still showing the wood’s character.
- Be aware that reclaimed wood can be very heavy; plan for delivery and assembly accordingly.
- For a DIY project, start small with something like a simple shelf or a picture frame.
- Understand the history of the wood if possible—it adds to the story of the piece.
- Always sand the wood lightly to remove splinters, but not so much that you erase its unique texture and saw marks.
Style Tips:
- Let a large reclaimed wood dining table be the undeniable focal point of your dining room.
- Create contrast by pairing a rustic reclaimed wood piece with sleek, modern chairs or metal accents.
- A reclaimed wood headboard adds instant warmth and a focal point to a bedroom.
- Use a single, thick piece of reclaimed wood as a fireplace mantel for a dramatic, natural statement.
- Soften the hard lines of the wood with plush, soft textiles like a wool rug or linen upholstery.
- Don’t be afraid to mix different tones of reclaimed wood in the same room for a layered, collected look.
- A console table made from reclaimed wood and black metal legs perfectly blends rustic and industrial styles.
- Keep the surrounding decor simple to let the natural beauty and imperfections of the wood shine.
- Use reclaimed wood for open shelving in a kitchen or living room to display dishware or decor.
- A whitewashed or gray-washed finish can give reclaimed wood a lighter, more coastal-farmhouse feel.
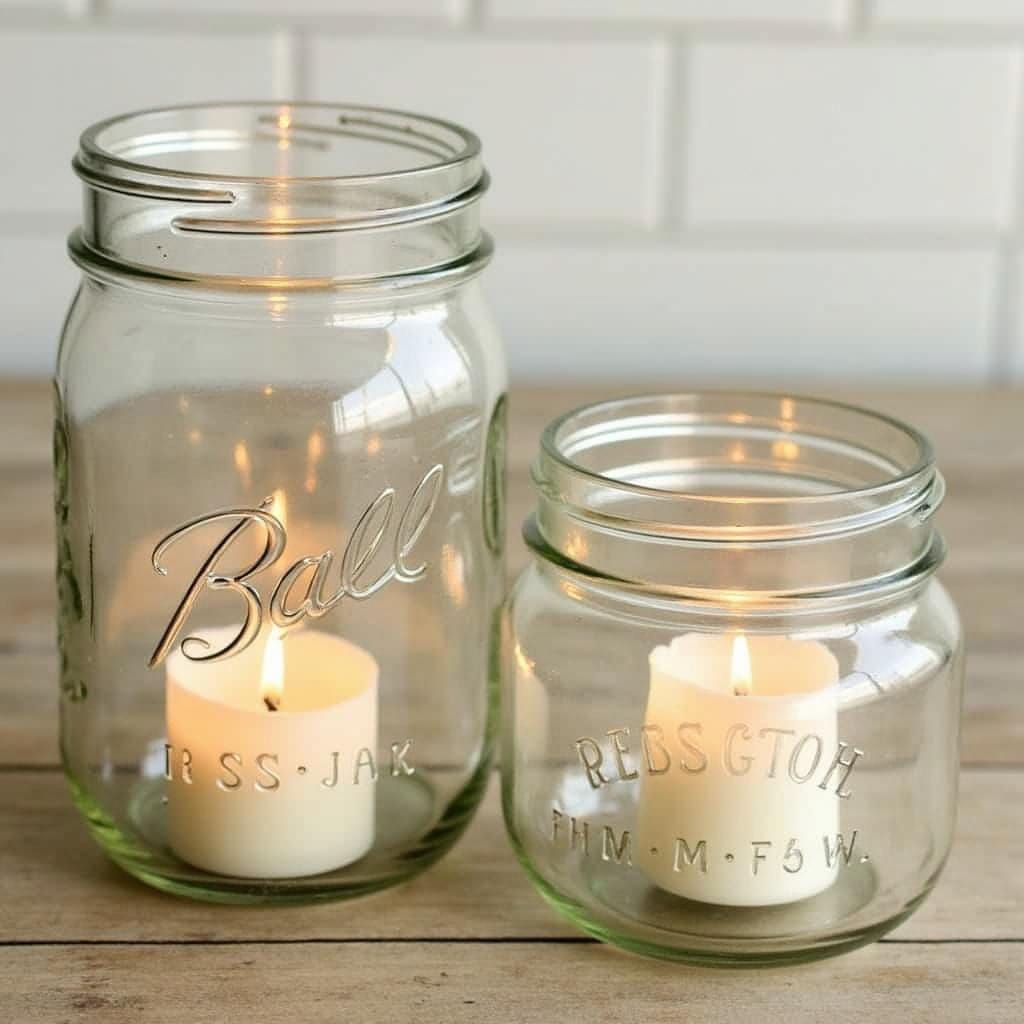
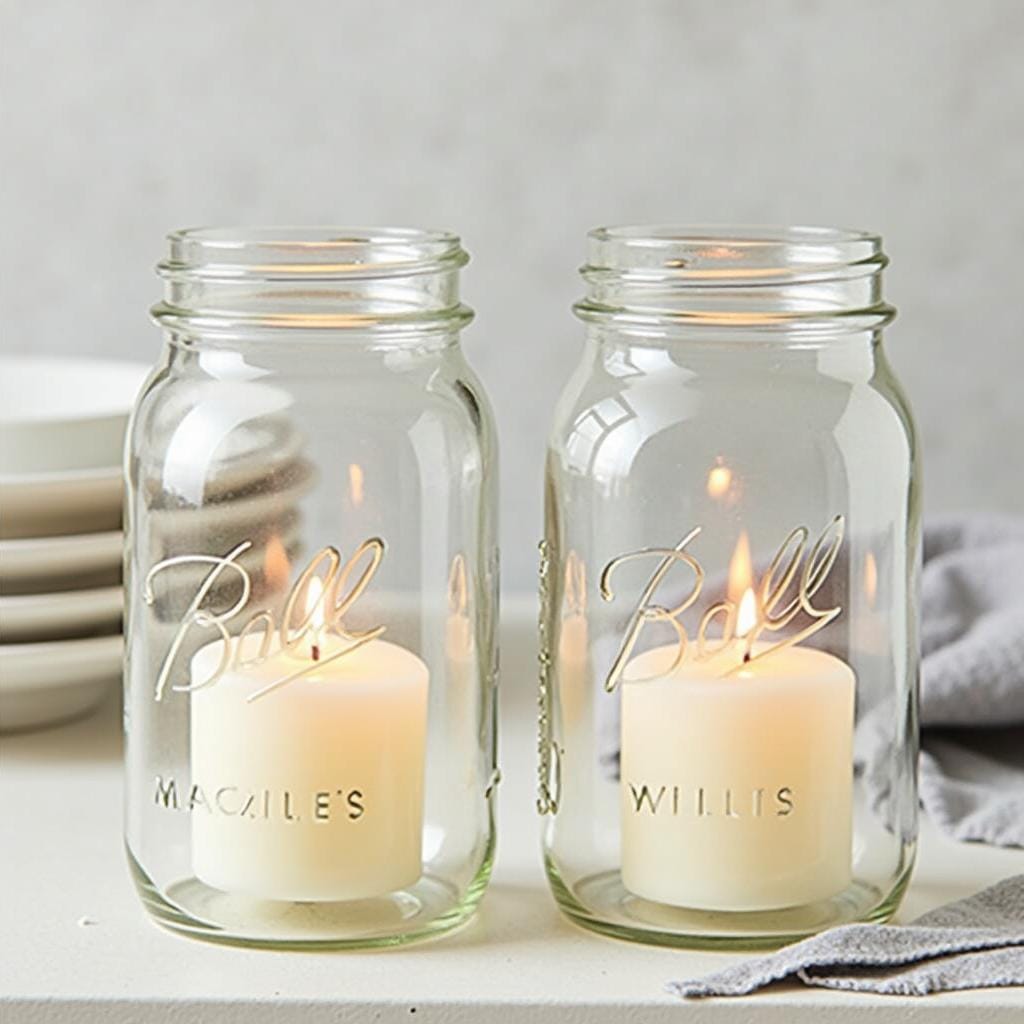
2. Mason Jar Accents
Mason jars are versatile and inexpensive. Use them as vases, candle holders, or storage containers to bring a farmhouse vibe to any room.
Pro Tips:
- To make a candle holder, fill the bottom of the jar with sand, salt, or small pebbles to stabilize the candle.
- When painting mason jars, use chalk paint for a matte, vintage finish that adheres well to glass.
- For food storage, ensure you are using food-safe jars and lids, especially for canning or preserving.
- To create a light fixture, use a pendant light kit designed for jars, and always use a low-wattage LED bulb to prevent overheating.
- Group jars in odd numbers (three or five) for a more visually appealing arrangement.
- To use as a flower vase, a small flower “frog” or even a crisscross pattern of clear tape over the opening can help arrange stems.
- If you’re creating a soap dispenser, be sure to buy a pump that is rust-resistant.
- Avoid over-cluttering surfaces; a few well-placed mason jars are more impactful than dozens scattered around.
- Use them for practical DIY gifts, like a “cookies-in-a-jar” mix or homemade sugar scrub.
- Clean jars thoroughly, especially vintage finds, before using them for food or as decor.
Style Tips:
- Wrap twine, burlap, or a festive ribbon around the rim of the jar for a simple decorative touch.
- Use vintage blue Ball jars for a pop of authentic color.
- Fill jars with seasonal items: small pinecones in the fall, faux snow in the winter, or seashells in the summer.
- Use a collection of mason jars as a rustic centerpiece on a dining table, each holding a single flower stem or a tealight.
- Hang a series of jars from a piece of reclaimed wood to create a unique wall-mounted vase or herb garden.
- Use smaller mason jars to organize items like cotton balls and Q-tips in the bathroom.
- Paint and lightly distress the jars with sandpaper to give them a shabby-chic, weathered look.
- Serve drinks like lemonade or iced tea in mason jars for a casual, farmhouse-style party.
- Use a large jar as a utensil holder on your kitchen counter.
- Tint clear jars with food coloring and Mod Podge to create custom-colored decorative pieces.
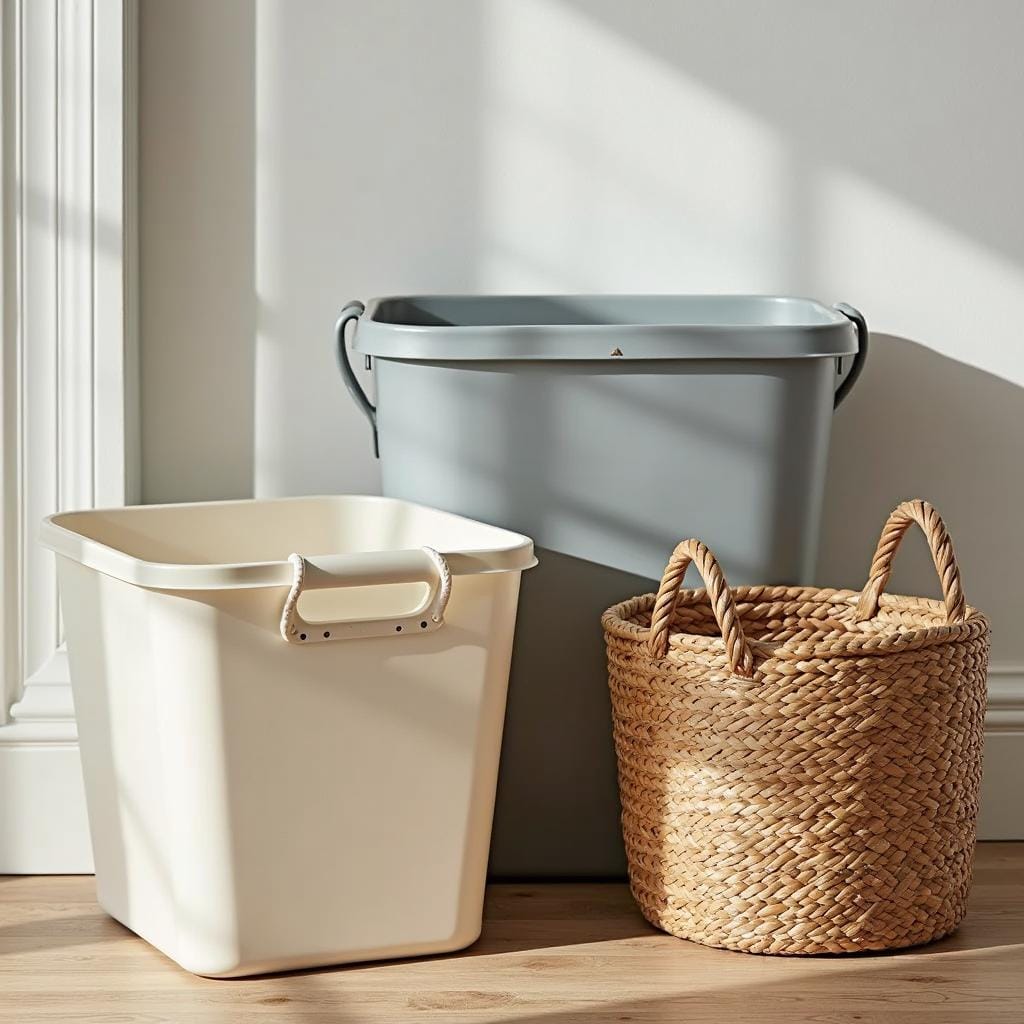
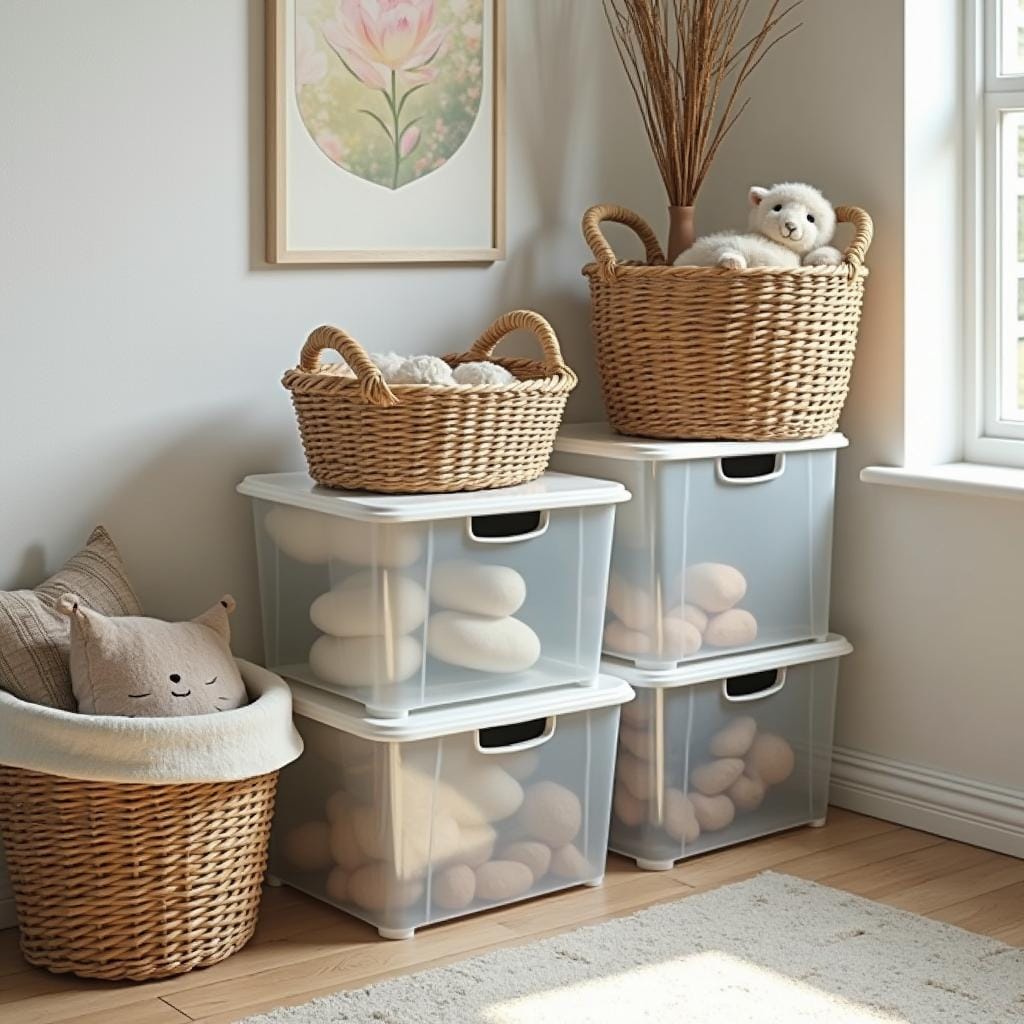
3. Woven Baskets for Storage
Replace plastic bins with woven baskets. They add texture and warmth while keeping your space organized.
Pro Tips:
- Choose the right material for the job: sturdy rattan for heavy items like firewood, and softer seagrass or hyacinth for blankets.
- Use fabric liners inside baskets to protect delicate items like knit blankets from snagging.
- Check that the basket’s handles are well-constructed and securely attached if you plan to carry it frequently.
- To clean, vacuum baskets with a brush attachment and wipe with a slightly damp cloth.
- Use baskets to corral specific categories of items: one for remote controls, one for pet toys, one for magazines.
- To prevent a wicker basket from drying out and becoming brittle, lightly mist it with water occasionally.
- Don’t overload baskets, as this can cause them to lose their shape over time.
- Use a small, subtle tag to label the contents of each basket for easy organization.
- For storing children’s toys, opt for softer baskets without sharp, poky wicker ends.
- Measure your space (like the cubbies in a bookshelf or the space under a bench) before buying to ensure a perfect fit.
Style Tips:
- Create a “basket wall” by hanging a collection of shallow, decorative baskets as wall art.
- Use a large, beautiful basket as a planter for a fiddle-leaf fig or other large houseplant (be sure to use a waterproof liner).
- Slide a row of matching baskets under a console table or bench for a look that is both stylish and organized.
- Mix different shapes and sizes of baskets for a more eclectic, collected-over-time feel.
- A tall, sturdy basket makes a fantastic and stylish alternative to a traditional laundry hamper.
- Use a large, round belly basket to store extra throw pillows or blankets next to your sofa.
- Place a small woven basket on your entryway table to act as a catch-all for keys and mail.
- In a guest room, place a basket with rolled-up towels, a water bottle, and some snacks for a welcoming touch.
- Hang small baskets from a peg rail in a mudroom or kitchen to store hats, gloves, or produce.
- Use a wire basket to add a more industrial-farmhouse element to your storage.
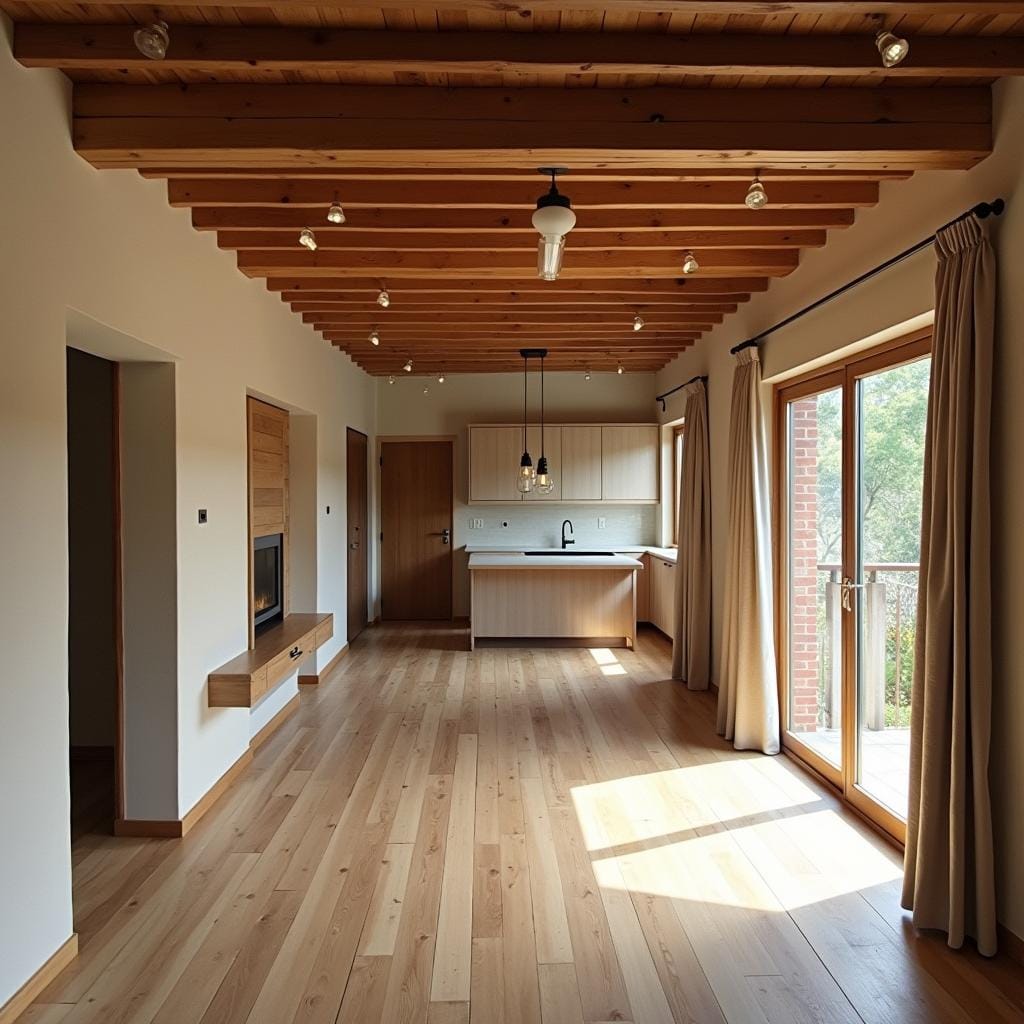
4. Exposed Beams
Exposed wooden beams instantly transform a space with rustic charm. If your home doesn’t already have them, faux beams are a great alternative.
Pro Tips:
- Faux beams made from lightweight, high-density polyurethane are much easier and cheaper to install than real wood beams.
- If installing real wood beams, consult a structural engineer to ensure your home can support the weight.
- For faux beams, use construction adhesive and screws to secure them to the ceiling joists for a safe and permanent installation.
- Clean beams by dusting them with a long-handled duster or vacuuming with a brush attachment.
- In rooms with low ceilings, use beams sparingly or choose a lower profile to avoid making the room feel smaller.
- Space beams logically, aligning them with the room’s architecture to look as if they are part of the original structure.
- Test stains and finishes on a scrap piece of wood or an inconspicuous area of the beam first.
- Integrate lighting by wrapping beams with string lights or installing spotlights between them.
- Inspect original, old beams for any signs of pest damage or rot before making them a centerpiece of your design.
- When creating a vaulted ceiling effect, ensure the pitch and placement of the beams look architecturally sound.
Style Tips:
- Paint beams crisp white to blend with the ceiling for a subtle, modern farmhouse look that adds texture without heaviness.
- Stain beams a dark color to create a dramatic contrast against a light-colored ceiling for a classic Tudor or rustic lodge feel.
- Wrap beams in warm, twinkling fairy lights for a magical, ambient glow in the evenings.
- Use beams to visually define a space, such as separating the kitchen from the living area in an open-plan home.
- Match the stain of your beams to other wood elements in the room, like your flooring or mantel, for a cohesive look.
- Hang lightweight decor, like dried herbs or a simple wreath, from a central beam.
- In a room with very high ceilings, a complex truss system of beams can create a stunning architectural focal point.
- The raw, rough-hewn texture of natural wood beams provides a perfect rustic contrast to smooth, modern furniture.
- Use a single, substantial beam as a statement-making fireplace mantel.
- Leave the beams in their natural, unstained state for an authentic, organic feel.
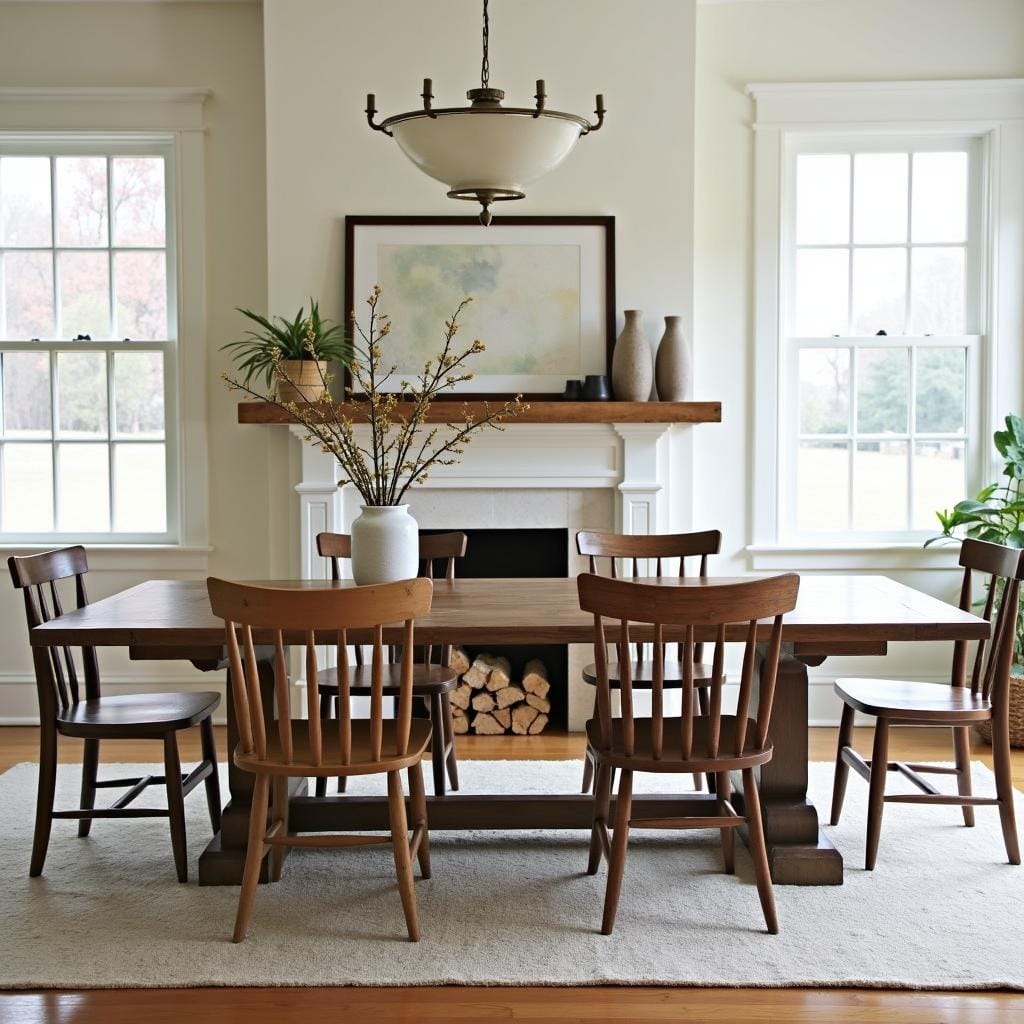
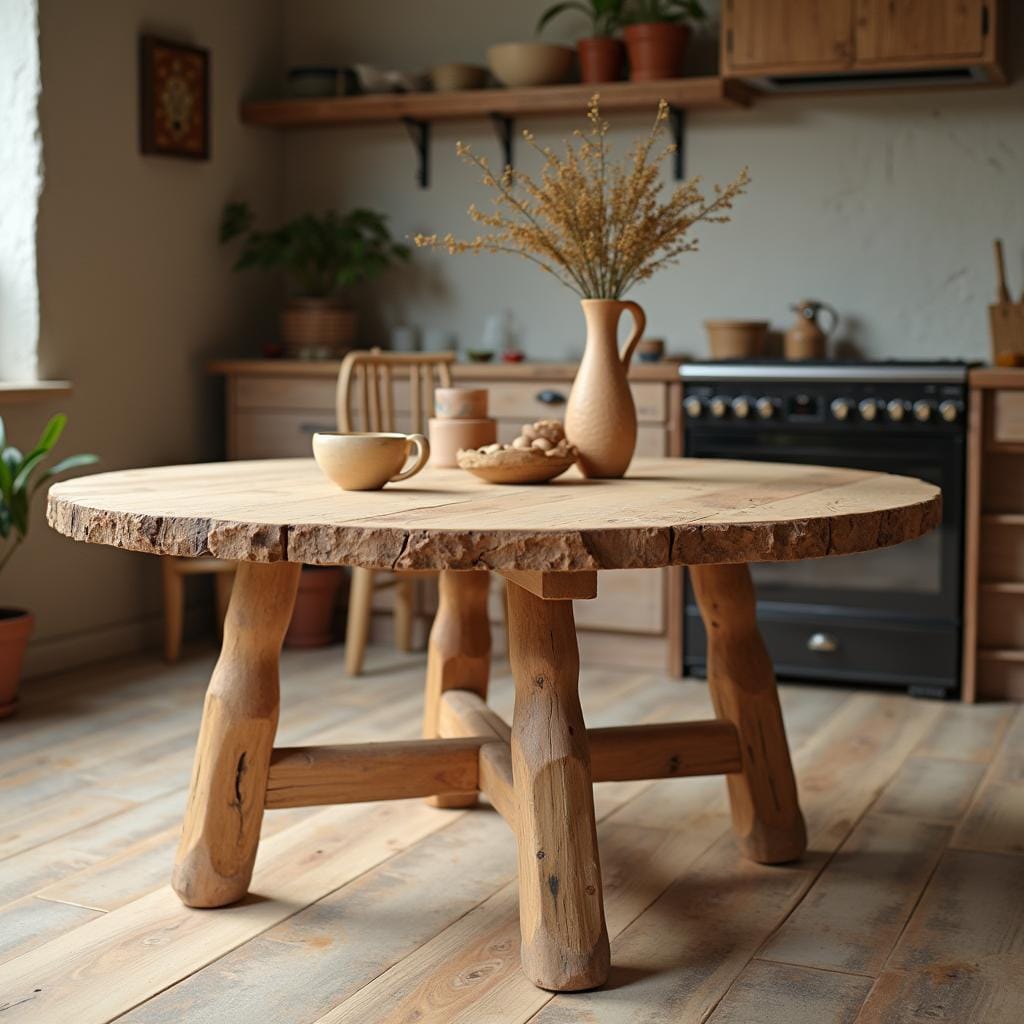
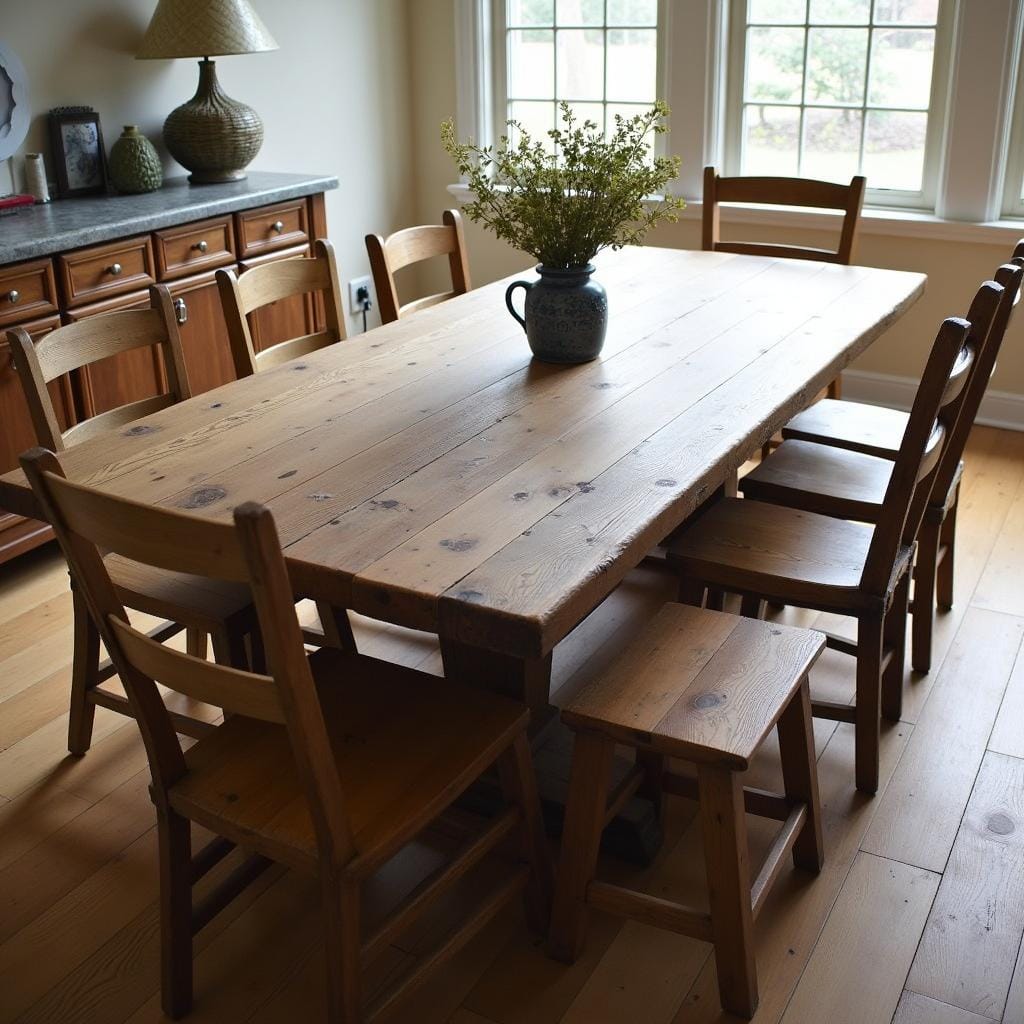
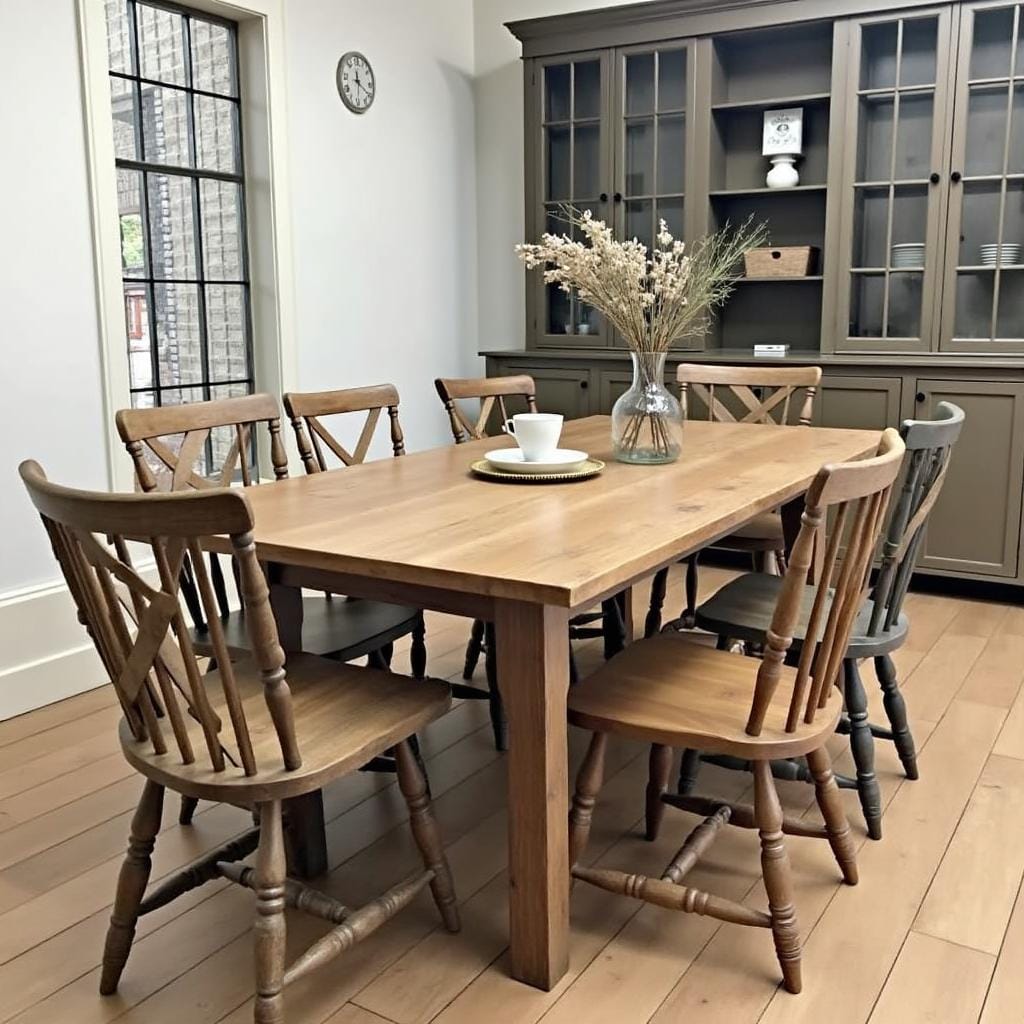
5. Farmhouse Dining Table
A large, wooden farmhouse dining table is perfect for family gatherings. Pair it with mismatched chairs for an extra touch of rustic charm.
Pro Tips:
- Choose the right size: allow for at least 36 inches of clearance between the table and walls or other furniture for easy movement.
- Protect the tabletop with a clear matte or satin sealant to prevent water rings and make cleaning easier.
- Use coasters and placemats to protect the wood from heat and spills.
- For a sturdy, long-lasting table, look for one with a solid wood top and a robust base, like a trestle or pedestal style.
- Look for authentic vintage tables at flea markets or antique stores for a one-of-a-kind piece with genuine history.
- If you’re a DIYer, building a simple farmhouse table is a very achievable and rewarding project.
- Consider an extendable table with a leaf if you need flexibility for hosting larger groups.
- The rug underneath your dining table should be large enough that all chairs remain on the rug, even when pulled out.
- Fix minor scratches or dings with a wood-stain pen that matches your table’s finish.
- A round pedestal table can be a great space-saving option for smaller, square-shaped dining areas.
Style Tips:
- Create an eclectic, collected look by pairing your table with mismatched vintage wooden chairs.
- Use a long, rustic bench on one side of the table to provide casual seating and save space.
- A simple linen table runner down the center adds softness without hiding the beautiful wood grain.
- For a modern farmhouse twist, contrast a rustic wood table with sleek, modern metal or molded plastic chairs.
- Leave the wood in its raw, natural state (properly sealed, of course) for an authentic, organic look.
- Paint the base of the table a classic white or black and leave the tabletop with a natural wood finish for a popular two-tone look.
- Use more substantial, upholstered “captain’s chairs” at the heads of the table for a more formal feel.
- A centerpiece of fresh greenery in a simple vase or a long wooden dough bowl filled with seasonal items is the perfect finishing touch.
- Choose a table with a distressed or “breadboard” style top for added rustic character.
- Let the table be the star and keep the surrounding decor simple and uncluttered.
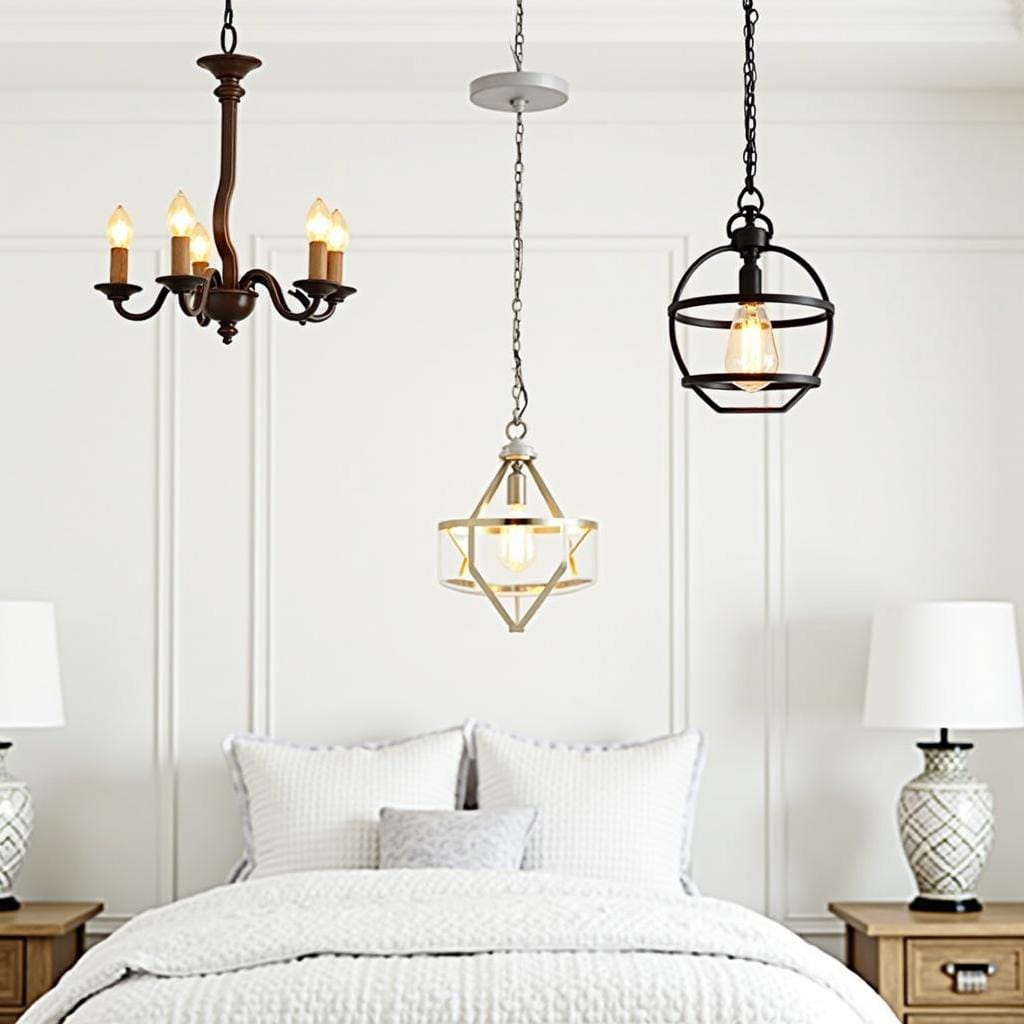
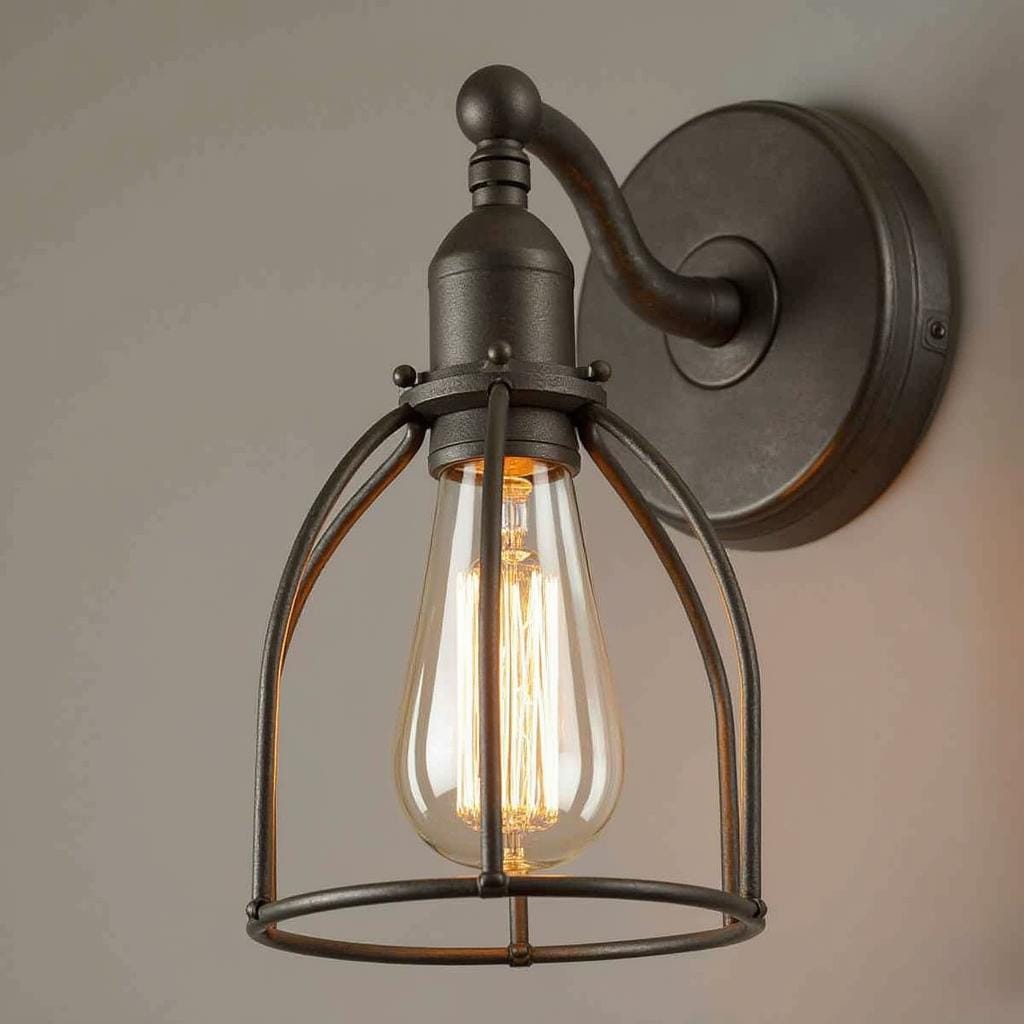
6. Vintage Lighting Fixtures
Swap modern light fixtures for vintage-inspired ones. Think wrought iron chandeliers or lantern-style pendant lights.
Pro Tips:
- If you find an authentic vintage fixture, have it rewired by a certified electrician to ensure it’s safe and up to modern codes.
- Use Edison-style LED bulbs to get that vintage filament look without the high energy consumption or heat output of traditional bulbs.
- Always install dimmer switches to allow you to control the ambiance, from bright task lighting to a soft, warm glow.
- Choose a fixture that is scaled appropriately for your room; a large chandelier in a small room can be overwhelming.
- To clean intricate fixtures, turn the power off, and use a soft cloth and a gentle cleaner.
- When installing a chandelier over a dining table, the bottom should hang 30-36 inches above the tabletop.
- Mix different styles of vintage-inspired lighting (e.g., a chandelier in the dining room and sconces in the hallway) for a layered look.
- Look for UL (Underwriters Laboratories) certification on reproduction fixtures to ensure they meet safety standards.
- Use plug-in sconces for a vintage look without the need for an electrician—perfect for renters.
- Check for authenticity in true vintage pieces by looking for signs of age, maker’s marks, or original construction details.
Style Tips:
- A large, black wrought iron or wooden bead chandelier makes a stunning focal point over a dining table or in an entryway.
- Hang a row of lantern-style or glass jar pendant lights over a kitchen island for perfect task lighting.
- Use gooseneck “barn lights” in a kitchen or mudroom for a classic, industrial-farmhouse look.
- Incorporate a pulley-style pendant light for an adjustable and interesting industrial element.
- Flank a bed or a bathroom mirror with a pair of simple vintage-style wall sconces.
- Mix metals for a curated look, such as a black iron fixture with small brass or copper details.
- Flea markets, antique shops, and architectural salvage yards are excellent places to find unique, one-of-a-kind fixtures.
- A simple pendant with a glass cloche or bell jar shade adds a touch of vintage scientific charm.
- Pair a rustic fixture with simple, modern furniture for an interesting juxtaposition of styles.
- Choose fixtures with seeded glass shades to add texture and a soft diffusion to the light.
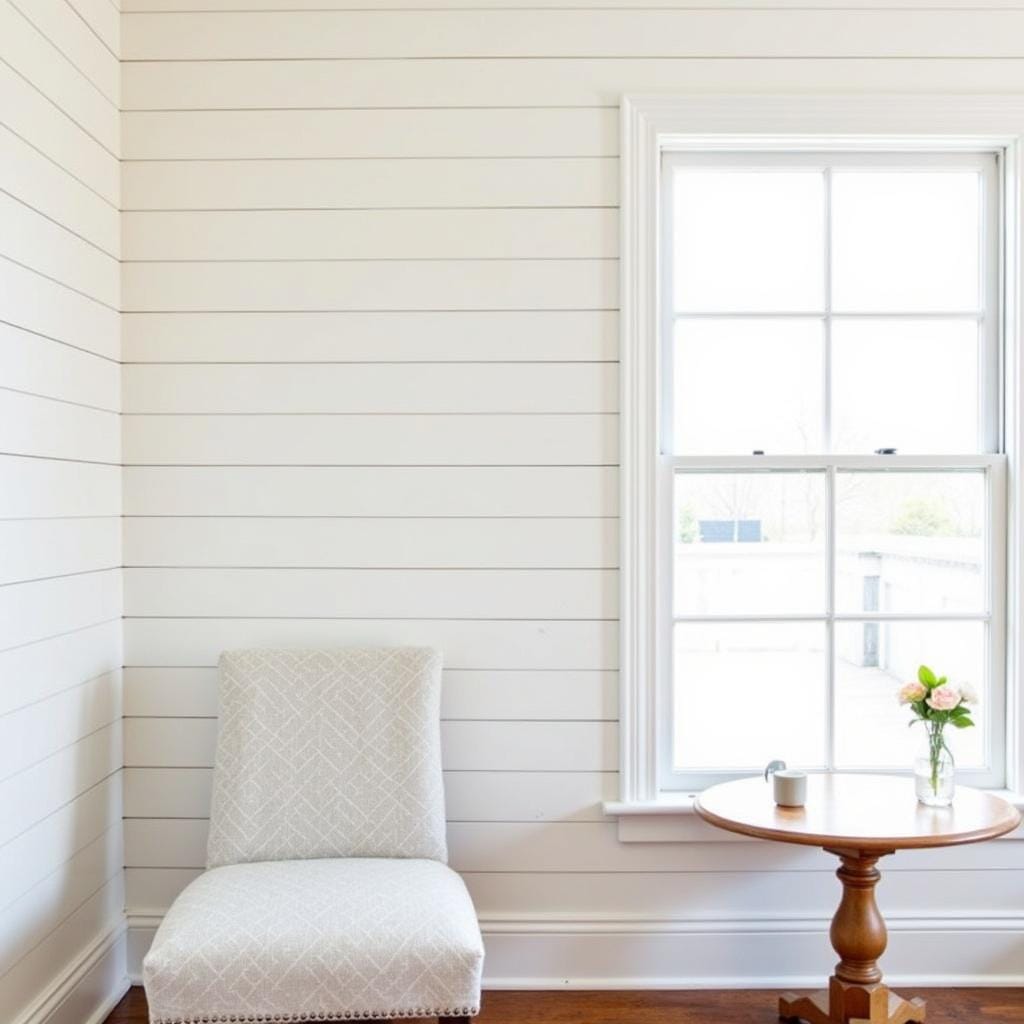
7. Shiplap Walls
Shiplap walls add a classic farmhouse look. You can install real wood panels or use peel-and-stick options for an easier update.
Pro Tips:
- For an authentic look, use real wood planks and leave a “nickel gap” (the thickness of a nickel) between each board.
- Install planks horizontally to make a room feel wider, or vertically to make the ceiling feel higher.
- When painting shiplap, use a semi-gloss or satin finish for durability and easy cleaning, especially in high-traffic areas.
- Use shiplap to create a single accent wall, often behind a bed or a sofa, for a high-impact look without overwhelming the space.
- Plan your layout carefully around outlets and light switches, using a jigsaw to cut precise openings.
- In bathrooms or other high-moisture areas, use engineered wood or PVC shiplap that is resistant to warping and mildew.
- Finish the outside corners and edges with a piece of trim for a clean, professional look.
- For a budget-friendly DIY, you can create a “faux shiplap” look by drawing lines on a smooth wall or using thin plywood strips.
- Clean shiplap walls with a vacuum brush attachment or a microfiber duster to remove dust from the gaps.
- Peel-and-stick shiplap wallpaper is a fantastic, renter-friendly option for getting the look without the commitment.
Style Tips:
- Classic white shiplap is the hallmark of the modern farmhouse style, creating a bright, clean, and textured backdrop.
- Paint your shiplap a dramatic dark color, like charcoal gray or navy blue, for a moody and sophisticated take on the trend.
- Install shiplap on a ceiling to add unexpected architectural interest.
- Use shiplap as a backsplash in a kitchen for a textural alternative to tile.
- Create a wainscoting effect by running shiplap halfway up the wall and painting it a contrasting color from the wall above.
- Leave the shiplap in its natural, unstained wood state for a more rustic, cabin-like feel.
- Lightly distress painted shiplap with sandpaper to give it a weathered, lived-in charm.
- The clean, horizontal lines of shiplap provide a perfect backdrop for hanging modern art or a gallery wall.
- Use shiplap to frame a fireplace, turning it into an even more prominent focal point.
- A single wall of shiplap can serve as the perfect, textured backdrop for open shelving.
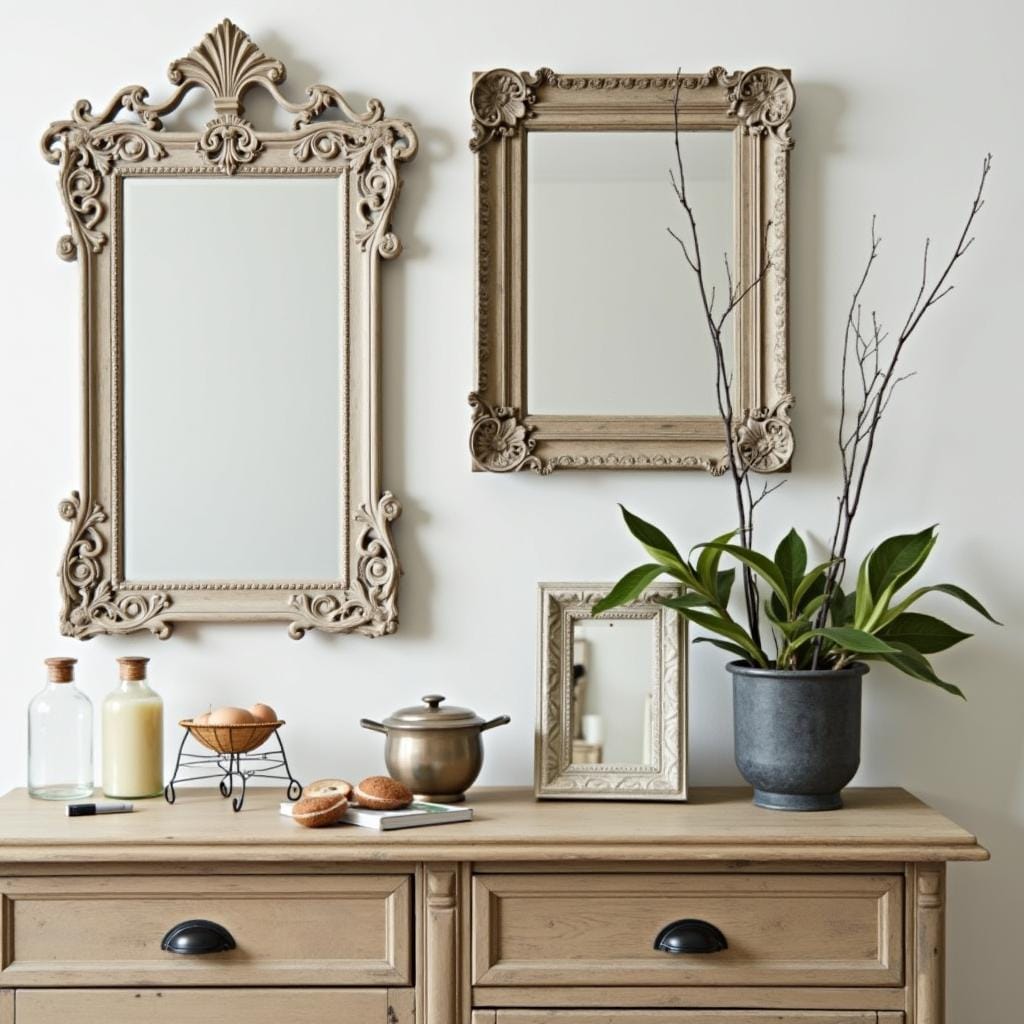
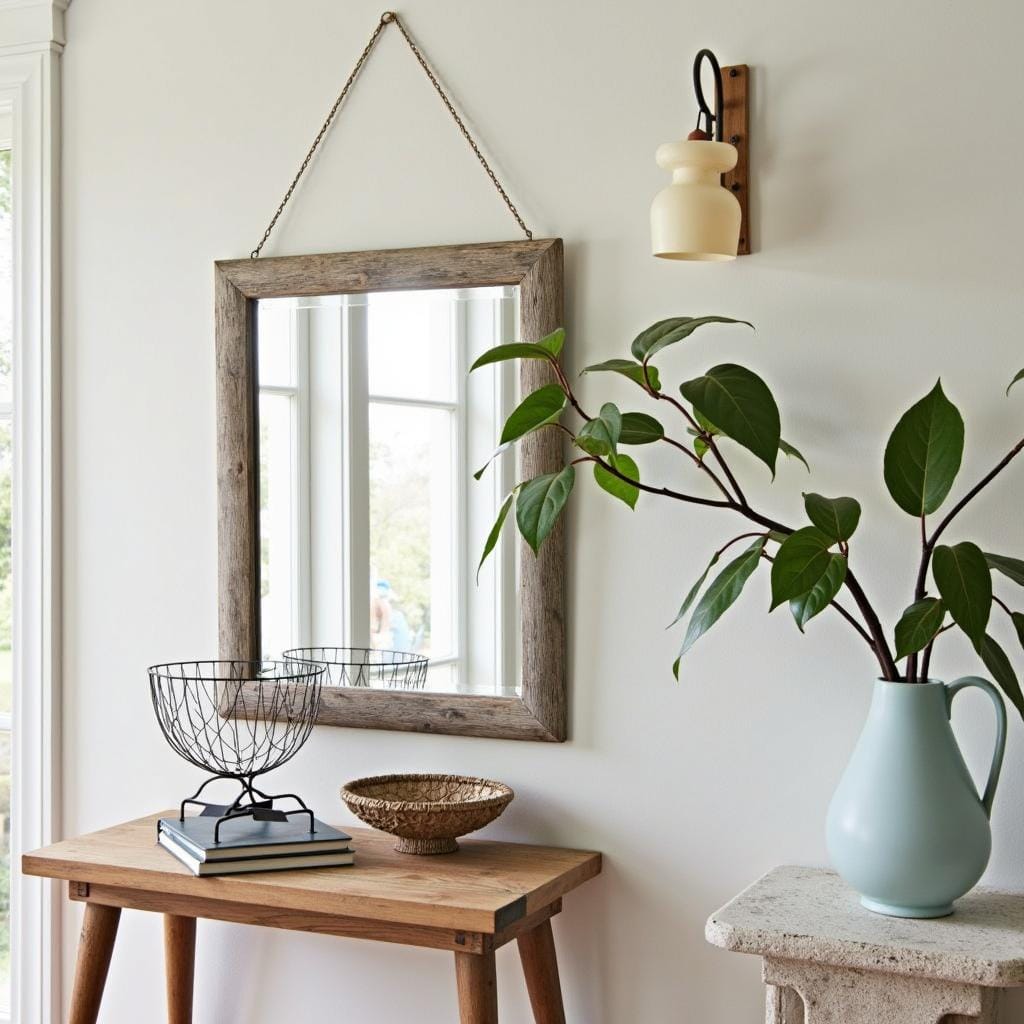
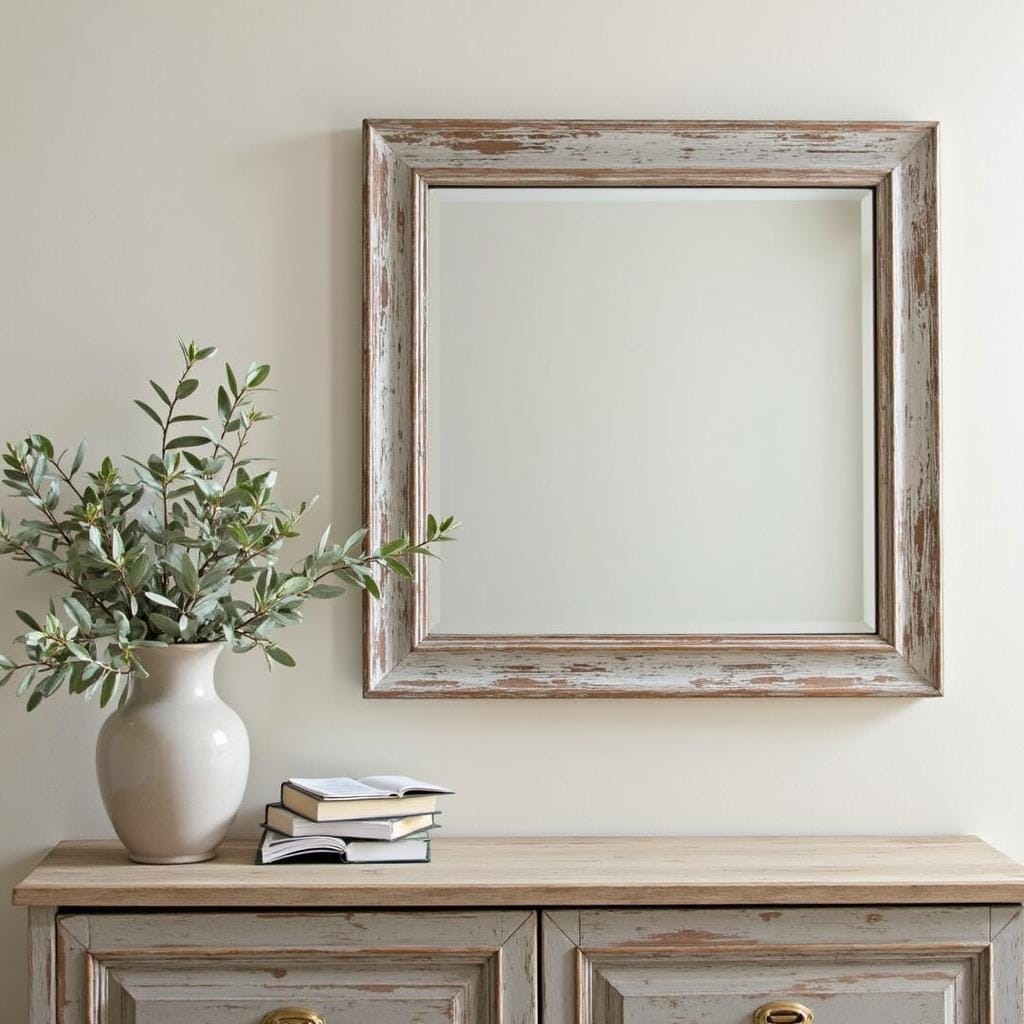
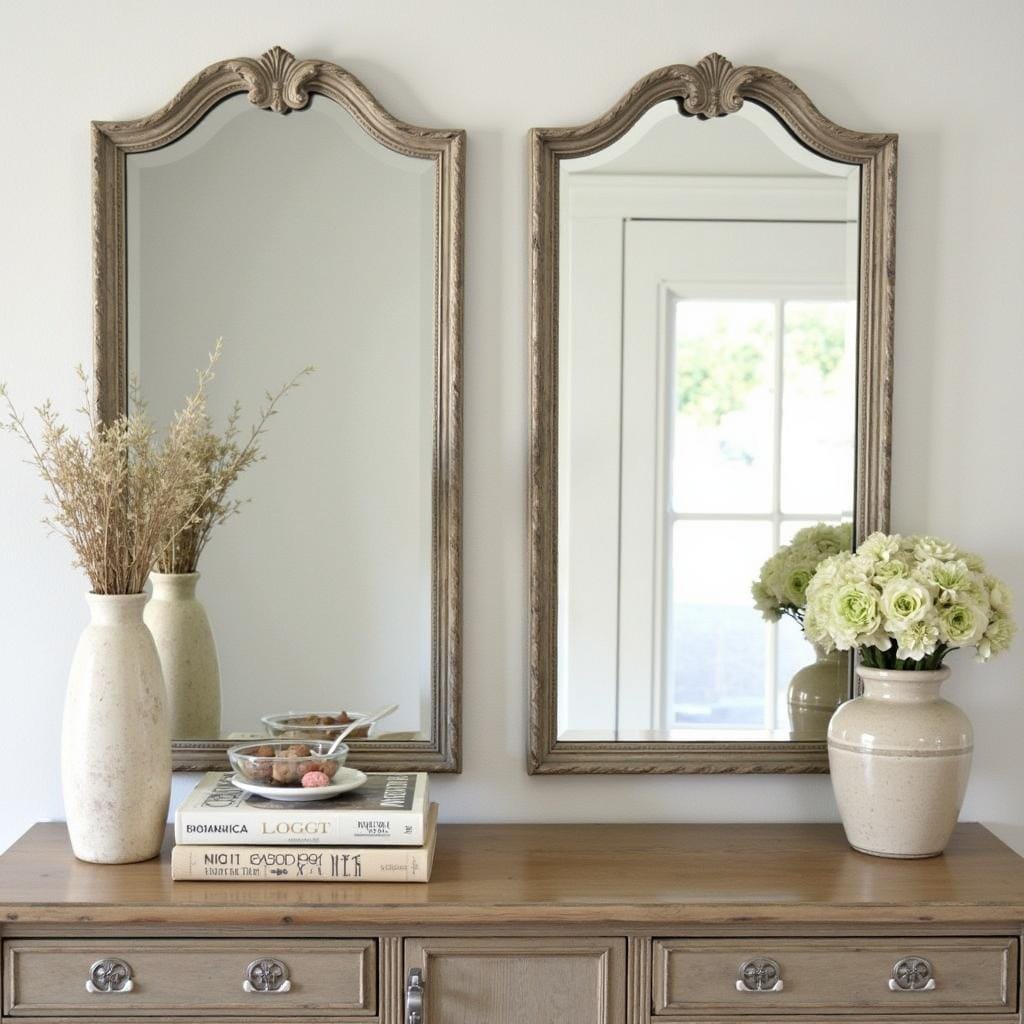
8. Antique Mirrors
Incorporate antique mirrors with weathered frames. They reflect light and make your space feel larger while maintaining a rustic aesthetic.
Pro Tips:
- True antique mirrors often have “desilvering” (dark spots or cloudiness), which adds to their character.
- Clean the delicate frame of an antique mirror with a soft, dry cloth; avoid spraying cleaners directly on it.
- Use heavy-duty picture wire and wall anchors designed to hold the mirror’s weight.
- Place a mirror on the wall opposite a window to maximize the amount of natural light it reflects into the room.
- You can DIY an “antiqued” mirror effect on a new piece of glass using a spray bottle of vinegar and water with metallic spray paint.
- If a mirror has significant desilvering that obscures the reflection, consider what it will be reflecting before you hang it.
- Flea markets, thrift stores, and antique shops are the best places to find authentic, one-of-a-kind antique mirrors.
- Check the integrity of the frame before you buy; ensure it is sturdy and not rotting or falling apart.
- Don’t over-restore an antique frame; the chips and patina are part of its charm.
- When hanging a group of mirrors, lay them out on the floor first to perfect your arrangement.
Style Tips:
- Create an eye-catching gallery wall by grouping several small, mismatched antique mirrors.
- Lean a large, full-length antique mirror against a wall in a bedroom or hallway for a casual yet elegant look.
- An antique mirror with an ornate, gilded, or heavily carved frame makes a beautiful statement piece above a fireplace mantel or console table.
- The soft, imperfect reflection from an antique mirror adds a romantic, moody atmosphere to a room.
- Pair a weathered, rustic mirror with a sleek, modern piece of furniture for a beautiful style contrast.
- Use a windowpane-style mirror to create the illusion of an extra window and add architectural interest.
- An antique mirror is a perfect addition to an entryway, providing a last-minute spot to check your reflection before you leave.
- Let the beautifully aged patina of the mirror glass and the weathered frame be the star of the show by keeping surrounding decor simple.
- Choose a mirror with a shape that complements your space, such as a tall, arched mirror to add a sense of height.
- Hang a simple wreath or a string of beads over the corner of an antique mirror for a layered look.
9. Cozy Throw Blankets
Add layers of comfort with cozy throw blankets in neutral colors or plaid patterns. Drape them over sofas, chairs, or beds.
Pro Tips:
- Choose natural, breathable materials like wool for warmth or cotton for a lighter, all-season option.
- Always check the care instructions before buying; some chunky knits or wool blankets may be dry-clean only.
- For a tidy look, store extra blankets rolled up in a large woven basket.
- To drape a blanket artfully, fold it in thirds lengthwise and then casually drape it over the arm or back of a sofa.
- Layering a thin quilt with a thicker, more textured throw adds depth and visual interest.
- Weighted blankets are a great rustic-friendly option that can also help reduce anxiety and improve sleep.
- Be aware that some very chunky knit blankets can be prone to shedding or pilling.
- A wooden blanket ladder is a stylish and functional way to display your collection of throws.
- Choose a throw that is large enough to actually snuggle under, not just look pretty.
- Rotate your throws seasonally: lighter cotton or linen in the summer, and heavy wool or faux fur in the winter.
Style Tips:
- A classic plaid, tartan, or buffalo check throw is a quintessential element of rustic and farmhouse decor.
- A super chunky knit throw adds incredible texture and a sense of “hygge” (coziness) to a space.
- Stick to a palette of warm neutrals like cream, beige, taupe, and charcoal for a calming, cohesive feel.
- Drape a throw diagonally across the corner of your bed for an effortless, “lived-in” look.
- A faux fur throw blanket instantly adds a touch of luxury and rustic lodge-inspired comfort.
- An old-fashioned quilt, whether a family heirloom or a vintage find, adds a layer of history and charm.
- Use a throw to introduce a subtle pop of color, like a muted sage green or a dusty blue.
- In a living room, have a throw blanket on each main seating piece to make the space feel extra welcoming.
- A simple, fringed linen throw is perfect for a more minimalist or Scandinavian take on rustic style.
- Drape a small, decorative throw over a bench in an entryway for a welcoming first impression.
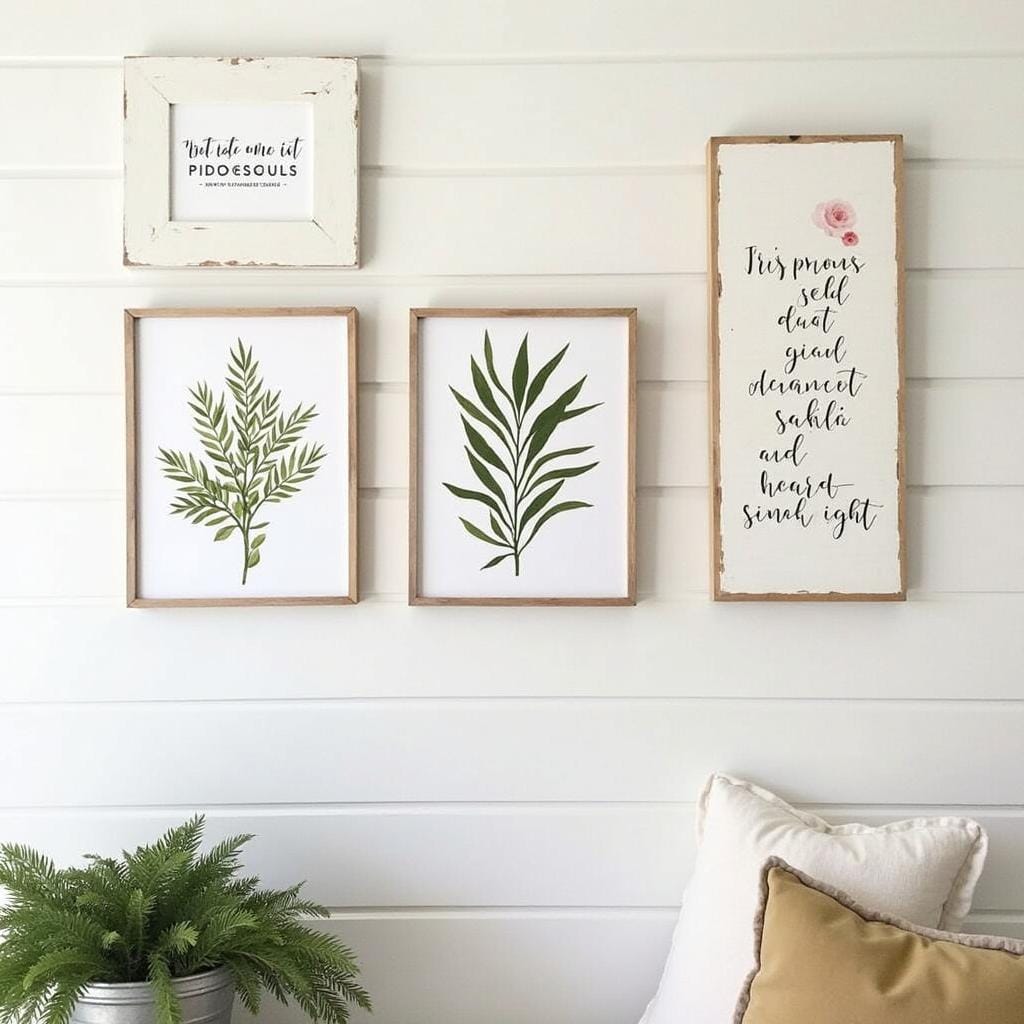
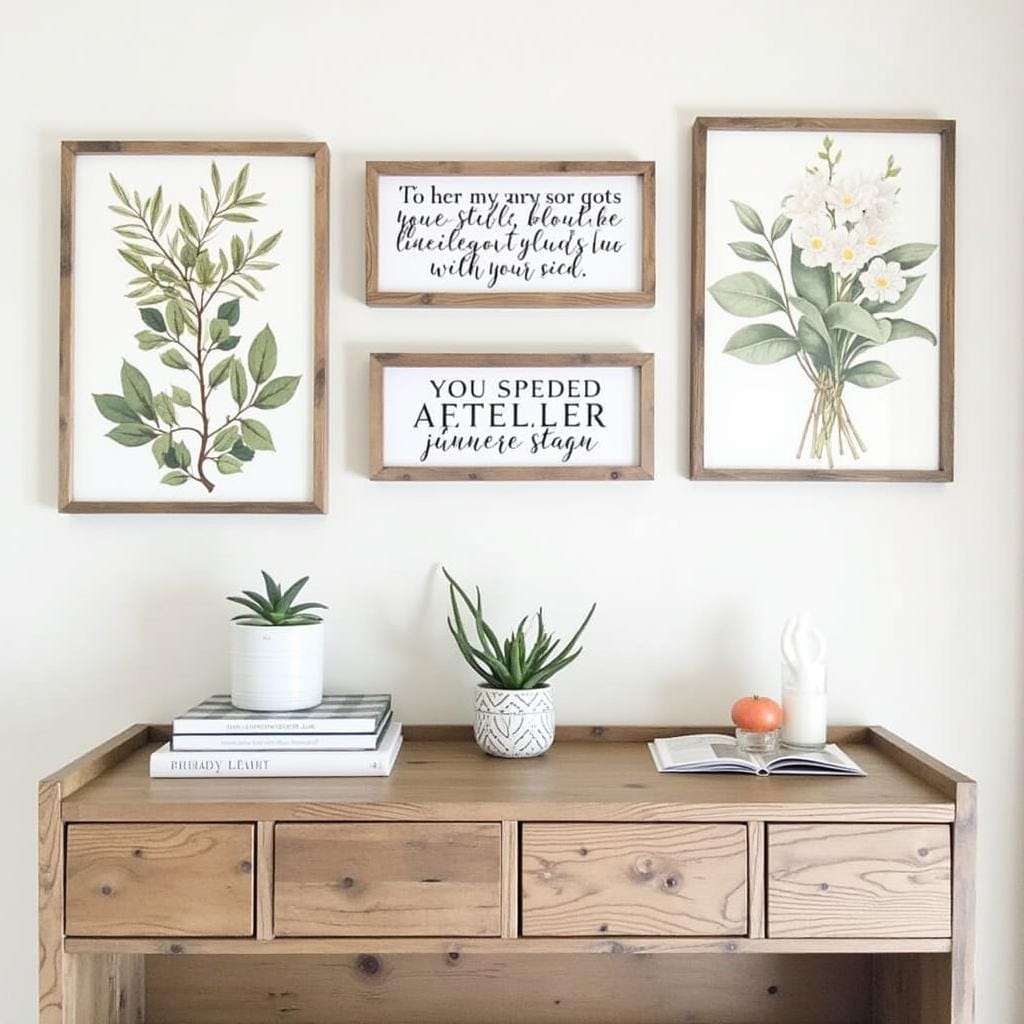
10. Rustic Wall Art
Choose wall art that complements your farmhouse theme. Options include botanical prints, vintage signs, or wooden plaques with inspirational quotes.
Pro Tips:
- Hang art so that the center of the piece or grouping is at eye level, approximately 57 inches from the floor.
- When creating a gallery wall, choose a common element to tie the pieces together, such as a consistent frame color or a shared theme.
- Picture ledges offer a flexible way to display art, allowing you to easily rotate pieces without putting new holes in the wall.
- For a budget-friendly option, frame beautiful prints from an old book, a piece of fabric, or even high-quality wrapping paper.
- Ensure your art is scaled appropriately for the wall; a tiny piece of art will get lost on a large wall.
- Use a level to make sure every piece is perfectly straight.
- Secure heavy pieces, like architectural salvage, with heavy-duty anchors and screws.
- Mix different mediums, like a painting, a photograph, and a three-dimensional object, for a more interesting display.
- Before hanging, lay out your arrangement on the floor to visualize spacing and placement.
- Don’t forget to light your art; a simple picture light can make a piece feel much more special.
Style Tips:
- A set of framed vintage-style botanical or animal prints is a classic choice for rustic decor.
- Hang an authentic vintage sign, like one for a farm feed store or a local dairy, for a touch of genuine history.
- Use a piece of architectural salvage, like an old window frame or a carved wooden panel, as a unique piece of wall art.
- Oversized wooden or metal letters that spell out a word like “HOME” or “EAT” are a popular farmhouse choice.
- Create a gallery wall of black and white family photos in simple, rustic wood frames.
- Press and frame local flowers or leaves for a beautiful, personal, and natural piece of art.
- A large landscape painting of a pastoral scene can serve as a beautiful focal point over a sofa or bed.
- Incorporate textural art, like a macramé wall hanging or a woven piece, to add softness.
- Lean a large piece of art against the wall on a console table for a more casual, layered look.
- A chalkboard with a hand-drawn design or a welcoming message is a fun and changeable art piece for a kitchen or mudroom.
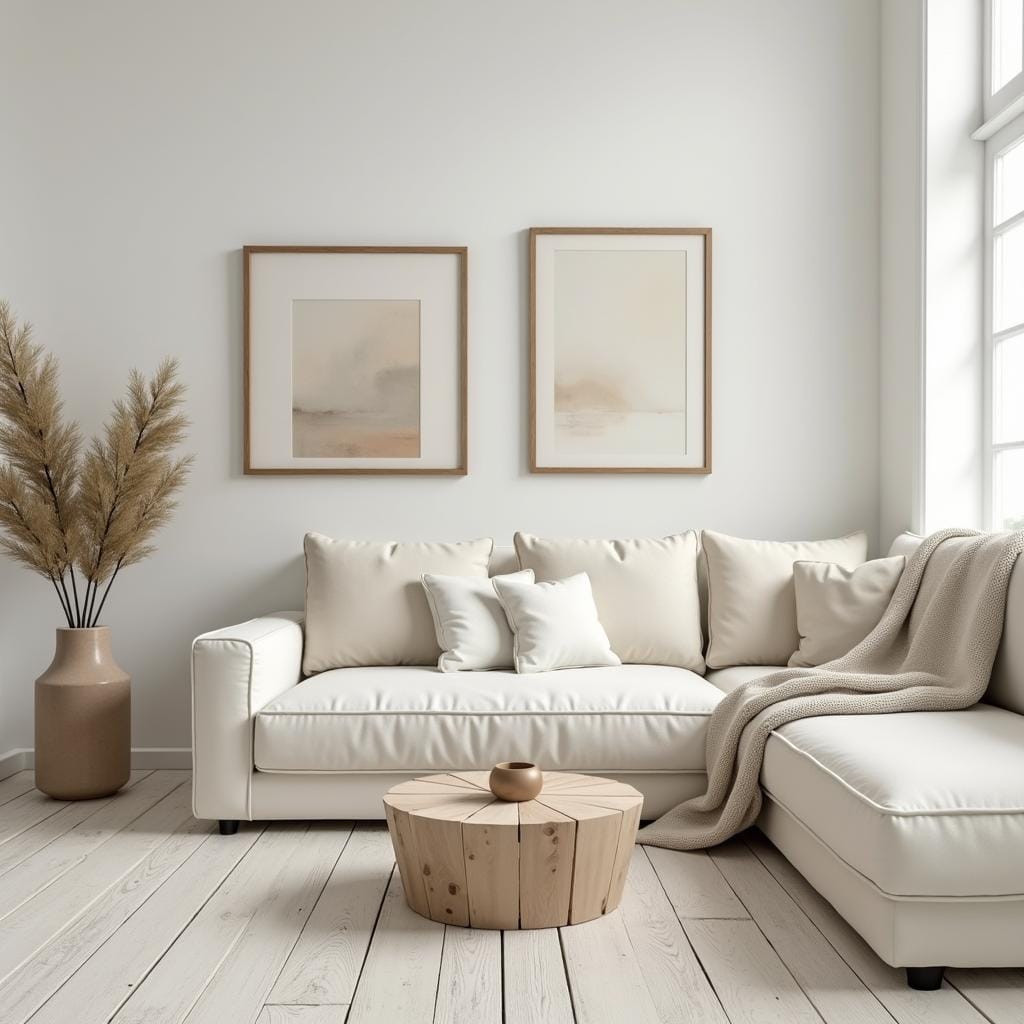
11. Neutral Color Palette
Stick to a neutral color palette with shades of white, beige, gray, and earthy tones. This creates a calming and cohesive look.
- ose the right undertone for your white paint. Warm whites have yellow or pink undertones and feel cozy, while cool whites have blue or gray undertones and feel crisp.
- Layer different shades of the same neutral color to create depth and prevent the room from feeling flat.
- Always test paint swatches on your walls and observe them at different times of day to see how the light affects the color.
- Use a matte or eggshell paint finish to hide imperfections and create a soft, non-reflective surface that enhances a rustic feel.
- Use a pop of muted color, like sage green or dusty blue, sparingly as an accent against your neutral backdrop.
- The key to a successful neutral room is texture. Mix wood, stone, linen, wool, and metal to create visual interest.
- Use online color visualizer tools to see how a certain neutral might look in your space before you commit.
- When choosing furniture, stick to neutral upholstery and bring in color with easily changeable items like pillows and throws.
- Pay attention to your lighting; warm-toned light bulbs (2700K) will enhance the coziness of a warm neutral palette.
- If you’re unsure, “greige” (a mix of gray and beige) is a very popular and versatile neutral that works in almost any space.
Style Tips:
- Layer various shades of white, cream, and ivory for a soft, serene, and classic farmhouse look.
- Use a warm, earthy greige on the walls as a perfect backdrop for rustic wood tones.
- Incorporate natural wood furniture and accents to bring warmth and organic texture to the neutral palette.
- Use pops of matte black through light fixtures, window frames, or hardware to provide a sharp, modern contrast.
- Add dimension with a variety of neutral-colored textiles: a nubby wool rug, linen curtains, a chunky knit throw.
- Natural greenery from houseplants provides the perfect, organic “color” in a neutral room.
- Paint walls, trim, and even the ceiling in the same soft neutral for an immersive, cohesive feel.
- A slipcovered sofa in a light neutral like white or beige is a practical and classic farmhouse choice.
- Use materials like stone (for a fireplace) or brick (as an accent wall) to add natural, textural elements.
- Create visual interest with patterns in neutral tones, like a beige-and-white striped rug or a subtly patterned pillow.
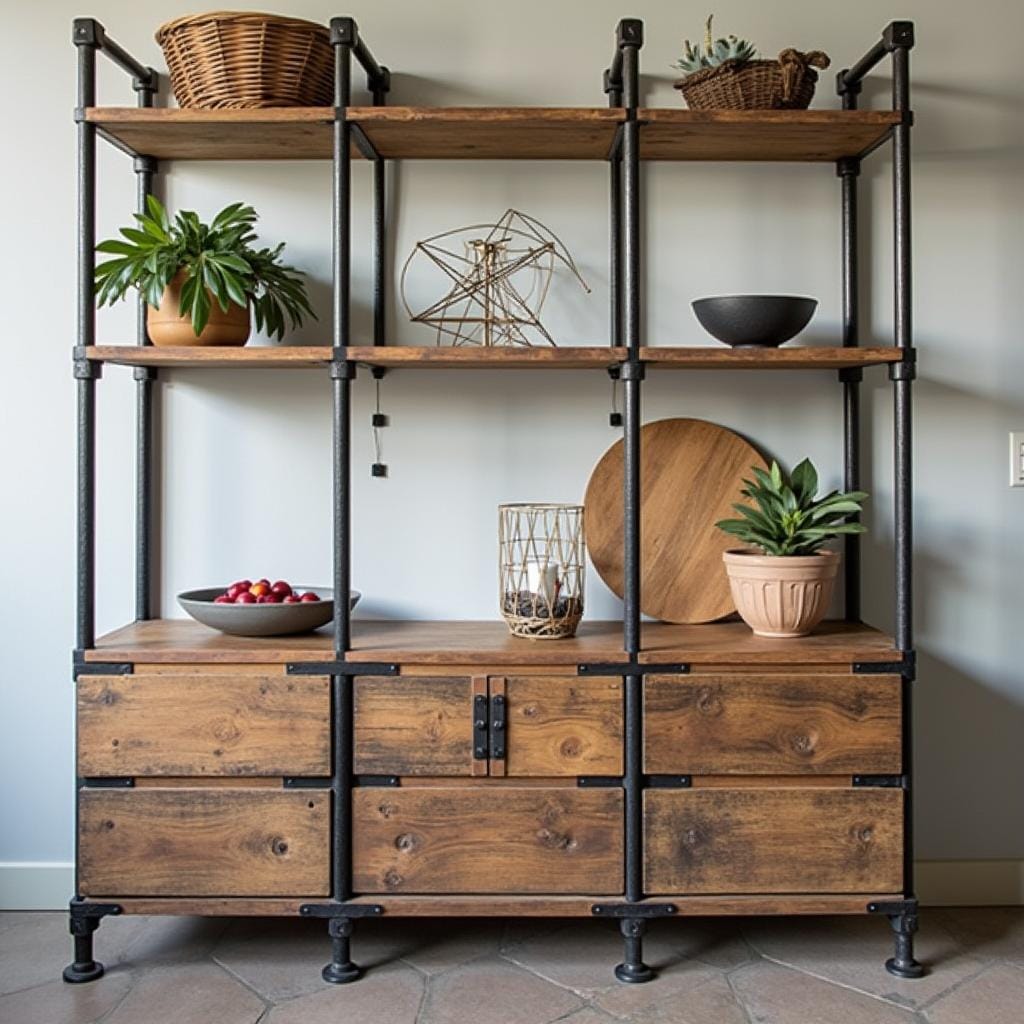
12. Industrial Elements
Blend rustic and industrial styles by incorporating metal accents such as pipe shelving or steel light fixtures.
Pro Tips:
- The key is balance; use industrial elements as accents to warm, rustic pieces to prevent the space from feeling too cold or sterile.
- When building DIY pipe shelving, be sure to thoroughly clean the pipes to remove grease, and then seal them with a clear coat to prevent rust.
- Ensure all industrial-style shelving is securely anchored to the wall, especially when holding heavy items.
- Clean metal fixtures with a soft cloth and the appropriate cleaner for the specific type of metal.
- Mix metals thoughtfully. A good rule of thumb is to not mix more than two or three different metal finishes in one room.
- Look for furniture that naturally combines wood and metal, like a dining table with a wood top and a steel base.
- Incorporate industrial elements in functional areas like kitchens and home offices, where they feel most natural.
- Soften the hard edges of industrial pieces with soft textiles like plush rugs, curtains, and pillows.
- Source authentic industrial pieces, like old factory carts or metal lockers, from salvage yards for a genuine feel.
- Check for sharp edges or rough spots on salvaged industrial items, especially if you have children.
Style Tips:
- Install open shelving made from black iron pipes and reclaimed wood in a kitchen or living room.
- Hang gooseneck barn lights or cage-style pendant lights for a classic industrial-farmhouse lighting choice.
- Use metal stools, like classic Tolix-style chairs, at a kitchen island or dining table.
- A coffee table that resembles an old factory cart on casters is a perfect industrial focal point.
- Incorporate a piece of furniture with wire mesh or metal grate doors.
- Use wire baskets for storage to add a light, industrial touch.
- A sliding barn door with exposed metal hardware is a perfect blend of rustic and industrial styles.
- Leave structural elements like brick walls or concrete floors exposed for an authentic industrial foundation.
- Choose a bed frame made of simple, dark metal for an industrial touch in the bedroom.
- Use metal numbers or letters as a simple, graphic piece of wall art.
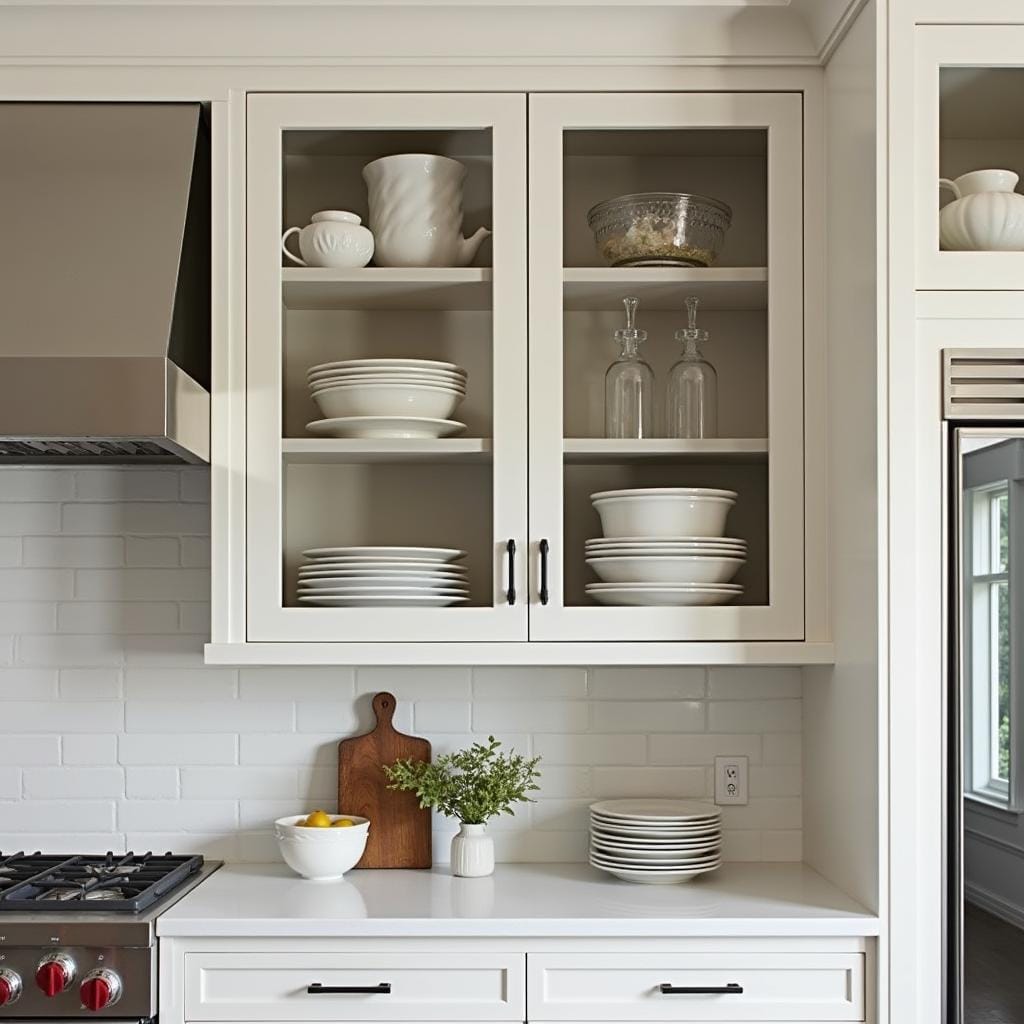
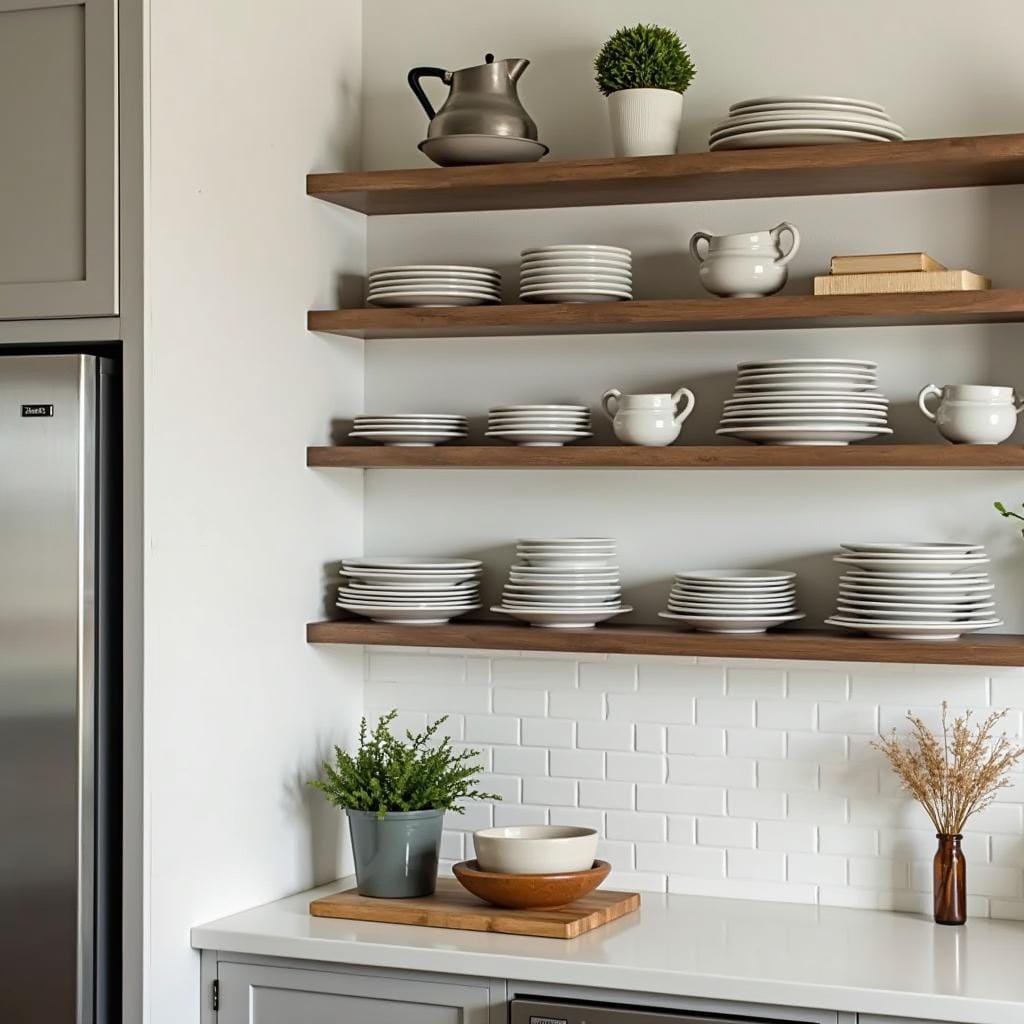
13. Open Shelving
Replace upper kitchen cabinets with open shelving to showcase dishes, glassware, or rustic decor items.
Pro Tips:
- Use heavy-duty brackets and install them directly into wall studs to ensure the shelves can support the weight of your dishes.
- Before committing, you can test the look by removing the doors from one or two of your existing upper cabinets.
- Open shelving requires you to be tidy. Only display items you use regularly and keep them neatly organized.
- Wipe down the shelves and the items on them regularly, as they will collect dust more quickly than items in a cabinet.
- Don’t overload the shelves. Leaving some “breathing room” or negative space is key to a stylish, uncluttered look.
- Install the lowest shelf high enough that you have a functional, clear countertop space underneath.
- For a budget-friendly option, use simple, sturdy shelf brackets from a hardware store paired with stained pine boards.
- Think about what you’ll store elsewhere. You may still need some closed cabinets or a pantry for less attractive items.
- Use plate racks or dividers to stack plates vertically and keep them organized.
- Consider the depth of the shelves; 10-12 inches is standard and holds most dinner plates.
Style Tips:
- Display a uniform set of simple, white everyday dishes for a clean, cohesive, and classic farmhouse look.
- Mix in natural wood elements like cutting boards, salad bowls, and utensil holders to add warmth.
- Add a few small plants, like potted herbs or a trailing pothos, to bring life and a pop of green to the shelves.
- Style the shelves by stacking items, leaning items, and grouping them by color or material.
- Create a dedicated coffee or tea station with mugs, a coffee maker, and jars of coffee beans and tea bags.
- Use thick, reclaimed wood shelves for a truly rustic and substantial look.
- Paint the wall behind the shelves a contrasting color to make your displayed items pop.
- Incorporate a few purely decorative items, like a vintage scale, a small piece of art, or a ceramic pitcher.
- A set of matching glass jars for storing dry goods like pasta, flour, and sugar is both functional and beautiful.
- Install a brass or black metal rail below the shelf to hang S-hooks for mugs or utensils.
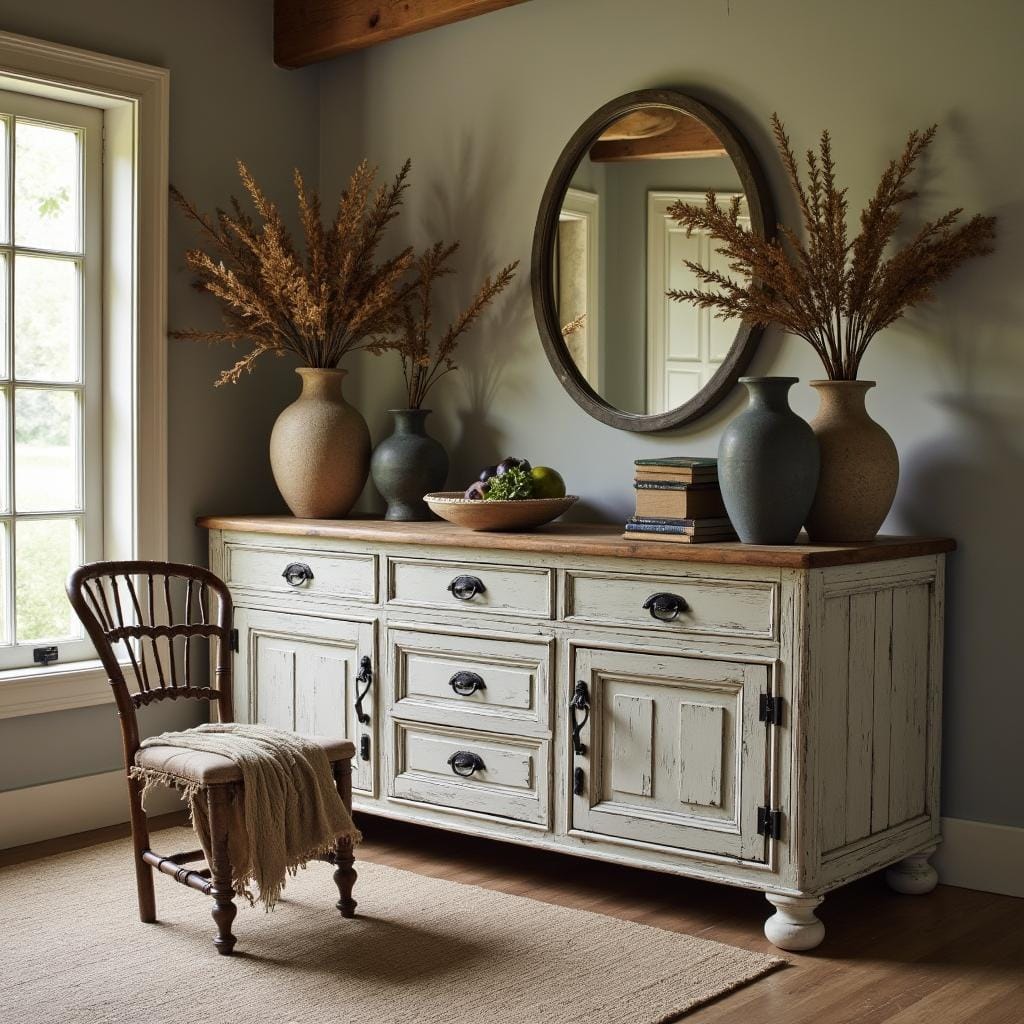
14. Distressed Finishes
Opt for furniture and decor with distressed finishes. This creates a lived-in look that’s quintessentially rustic.
Pro Tips:
- To DIY a distressed look, paint a piece of furniture, then gently sand the edges and high-traffic areas where it would naturally show wear.
- Using chalk paint is one of the easiest ways to achieve a distressed finish, as it requires minimal prep and sands off easily.
- Apply a dark wax over chalk paint to give the piece an aged, antique look and to seal the finish.
- Always seal a distressed piece with a clear matte wax or polyurethane to protect the finish and prevent paint from chipping further.
- Clean distressed furniture gently with a soft, damp cloth to avoid removing more of the paint finish.
- Choose which pieces to distress wisely. A single, beautifully distressed focal piece often has more impact than a room full of distressed items.
- “Less is more” when it comes to sanding. Start lightly and add more distressing as needed.
- For a “chippy” paint look, apply a layer of vaseline to areas you want the paint to chip off before you apply your top coat.
- Look for authentically distressed pieces at flea markets and thrift stores.
- Consider the original material; distressing works best on solid wood furniture.
Style Tips:
- A distressed dresser or console table can serve as a beautiful focal point in a bedroom or entryway.
- A whitewashed, distressed dining table creates a light and airy coastal farmhouse feel.
- Group a collection of distressed picture frames on a gallery wall for a shabby-chic look.
- A bench with a chippy paint finish is a perfect rustic accent for a mudroom or at the foot of a bed.
- Pair a heavily distressed piece with a pristine, modern item—like a sleek lamp or a new vase—for a stylish contrast.
- Use a distressed cabinet with chicken wire or glass doors to display dishware or linens.
- A distressed finish can soften a piece of furniture with heavy or ornate details.
- Incorporate a set of distressed dining chairs around a simple, modern table.
- A distressed mirror frame adds a touch of romantic, vintage charm.
- Choose a distressed finish in a muted color, like duck egg blue or pale yellow, for a cottage-inspired look.
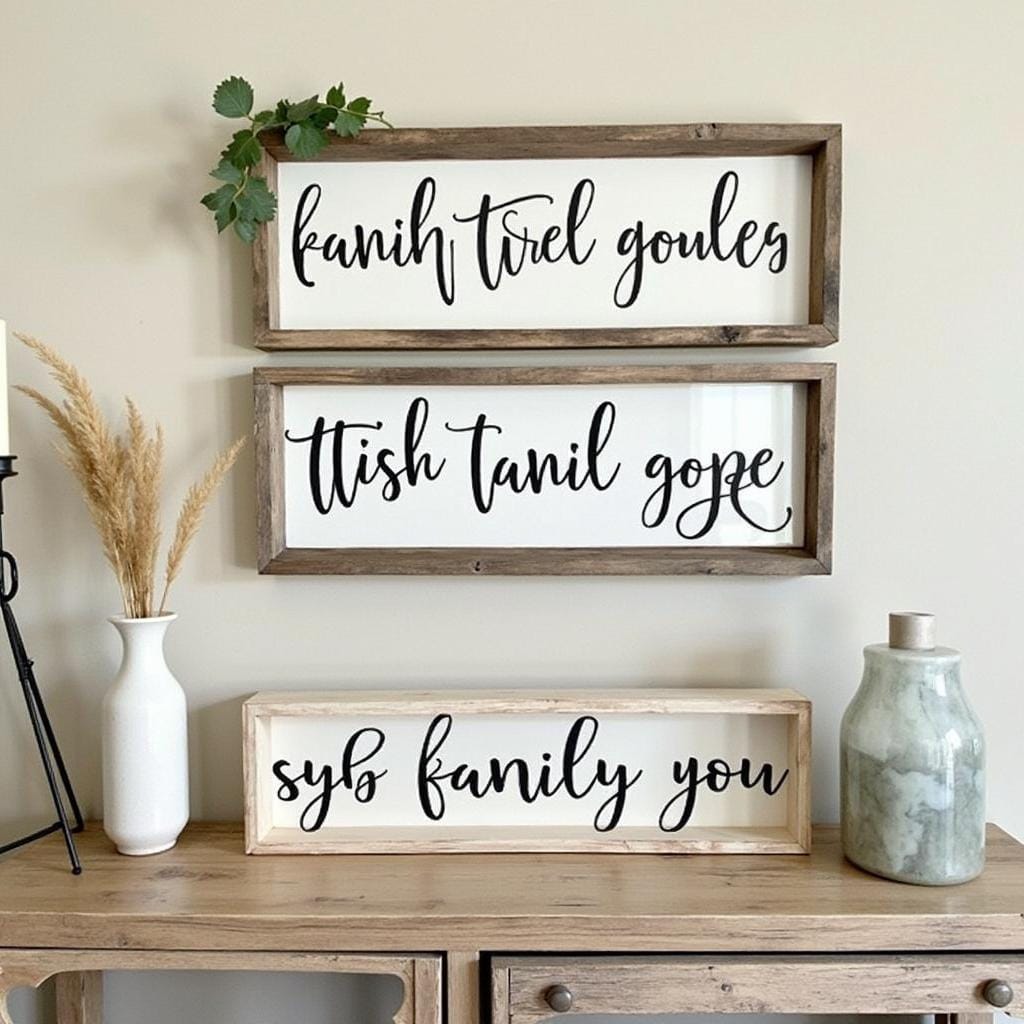
15. Wooden Signs
Add a touch of farmhouse charm with wooden signs featuring quotes, sayings, or family names. Hand-painted options add a personal touch.
Pro Tips:
- For a DIY sign, use stencils to achieve clean, professional-looking lettering.
- Choose quotes or sayings that are meaningful to your family to make the sign more personal.
- Use reclaimed pallet wood or an old piece of barn wood for an authentic, rustic base.
- If you plan to hang the sign outdoors, be sure to seal it with an exterior-grade polyurethane to protect it from the elements.
- Use D-rings or a sawtooth hanger on the back for easy and secure wall mounting.
- The font choice is crucial; a simple serif or a classic script font often works best for a farmhouse feel.
- For a hand-painted look without free-handing, use the pencil-transfer method to trace a printed design onto the wood.
- Sand the wood before painting for a smoother surface, or leave it rough for a more rustic texture.
- A light coat of stain before painting the letters can enhance the wood grain.
- Check for splinters and sand any sharp edges before hanging.
Style Tips:
- Lean a large, oversized sign against a wall in your entryway or living room for a casual statement.
- Hang a long, horizontal sign with a sweet saying like “gather” or “blessed” over a main doorway or a bed.
- A personalized sign with your family’s name and established date is a perfect addition to a gallery wall.
- Choose signs with simple, classic fonts and a slightly distressed finish for the most authentic look.
- Incorporate smaller wooden signs into the styling of a bookshelf or open shelving unit.
- A sign with a simple, graphic image, like a silhouette of a cow or a windmill, adds a playful touch.
- Hang a vertical “Welcome” sign next to your front door.
- A set of signs for your pantry, laundry room, or bathroom adds a charming, organizational element.
- Place a small sign with a cute quote on your coffee bar or kitchen counter.
- Match the stain or paint color of your sign to other wood or accent colors in the room for a cohesive look.
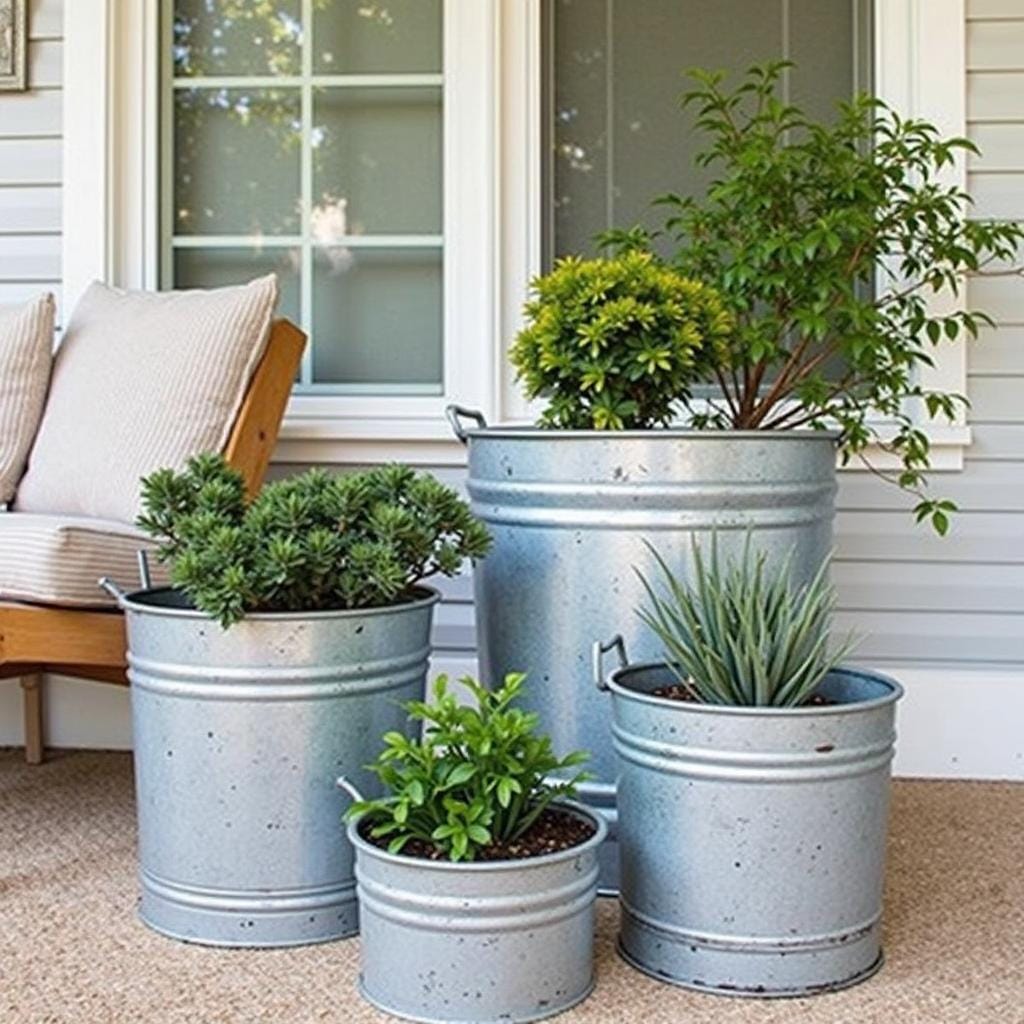
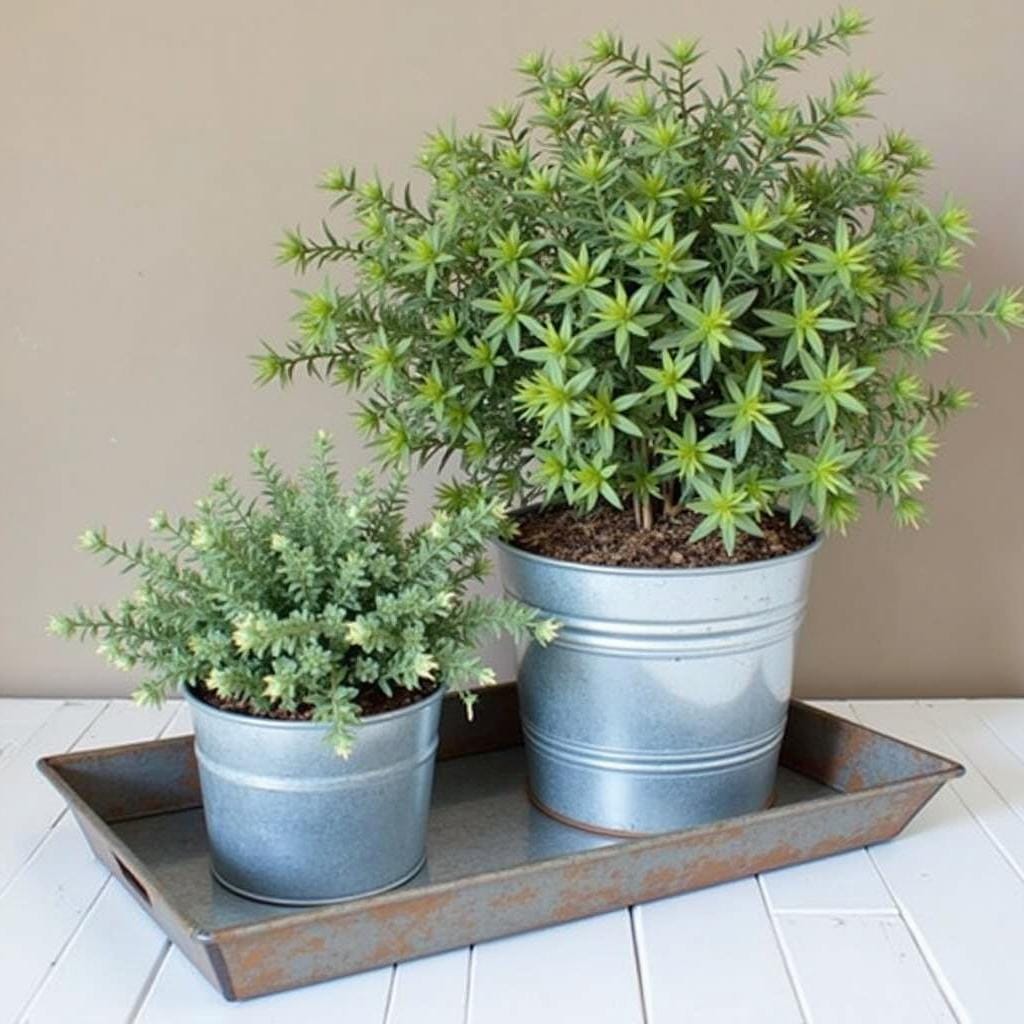
16. Galvanized Metal Accents
Incorporate galvanized metal pieces, such as buckets, trays, or planters, for a farmhouse feel. These work well indoors and outdoors.

Pro Tips:
- If using a galvanized bucket as a planter, drill drainage holes in the bottom and use a plastic liner to help prevent rust over time.
- Clean galvanized metal with a simple solution of soap and water; avoid abrasive scrubbers that can scratch the finish.
- Check for sharp edges on older or handmade galvanized pieces.
- Many new “farmhouse style” galvanized items are for decorative use only; check if they are food-safe before using them to serve.
- Galvanized metal is perfect for outdoor decor as it is naturally rust-resistant.
- To accelerate the aging process and give new galvanized metal a weathered patina, you can spray it with a mix of vinegar or toilet bowl cleaner (do this outdoors and with proper safety gear).
- Use felt pads on the bottom of galvanized trays or buckets to prevent them from scratching your furniture.
- Look for unique galvanized items at flea markets or farm supply stores.
- A magnetic wreath hook will stick to many galvanized metal surfaces.
- Don’t be afraid to mix galvanized metal with other finishes like black iron or warm wood.
Style Tips:
- Use a large galvanized tub filled with ice to hold drinks for a casual party.
- Place a few small galvanized buckets on a desk or craft table to hold pens, pencils, and art supplies.
- A galvanized metal tray is a perfect base for a centerpiece on a coffee table or ottoman.
- Use galvanized planters or buckets on your front porch or patio for flowers and herbs.
- A tiered galvanized metal stand is a stylish and functional organizer for a kitchen counter or bathroom.
- Incorporate a galvanized metal olive bucket as a unique storage container for magazines or rolled-up blankets.
- Use a set of galvanized metal canisters for storing flour, sugar, and coffee on your kitchen counter.
- A galvanized metal charger plate under a white dinner plate adds a rustic touch to your table setting.
- Use a small galvanized pail as a utensil caddy for a buffet or outdoor barbecue.
- Replace a standard light fixture shade with a galvanized metal one for an industrial-farmhouse look.
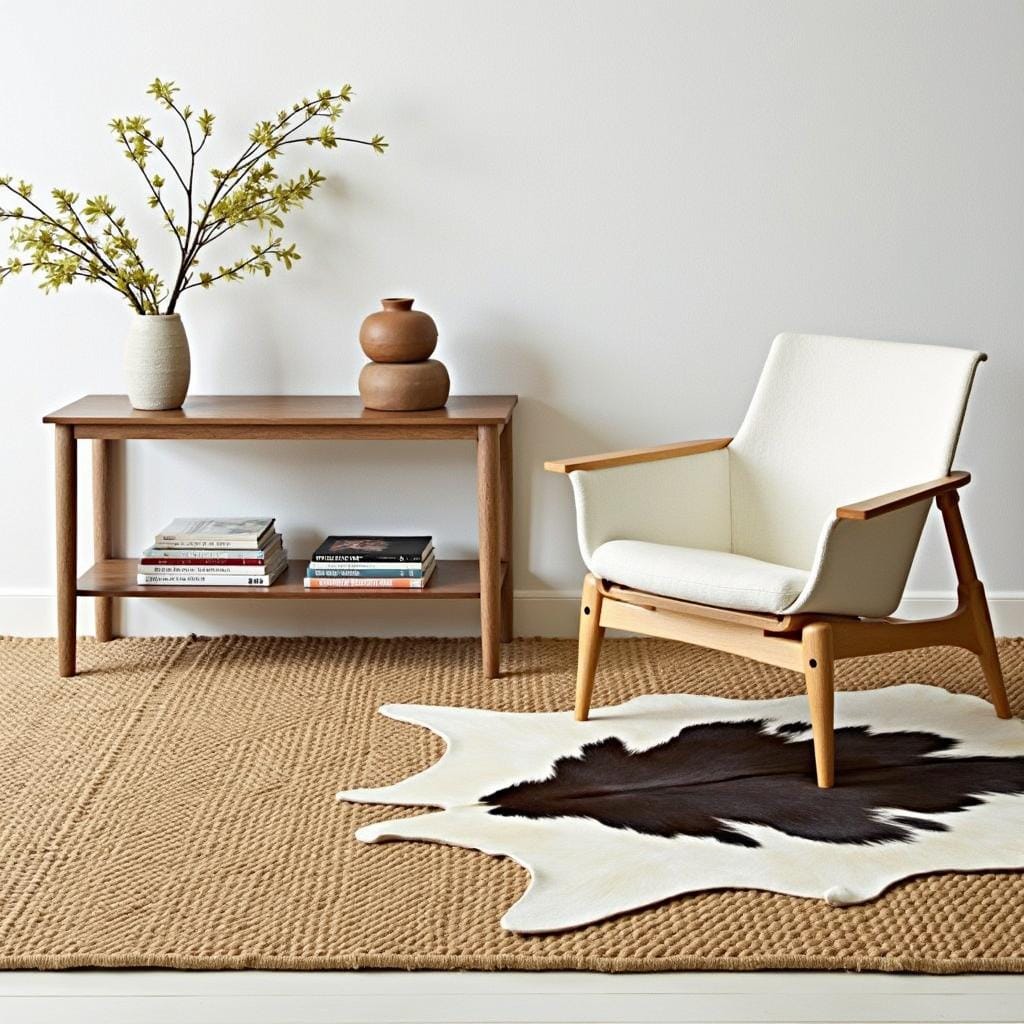
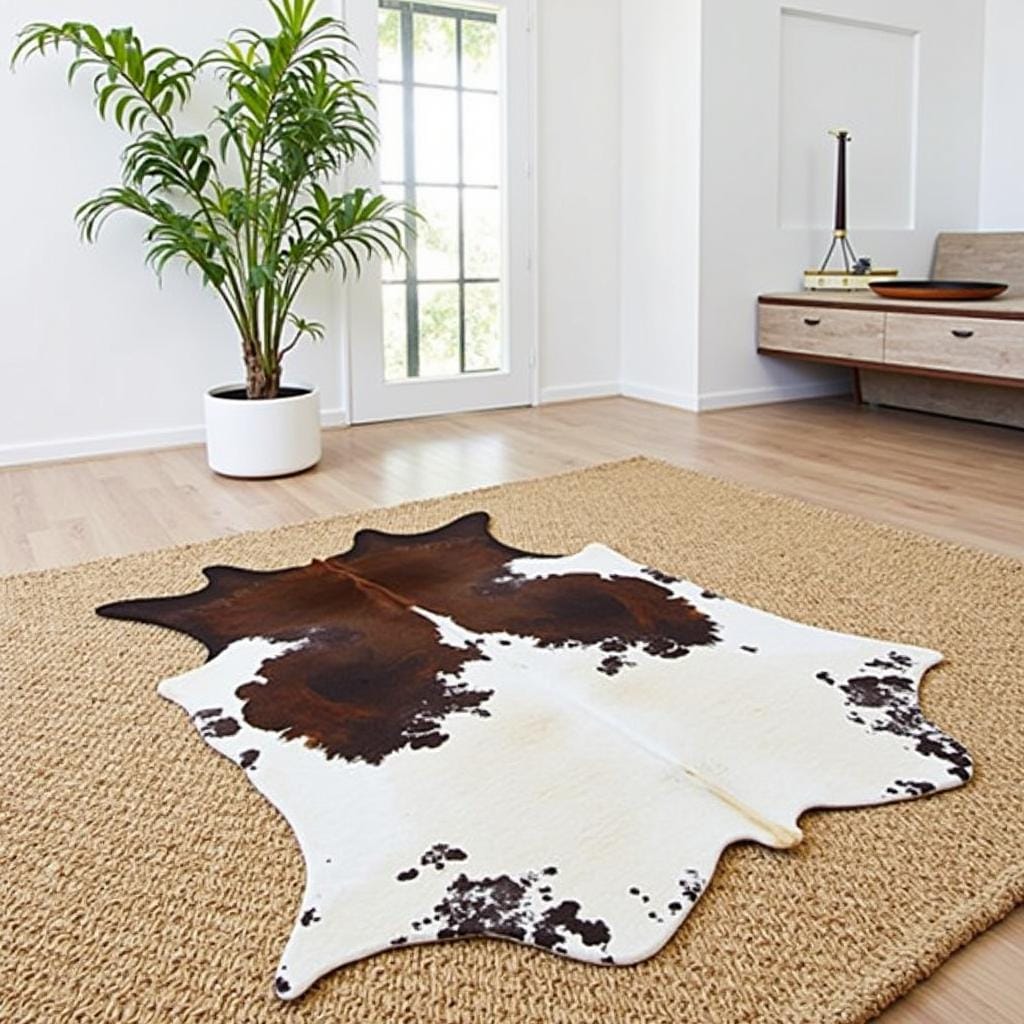
17. Layered Rugs
Layer rugs to add depth and texture. Use a jute or sisal rug as a base and top it with a smaller patterned or cowhide rug.
Pro Tips:
- Get the proportions right. The base rug should be large enough to anchor the furniture, and the top rug should be significantly smaller, leaving a generous border of at least 12-18 inches.
- Always use a non-slip rug pad under the base rug to keep it in place.
- For the top layer, a thin rug pad or rug tape can help keep it from shifting and bunching up.
- Ensure the combined thickness of the rugs doesn’t create a significant tripping hazard, especially in high-traffic areas.
- Jute and sisal are excellent base rugs because they are durable, neutral, and provide great texture.
- Clean both rugs according to their specific care instructions. Natural fiber rugs often require spot cleaning only.
- This technique works best in living rooms, dining rooms, and bedrooms.
- When layering, it’s easiest if the two rugs have a similar orientation (e.g., both rectangular).
- If your top rug is a vintage piece that’s too small for the room on its own, layering is the perfect solution.
- Consider the pile height; a low-pile base rug makes it easier to layer another rug on top.
Style Tips:
- The most classic combination is a neutral, natural fiber rug like jute or sisal as the base.
- Layer a colorful, patterned vintage Persian or Turkish-style rug on top to add personality and color.
- For a more modern or rustic look, layer a faux cowhide rug (placed at an angle) over the base rug.
- Use layering to define a specific zone within a larger room, like the main seating area in a living room.
- In a neutral room, the top rug is a perfect opportunity to introduce a bold pattern or color.
- Layer a soft, plush sheepskin or shag rug on top of a jute rug to create a cozy landing spot next to a bed.
- For a simple, textural look, layer two neutral rugs of different materials, like a woven jute rug and a simple wool rug.
- Match the colors in your top rug to your throw pillows or artwork to create a cohesive look.
- A buffalo check or simple striped rug layered over a natural fiber rug is a classic farmhouse choice.
- Don’t be afraid to layer over wall-to-wall carpet to define a space and add a decorative element.
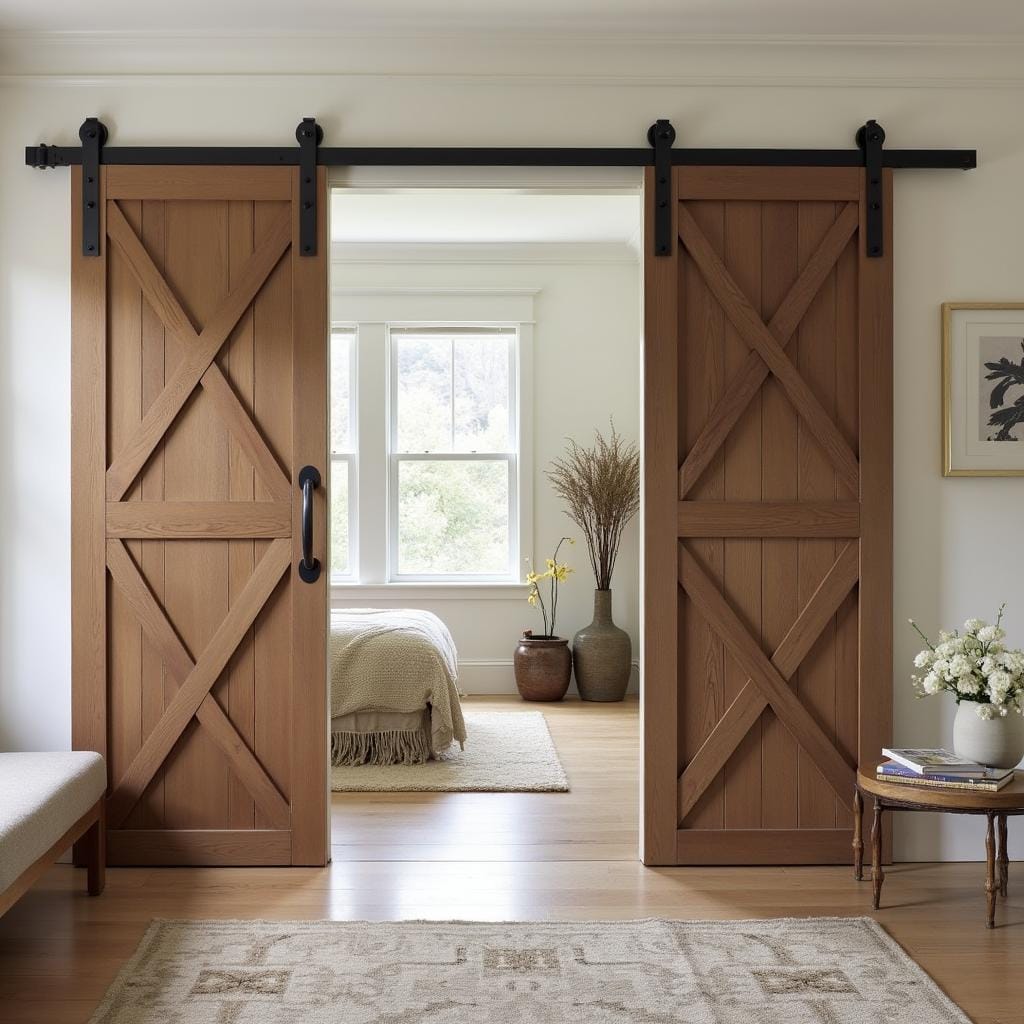
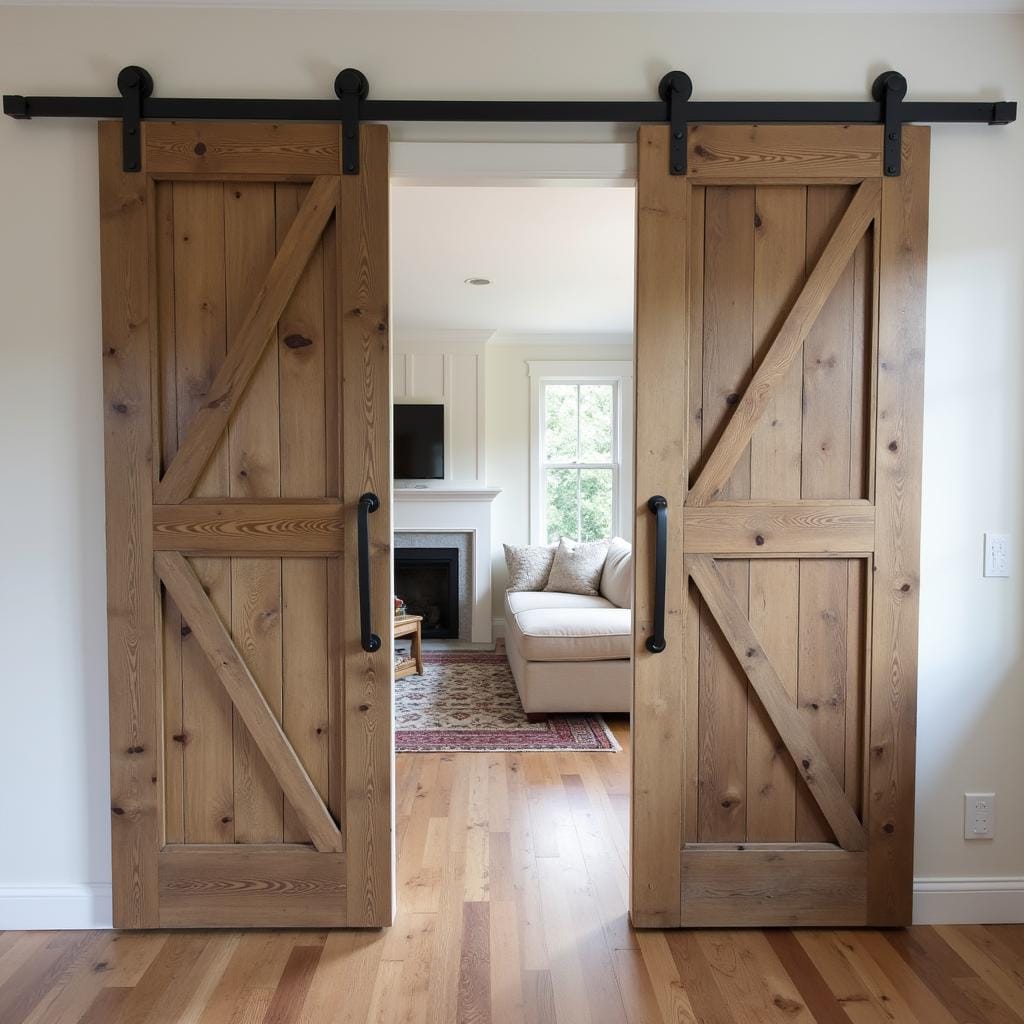
18. Sliding Barn Doors
Sliding barn doors are a functional and stylish addition. Use them to separate spaces or as a decorative element.
Pro Tips:
- Ensure you have enough adjacent wall space for the door to slide completely open. The wall needs to be at least as wide as the door itself.
- Choose high-quality, sturdy hardware. The track and rollers need to be able to support the door’s weight and operate smoothly.
- The wall above the doorway must have adequate support (studs or a header) to anchor the track securely.
- Install a floor guide to keep the bottom of the door from swinging in and out.
- Be aware that barn doors don’t provide the same level of privacy or sound insulation as a traditional swinging door, making them less ideal for bathrooms or bedrooms.
- Measure your doorway carefully and choose a door that is a few inches wider and taller than the opening to ensure full coverage.
- If you’re building your own door, use wood that is straight and kiln-dried to prevent warping over time.
- For a more streamlined look, you can find modern or minimalist barn door hardware.
- A soft-close mechanism can be added to the hardware to prevent the door from slamming.
- Consider a double barn door for very wide openings, like between a living room and dining room.
Style Tips:
- A barn door is a perfect, space-saving solution for a pantry, laundry room, or home office.
- Choose the classic “X” or “Z” brace design for a quintessential farmhouse look.
- Paint the barn door a bold accent color, like red, black, or navy, to turn it into a statement piece.
- Use a door made from reclaimed wood for an authentic, rustic feel.
- Incorporate frosted glass panels into the barn door to allow light to pass through while still providing some privacy.
- A “half” barn door or Dutch door style is a charming option for a kitchen or playroom.
- Hang a simple wreath on your barn door that you can change out seasonally.
- Use a sleek, modern barn door with clean lines in a more contemporary take on the farmhouse style.
- A mirrored barn door can be a fantastic, space-saving solution for a closet or dressing area.
- Use a barn door to stylishly conceal a television when it’s not in use.
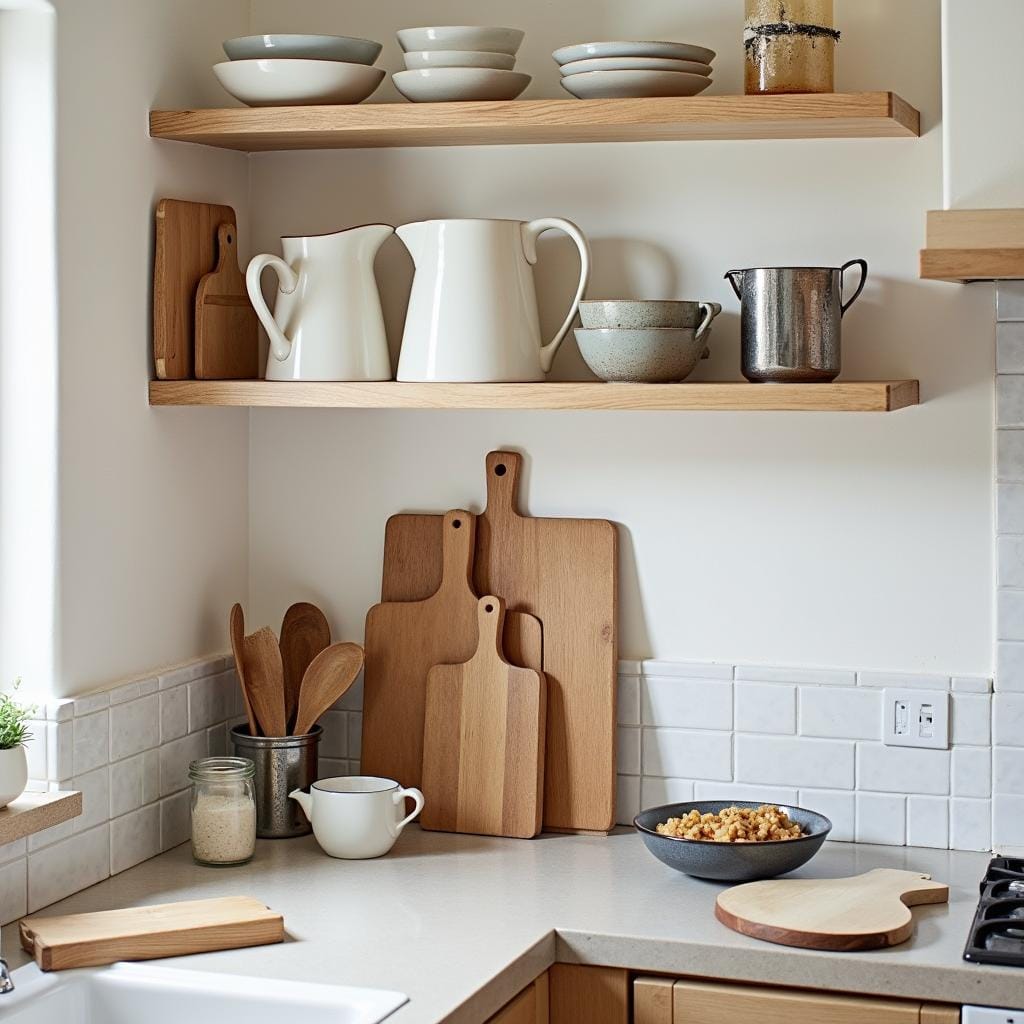
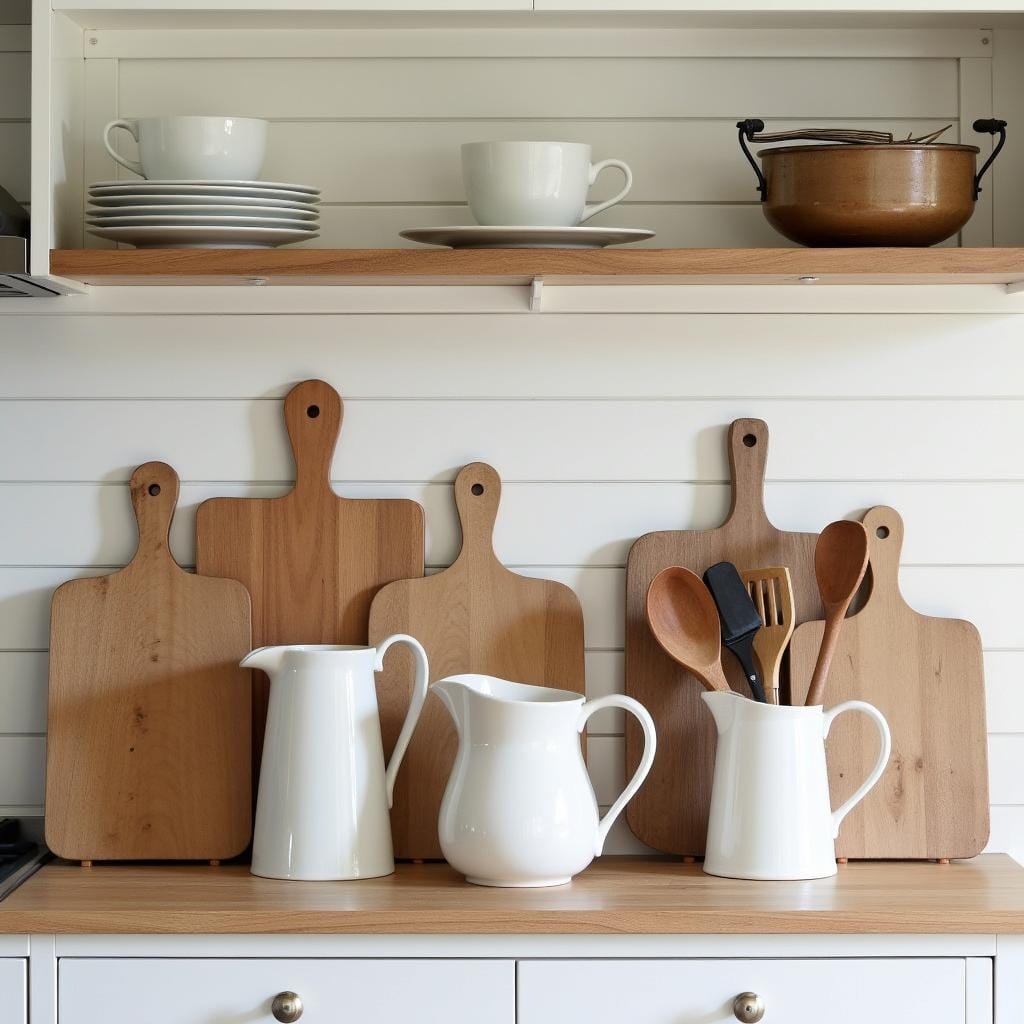
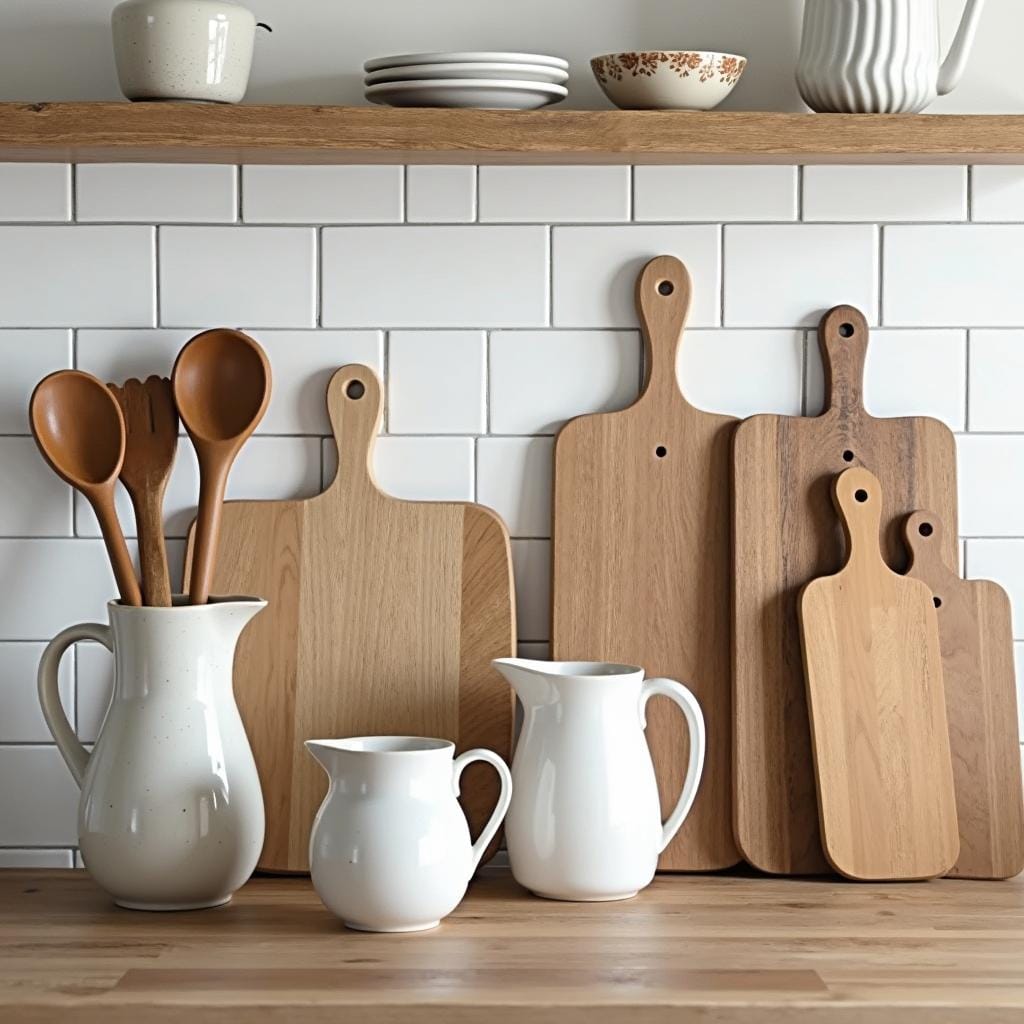
19. Rustic Kitchen Accessories
Add wooden cutting boards, ceramic pitchers, and vintage utensils to your kitchen for a touch of farmhouse charm.
Pro Tips:
- Regularly treat wooden cutting boards and utensils with food-grade mineral oil to keep them from drying out and cracking.
- Use a large ceramic crock or pitcher next to the stove to corral your most-used cooking utensils.
- If you plan to use vintage kitchen items for food, check for any lead-based paint or glazes, especially on older ceramics.
- To avoid a cluttered look, choose a few beautiful, functional items to display and keep the rest in drawers.
- Group similar items together, like a collection of cutting boards or a set of matching canisters.
- Hang pots and pans from a pot rack to free up cabinet space and add a rustic, functional display.
- Wash wooden items by hand, not in the dishwasher.
- Use felt pads under heavy items like crocks or scales to protect your countertops.
- Look for unique, high-quality pieces at antique stores, flea markets, and craft fairs.
- Mix old and new items for a curated, personal look.
Style Tips:
- Lean a collection of various-sized wooden cutting boards against your kitchen backsplash for a warm, layered look.
- Display a vintage kitchen scale on an open shelf or your counter.
- Use a simple white ceramic pitcher as a vase for fresh flowers or as a utensil holder.
- Hang vintage copper or cast iron pans from a pot rack as a beautiful and functional display.
- A large wooden dough bowl makes a perfect fruit bowl or centerpiece for a kitchen island.
- Use glass jars or vintage-style canisters to store dry goods like flour, sugar, and oats on the counter.
- A small, charming stand mixer in a retro color can be a key decorative accessory.
- Display everyday white dishware on open shelves or in a glass-front cabinet.
- Use a small, rustic stool to help reach high shelves or as a spot for a small plant.
- Incorporate textiles like striped linen tea towels, a simple table runner, or a checkered apron.
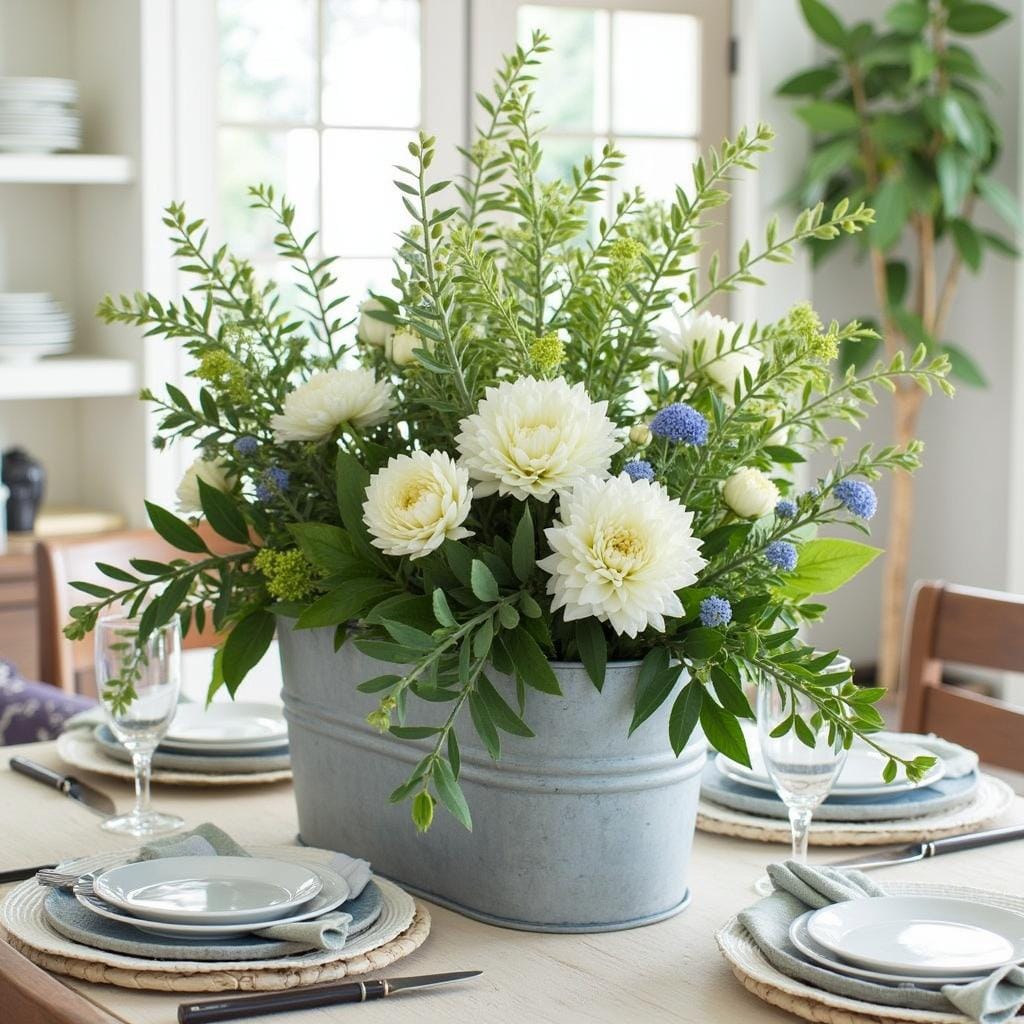
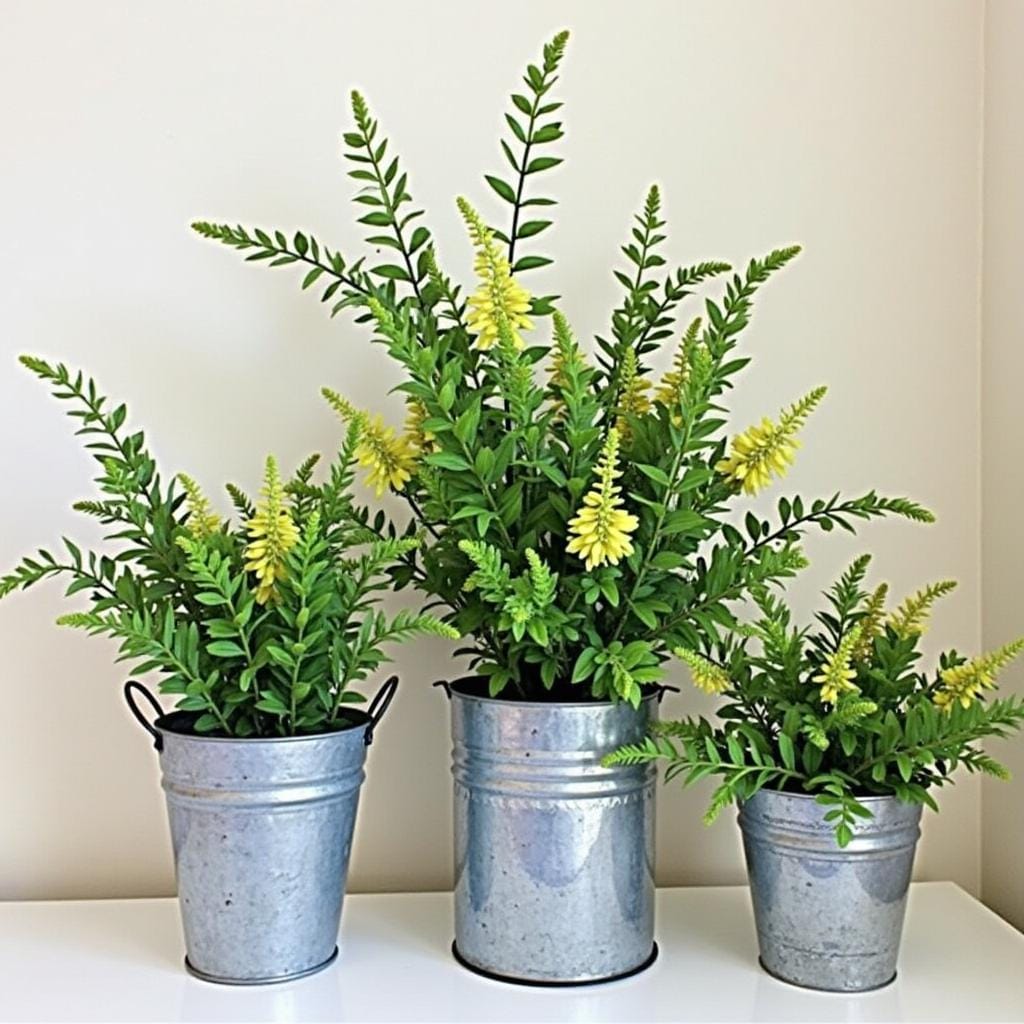
20. Greenery and Floral Arrangements
Bring nature indoors with greenery and floral arrangements. Use simple vases or galvanized buckets to hold fresh or faux plants.
Pro Tips:
- Choose low-maintenance houseplants that thrive in your home’s specific light conditions. Snake plants, pothos, and ZZ plants are great options.
- For a no-fuss, always-perfect look, invest in a few high-quality faux plants or stems.
- Change the water for fresh-cut flowers every day or two and trim the stems at an angle to help them last longer.
- Use seasonal greenery from your own yard, like pine branches in the winter or blossoming branches in the spring.
- Ensure any pot you use for a live plant has proper drainage to prevent root rot.
- Group a few small plants together to create a more impactful display.
- Wipe the leaves of your houseplants with a damp cloth to keep them free of dust.
- Herbs in small pots on a kitchen windowsill are both beautiful and functional.
- When arranging flowers, start with a base of greenery and then add your main flowers.
- For a long-lasting option, dried flowers like eucalyptus, lavender, or hydrangeas are perfect.
Style Tips:
- Use simple, informal vessels like glass milk bottles, mason jars, or ceramic pitchers as vases.
- A small galvanized bucket or pail makes a perfect, rustic container for a floral arrangement or a potted plant.
- For a farmhouse arrangement, use loose, “just-picked-from-the-garden” flowers like wildflowers, Queen Anne’s lace, or sunflowers.
- A simple bunch of eucalyptus or olive branches in a tall vase adds a touch of elegant, natural greenery.
- Hang a simple, handmade wreath on an interior door, a mirror, or an empty spot on a wall.
- A small potted plant on a nightstand, a bookshelf, or a bathroom counter adds a touch of life to any corner.
- Forage for interesting branches, cattails, or grasses to create a simple, textural arrangement.
- A terrarium with succulents or air plants can be a fun, modern take on indoor greenery.
- Place a single, beautiful fern or other large plant in a statement-making basket on the floor.
- Dried hydrangeas in a large crock or vase provide beautiful, muted color that lasts for months.
Conclusion
Transforming your home with rustic decor is all about mixing natural materials, vintage elements, and cozy accents. Whether you’re starting small or going for a full farmhouse makeover, these 20 ideas will help you create a warm, inviting space with timeless appeal.