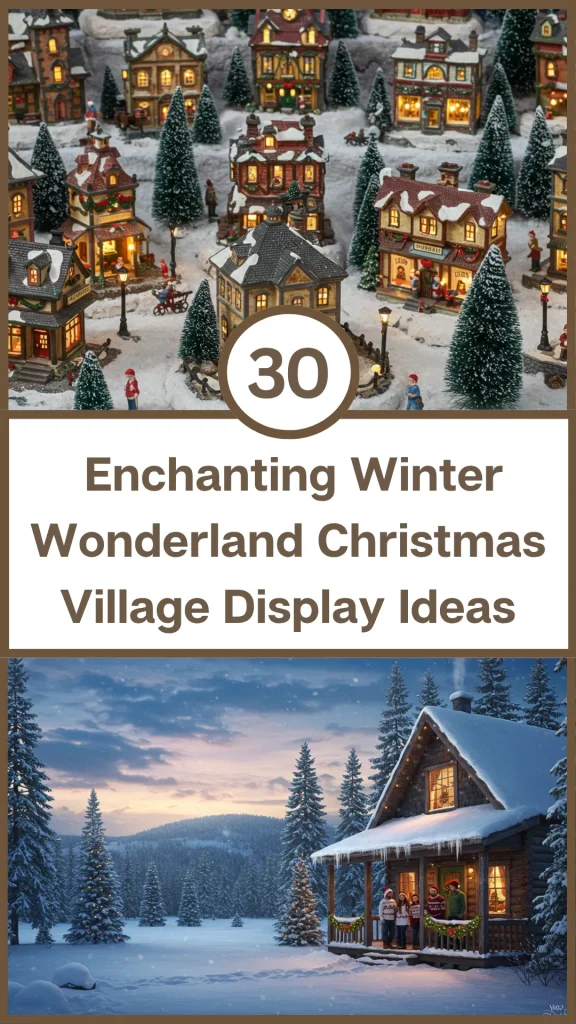
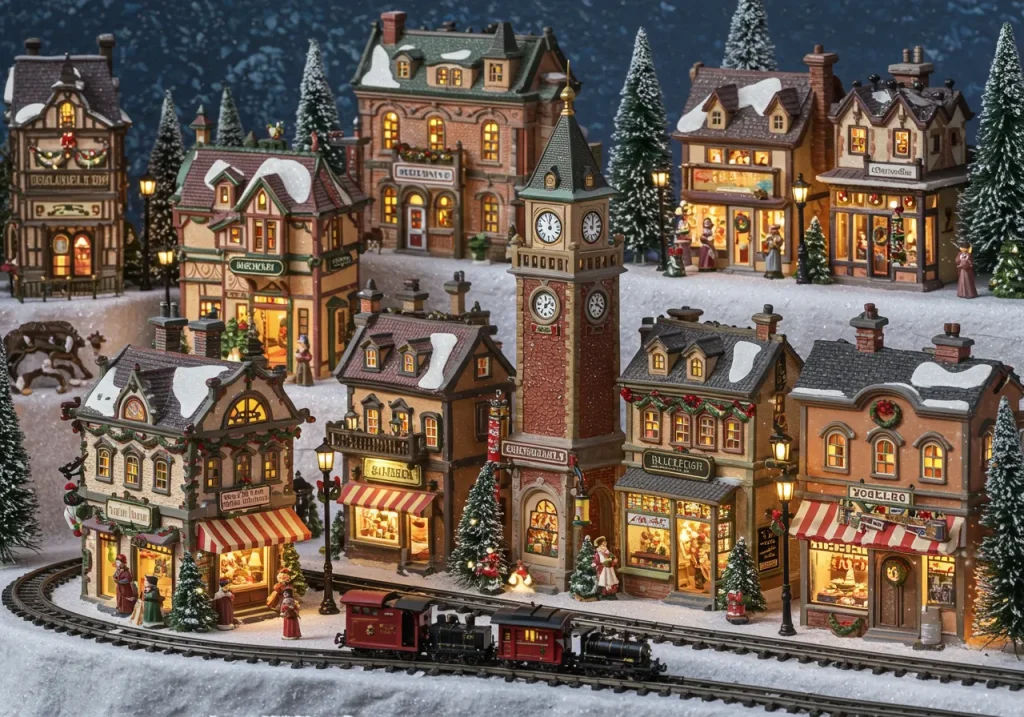
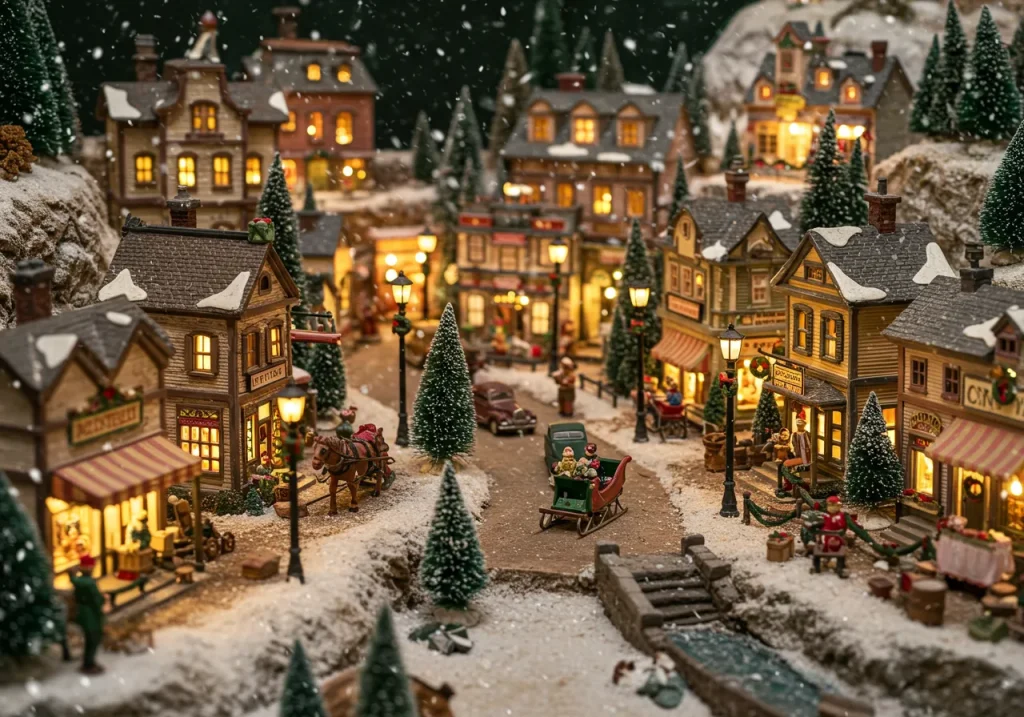
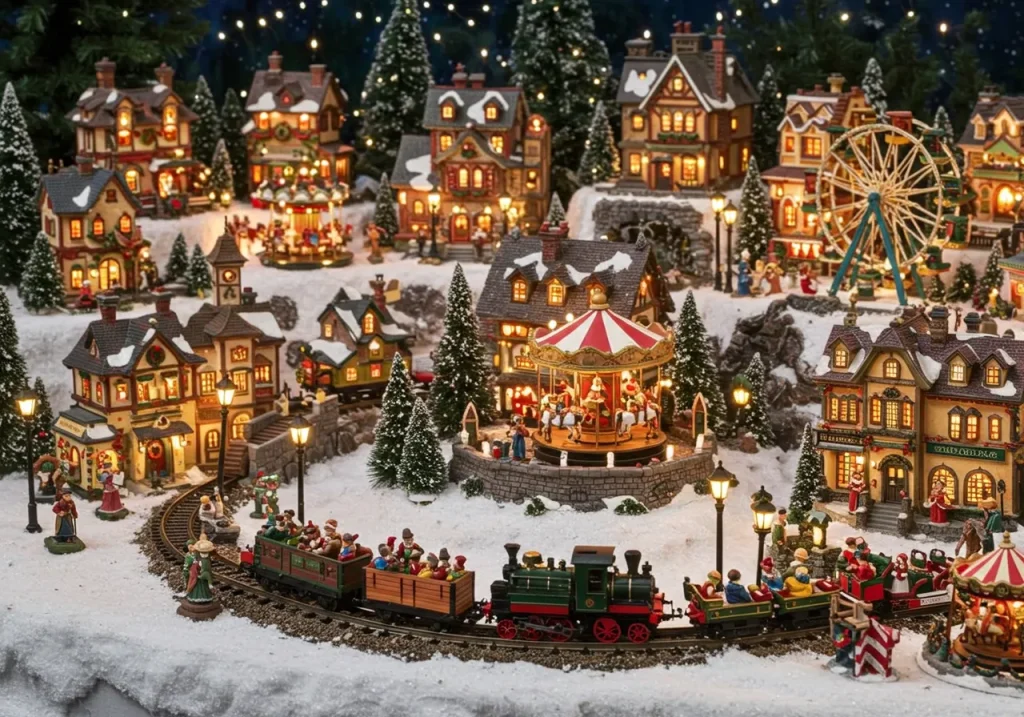
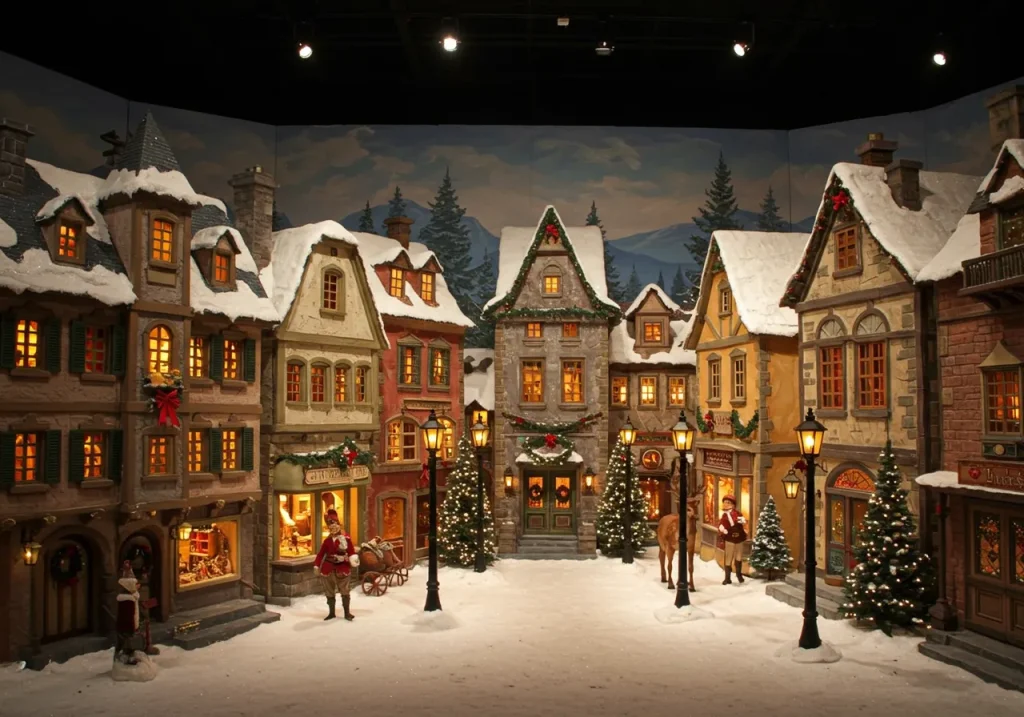
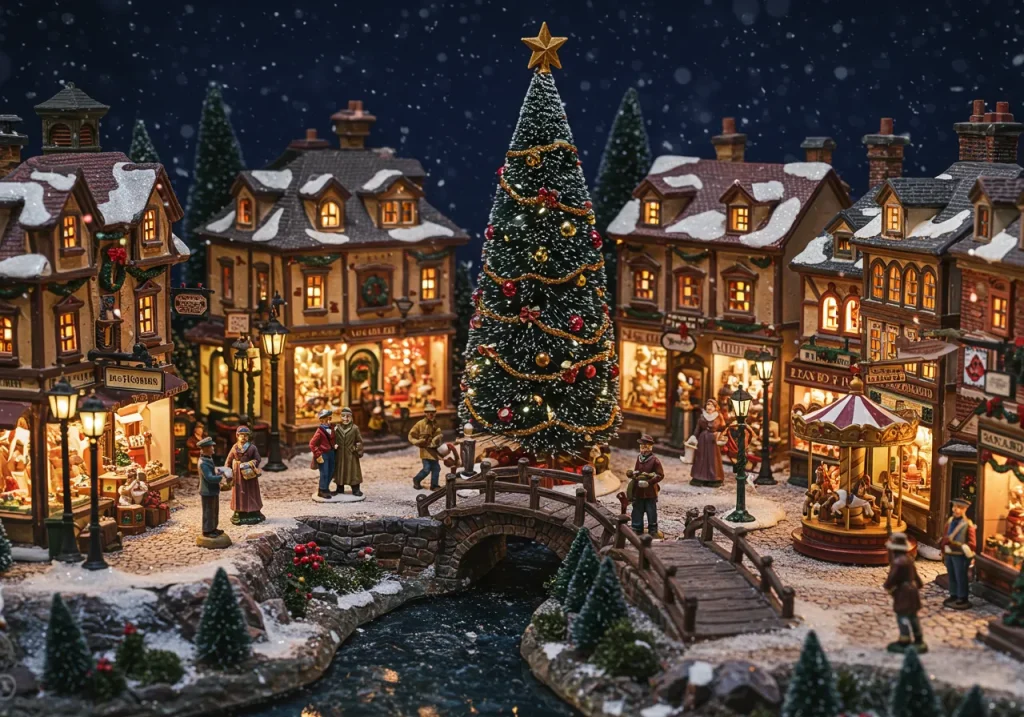
Christmas village displays are a cherished tradition, bringing the warmth and wonder of the holiday season into our homes. These miniature worlds capture the essence of a bygone era, evoking feelings of nostalgia and joy. Creating your own winter wonderland allows for endless creativity and a truly personalized touch.
1. Setting the Scene: Foundation and Backdrop
The foundation of your village display is crucial for establishing a stable and visually appealing scene. Consider using a sturdy table or a dedicated display board. The backdrop helps to frame your village and enhance the sense of depth.
DIY Tips:
- Use white felt or batting for a snowy base.
- Create rolling hills with crumpled newspaper covered in fabric.
- Paint a blue sky and distant evergreen trees on a cardboard or foam board backdrop.
- Drape fairy lights behind the backdrop for a starry night effect.
- Consider using a mirrored surface as a base for a water feature effect.
2. Lighting the Way: Illuminating Your Village
Effective lighting is paramount to bringing your Christmas village to life, creating a magical glow that highlights its intricate details. Beyond the internal lights of the buildings, consider external lighting to enhance the overall ambiance. Strategic placement can draw attention to specific scenes.
DIY Tips:
- Hide battery-operated LED string lights under the snow to illuminate paths.
- Use small spotlights to highlight a focal point like a church or a skating rink.
- String miniature Christmas lights through tiny evergreen trees.
- Add flickering LED tea lights inside buildings for a warm, inviting glow.
- Consider a blue or cool-toned light strip behind the backdrop for a nighttime effect.

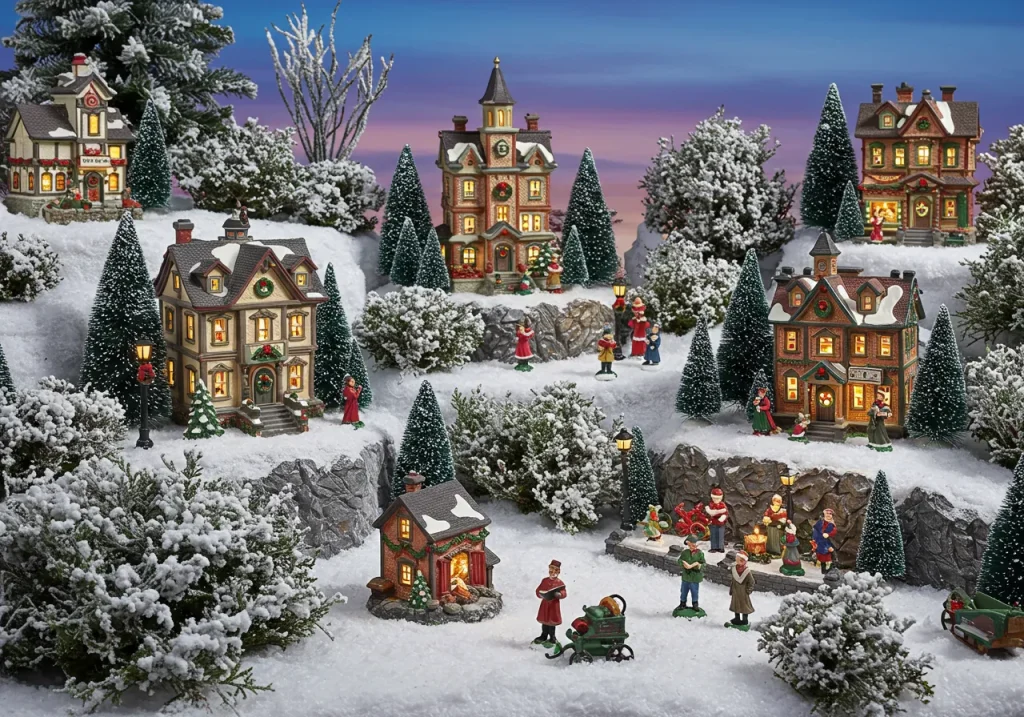
3. The Heart of the Village: Main Buildings
Selecting your main buildings is often the first step in populating your Christmas village, as these structures will define the theme and character of your display. Choose a variety of building types to create a diverse and engaging landscape. Consider buildings that tell a story.
DIY Tips:
- Craft simple cardboard buildings and paint them with festive colors.
- Decorate plain wooden birdhouses to resemble miniature cottages.
- Add glitter and miniature wreaths to store-bought village houses for a custom look.
- Print out miniature facades from the internet and glue them onto small boxes.
- Use craft foam to build unique structures, cutting out windows and doors.

4. Populating Your Paradise: Figurines and Characters
Figurines and characters breathe life into your miniature world, adding narrative and charm to your display. From carolers to ice skaters, these tiny inhabitants tell a story and invite viewers to imagine the activities within the village. Choose a diverse range of characters.
DIY Tips:
- Mold tiny people from polymer clay, painting them with fine details.
- Use small wooden peg dolls and dress them in fabric scraps for simple figures.
- Cut out tiny paper silhouettes of people and glue them to small stands.
- Repurpose small toy animals as village pets or wildlife.
- Add miniature accessories like tiny presents or sleds to your figures.

5. Natural Beauty: Trees and Greenery
No winter wonderland is complete without an abundance of festive trees and natural greenery. These elements provide scale, texture, and a sense of realism to your miniature landscape. Varying heights and types of trees creates a more dynamic look.
DIY Tips:
- Use bottle brush trees in various shades of green and white for a classic look.
- Create miniature evergreen trees from pipe cleaners twisted around a wire stem.
- Dust store-bought trees with artificial snow or glitter for a frosted effect.
- Collect small twigs and attach miniature leaves made from felt or paper.
- Use real sprigs of evergreen (pine, cedar) for a fresh scent and authentic touch.
6. Pathways and Roads: Guiding the Eye
Pathways and roads are essential for defining the layout of your village and guiding the viewer’s eye through the display. They connect different areas and suggest movement and activity. Consider different materials for varied textures.
DIY Tips:
- Use strips of gray felt or sandpaper for paved roads.
- Create snowy paths with sprinkled iridescent glitter over white glue.
- Lay down thin strips of brown craft paper for dirt paths.
- Outline paths with miniature fences or tiny streetlights.
- Use small pebbles or crushed gravel for a rustic pathway effect.
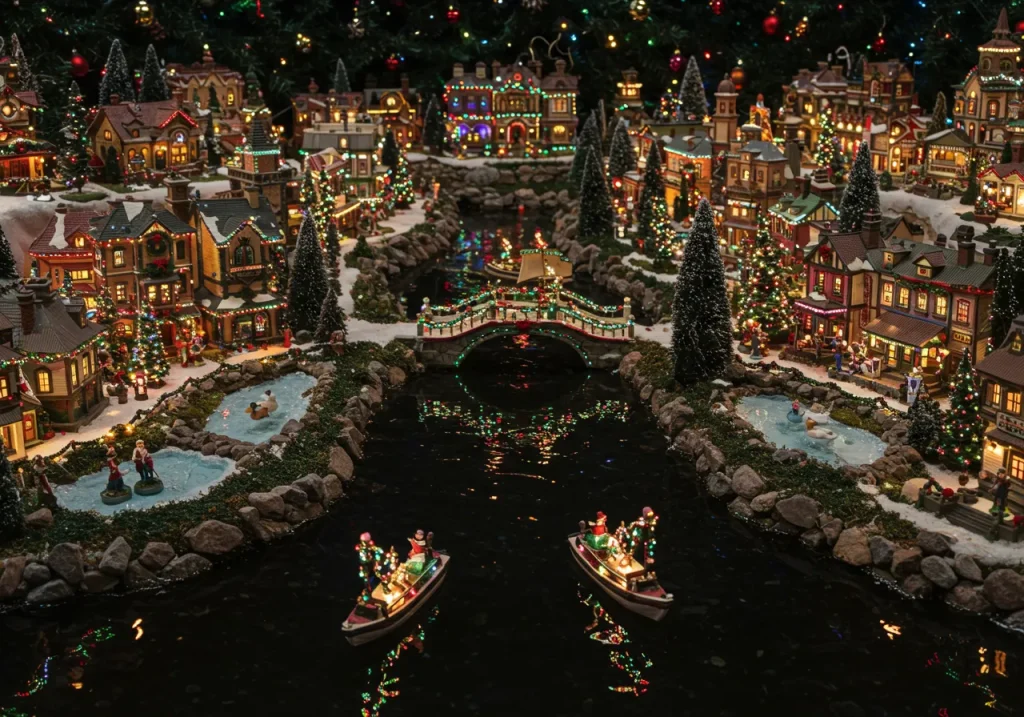
7. Water Features: Lakes, Rivers, and Ponds
Adding miniature water features brings a serene and dynamic element to your Christmas village. A frozen lake for ice skaters or a flowing river enhances the winter theme. These elements can become captivating focal points.
DIY Tips:
- Use blue cellophane or clear acrylic sheets for a frozen pond effect.
- Create ripples in “water” by applying clear craft glue and drawing lines with a toothpick.
- Outline a river with small rocks or miniature wooden bridges.
- Add tiny mirrors to represent reflective icy surfaces.
- Place miniature ice skaters on a blue glitter-covered foam board pond.
8. Festive Fun: Activities and Scenes
Beyond static buildings, incorporating scenes of activity brings a vibrant narrative to your village. Think about what people would be doing in a festive winter village. These vignettes add charm and storytelling.
DIY Tips:
- Set up a miniature ice-skating rink with figures enjoying the ice.
- Create a sledding hill with tiny sleds and figures sliding down.
- Show carolers gathered around a lamppost, singing holiday tunes.
- Design a miniature Christmas market with tiny stalls and shoppers.
- Depict children building a snowman or having a snowball fight.
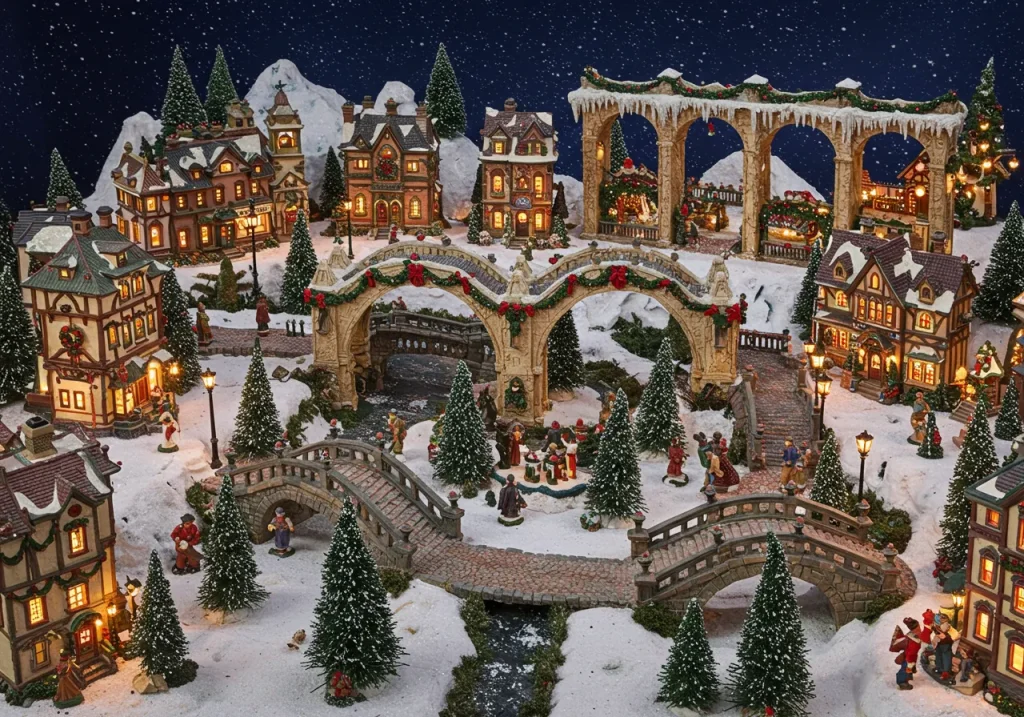
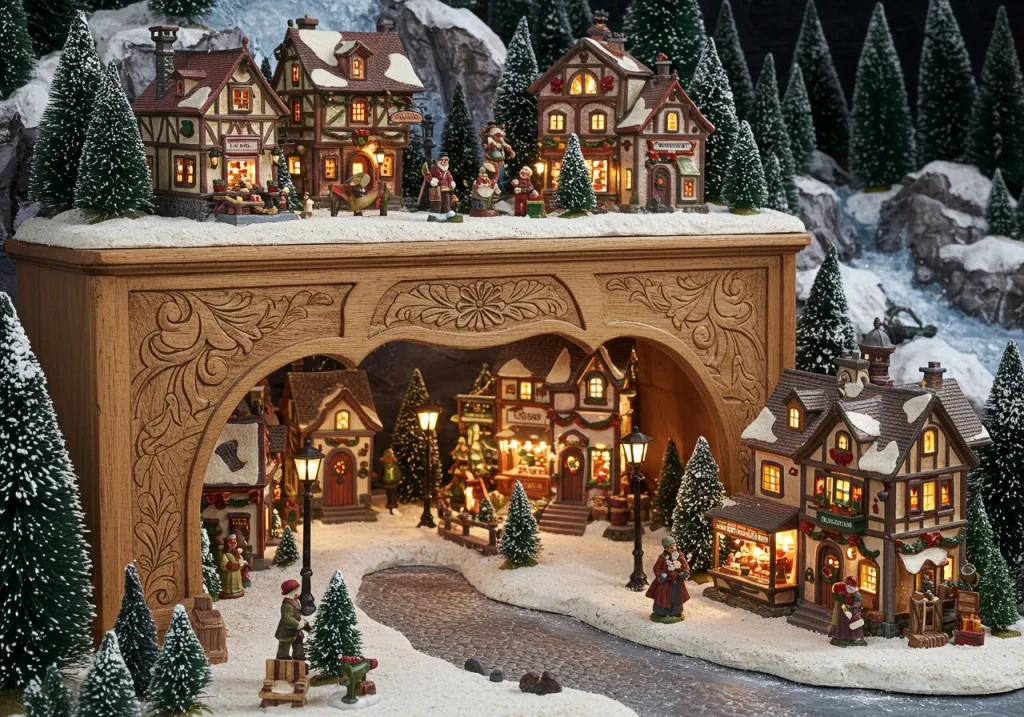
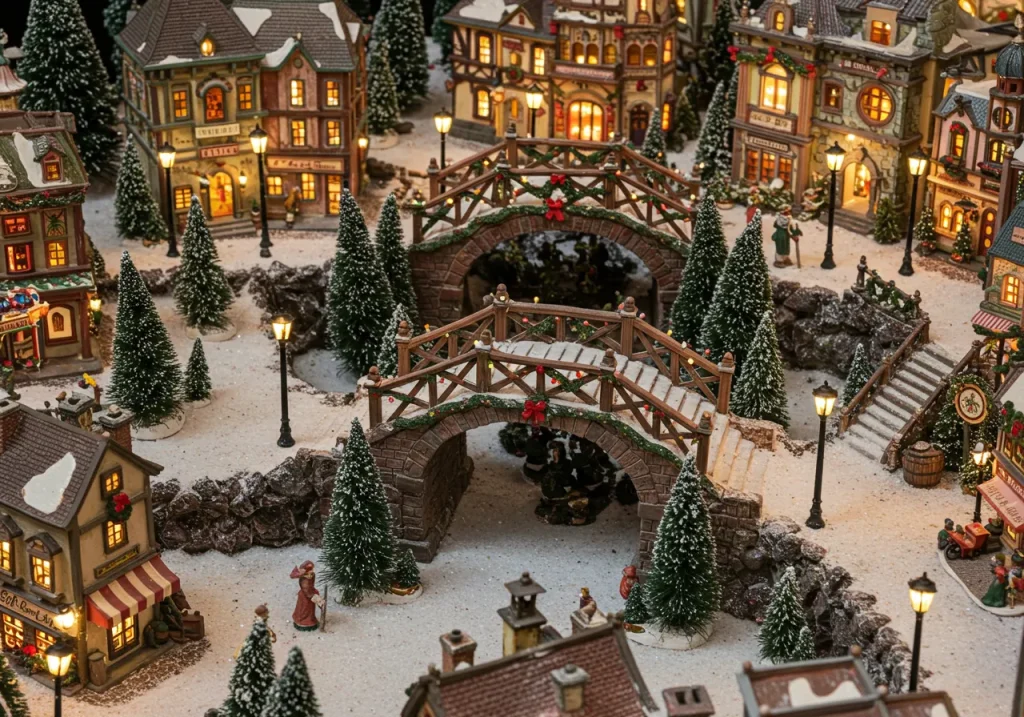
9. Magical Details: Bridges and Arches
Bridges and arches add architectural interest and connect different sections of your village, creating a sense of flow and exploration. They can also serve as charming entry points or focal points. These structures add depth.
DIY Tips:
- Craft simple wooden bridges from craft sticks or popsicle sticks.
- Build stone-look arches from painted foam core or small pebbles.
- Decorate bridges with miniature wreaths, garlands, or fairy lights.
- Use thin cardboard rolled into an arch shape for a quick solution.
- Paint a faux stone texture onto craft foam for realistic bridge abutments.
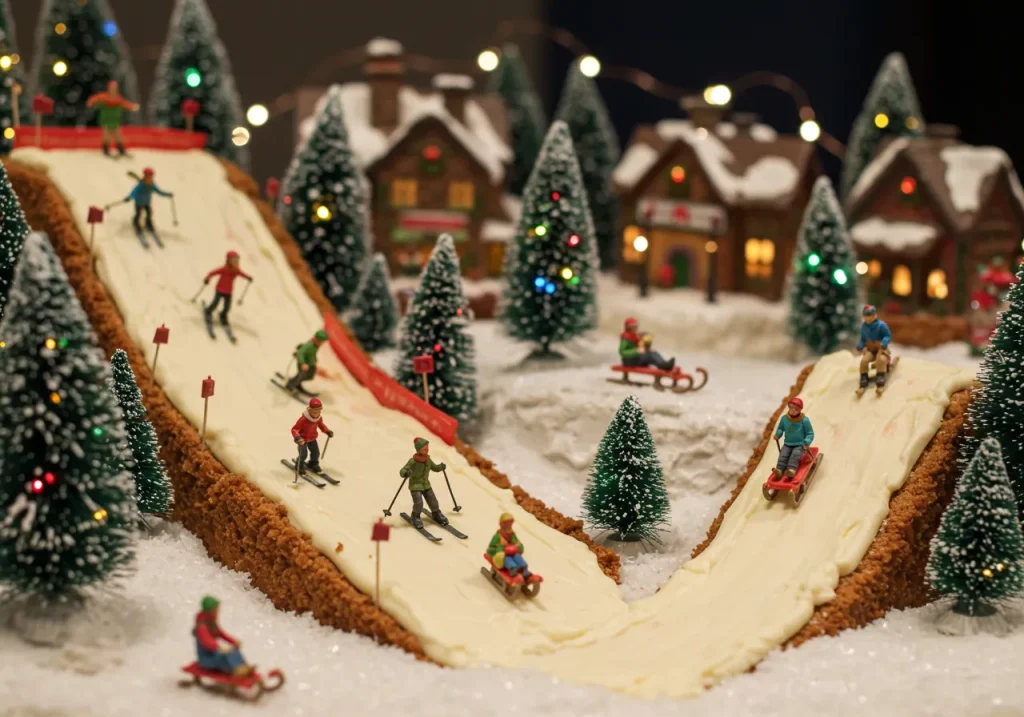
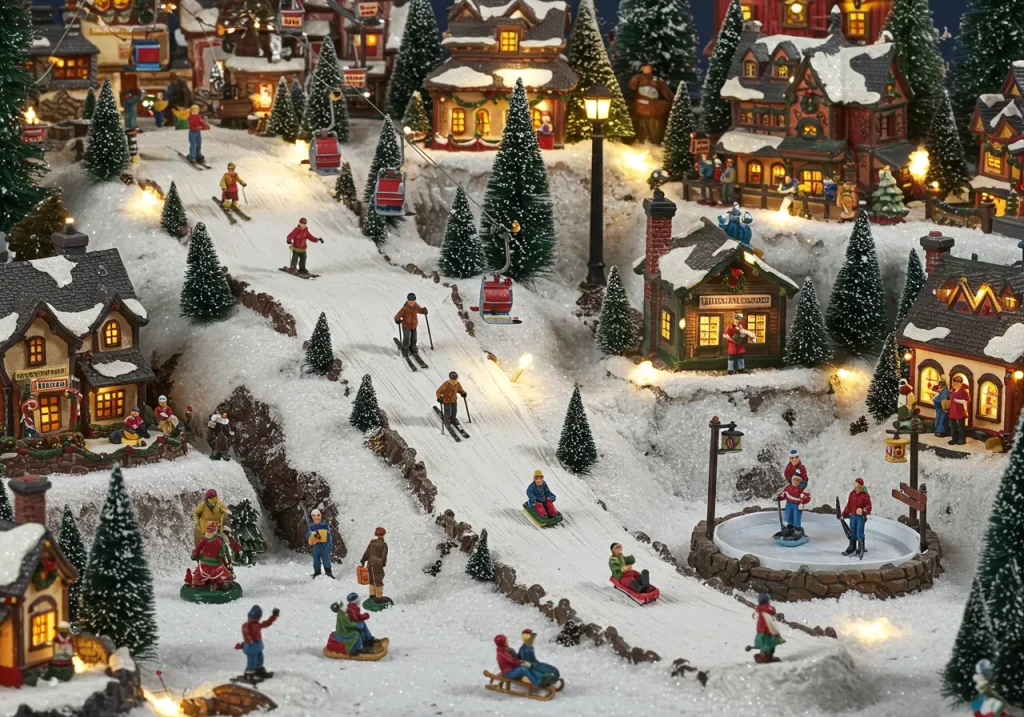
10. Winter Sports: Ski Slopes and Sledding Hills
Embrace the joy of winter sports by incorporating ski slopes or sledding hills into your display. These dynamic elements add excitement and suggest a lively, active village. They are perfect for showcasing miniature figures.
DIY Tips:
- Create slopes by elevating sections of your base with foam blocks or crumpled newspaper.
- Cover hills with white fabric or artificial snow for a smooth, snowy surface.
- Add tiny skis, poles, and sleds next to your miniature figures.
- Use cotton batting to create soft, pillowy drifts at the base of hills.
- Paint subtle tracks in the “snow” to suggest recent activity.
11. Winter Sports: Ski Slopes and Sledding Hills
A crackling fire pit or bonfire adds a touch of warmth and gathering to your winter wonderland, inviting villagers to huddle together. These small details create an inviting atmosphere, suggesting community. They are perfect for night scenes.
DIY Tips:
- Use small twigs arranged in a cone shape with a red or orange LED flickering light.
- Cut small flame shapes from translucent red and orange plastic, backlit by a tiny LED.
- Surround your fire pit with tiny stones or logs made from small twigs.
- Place miniature figures gathered around the fire, perhaps roasting marshmallows.
- Use a small piece of cotton batting around the “fire” to simulate smoke.
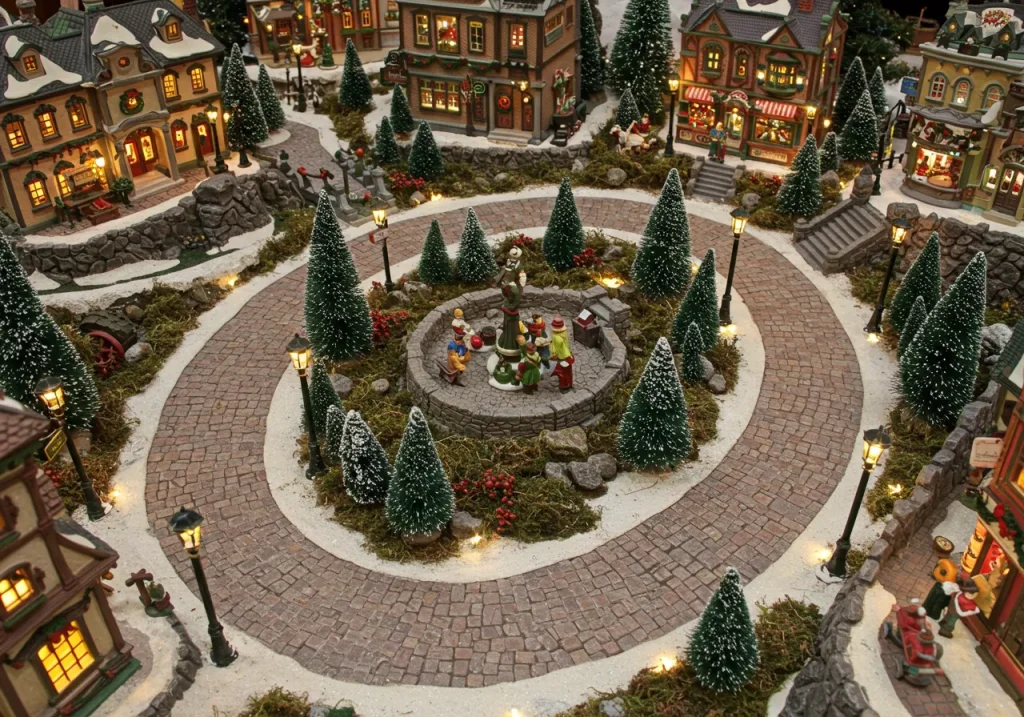
12. Public Spaces: Parks and Town Squares
Every vibrant village needs public spaces where its inhabitants can gather, celebrate, and socialize. Parks and town squares offer opportunities for diverse scenes and decorative elements. They serve as central hubs.
DIY Tips:
- Design a central gazebo using craft sticks and miniature pillars.
- Place a miniature Christmas tree in the center of a town square, adorned with tiny lights.
- Add park benches made from small wooden blocks or craft sticks.
- Create a fountain in the center of the square using a small mirrored base and clear plastic.
- Surround the square with tiny streetlights and festive banners.
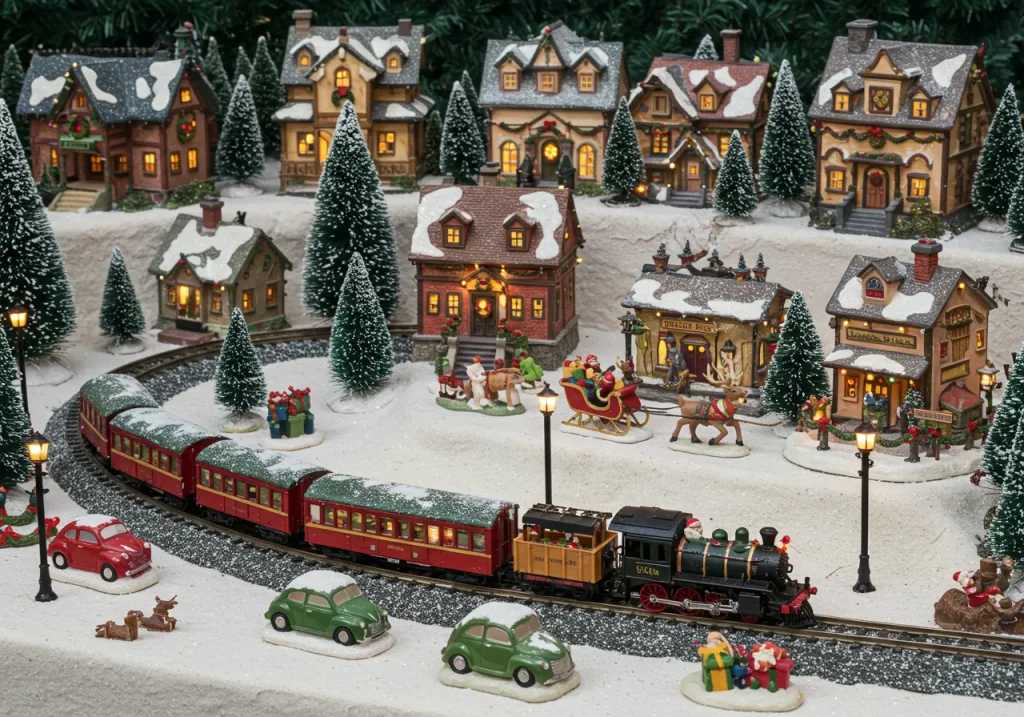
13. Transportation: Cars, Trains, and Sleighs
Adding miniature forms of transportation enhances the realism and storytelling within your village. Whether it’s a vintage car, a classic train, or a horse-drawn sleigh, these elements suggest movement. They connect different areas of the display.
DIY Tips:
- Place a miniature train set running around the perimeter or through the village.
- Position tiny vintage cars parked along the streets or in front of buildings.
- Craft a simple sleigh from cardboard and add tiny reindeer figurines.
- Use small toy buses or trucks for a more modern village setting.
- Create a miniature “bus stop” or “train station” platform for added detail.
14. Winter Flora: Snowy Bushes and Evergreens
While larger trees define the landscape, smaller snowy bushes and evergreens fill in the gaps and add texture at ground level. These smaller details contribute to the overall winter aesthetic, enhancing the depth. They provide contrast.
DIY Tips:
- Use small pieces of floral foam covered in artificial snow for snowy bushes.
- Shape green pipe cleaners into shrub forms and dust with glitter.
- Collect small twigs and attach tiny clumps of cotton batting for snowy branches.
- Use dried moss covered in white paint for a frosty look.
- Arrange small clusters of miniature evergreens around buildings and pathways.
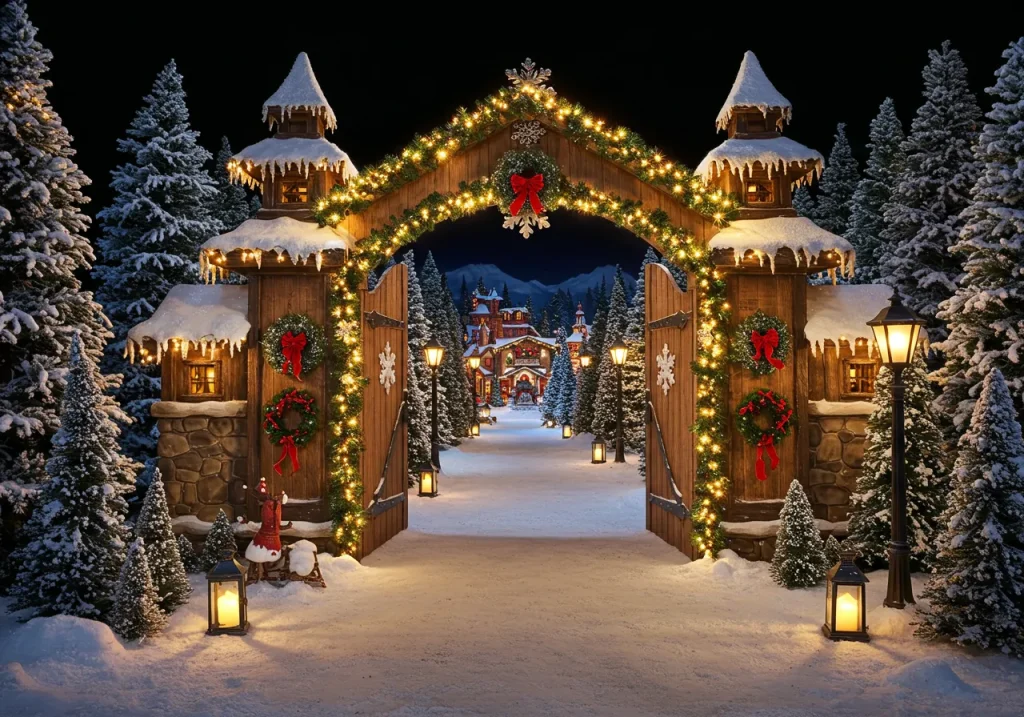
15. The Grand Entrance: Gates and Archways
Creating a grand entrance with gates or archways can define the beginning of your village display and welcome viewers into your miniature world. These elements provide a clear focal point and add a touch of majesty. They can be elaborate or simple.
DIY Tips:
- Build a festive archway from craft foam, decorated with miniature garlands and bows.
- Construct small picket fences or gates from craft sticks.
- Use intertwined twigs and miniature berries for a rustic, natural arch.
- Add tiny LED lights along the archway to illuminate the entrance.
- Place a small “Welcome to Our Village” sign made from a craft stick.
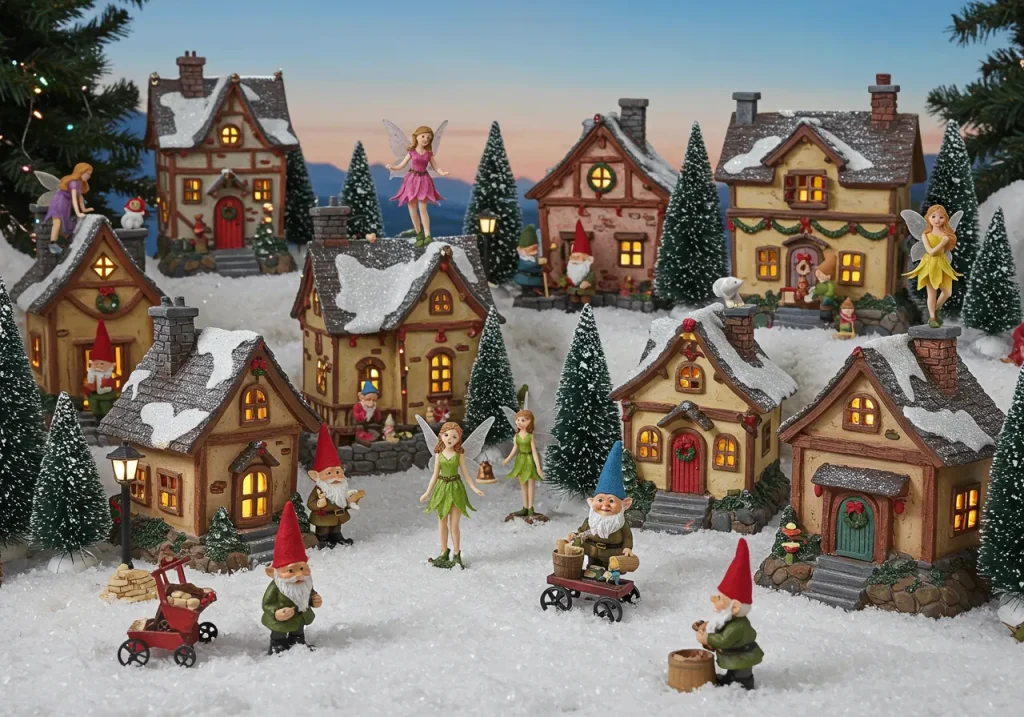
16. Whimsical Touches: Fairies and Gnomes
Inject a sense of magic and whimsy into your Christmas village by incorporating tiny fairies, gnomes, or other mythical creatures. These delightful additions spark imagination and add an unexpected charm. They make the village unique.
DIY Tips:
- Place tiny fairy figurines peeking out from behind trees or bushes.
- Craft small gnomes from felt and wooden beads, giving them pointy hats.
- Create miniature fairy doors at the base of your trees.
- Add tiny, iridescent wings to some of your figures for a magical effect.
- Build a miniature fairy house from bark and moss.
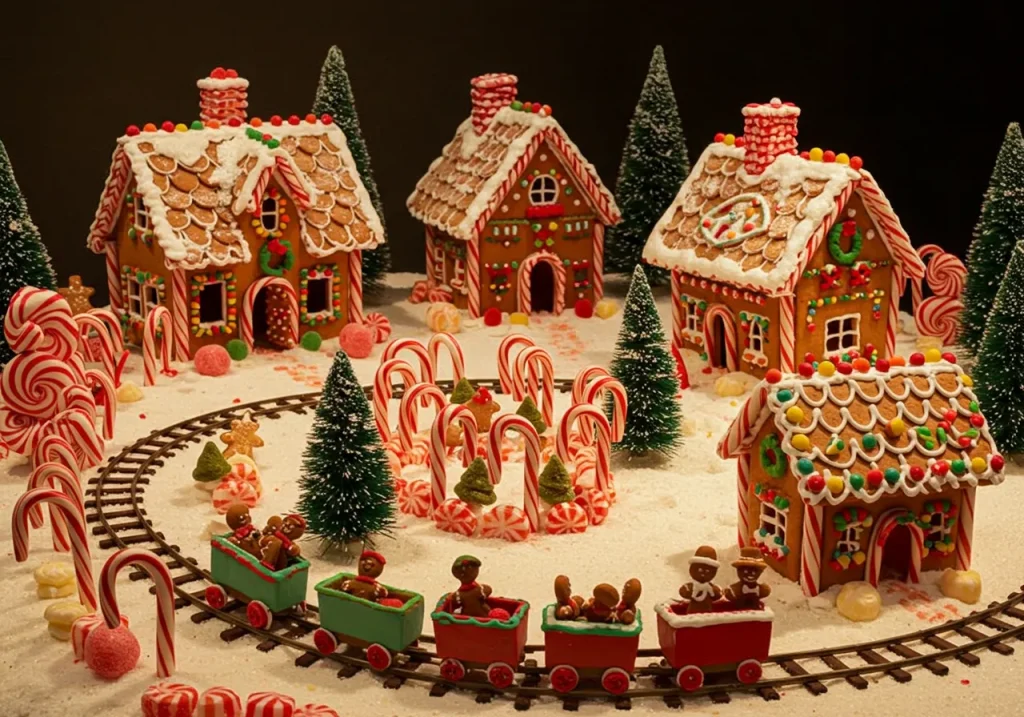
17. Edible Elements: Candy Canes and Gingerbread
Incorporating edible-looking elements like candy canes, gingerbread houses, or lollipops adds a sweet and playful touch to your Christmas village. These details evoke the joy and deliciousness of the holiday season. They appeal to all ages.
DIY Tips:
- Use real mini candy canes as fence posts or lampposts.
- Craft miniature gingerbread houses from brown felt or cardboard.
- Create tiny lollipops from painted wooden beads on wire sticks.
- Sprinkle iridescent glitter over “gingerbread” houses for a sugared look.
- Make tiny gumdrop bushes from colorful pom-poms.
18. Soundscapes: Enhancing the Atmosphere
While not visual, incorporating subtle soundscapes can significantly enhance the immersive experience of your Christmas village. Gentle carols, sleigh bells, or even crackling fire sounds add another sensory layer. They bring the village to life.
DIY Tips:
- Hide a small speaker playing soft Christmas carols or classical music.
- Use a sound machine with nature sounds like crackling fire or gentle wind.
- Place tiny bells on miniature reindeer or sleighs for a subtle jingle.
- Record ambient sounds of a bustling market and play them softly.
- Consider a miniature music box near a dancing figurine.
19. Elevation and Levels: Creating Depth
Varying the elevation and creating different levels within your display adds significant depth and visual interest. This technique helps to break up the flat surface and provides more dynamic viewing angles. It makes the village feel larger.
DIY Tips:
- Use foam blocks, sturdy boxes, or stacked books as risers under your base.
- Create terraced hills by gradually building up layers of foam or cardboard.
- Design a multi-level village with buildings situated at different heights.
- Build a small bridge connecting a lower area to a higher plateau.
- Use gentle slopes rather than abrupt changes for a more natural look.
20. Pathways to the Sky: Hot Air Balloons and Airships
For a truly whimsical and unique touch, consider adding miniature hot air balloons or fantastical airships floating above your village. These elements add an unexpected vertical dimension and a sense of magical adventure. They capture the imagination.
DIY Tips:
- Craft small hot air balloons from painted styrofoam balls and tiny baskets made from twine.
- Use light fabric or paper to create balloon shapes, attaching them to a thin wire.
- Design airships from cardboard and attach small propellers.
- Hang them from invisible fishing line or thin clear wire above the display.
- Add tiny figures peeking out of the baskets for a realistic touch.

21. Woodland Wonders: Forest Critters
Bring the surrounding wilderness into your village with miniature forest critters, such as deer, rabbits, foxes, and owls. These animals add a touch of nature and a sense of peaceful coexistence within the winter wonderland. They add realism and charm.
DIY Tips:
- Place miniature deer grazing near the edge of a forest or by a frozen pond.
- Add tiny rabbits hopping along snowy paths or hiding under bushes.
- Perch a small owl figurine on a miniature tree branch.
- Position a miniature fox peeking out from behind a snowy bank.
- Use small plastic or resin animal figurines that fit the scale of your village.

22. Vintage Charm: Retro Elements
Embrace a sense of nostalgia by incorporating vintage-inspired elements into your Christmas village display. Think classic cars, retro signage, or old-fashioned streetlights to evoke a timeless holiday feel. These details add character.
DIY Tips:
- Seek out miniature vintage vehicles from toy stores or craft shops.
- Print out miniature old-fashioned advertisements or shop signs.
- Use flickering flame-tip LED lights for a gas lamp effect on streetlights.
- Incorporate figures dressed in period attire from a specific era.
- Look for miniature reproductions of classic Christmas decorations.
23. Interactive Elements: Moving Parts
Adding subtle interactive elements or moving parts can captivate viewers and bring an extra layer of dynamism to your village. This could be a rotating Ferris wheel, a spinning carousel, or a train that actually moves. They add a wow factor.
DIY Tips:
- Integrate a miniature battery-operated train set that circles the display.
- Place a small rotating carousel or Ferris wheel (many village brands offer these).
- Create a simple spinning ice rink with tiny figures on a rotating base.
- Use a small motor to make a tiny windmill or water wheel turn.
- Consider miniature figures with subtle animated movements (e.g., waving).
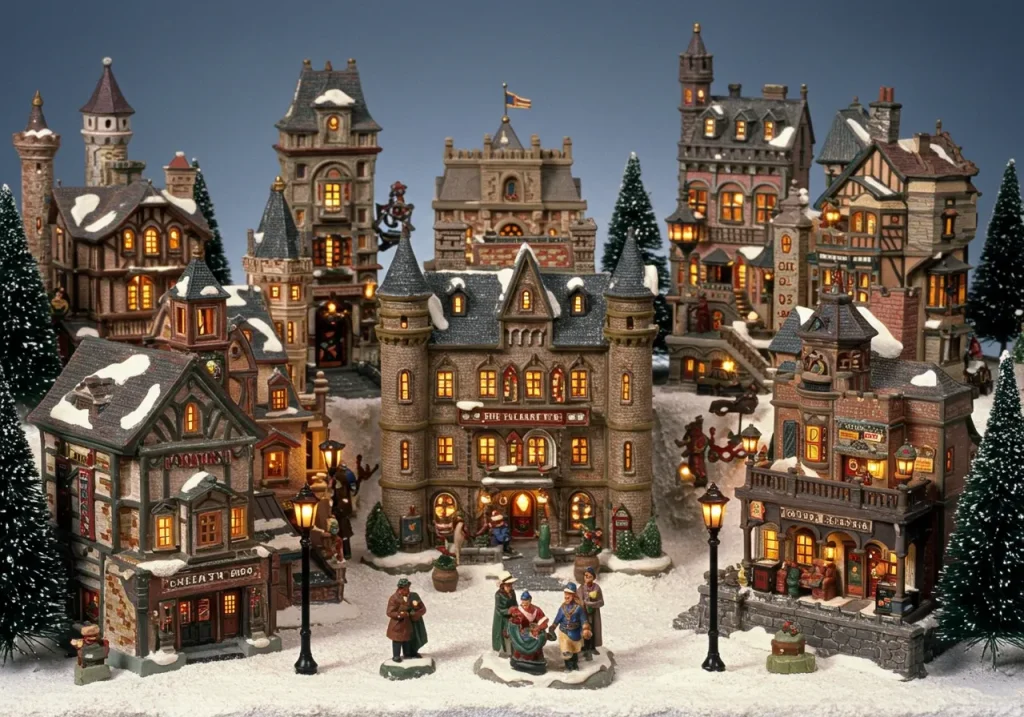
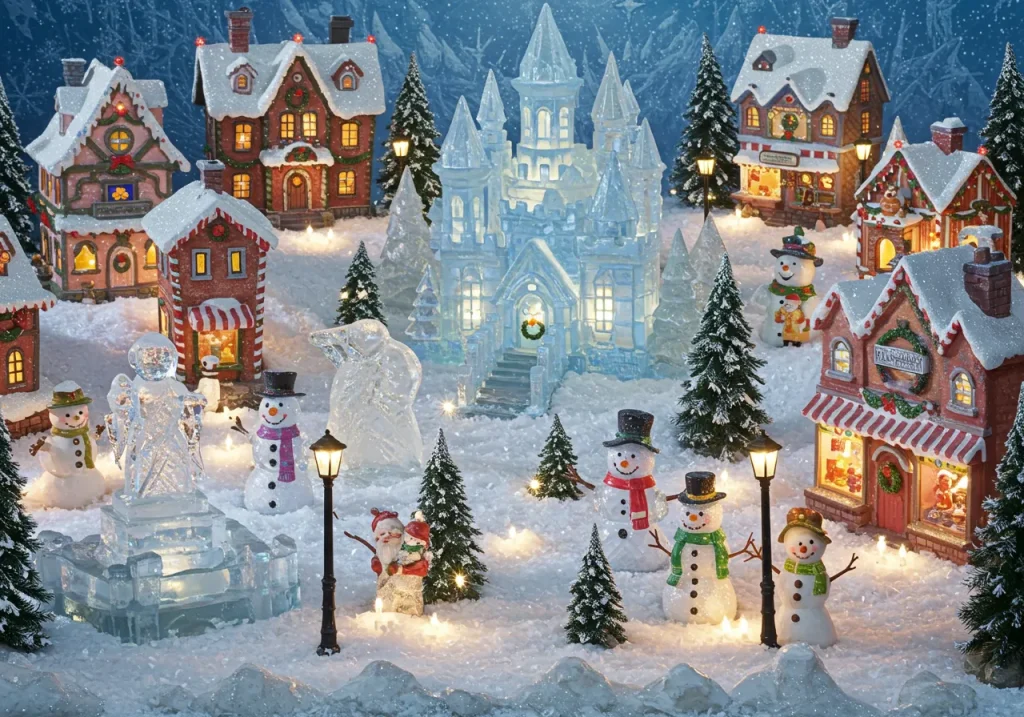
24. A Touch of Royalty: Castles and Palaces
For a truly enchanting and fairytale-like village, consider incorporating a miniature castle or a grand palace. These majestic structures can serve as a stunning focal point and add a sense of grandeur to your winter wonderland. They create a magical atmosphere.
DIY Tips:
- Build a cardboard castle, painting it with intricate details and adding glitter.
- Decorate a dollhouse to resemble a snowy palace with turrets and spires.
- Use foam core to create impressive castle walls and towers.
- Add tiny flags and banners to the top of the castle for a regal touch.
- Illuminate the castle from within with soft, warm LED lights.
25. Frozen Wonders: Ice Sculptures and Snowmen
Emphasize the winter theme with miniature ice sculptures and cheerful snowmen scattered throughout your village. These frosty creations add a playful and artistic element to the snowy landscape. They are quintessential winter decorations.
DIY Tips:
- Craft tiny snowmen from white clay, pom-poms, or cotton balls with small twig arms.
- Use clear resin or hot glue molded into shapes for “ice sculptures.”
- Add glitter to your “ice sculptures” for a shimmering effect.
- Place miniature buckets and scarves on your snowmen for personality.
- Consider making a small “ice palace” out of clear plastic or acrylic cubes.
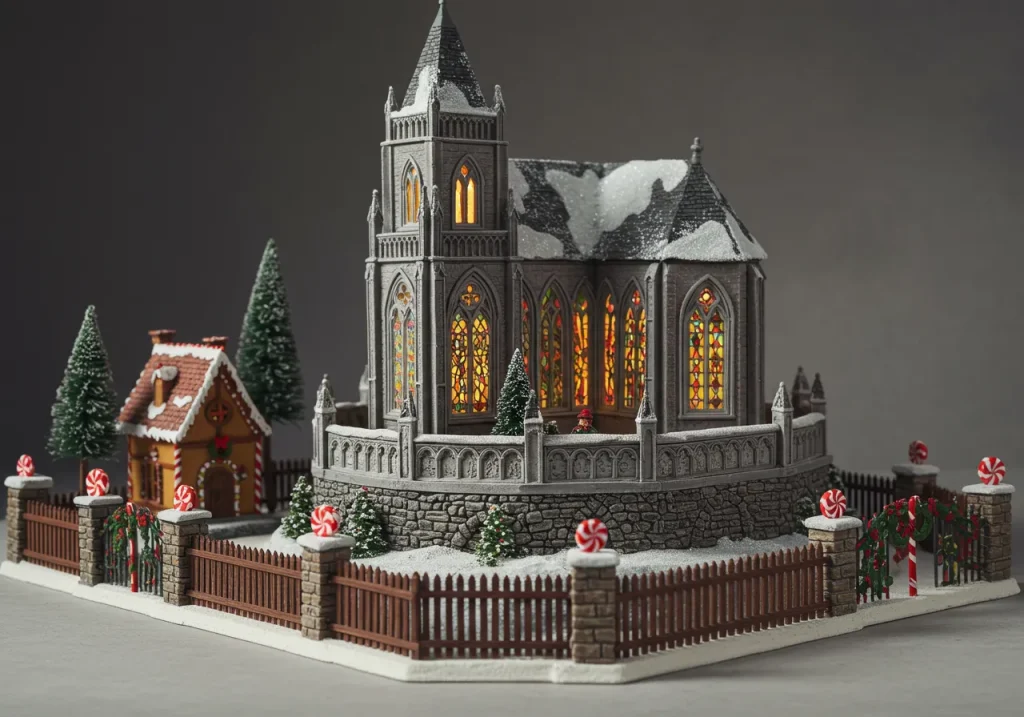
26. Architectural Accents: Fences and Walls
Fences and walls help define property lines, create boundaries, and add intricate architectural detail to your miniature world. They guide the eye and add structure to the landscape. They can be rustic or elegant.
DIY Tips:
- Construct picket fences from craft sticks or coffee stirrers, painted white.
- Use small natural twigs and twine for a rustic split-rail fence.
- Build stone walls from small pebbles glued together or painted craft foam.
- Add miniature gates at the entrance to properties or parks.
- Drape miniature garlands or wreaths on fences for a festive touch.
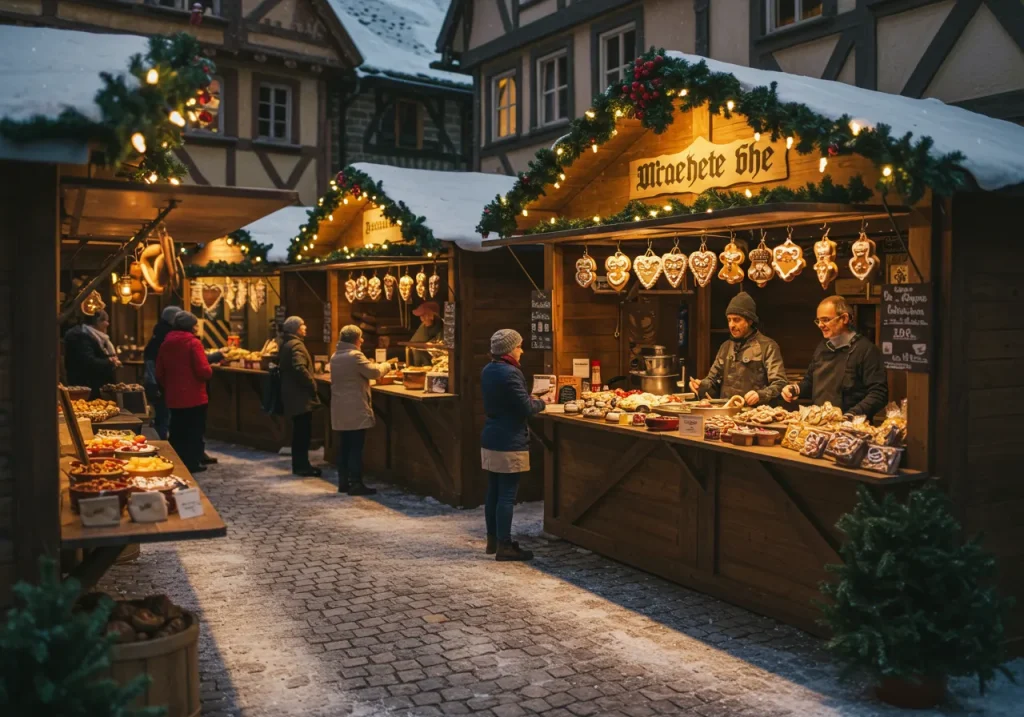
27. Festive Food Stalls: Market Delights
A bustling Christmas market is a quintessential part of many winter villages, and adding miniature food stalls brings a delightful sensory element to your display. Imagine tiny vendors selling hot cocoa, roasted chestnuts, and gingerbread cookies. They add vibrancy.
DIY Tips:
- Craft tiny market stalls from cardboard boxes, painting them with festive colors.
- Create miniature food items from polymer clay (e.g., tiny pretzels, mugs of cocoa).
- Use small beads or painted seeds for “roasted nuts.”
- Add tiny signs above each stall indicating what’s being sold.
- Place miniature figures browsing or purchasing items at the stalls.
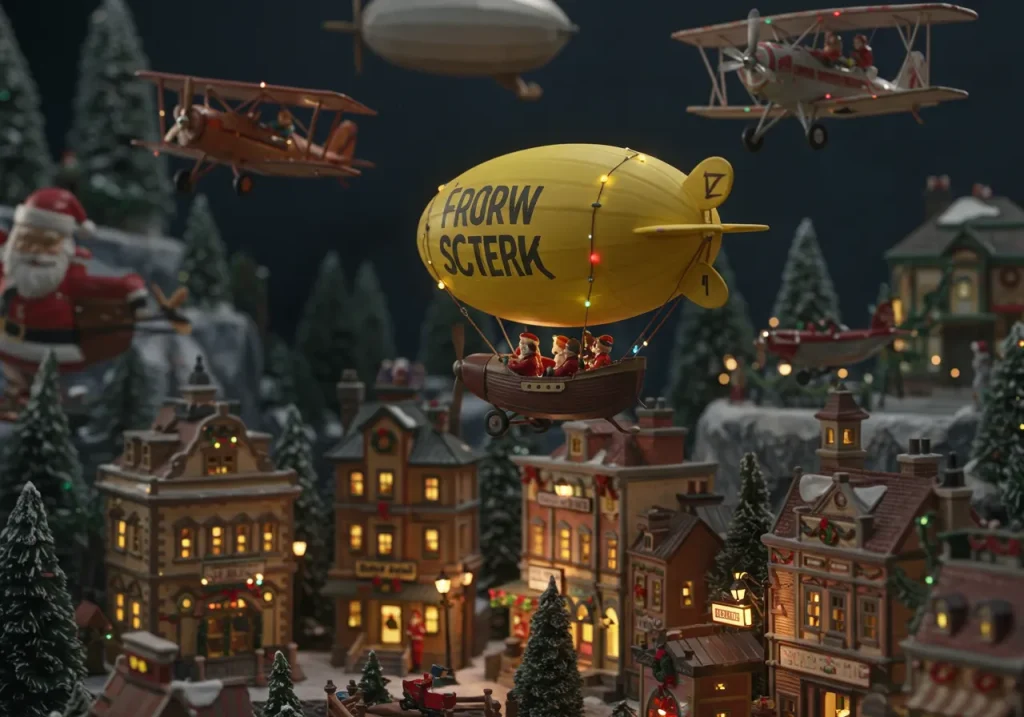
28. Above the Village: Airplanes and Blimps
For a truly expansive and creative touch, extend your village’s narrative into the skies above. Miniature airplanes, blimps, or even Santa’s sleigh can add a dynamic vertical element. They suggest grand adventures and wider connections.
DIY Tips:
- Hang a miniature vintage airplane or blimp from the ceiling above your display with clear wire.
- Craft Santa’s sleigh and reindeer from cardboard or lightweight wood, suspended in mid-air.
- Use a small toy plane, painted and decorated for a festive look.
- Create tiny clouds from cotton batting around the suspended elements.
- Consider adding tiny flashing LED lights to the “aircraft” for a magical effect.
29. Artistic Flair: Murals and Painted Backdrops
Beyond a simple blue sky, an elaborate painted mural or backdrop can transform your village into an immersive scene. This allows for greater artistic expression and can extend the visual narrative far beyond the physical village boundaries. It sets the overall mood.
DIY Tips:
- Paint a detailed winter landscape with distant mountains, forests, and a starry night sky.
- Use a large piece of foam board or canvas as your backdrop.
- Incorporate a scenic aurora borealis effect with swirling blues, greens, and purples.
- Paint a snowy town in the distance, creating a sense of a larger world.
- Add subtle glitter to the painted snow and stars for a shimmering effect.
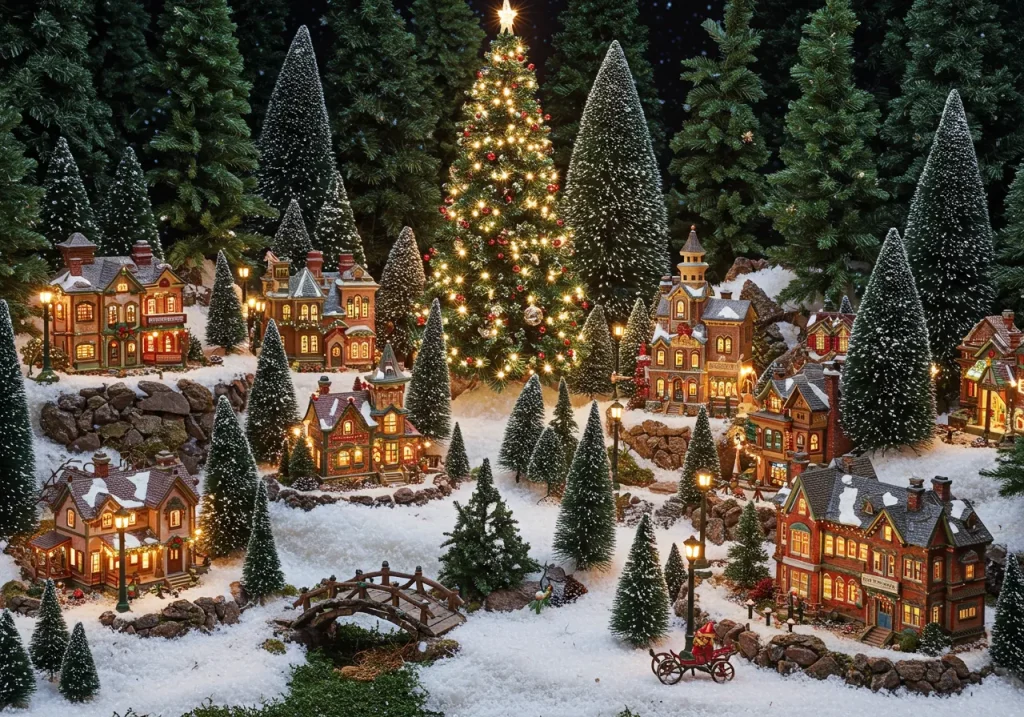
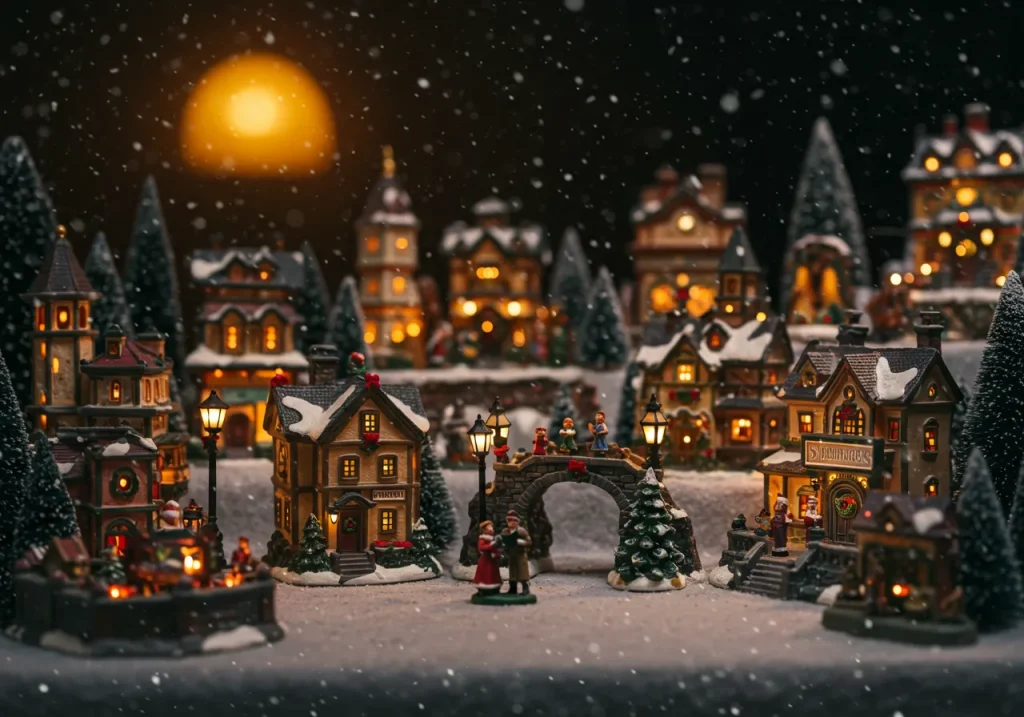
30. The Grand Finale: Focal Points and Centerpieces
Every captivating Christmas village needs a grand finale or a prominent focal point that draws the eye and anchors the entire display. This centerpiece should be a showstopper, tying all elements together. It provides a sense of culmination.
DIY Tips:
- Design an elaborate illuminated church or a magnificent town hall as the central building.
- Create a towering, heavily decorated Christmas tree as the village’s main attraction.
- Set up a vibrant winter carnival scene with multiple moving rides and bright lights.
- Position a grand ice palace or a castle overlooking the entire village.
- Build a spectacular mountain range with a prominent ski lodge at its peak.
Conclusion
Creating a winter wonderland Christmas village is a delightful and rewarding experience, allowing you to craft a miniature world filled with holiday cheer. From the snowy base to the highest steeple, each element contributes to the magic and charm. By focusing on lighting, varied textures, and intricate details, you can bring your vision to life, enchanting all who behold it. This cherished tradition provides a canvas for creativity and a beautiful way to celebrate the most wonderful time of the year.