Table of Contents
- 1. Traditional Heritage: Irish Whiskey and Coffee Roast Flavor Matrix
- 2. Precise Ratios: Balancing Baileys and Whiskey for the Perfect Blend
- 3. Temperature Control: Preventing Baileys from Curdling in Acidic Brews
- 4. Glass Preparation: Step-by-Step Mixing for an Elevated Experience
- 5. Elegant Garnishes: Layering Fresh Whipped Cream and Rich Cocoa Powder
- Pouring the Final Foundation: Your Signature Blend
- Blueprint for the Perfect Brew: Common Questions
Crafting the perfect Irish coffee requires the same precision one applies to drafting a detailed floor plan.
Much like selecting the right hardwood for a foundation, the base of high-quality coffee must be robust and stable. This beverage serves as the structural heart of a sophisticated evening, offering a warm welcome to both houseguests and professional clients.
When we analyze the components, the marriage of Irish whiskey and cream liqueur functions like a seamless transition between architectural materials.
The whiskey provides the necessary structural depth; meanwhile, the Baileys acts as a refined finishing glaze that softens the edges.
Professionals often compare this process to balancing modern aesthetics with traditional craftsmanship to ensure every layer serves a specific purpose.
Finalizing the presentation involves more than just taste; it is about the visual harmony of the glass and the garnish.
Whether you are styling a contemporary home office or hosting a gathering for real estate developers, these techniques transform a simple drink into a curated experience. This guide provides the actionable steps needed to master the art of the pour with the confidence of a seasoned maker.
1. Traditional Heritage: Irish Whiskey and Coffee Roast Flavor Matrix
Rich walnut countertops and warm amber lighting create the perfect atmospheric foundation for an authentic evening beverage experience.
Designing a dedicated zone for your spirits and espresso tools drastically improves kitchen workflow. This layout prevents unnecessary movement.
If you are planning an upgrade, exploring 25 smart coffee bar ideas for a functional home station provides essential ergonomic layouts.
Crafting the Perfect Environmental Flow
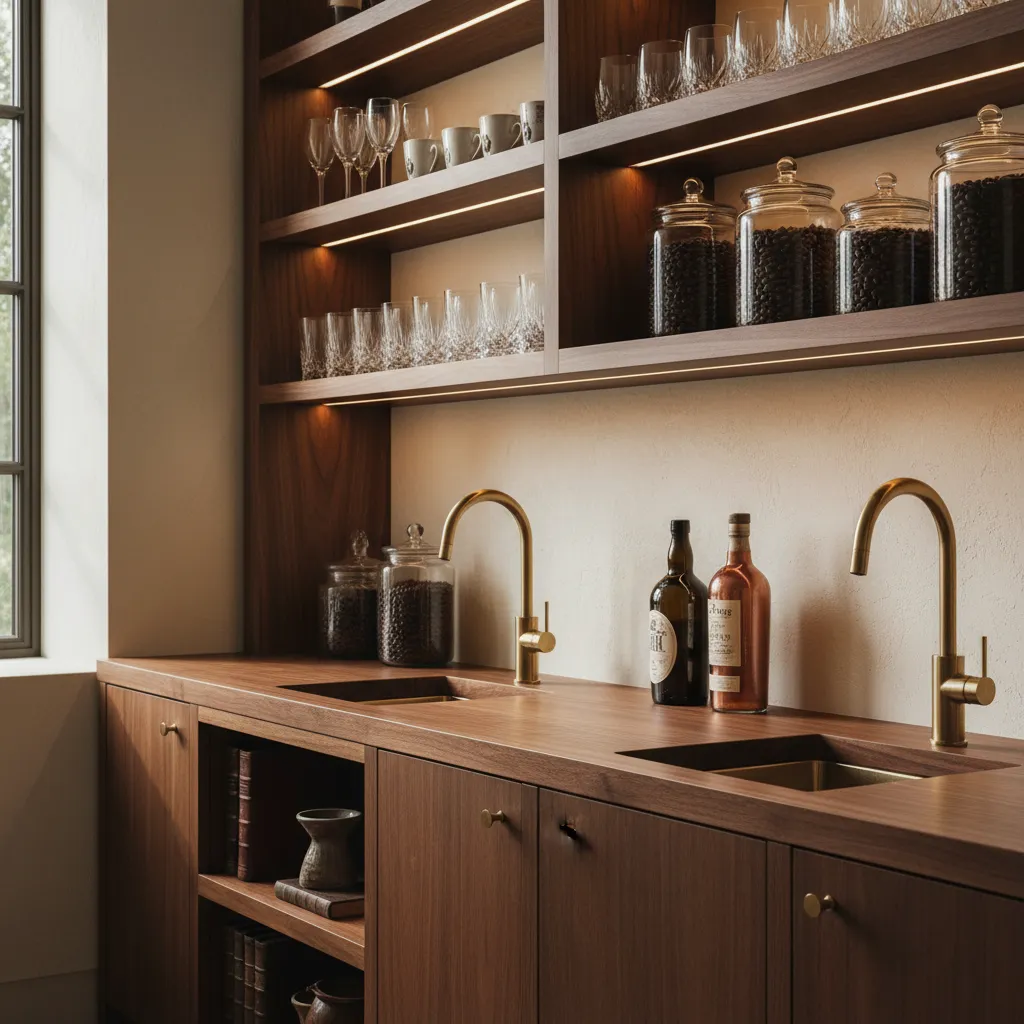
Tactile elements like brushed brass hardware and smooth glass decanters elevate the daily ritual of brewing. Proper ambient lighting sets a relaxed mood.
Installing counters at a standard 36 inches ensures comfortable pouring. This functional height minimizes strain while maximizing aesthetic appeal.
A home bar is an opportunity to inject a little glamour into your home, creating a dedicated space that invites lingering and conversation.
Nate Berkus, Architectural Digest Home Bar Guide
The Ultimate Coffee and Whiskey Matrix
The structural integrity of a great beverage relies on balance. Mixing heavy creams requires a solid foundation of correctly roasted beans.
Mastering professional at home coffee recipes for a daily luxury requires understanding how different roast profiles interact with spirits.
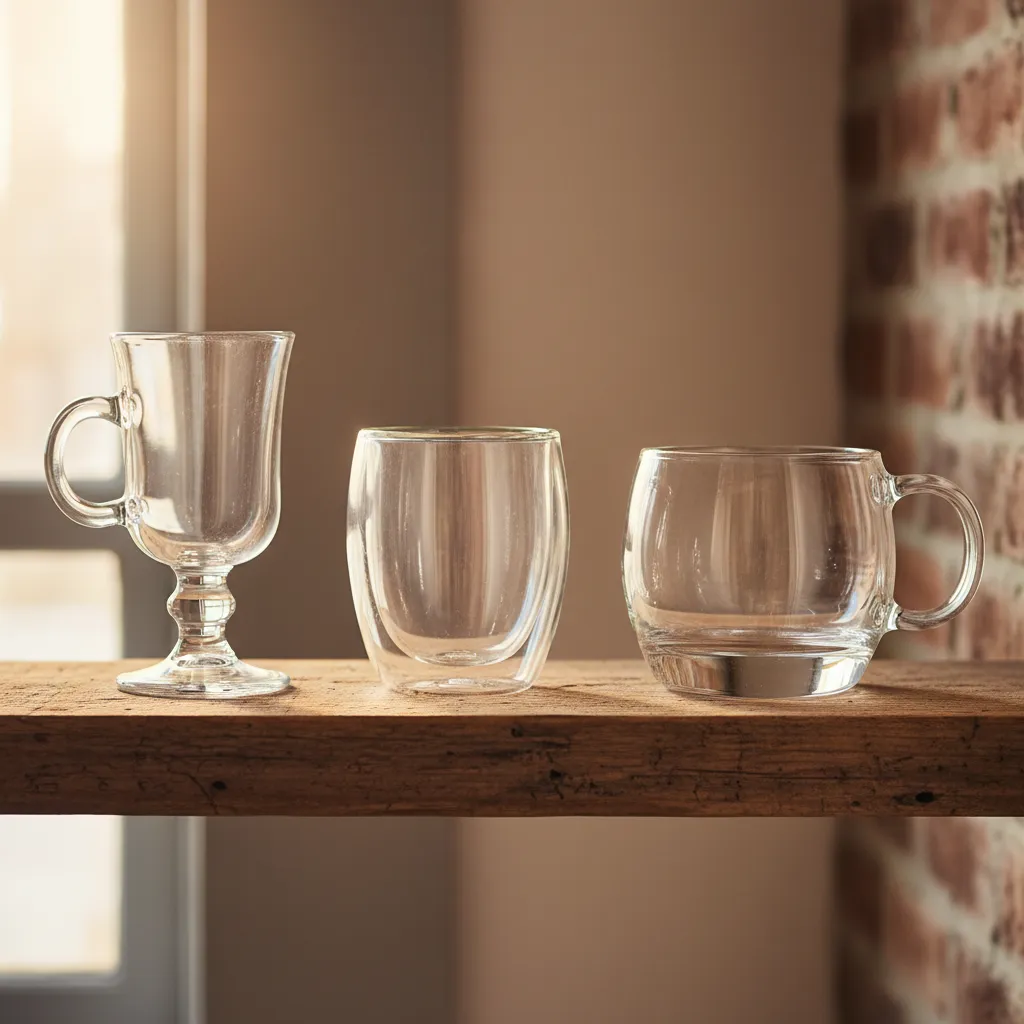
| Coffee Roast | Whiskey Profile | Texture & Pairing | Optimal Glassware |
|---|---|---|---|
| Light Roast | Smooth, Floral | High acidity clashes with heavy cream | Standard Ceramic Mug |
| Medium Roast | Oak, Vanilla Notes | Perfect balance of body and sweetness | Clear Footed Glass |
| Dark Roast | Bold, Peaty | Overpowers delicate cream textures | Thick Stemmed Goblet |
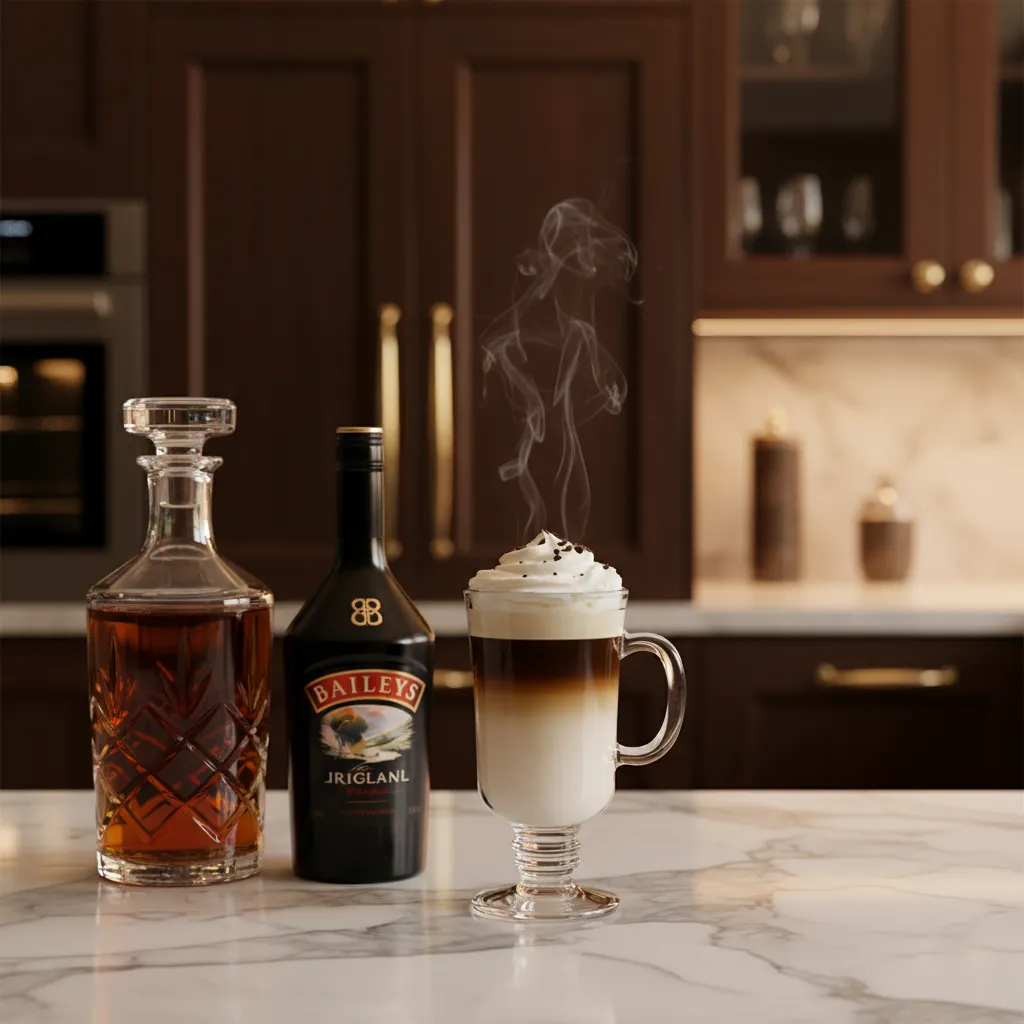
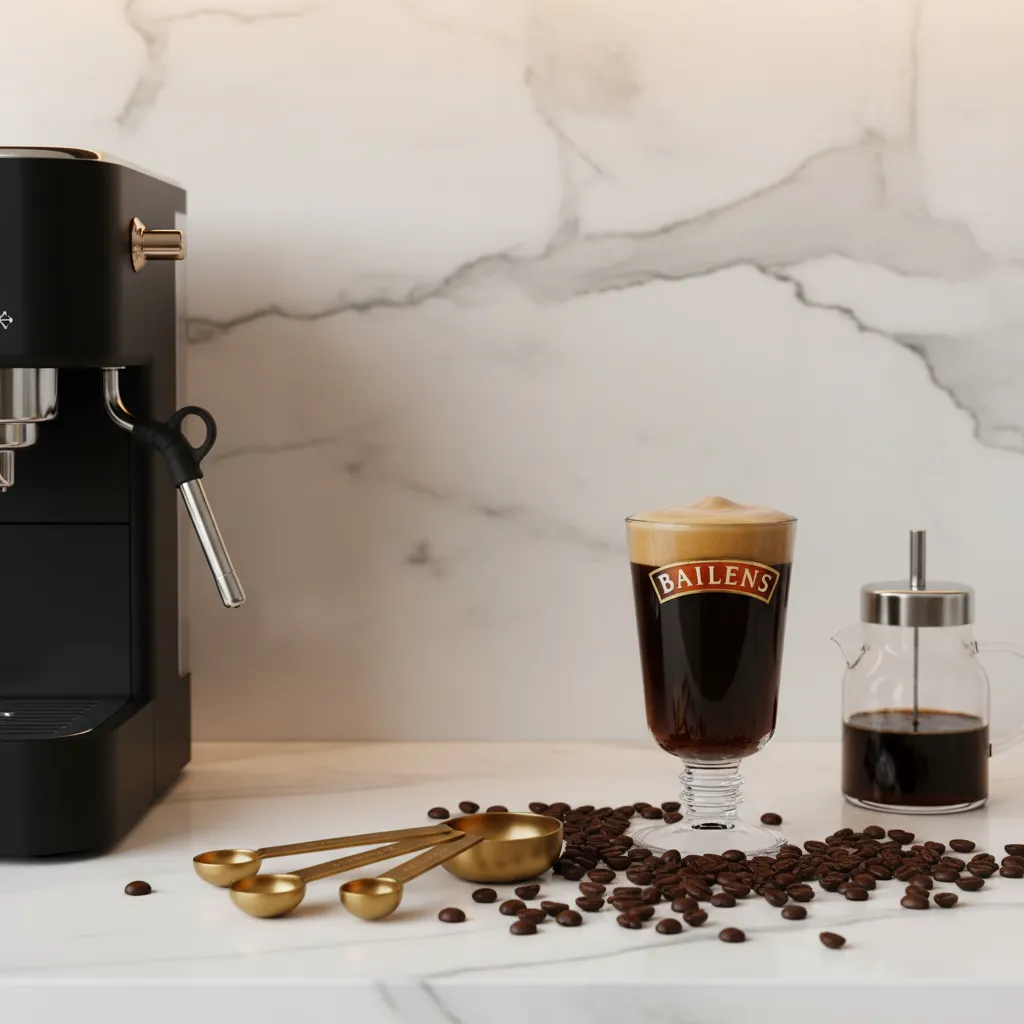
Using a clear footed glass serves a dual purpose. It beautifully showcases the contrasting layers while maintaining the ideal thermal temperature.
True hospitality begins where functional design meets curated flavors.
Heritage Hosting Hacks
- Install your coffee and spirits station at a standard 36-inch counter height to minimize strain and ensure comfortable pouring.
- Choose medium roast coffee beans when pairing with oak or vanilla-noted whiskeys to perfectly balance body and sweetness without clashing with heavy creams.
- Elevate your daily brewing ritual by incorporating tactile elements like brushed brass hardware and warm amber lighting to set a relaxed, glamorous mood.
2. Precise Ratios: Balancing Baileys and Whiskey for the Perfect Blend
Achieving the ideal Irish coffee is a study in structural integrity. You must carefully balance the robust bite of Irish whiskey with the velvet texture of Baileys.
This precise ratio transforms your kitchen into a luxurious tasting room. The deep amber glow of the whiskey layers beautifully beneath the heavy, rich cream.
A dedicated preparation zone enhances this daily ritual. Setting up a functional home coffee station streamlines your workflow for effortless hosting.
A bar is the jewelry box of the home, a place that instantly brings people together.
Martyn Lawrence Bullard, Elle Decor
Spatial dynamics play a massive role in drink preparation. Keeping your tools and spirits in a dedicated zone ensures smooth traffic flow during parties.
- The Classic Balance: Mix one ounce of whiskey with one ounce of Baileys for perfect harmony.
- The Robust Pour: Use one and a half ounces of whiskey to amplify the warm, toasted notes.
- The Velvet Dessert: Lean into one and a half ounces of Baileys for a sweeter, creamier finish.
These measurements directly impact the visual palette of your drink. A heavier Baileys pour creates a milky, opaque finish that feels incredibly cozy.
Perfecting the ratio of your evening drink brings an effortless harmony to the entire room.
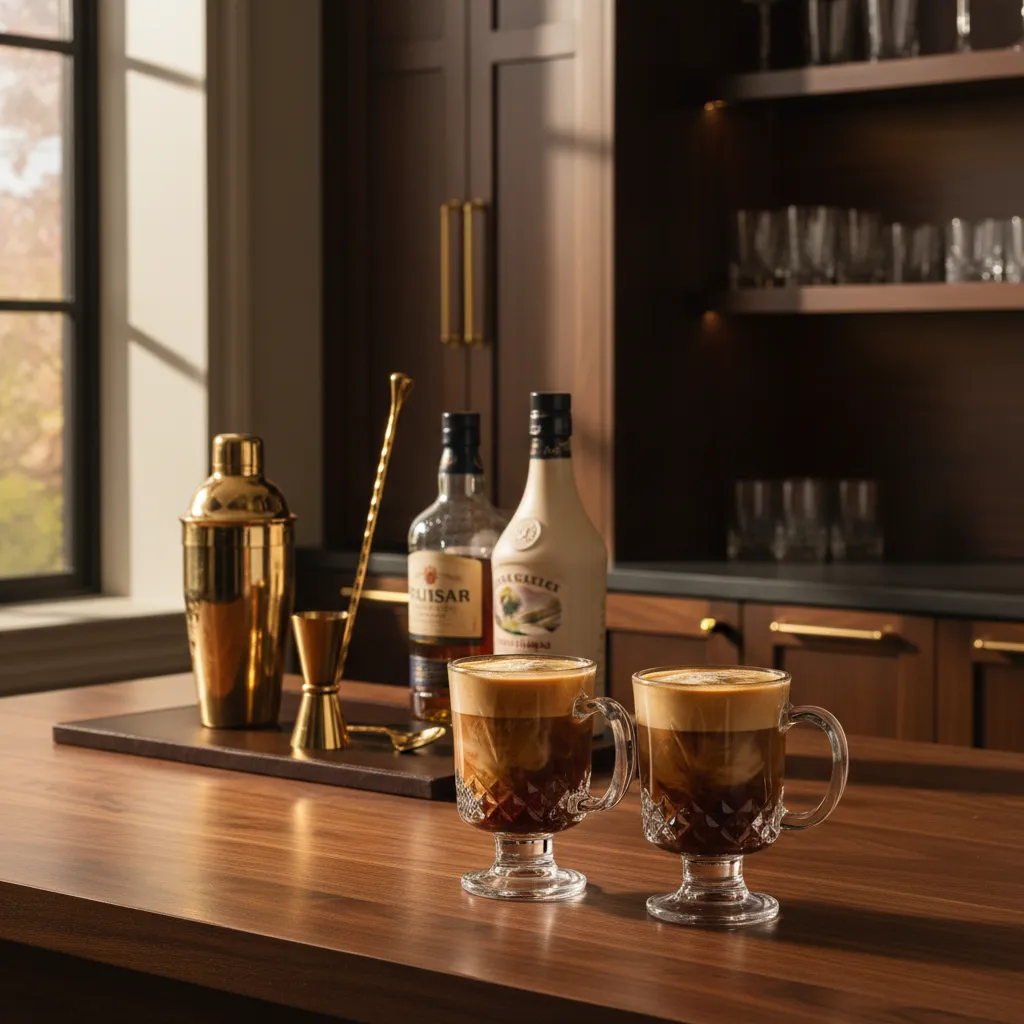
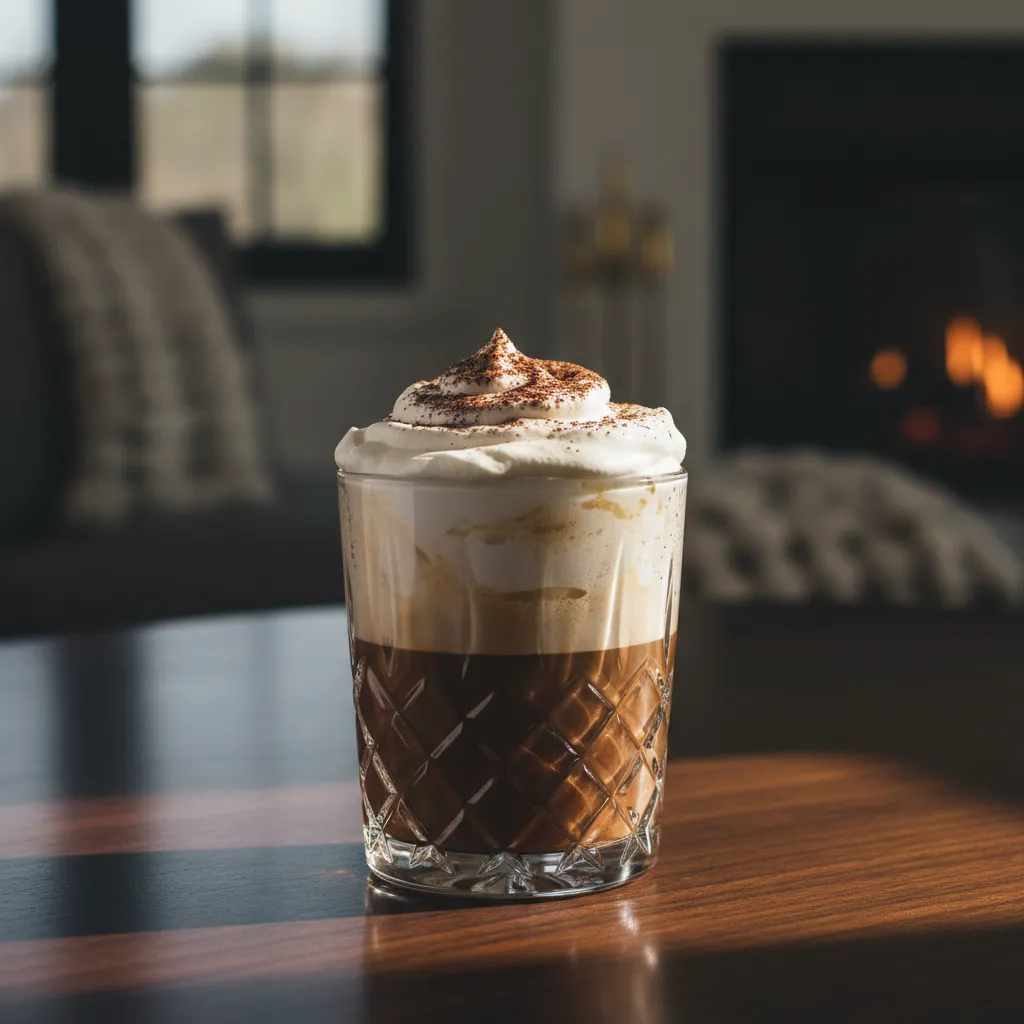
Serve these carefully crafted drinks in clear, double-walled glass mugs. This reveals the striking liquid strata while protecting your hands from the heat.
The Perfect Pour Playbook
- Pre-batch your preferred whiskey and Baileys ratio in a dedicated crystal decanter to instantly elevate your home bar aesthetic and streamline hosting.
- Serve your crafted blend in clear, double-walled glass mugs to beautifully display the liquid strata while protecting your guests’ hands from the heat.
- Anchor your coffee station tools and spirits on a curated decorative tray to define the prep zone and ensure smooth spatial dynamics during parties.
3. Temperature Control: Preventing Baileys from Curdling in Acidic Brews
Mastering Thermal Dynamics in Your Cup
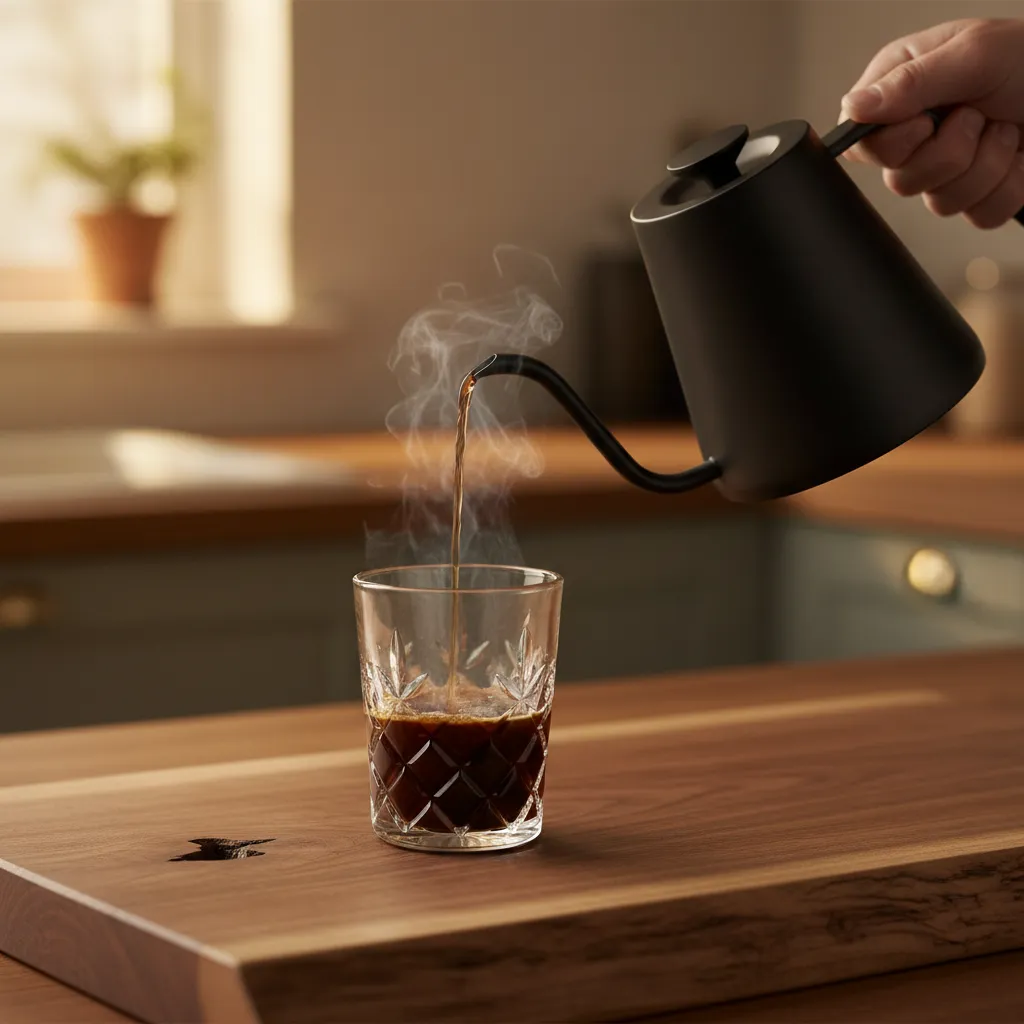
Crafting the perfect beverage requires exact temperature control. Pouring delicate Irish cream into scalding coffee often results in unsightly curdling.
This chemical reaction happens when extreme heat meets the natural acids in your brew. A premium temperature-controlled gooseneck kettle solves this instantly.
Lowering your brew to around 160 degrees Fahrenheit protects the cream. This crucial step ensures a velvety texture that feels incredibly luxurious on the palate.
Your physical layout should support this precision. A dedicated station elevates professional at home coffee recipes effortlessly.
True luxury in the kitchen combines aesthetic beauty with scientific precision.
Strategic Ingredient Pacing
Functionality dictates that your workflow matters. Pour the whiskey first to act as a thermal buffer while working on a sleek marble countertop.
Using a dark roast coffee naturally lowers the acidity of your base. This smart switch prevents the delicate dairy proteins from snapping and separating.
The warm ambient glow of under-cabinet lighting enhances the prep experience. Organize your layout to keep polished brass tools within easy reach.
Implementing simple home coffee bar ideas with clear zoning streamlines this process. A clutter-free space significantly improves your traffic flow.
Your brewer should maintain a water temperature between 195 to 205 degrees Fahrenheit for optimal extraction.
National Coffee Association, How to Brew Coffee Guide
Anti-Curdling Checklist for the Home Bar

Maintaining structural integrity in your drink requires a balance of timing and tools. Follow these practical steps to protect your ingredients.
- Let It Breathe: Allow your brewed coffee to rest for three minutes. This drops the harsh initial heat before mixing begins.
- Temper the Cream: Pour the Baileys into your glass first, then slowly drizzle a small amount of warm coffee to gently raise its core temperature.
- Select Dark Roasts: Light roasts contain higher fruit acids. Darker beans offer a smoother, low-acid foundation that protects dairy.
- Warm the Glassware: Pre-warming your crystal mugs prevents thermal shock. This simple habit keeps the final drink hot while remaining incredibly stable.
The Science of Smoothness
- Temper your cream by adding a small splash of coffee to the Baileys first to equalize temperatures before the full pour.
- Opt for low-acid beans like Sumatran or Brazilian dark roasts to minimize the chemical reaction between the coffee’s pH and the dairy.
- Slow the integration by pouring the liqueur over the back of a chilled bar spoon to prevent immediate thermal shock.
4. Glass Preparation: Step-by-Step Mixing for an Elevated Experience
Proper glass preparation transforms a simple beverage into a sophisticated ritual. The warm ambient glow catching the crystal facets creates an inviting focal point in any room.
Choosing the right vessel enhances both spatial flow and ergonomics. A well-designed mug balances heat retention with a comfortable grip, ensuring a seamless serving experience.
The details are not the details. They make the design.
Charles Eames, Eames Office
Temperature control dictates the structural integrity of your drink. Pre-heating the glass prevents the hot liquid from shattering delicate crystal while maintaining ideal heat.
If you are styling a dedicated space, incorporating these elements into your simple home coffee bar ideas maximizes daily utility and organization.
Elevated drinkware bridges the gap between everyday routines and luxurious architectural living.
Executing the perfect pour requires methodical craftsmanship. The staging area should be well-lit with warm undertones to showcase the distinct layers of coffee and cream.
The Methodical Mixing Sequence
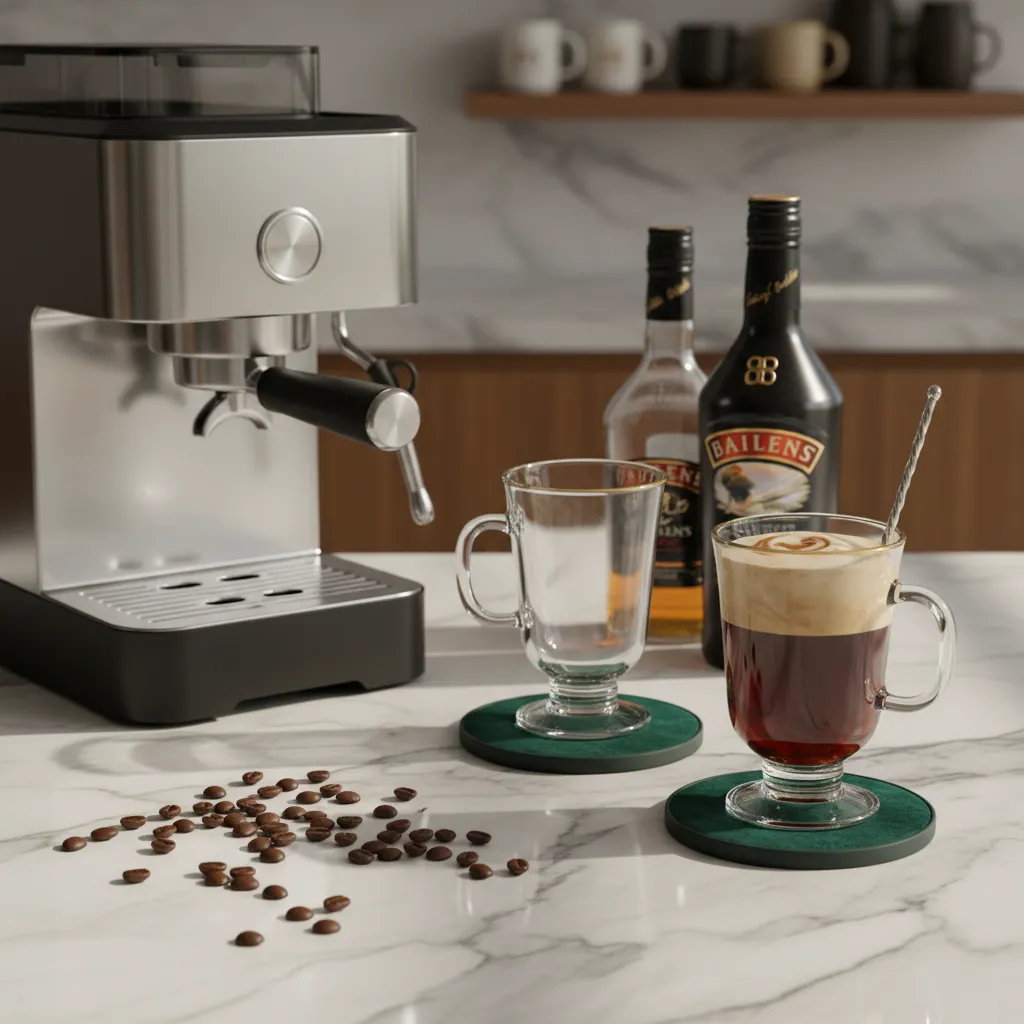
- Warm the Vessel: Fill your tempered glass with boiling water. This prevents thermal shock and keeps the drink piping hot.
- Add the Sweetener: Discard the water. Place your sugar at the base to create a dense foundation for the alcohol.
- Pour the Spirits: Carefully measure the whiskey and Baileys. The layered textures start building visual depth.
- Brew Integration: Pour the hot coffee over the back of a spoon to protect the delicate structure of the spirits.
For a highly customized experience, you might also elevate your brew with easy homemade coffee syrup recipes to add unique and aromatic tasting notes.
Selecting the Proper Glassware Material
Material selection directly impacts both aesthetics and durability. A robust glass ensures safety against high temperatures while maintaining an elegant and minimalist profile.
| Glass Material | Thermal Resistance | Visual Aesthetic |
|---|---|---|
| Borosilicate | Extremely High | Modern, ultra-clear, sleek |
| Tempered Glass | High | Classic, thick, substantial |
| Standard Crystal | Low (Pre-warming required) | Vintage, faceted, luxurious |
Integrating these durable materials into your cabinetry improves organization. The right vessels act as functional decor, bridging the gap between practical use and design.
The Connoisseur’s Touch
- Always use a lint-free microfiber cloth to polish your glassware after washing to ensure the ambient light catches the crystal facets without showing water spots.
- When layering, rest the tip of the spoon against the inside wall of the glass to slow the pour and maintain the architectural integrity of the layers.
- Check for micro-cracks before pre-heating; even high-quality crystal can succumb to thermal shock if there are unseen structural flaws from previous use.
5. Elegant Garnishes: Layering Fresh Whipped Cream and Rich Cocoa Powder
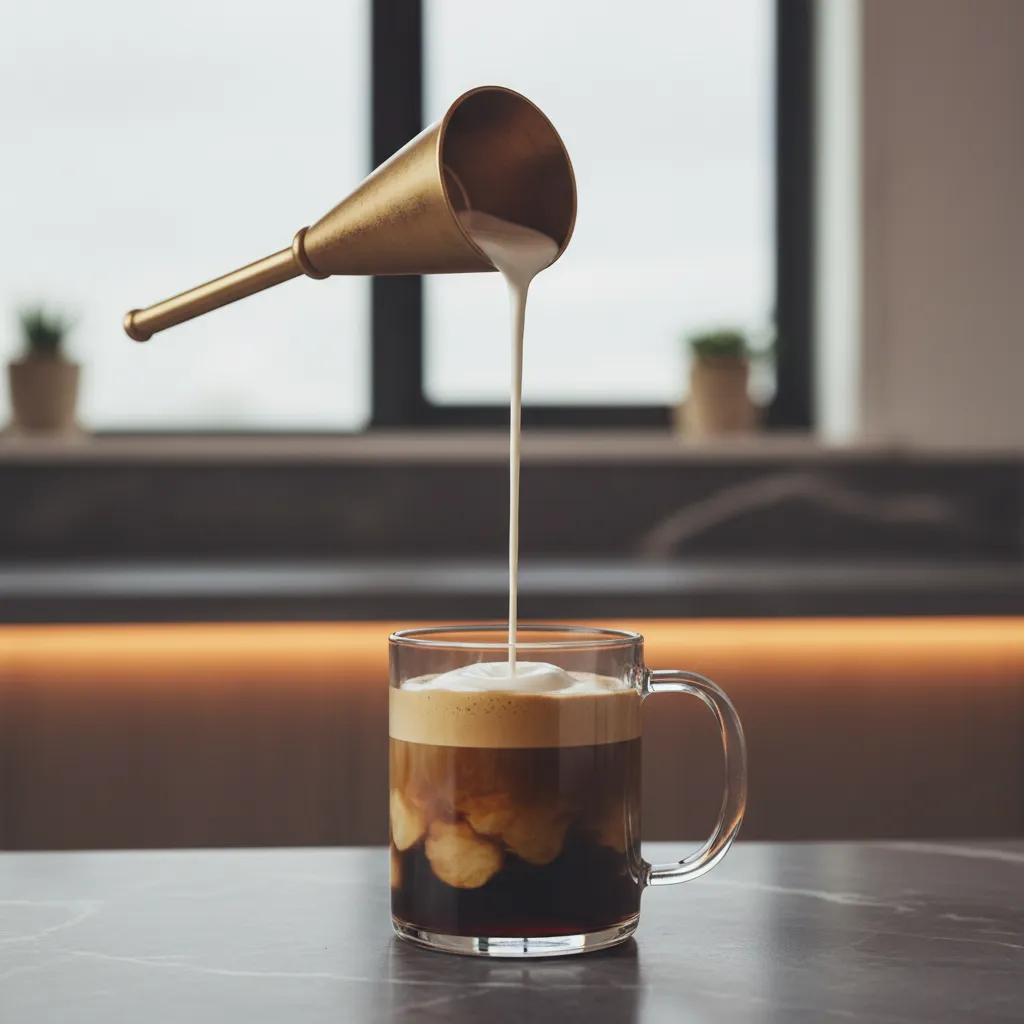
The visual impact of a perfectly crafted Irish coffee mirrors the principles of high-end interior design. Creating distinct layers requires careful attention to balance and contrast.
Much like zoning an open-concept living space, layering cream provides a functional barrier. This temperature division keeps the coffee piping hot while offering a cool, velvety sip.
Treat garnishes as structural elements. You can design your perfect morning ritual by mastering proper cream consistency to improve the final presentation.
Rawness and refinement are not opposite ends of a luxurious spectrum. They are two complementary features with which to populate a luxe environment.
Kelly Wearstler, MasterClass on Interior Design
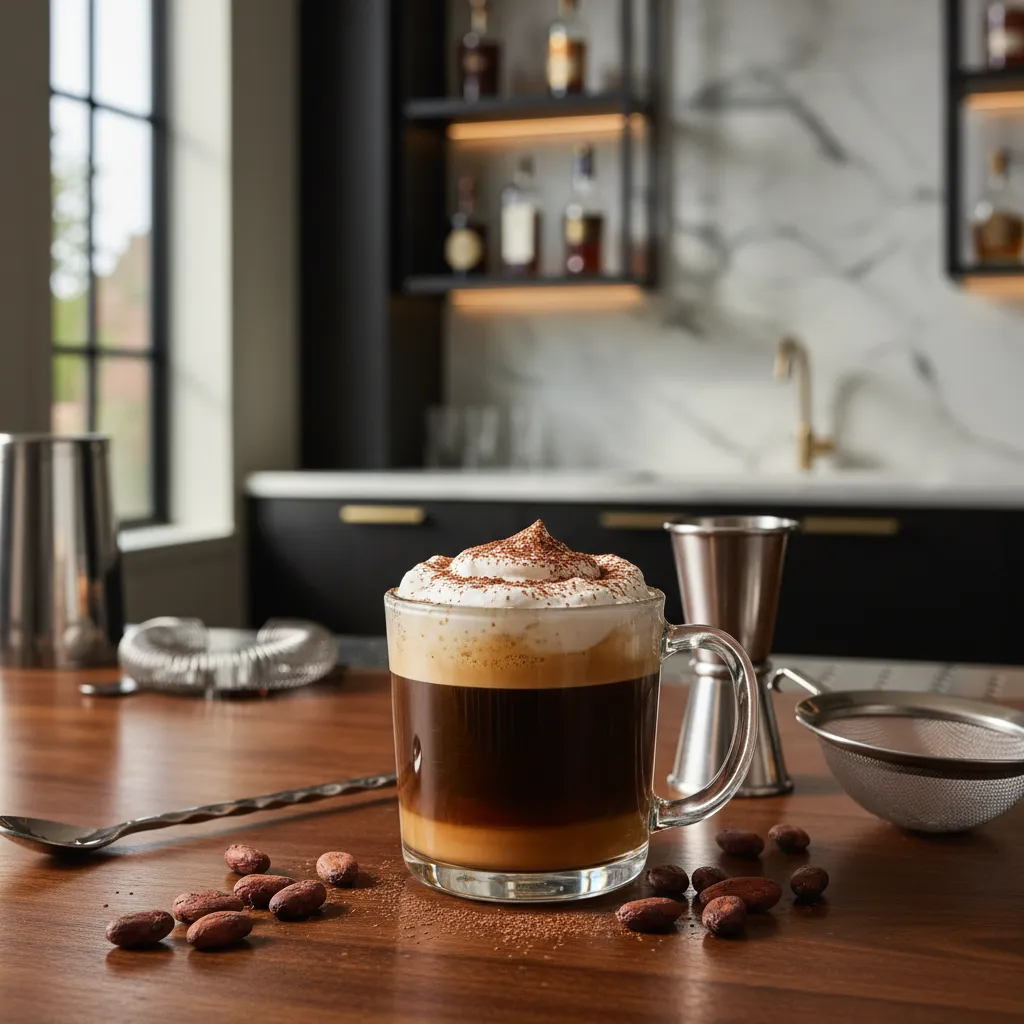
Dusting rich cocoa powder across the whipped cream introduces a raw, matte texture. This dark accent anchors the bright white cream against the deep amber tones of the warm liquid.
Mastering the Layered Aesthetic
Building the perfect drink requires a systematic approach to ingredients. The spatial dynamics within the glass directly affect both the visual appeal and the tasting experience.
- The Liquid Base: Maintain a dark, opaque foundation to ground the visual weight of the glass.
- The Cream Barrier: Float the cream gently to create a stark, modern color-blocking effect.
- The Cocoa Accent: Apply a delicate, organic dusting to break up the flawless white surface.
Treat your beverage garnishes like the final polish on a beautifully curated room, balancing texture, temperature, and visual warmth.
Serve these layered beverages under warm ambient lighting to highlight the glossy finish of the cream. The right illumination enhances the cozy atmosphere of a late-evening gathering.
Adding sophisticated touches requires minimal effort but delivers maximum aesthetic impact. Explore our guide on fun drinks to make at home for more seasonal styling inspiration.
The Finishing Touch
- Use the back of a warm spoon to gently pour the cream, ensuring it floats effortlessly atop the coffee for a sharp, clean division.
- Whip your cream to a soft-peak consistency; it should be thick enough to hold its shape but fluid enough to sip through easily.
- Use a fine-mesh sieve for cocoa dusting to achieve an even, matte finish that mimics high-end textural accents.
Pouring the Final Foundation: Your Signature Blend
Crafting the ultimate Irish coffee requires structural precision. Balancing Baileys and whiskey relies on a well-designed preparation zone.
A thoughtful coffee bar layout elevates this daily ritual. Selecting the right glassware and lighting transforms your kitchen into a lounge.
Merge functional design with curated flavors. Master the matrix of roasts and spirits to ensure every pour is structurally perfect.
Blueprint for the Perfect Brew: Common Questions
Yes. Installing counters at a standard 36 inches ensures ergonomic pouring. This height minimizes physical strain while mixing dense creams.
A medium roast provides the strongest structural foundation. It balances the oak notes of the whiskey without overpowering the heavy cream.
Clear glass beautifully highlights the structural layers of dark coffee and cream. The footed base also maintains optimal thermal temperature.
Absolutely. Utilize vertical shelving and task lighting to create a compact, functional zone. This prevents unnecessary movement while brewing.