Creating a successful Easter dirt cake casserole requires the same level of precision one might apply to a master architectural floor plan.
Each layer serves as a structural foundation, balancing textures and flavors to ensure a stable yet decadent result. Just as a designer selects premium flooring materials, a chef must choose quality ingredients to build a dessert that stands the test of time and taste.
For homeowners and office managers alike, this guide provides actionable steps to elevate a traditional DIY craft into a centerpiece of culinary excellence.
We provide detailed comparisons of ingredient ratios and preparation techniques to help you master the structural elements of the dish. Whether you are drafting a layout for a home office or a festive table, these professional insights will guide you toward a flawless execution.
The Classic Chocolate Oreo Dirt Casserole
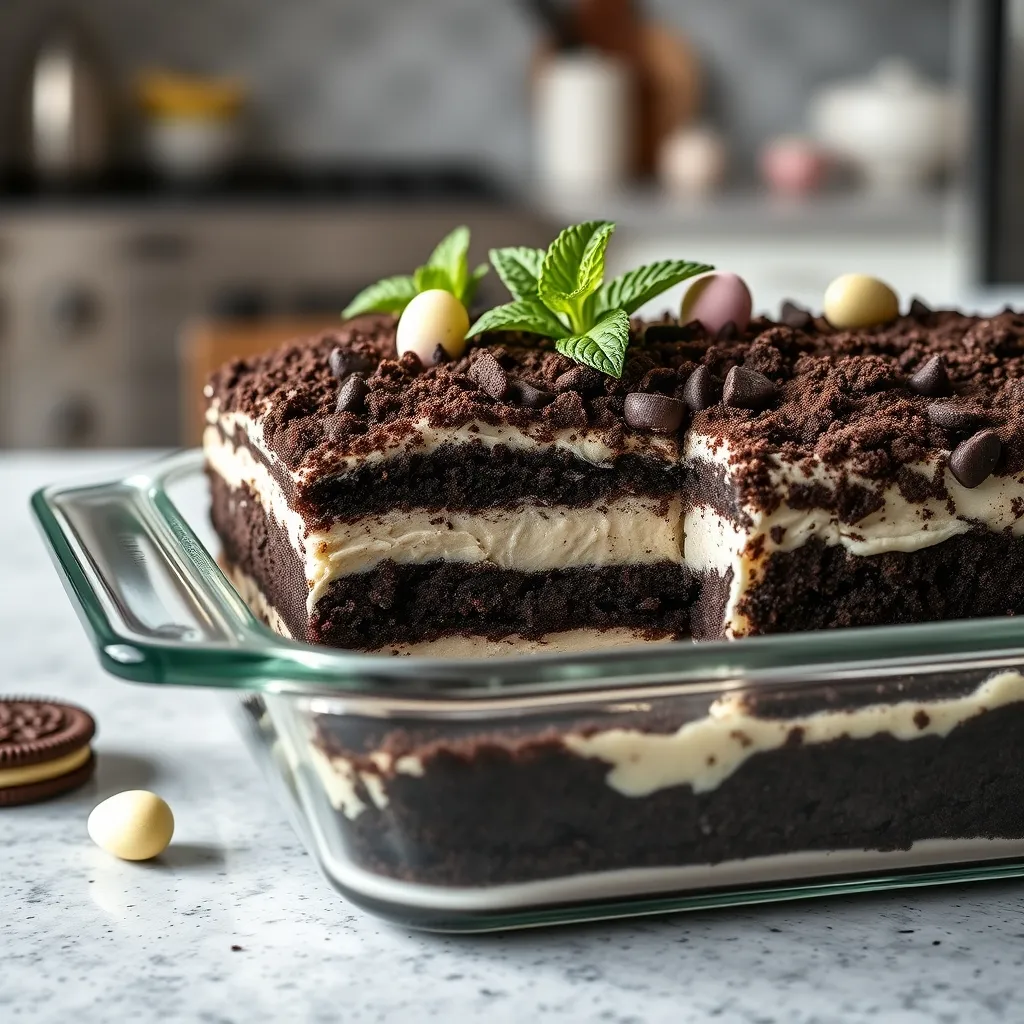
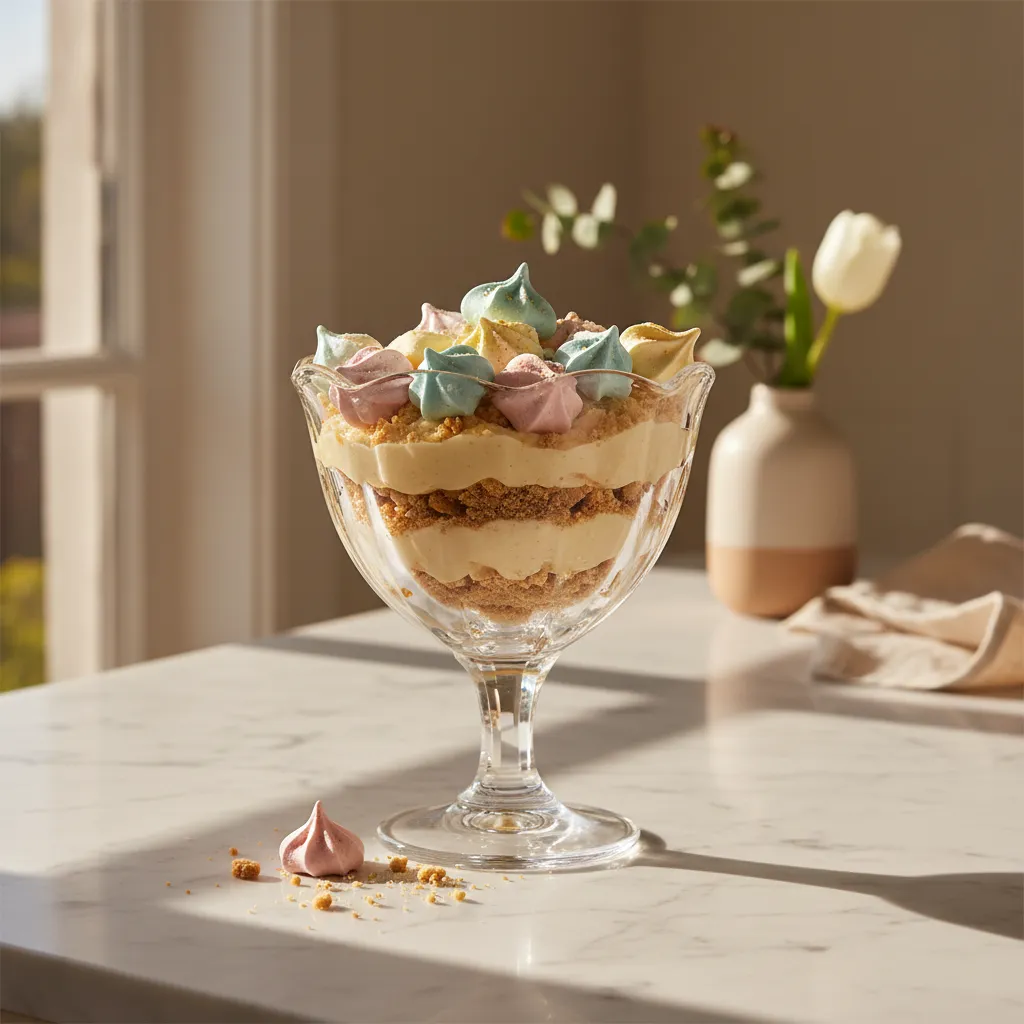
The classic chocolate Oreo dirt casserole relies heavily on visual contrast. The deep black cocoa of the cookie crumbs mimics rich, fertile soil.
This dark base provides a striking backdrop for pastel Easter accents. It creates a focal point on your dessert buffet that draws guests in immediately.
Flavor balance is critical for a sophisticated palate. The sweetness of the pudding must be tempered by the tangy notes of softened cream cheese.
This complexity elevates the dish beyond a simple children’s treat. It introduces a depth of flavor that appeals to adult sensibilities as well.
Design is not just what it looks like and feels like. Design is how it works, even on a dessert plate.
Structural Integrity and Layering
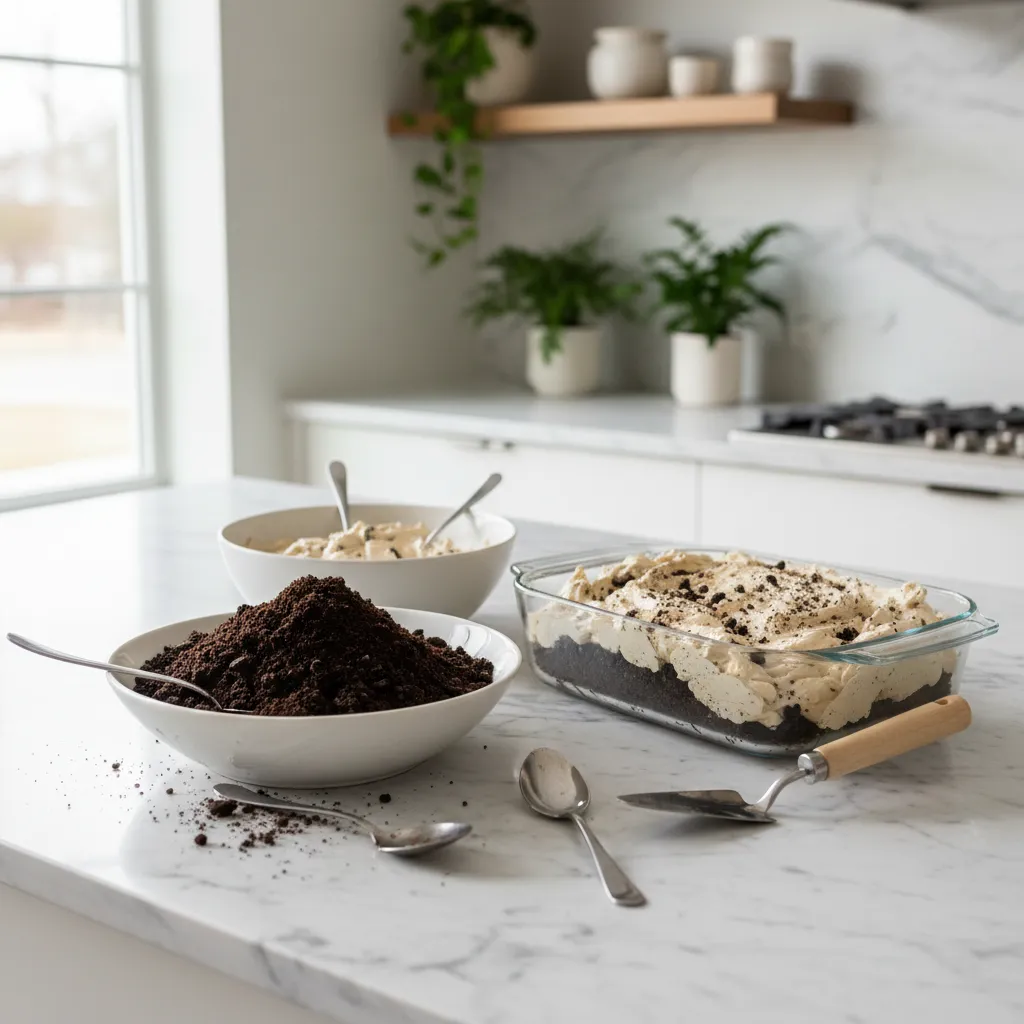
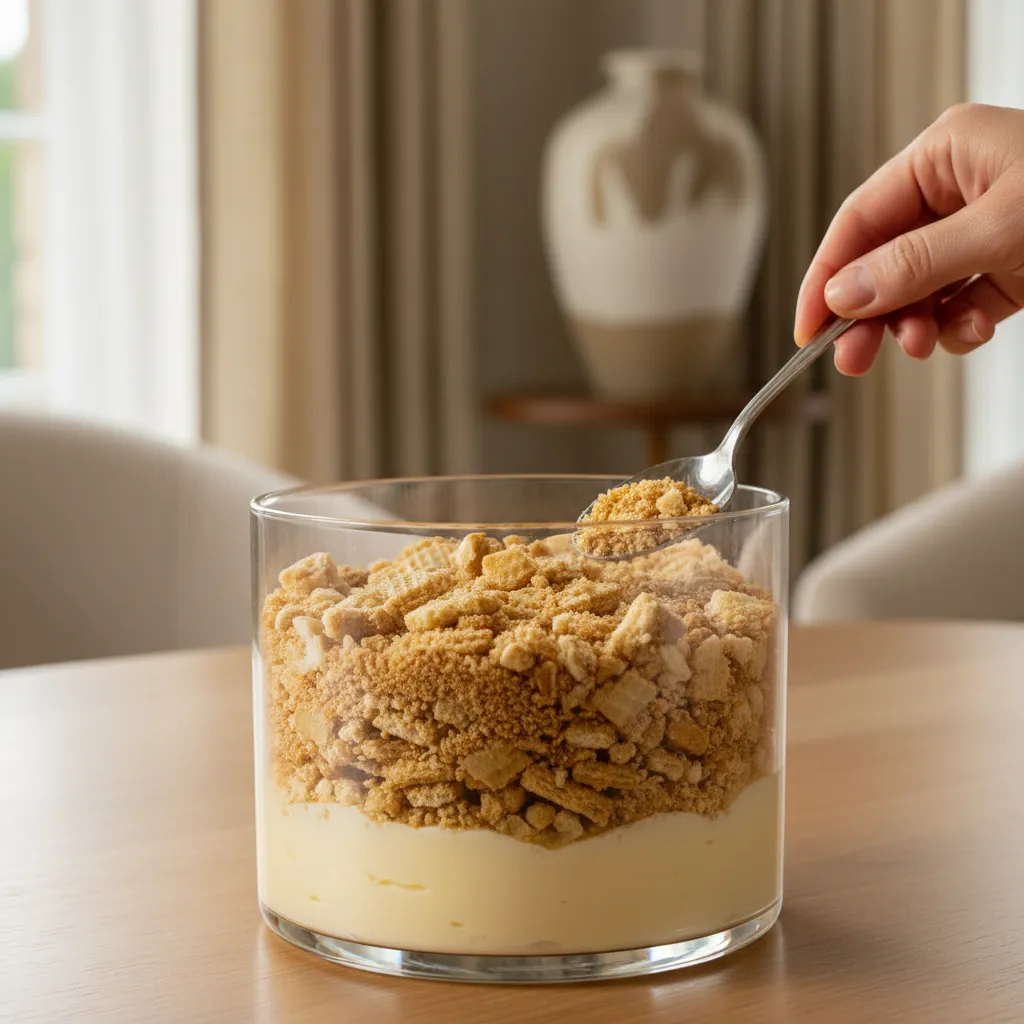
Layering is not just about looks; it defines the texture. A solid base of crushed cookies prevents the dessert from becoming soggy too quickly.
Proper zoning of ingredients ensures every scoop has crunch and cream. This technique mirrors the structural planning used in architectural design.
For those curating a menu of 15 Easter Desserts Ideas Easy No Bake for Spring Hosting, this stability is essential.
The texture of the crumb significantly impacts the mouthfeel. Varying the crush size changes how the light hits the “soil” and how it eats.
| Crumb Consistency | Visual Effect | Texture Profile |
|---|---|---|
| Fine Dust | Velvety, matte finish | Smooth, melts quickly |
| Chunky Gravel | Rustic, organic look | Substantial crunch |
| Mixed Aggregate | Realistic soil depth | Complex mouthfeel |
Vessel Selection for Visual Flow
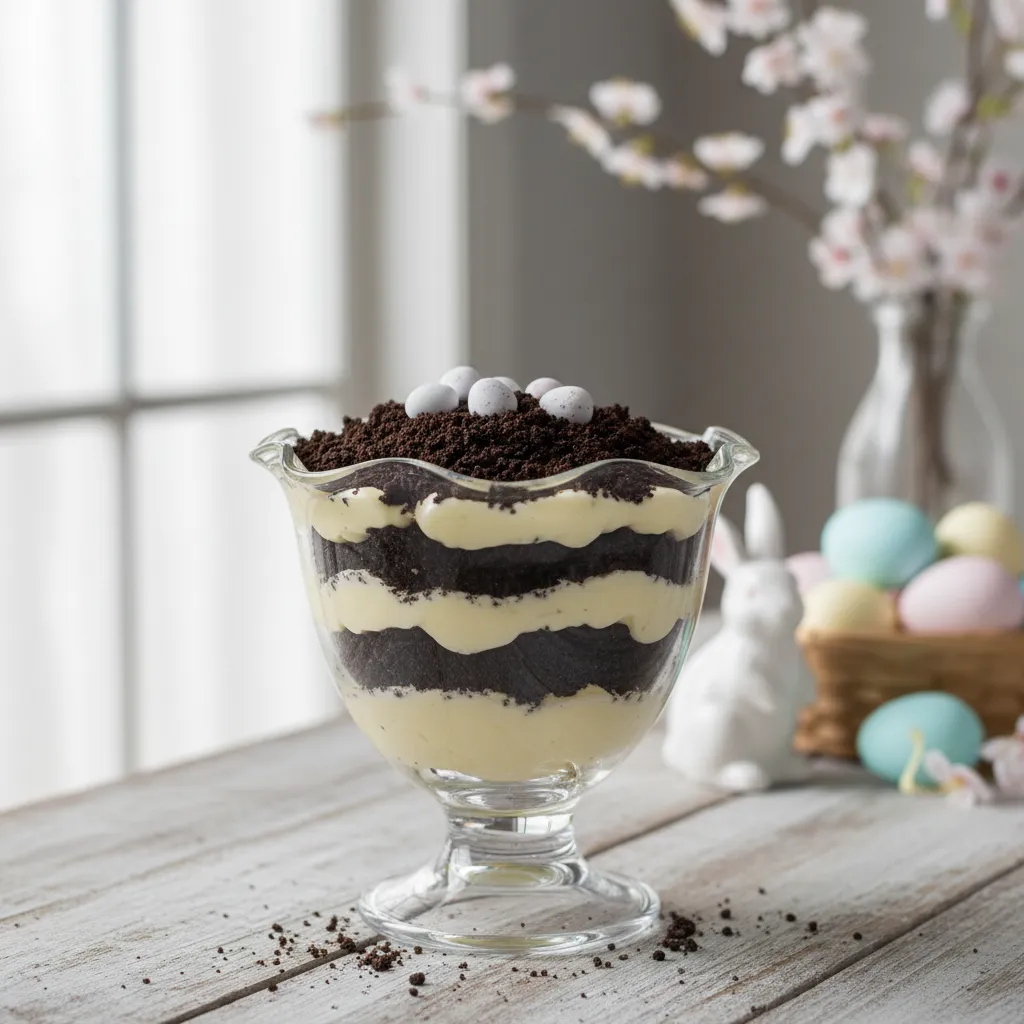
Glass dishes are superior for this specific casserole. They expose the architectural layers, turning the cross-section into a design element.
Seeing the stratification adds to the anticipation of the taste. It transforms the dessert into a centerpiece rather than just a side item.
Ceramic bakeware offers a more rustic, farmhouse aesthetic. However, it hides the intricate layering work, reducing the overall visual impact.
When planning a cohesive gathering, consider how this pairs with savory items. It balances heavy mains like those found in Top Easter Side Dishes That Go with Ham.
We eat with our eyes first. A clear vessel allows the beauty of the layers to shine through, creating an anticipation of flavor before the first bite is even taken.
Giada De Laurentiis, Giadzy Lifestyle
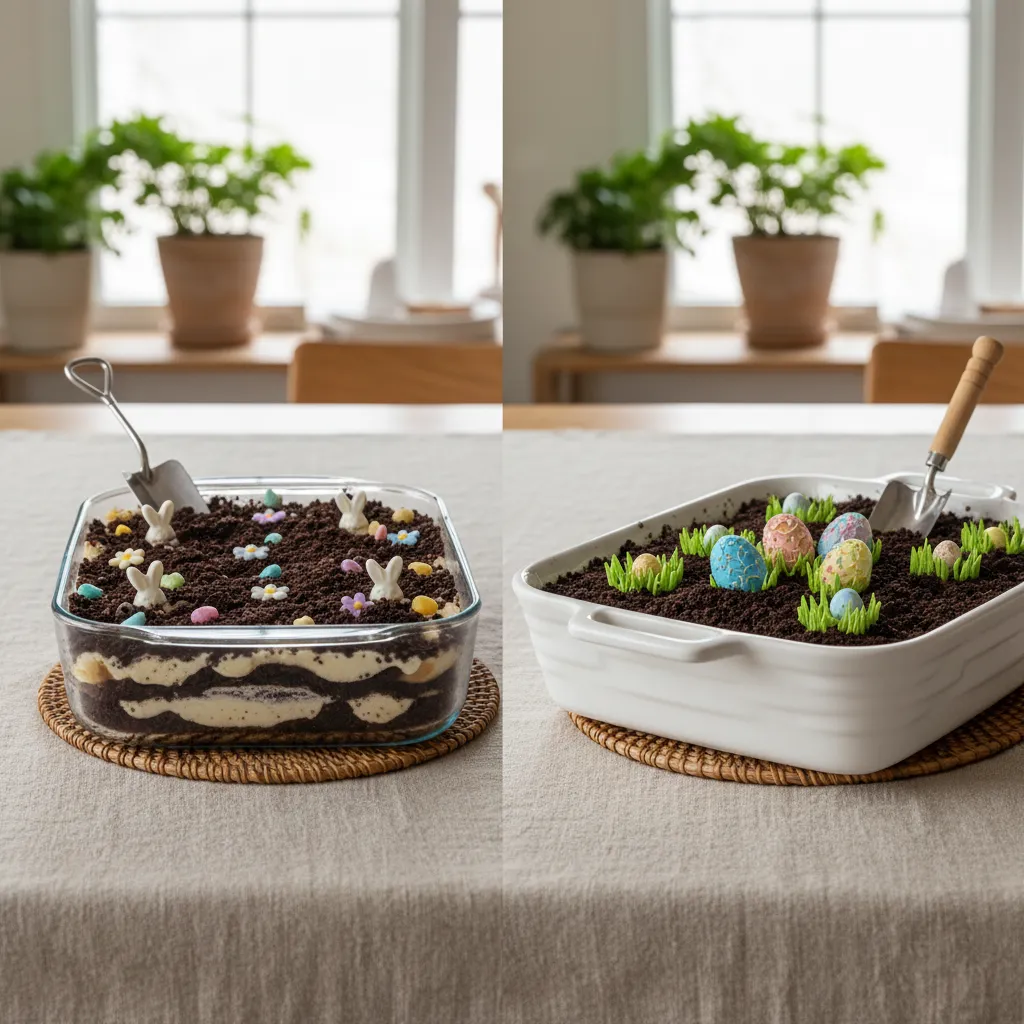
To finish the look, incorporate edible organic elements. Fresh mint sprigs simulate new growth emerging from the chocolate earth.
This touch of green adds vibrancy and breaks up the monochrome. It brings a sense of freshness that complements the dense chocolate.
Culinary Blueprint
- Achieve realistic ‘mixed aggregate’ soil by pulse-blending half your cookies into fine dust and hand-crushing the remainder to create varied light reflection and structural crunch.
- Enhance the flavor architecture by adding a pinch of flaky sea salt or a teaspoon of espresso powder to the pudding base to sharpen the contrast against the sweet cream.
- Ensure clean visual stratification in glass vessels by piping the cream layers instead of spreading them, keeping the cross-section crisp and distinct.
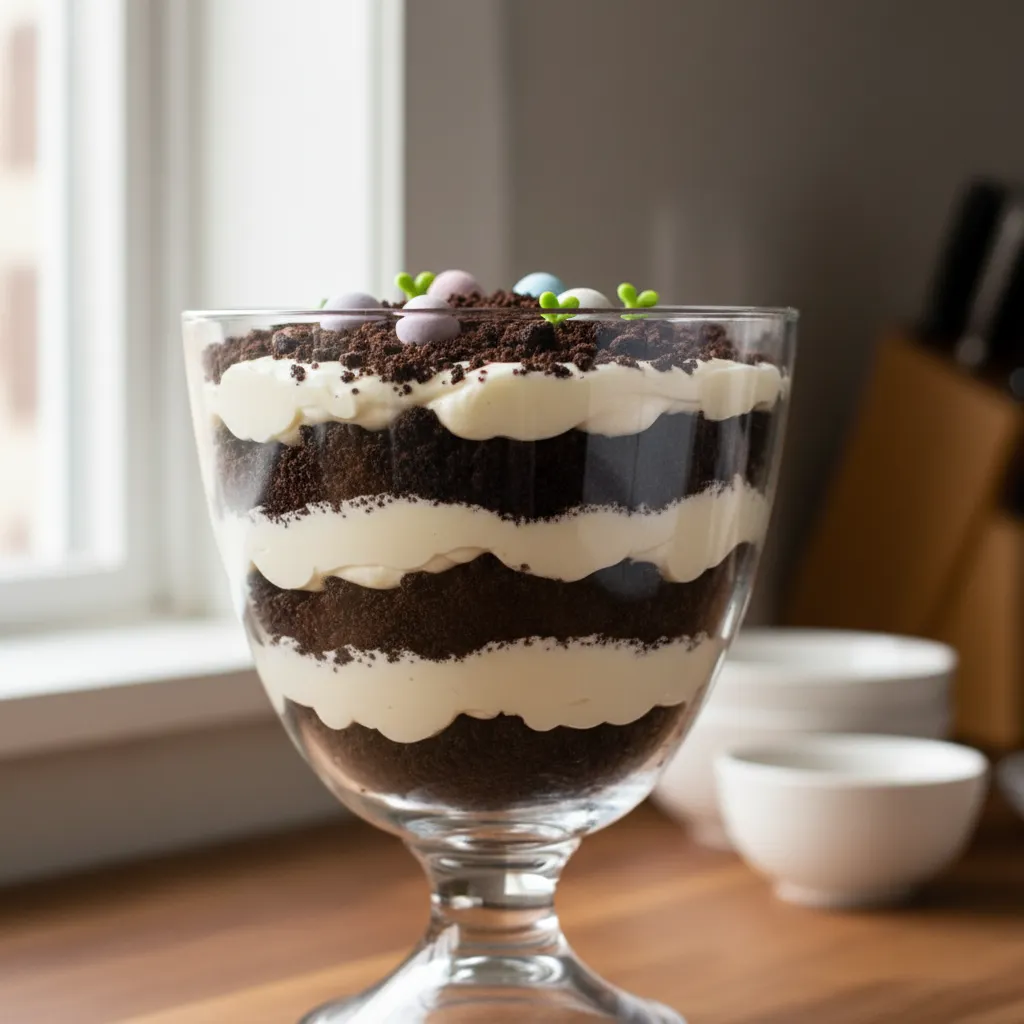
Golden Vanilla Sand Pudding Variation
The classic Easter Dirt Cake Casserole cooking taste often relies heavily on rich chocolate notes. However, a golden vanilla variation offers a lighter, more airy aesthetic.
This “Sand Pudding” concept swaps dark soils for a sun-bleached, coastal visual. It brings a bright, neutral palette to your dessert station that feels sophisticated and fresh.
Lighter dessert palettes act as a neutral canvas, allowing your spring florals and pastel accents to truly pop on the table.
Constructing the Golden Palette
To achieve the look of soft sand, texture is paramount. Finely crushed vanilla wafers or golden sandwich cookies provide a buttery crumb that mimics a beach landscape.
This lighter base allows for subtle flavor infusions. Consider incorporating lemon zest or almond extract to elevate the standard pudding profile.
If you are planning a diverse menu, this recipe aligns perfectly with other 15 Easter Desserts Ideas Easy No Bake for Spring Hosting.
Key Ingredient Swaps for Visual Lightness:
- The Soil: Use crushed Golden Oreos, Nilla Wafers, or pecan sandies instead of chocolate cookies.
- The Binding: Opt for French Vanilla or White Chocolate pudding mix for a creamy, off-white hue.
- The Decor: Replace gummy worms with seashell chocolates or pastel candy eggs.
- The Vessel: Choose clear glass or white ceramic to maintain the high-key lighting effect.
Serving and Presentation Flow
The visual weight of a dessert impacts the flow of a buffet. The golden sand variation feels less heavy than traditional chocolate, making it an inviting finish to a meal.
When positioning this dish, consider the lighting. Place the vessel where ambient light can catch the golden crumbs, enhancing the warm textures.
This light dessert pairs exceptionally well after savory main courses. It serves as a palate cleanser following Top Easter Side Dishes That Go with Ham.
The beauty of a trifle or layered dessert lies in its visibility. Use a clear vessel to turn the structural layers into a decorative element of the table.
The Editors, Real Simple
Functionally, the vanilla crumb is more forgiving on linens. Unlike dark chocolate crumbs that stain white tablecloths, golden crumbs brush off easily.
For a modern touch, serve individual portions in small mason jars. This improves traffic flow around the table and offers guests a personalized element.
Golden Hosting Hack
- Pulse your cookies into a fine dust rather than coarse chunks to perfectly mimic soft beach sand, then whisk a pinch of lemon zest into the pudding for a bright flavor lift.
- Opt for individual glass jars instead of a large bowl; this not only showcases the beautiful layers but also eases buffet traffic flow.
- Don’t worry about the mess; unlike dark chocolate soil, these golden vanilla crumbs brush easily off white table linens without leaving stubborn stains.
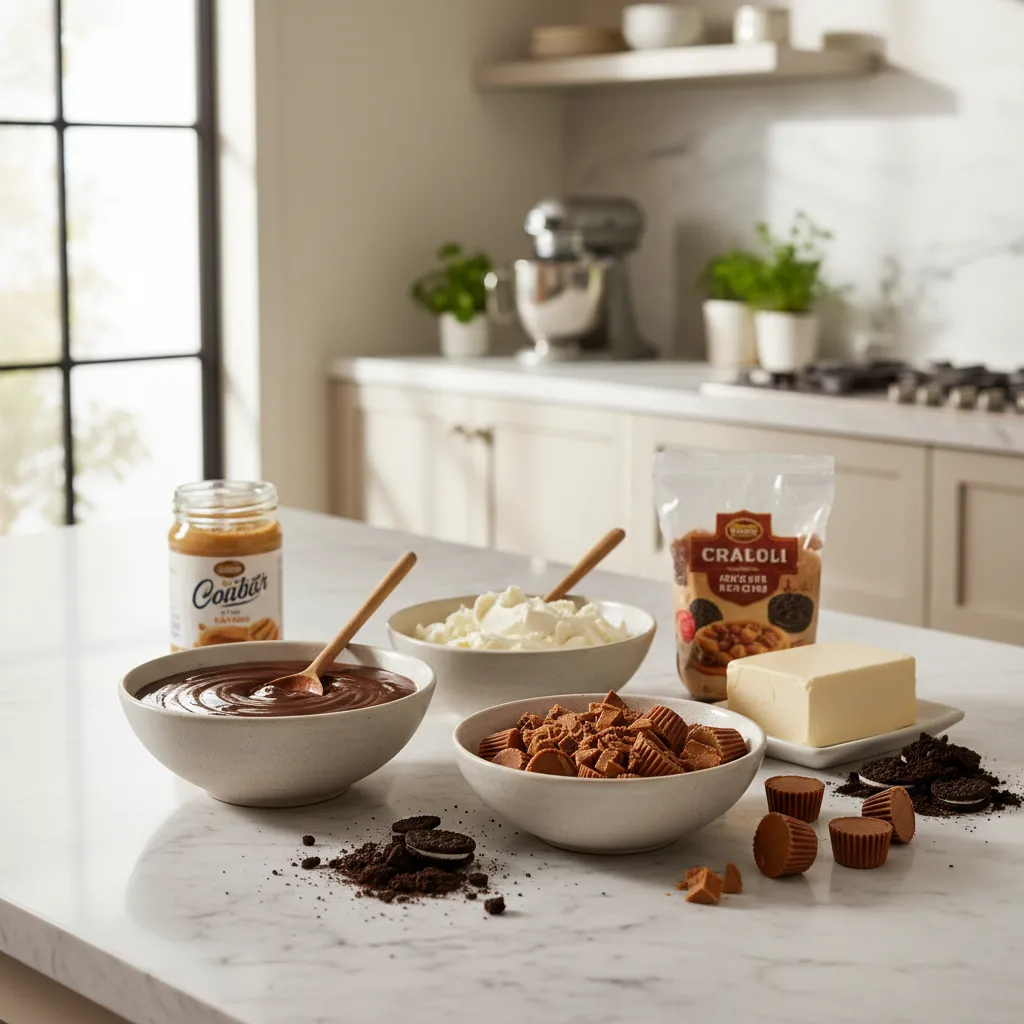
Rich Cream Cheese and Butter Flavor Profile
The structural integrity of any high-quality Easter dirt cake relies heavily on the binding layer. This component acts as the foundational primer for the entire dessert palette.
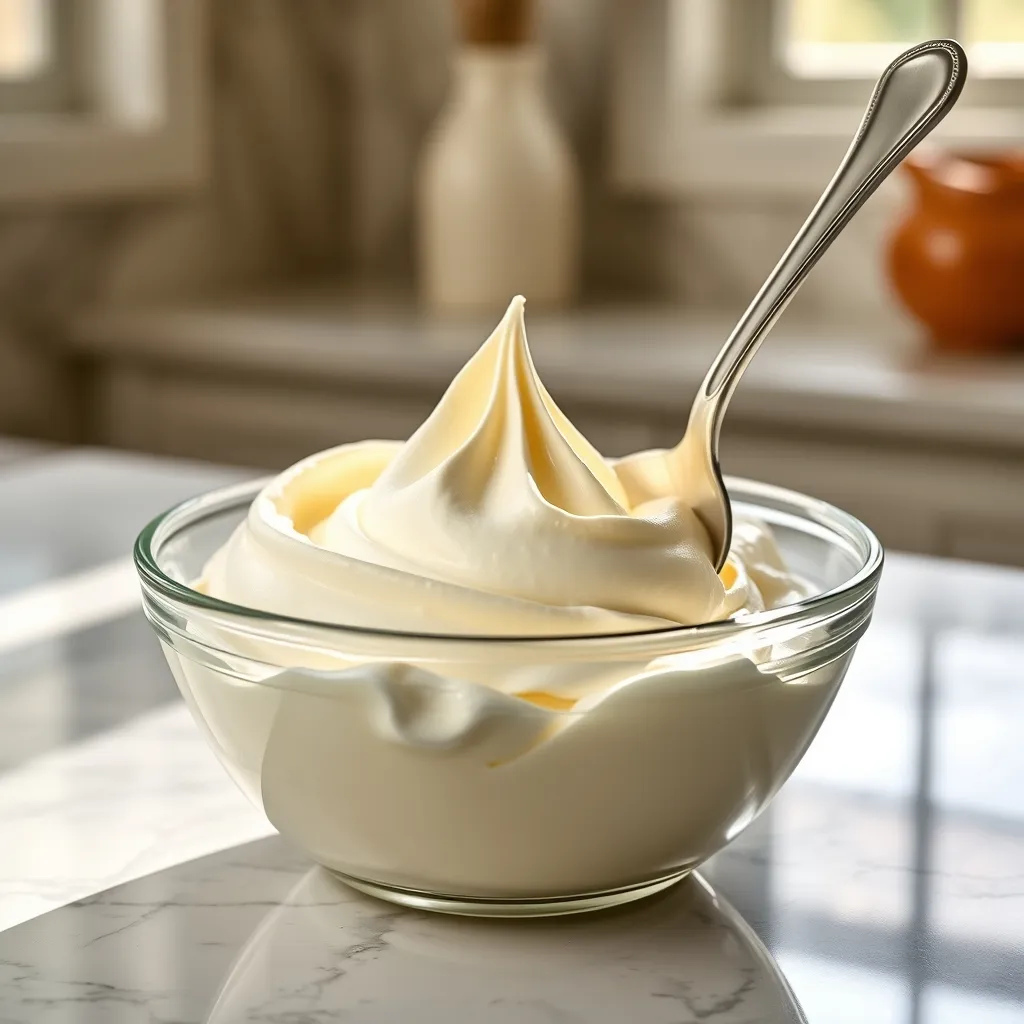
A blend of softened cream cheese and butter creates a velvety finish that anchors the dish. This richness contrasts beautifully with the dry, organic texture of the cookie crumble.
Visualizing the mixture in your kitchen involves more than just taste. The warm ambient glow of under-cabinet lighting should highlight the glossy sheen of the emulsified fats.
When prepared correctly, the consistency mimics the smooth application of high-end plaster. It provides a neutral, creamy canvas that allows the bolder chocolate notes to resonate.
In both design and dessert, the quality of your foundational layer dictates the stability of the final masterpiece.
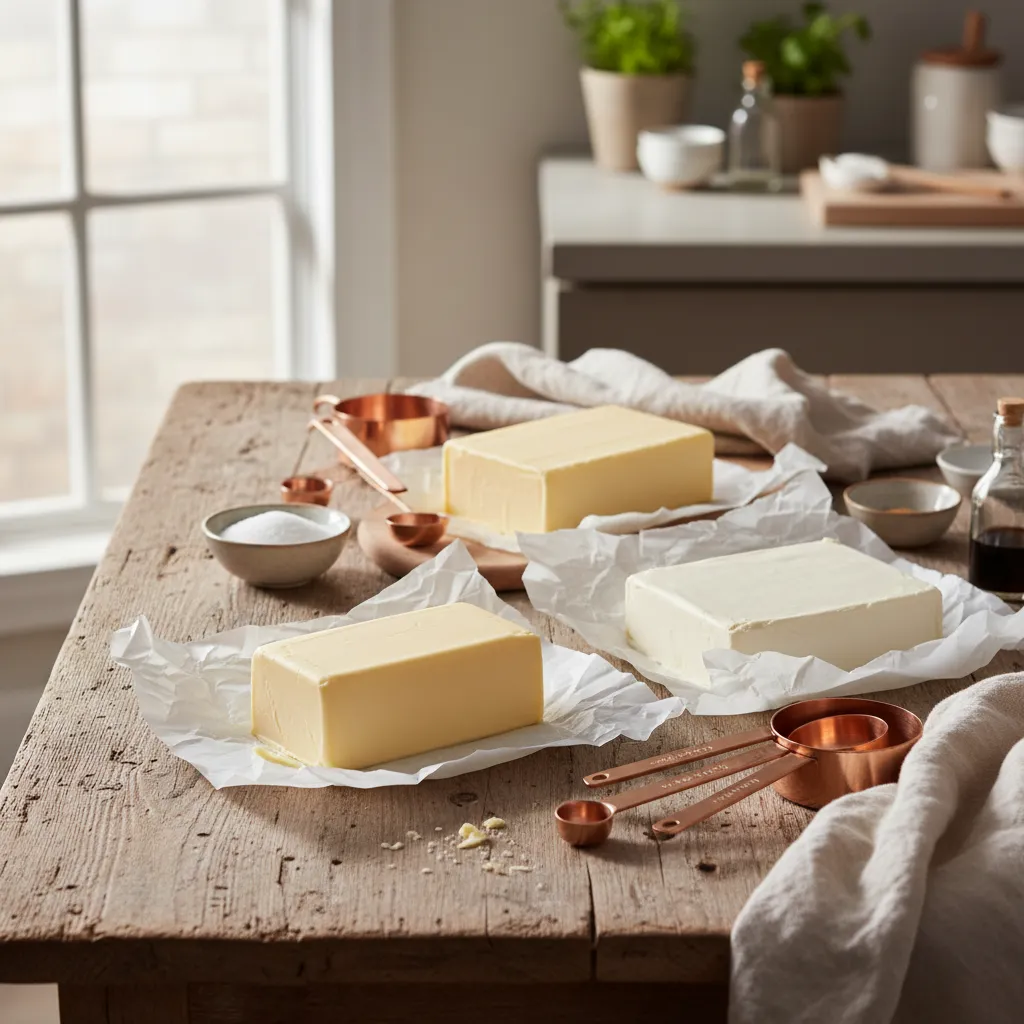
Selecting Your Materials: Butter and Cheese
The flavor profile balances the stark sweetness of powdered sugar with the slight tang of cultured cream cheese. This prevents the dish from becoming one-note or cloying.
Think of this layer as the neutral wall color in a well-zoned room. It allows the focal points, such as the gummy garnishes or chocolate pudding, to truly stand out visually.
For those interested in sophisticated hosting, choosing high-fat European butter can elevate the mouthfeel. The lower water content ensures a denser, more luxurious cream.
Functionally, the temperature of these “materials” is critical for the workflow. Ingredients must be at room temperature to avoid lumps that disrupt the spatial flow of the bite.
Room temperature ingredients bond together very easily since they’re warmer, creating a seamless and even texture… a cold batter won’t emulsify.
Sally McKenney, Sally’s Baking Addiction
Achieving the Perfect Finish
The mixing process requires patience to achieve the correct ergonomic flow. You are looking for a texture that holds its shape yet spreads without tearing the layers beneath.
Many classic no-bake recipes suffer from grainy textures due to rushed integration. Ensure the sugar is fully dissolved into the fats for a sleek, professional finish.
To ensure your dessert has the best structural quality, consider the following material characteristics:
- Salted Butter: Adds a savory contrast that cuts through the sugar, similar to adding a black accent piece to a white room.
- Unsalted Butter: Offers complete control over the sodium level, providing a pure and creamy backdrop.
- Full-Fat Cream Cheese: Essential for stability. Low-fat variants often result in a watery layer that compromises the casserole’s structure.
- Whipped vs. Block: Always use block cream cheese. Whipped varieties contain air that will deflate, causing the dessert to lose volume over time.
This attention to material quality ensures that the dessert not only tastes luxurious but also maintains its visual appeal on the buffet table.
The Designer’s Edge
- Bring your materials to room temperature before mixing to ensure a seamless bond; cold fats resist emulsification and create a lumpy texture rather than a smooth finish.
- Specify block cream cheese rather than whipped varieties, as the air in whipped tubs causes the foundation to deflate and lose structural integrity over time.
- Upgrade to high-fat European butter for a superior finish; the lower water content creates a denser, more luxurious cream layer to anchor your dessert.
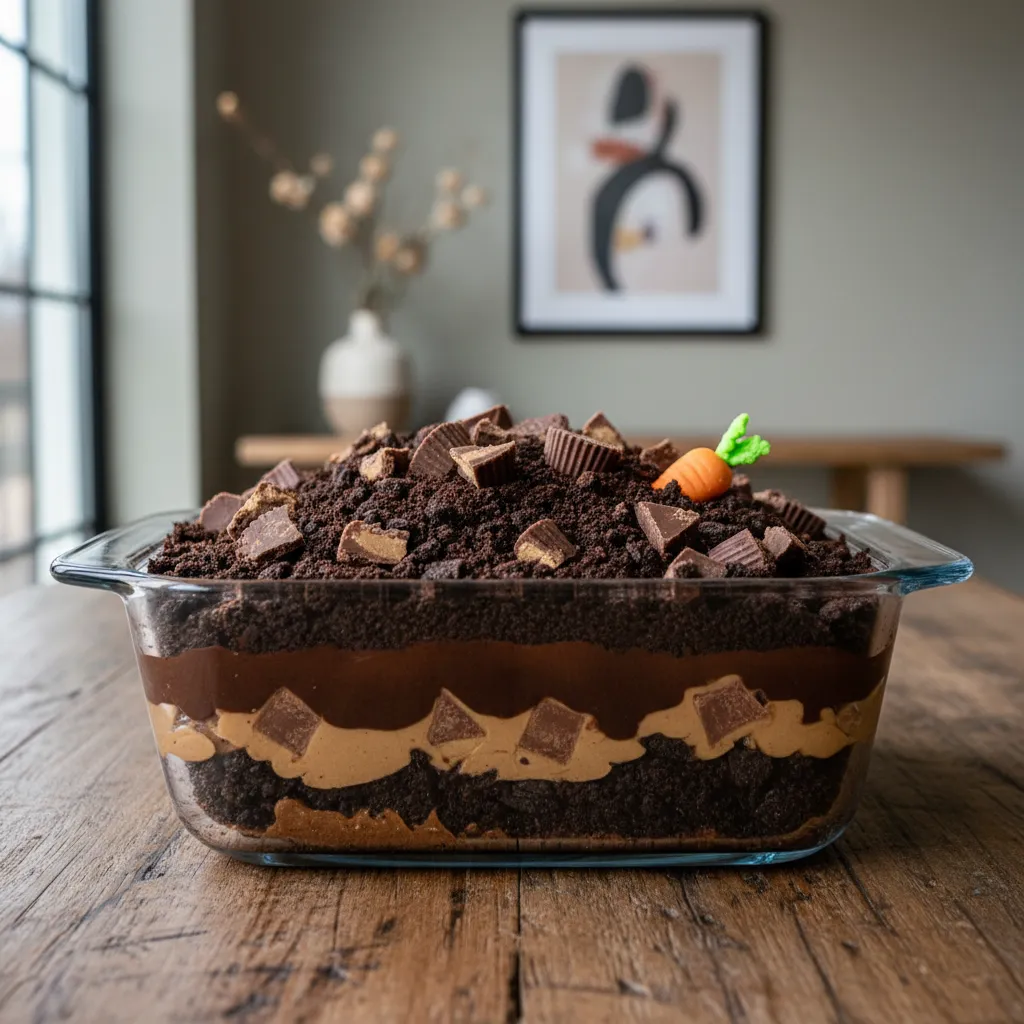
Peanut Butter Cup Mud Twist
Elevating the standard dirt cake requires a distinct balance of textures. The introduction of peanut butter creates a sophisticated salty-sweet profile that appeals to adult palates.
This variation mimics the density of rich mud but tastes like luxury velvet. The structural integrity of the dish relies on the quality of the chocolate peanut butter cups used within the layers.
Visually, the golden hues of chopped peanut butter cups break up the monochrome soil. This adds depth to the presentation, similar to using mixed metals in a modern room design.
Dessert should be designed, not just assembled. Layers create the architecture of flavor.
Functionality is key when serving this heavier iteration. Because the peanut butter adds density, you must ensure the base layer is packed firmly to support the weight above.
We recommend chilling the peanut butter cups before chopping. This prevents them from melting into the pudding and maintains a distinct architectural crunch in every bite.
For those curating a dessert table, this dish pairs exceptionally well with coffee. Consider browsing Top Dunkin Iced Coffee Drinks to Try: Flavors & Tips for pairing ideas.
Constructing the Flavor Palette
The assembly process is akin to laying a foundation. You are building flavor zones that need to remain distinct yet cohesive. The interplay of smooth pudding and rigid chocolate is vital.
If you are looking for other effortless options, this concept aligns with 55 Crowd-Pleasing No-Bake Recipes for Every Occasion, prioritizing impact over oven time.
To achieve the perfect “mud” consistency, use a mix of chocolate and vanilla pudding. The vanilla acts as a neutral canvas, allowing the peanut butter to serve as the focal point.
Structural Layering Checklist:
- The Foundation: A thick crust of crushed sandwich cookies mixed with melted butter. This prevents the casserole from shifting when scooped.
- The Binder: A whipped mixture of cream cheese and powdered sugar. This adds stability and a tangy contrast to the sweetness.
- The Aggregate: Coarsely chopped peanut butter cups. Ensure these are distributed evenly to guarantee a consistent texture in every serving.
- The Topsoil: A final dusting of fine cookie crumbs. This creates the matte finish that gives the dish its signature “dirt” aesthetic.
When layering desserts, texture is just as important as taste. Without crunch, a creamy dessert can feel monotonous and lack dimension on the palate.
Claire Saffitz, Bon Appétit
Finally, consider the vessel you use for this casserole. A clear glass trifle bowl or a white ceramic baker offers the best contrast for the dark layers.
The clear glass allows guests to see the stratification of ingredients. This visual transparency turns the food into a piece of edible art, enhancing the overall table decor.
The Designer’s Touch
- Flash-freeze your peanut butter cups for 15 minutes prior to chopping; this ensures clean, architectural shards that maintain their structural integrity rather than smearing into the pudding.
- Showcase the stratification by assembling this dessert in a clear glass trifle bowl or individual highball glasses, turning the distinct layers into a visual centerpiece.
- To amplify the sophisticated salty-sweet profile, incorporate a pinch of flaky sea salt into the cookie crumb foundation before packing it down.
Layering Techniques for Consistent Texture
Constructing a dirt cake casserole requires the same attention to structural integrity as laying a subfloor. The goal is a stable yet soft bite.
Visual appeal relies heavily on distinct lines between the dark, organic cookie crumbs and the pale, smooth cream filling.
You want to avoid muddied layers where the cream bleeds into the crust. This separation ensures every serving offers a complex mouthfeel.
For those managing dietary restrictions, you can adapt the foundation using Easter Baking Recipes Gluten Free: Sophisticated Hosting techniques.
The Foundation: Crumb Density
The bottom layer acts as the anchor for the entire dessert. It must be packed firmly enough to hold shape but loose enough to spoon out easily.
A mix of fine dust and small chunks creates a realistic soil texture. This variance mimics the organic irregularity found in nature.
Using a flat-bottomed measuring cup to press the initial layer ensures an even horizon line. This prevents the filling from pooling in corners.
To keep your layers distinct and prevent them from muddling, chill the pudding mixture until it is thick and substantial before assembly.
Danilo Alfaro, The Spruce Eats
Cream Consistency and Application
The cream layer provides the velvety contrast to the crunchy base. It functions similarly to the mortar in masonry, binding the structure together.
Ensure your cream cheese is completely softened. Lumps in the mixture will disrupt the smooth visual flow of the dessert’s profile.
When applying the cream, use an offset spatula. This tool allows you to spread the mixture to the edges without disturbing the crumb foundation.
The texture should rival a high-end custard. Compare the desired thickness to the base found in Perfectly Easy Crème Brûlée for reference.
Texture is the architecture of flavor; distinct layers turn a simple dish into a design statement.
Troubleshooting Common Texture Issues
Even seasoned bakers encounter structural failures. Understanding the physics of the ingredients helps prevent a collapsed presentation.
| Problem | Structural Cause | Design Solution |
|---|---|---|
| Soggy Crumb Base | Warm filling melts the binding. | Chill filling completely before spreading. |
| Uneven Layers | Poor tool selection during application. | Use an offset spatula or piping bag. |
| Dense Mouthfeel | Over-mixing the whipped topping. | Fold ingredients gently to retain air. |
| Crumb Migration | Applying filling too aggressively. | Dollop filling first, then connect the dots. |
Proper temperature management is critical. Just as you would not paint a damp wall, do not layer warm pudding over chocolate crumbs.
Allow the assembled dish to set in a cold environment. This “curing” time lets the moisture balance, softening the cookies slightly.
The Layering Blueprint
- Use the ‘dollop and drag’ method by placing small mounds of cream across the surface before gently connecting them with an offset spatula to prevent crumb migration.
- Chill your cream mixture for at least 30 minutes before assembly to ensure the viscosity is high enough to maintain distinct, razor-sharp visual lines.
- Achieve a professional soil profile by pulsing 70% of your cookies into a fine dust and hand-crushing the remaining 30% for realistic geological texture.
The Final Layer: Mastering the Sweet Aesthetic
Constructing the perfect Easter Dirt Cake is an exercise in edible architecture. It requires a keen eye for balance, texture, and structural integrity.
The contrast between dark cocoa crumbs and pastel accents creates a visual anchor. It turns a simple dish into a sophisticated centerpiece for your table.
By moderating sweetness with tangy cream cheese, you refine the flavor profile. This ensures the dessert appeals to both children and adults alike.
Select a glass vessel to showcase the internal layering. Let the structural beauty of the dessert stand as a testament to your design skills.
Culinary Blueprints: Design Queries Solved
Yes, a 24-hour setting period aids stability. However, apply the final topsoil layer just before service to preserve the requisite crunch.
Clear glass is the optimal choice. It reveals the stratigraphic layers, turning the cross-section of the dessert into a key design element.
Utilize dark cocoa for the crumb mixture. The slight bitterness provides a necessary counterweight to the sweet custard, adding depth to the palate.
Compact the base layer firmly during assembly. A dense foundation prevents moisture migration from the pudding, ensuring the texture remains distinct.