Table of Contents
- Mastering the Americana Aesthetic: Essential Faux-Aging Techniques
- The Centerpiece: Distressed Wood Box with Tea-Stained Flags
- The Wall Art: Barn Quilt Star on Reclaimed Pallet Wood
- The Wreath: Primitive Denim and Burlap Rag Design
- The Accent: Wooden Spindle Firecrackers for Shelf Decor
- Curating Your Patriotic Legacy
- Americana Design & Crafting Insights
Designing a cohesive space requires a firm understanding of structural integrity and spatial planning. Whether you are drafting a detailed floor plan or selecting the perfect hardwood flooring for a high-traffic office, the foundation sets the stage for every aesthetic choice. Mastering the technical nuances of construction ensures that your vintage holiday transformation remains grounded in professional quality and lasting durability.
Once the architectural framework is established, the focus shifts to the delicate balance of interior styling. Integrating Americana elements into a modern layout demands a sophisticated eye for color palettes and material textures. By selecting authentic finishes and weathered patinas, you can bridge the gap between contemporary office environments and the warmth of traditional heritage design.
Practical DIY projects offer the final touch of character needed to personalize any professional or residential setting. This guide provides actionable steps for creating hand-stitched banners and aged wooden accents that elevate your 4th of July celebration. Our comprehensive approach ensures that every handmade detail reflects the precision of a master craftsman while maintaining an inviting, festive atmosphere.
Mastering the Americana Aesthetic: Essential Faux-Aging Techniques
True Americana design thrives on history and storytelling. The charm lies in the imperfections that suggest a well-loved past. New materials often lack this character.
To create authentic 4th of July decor, you must master the art of faux-aging. This process transforms pristine craft store finds into heirlooms that carry visual weight.
The beauty of Americana lies not in perfection, but in the rugged durability of the materials.
Textural Depth through Wood Distressing
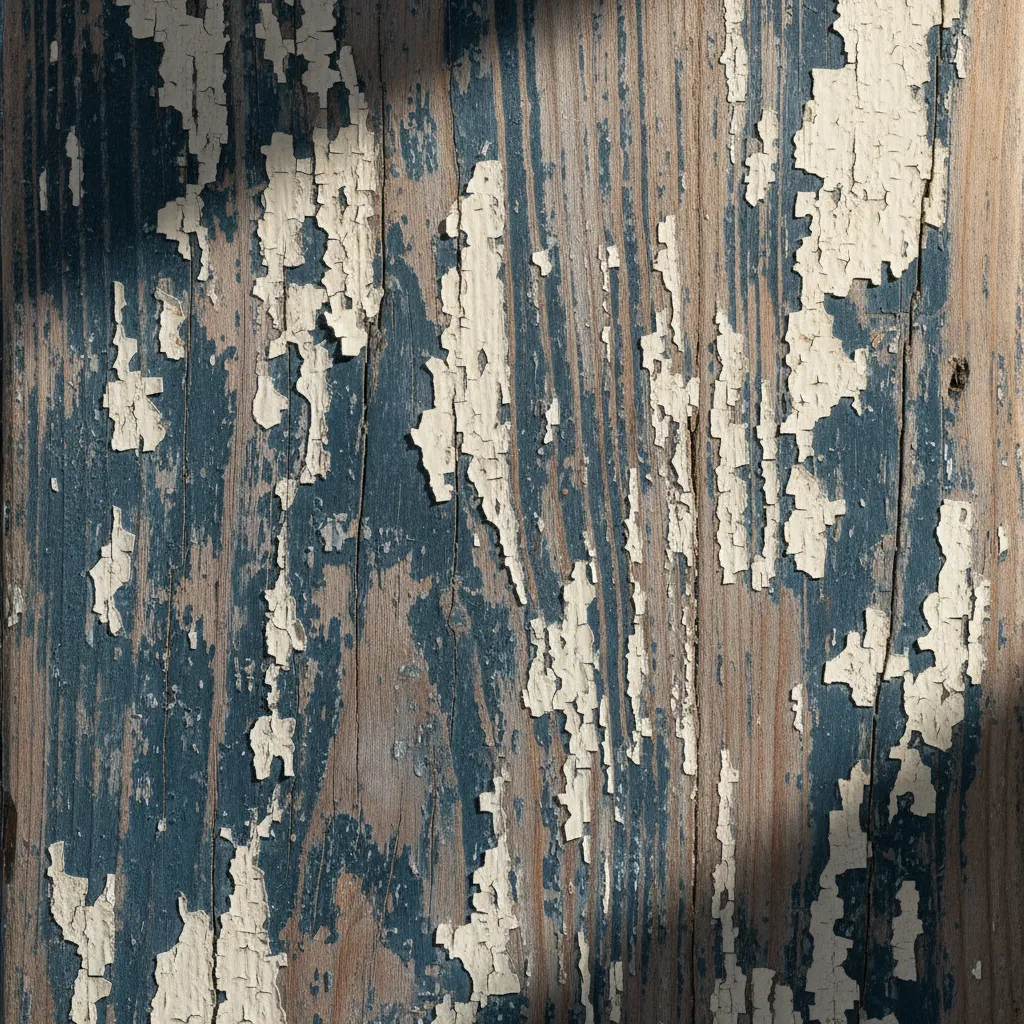
Wood is the backbone of rustic decor. To achieve a weathered look, start with a dark base stain before applying your topcoat of red, white, or blue paint.
Once the topcoat is dry, use 80-grit sandpaper to remove paint from the edges and raised grain. This reveals the dark wood underneath, mimicking years of handling.
This technique enhances the structural definition of the piece. It also ensures that accidental scratches in the future blend seamlessly into the design.
Patina is the sheen of age… It creates a sense of history and depth that a new finish simply cannot replicate.
Gil Schafer, Architectural Digest
Fabric Staining for Vintage Appeal
Bright white cotton can look jarringly modern against rustic wood. Softening these textiles with a tea or coffee stain creates a cohesive, antique palette.
Brew a concentrated batch of black tea and submerge your bunting or fabric strips. The tannins in the tea will dye the fibers a warm, parchment beige.
This subtle shift in color allows your crafts to blend effortlessly with other heirlooms. It is a technique often seen in vintage living room ideas where tone is key.
Simulating Rust and Oxidation
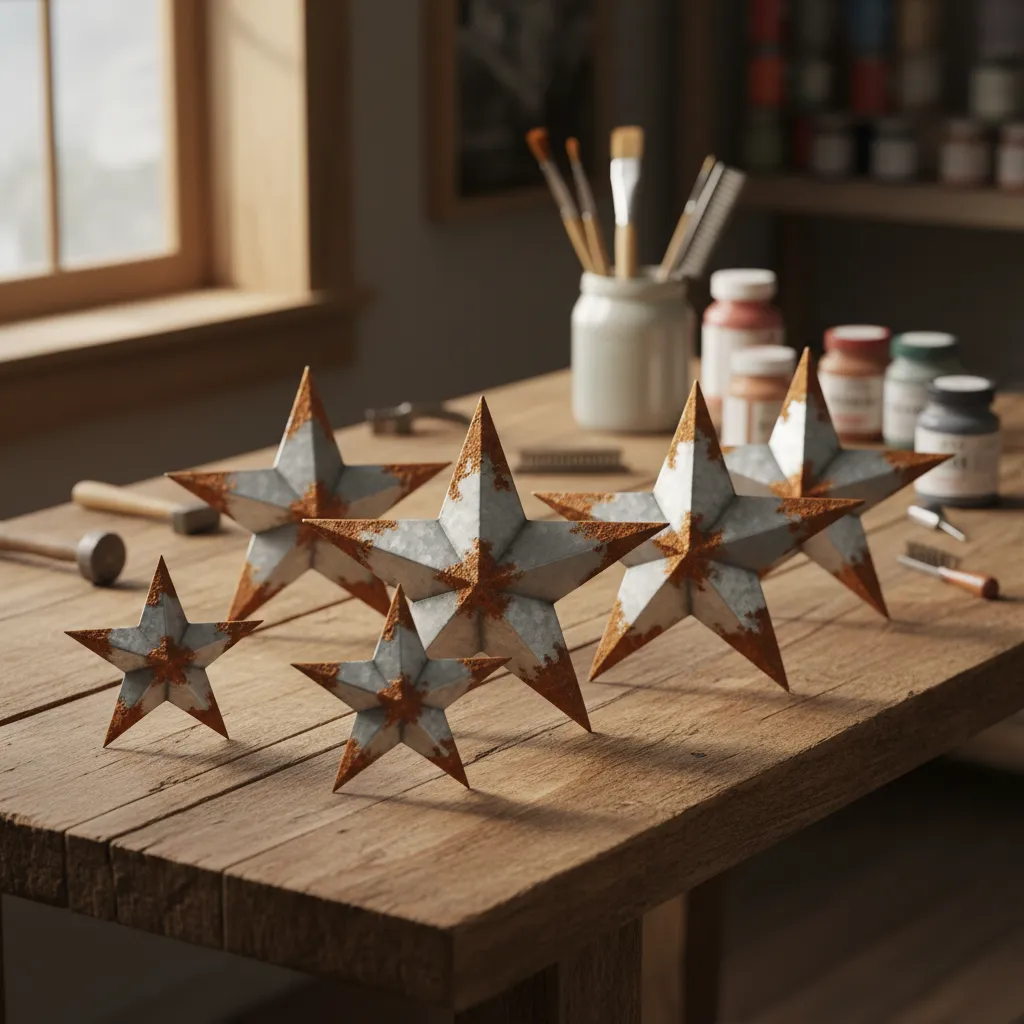
Metal elements add industrial contrast to soft wood grains. However, shiny galvanized steel can feel cold. Adding faux rust brings warmth and age to the piece.
Apply a matte Mod Podge to specific areas of the metal. While wet, sprinkle cinnamon or nutmeg over the adhesive. Seal it with a spray matte sealer.
The result is a textured, deep brown finish that catches the light like real oxidation. This works exceptionally well for exterior items like summer door hangers that need to stand out.
| Aging Medium | Best Material | Visual Effect | Durability |
|---|---|---|---|
| Dark Wax | Chalk Painted Wood | Soft, antique shading in crevices. | High (Protective) |
| Crackling Medium | Painted Furniture | Peeling, alligator-skin texture. | Medium |
| Steel Wool & Vinegar | Raw Lumber | Gray, driftwood-like oxidation. | Permanent |
| Coffee/Tea Stain | Natural Fabrics | Warm, yellow-brown parchment tone. | Washable (Fades) |
Choosing the right medium depends on the final location of the piece. Wax offers protection for tabletops, while chemical weathering is best for outdoor signs.
The Vintage Vault
- Rub a common white candle along wood edges before applying your topcoat; the wax resists the paint, creating instant, natural-looking chips without endless sanding.
- Mix a pinch of paprika into your cinnamon ‘rust’ application to introduce reddish-orange tones that create a more complex, realistic oxidation effect.
- Skip the iron after tea-staining; let fabrics dry in a crumpled heap to achieve permanent creases that suggest years of attic storage.
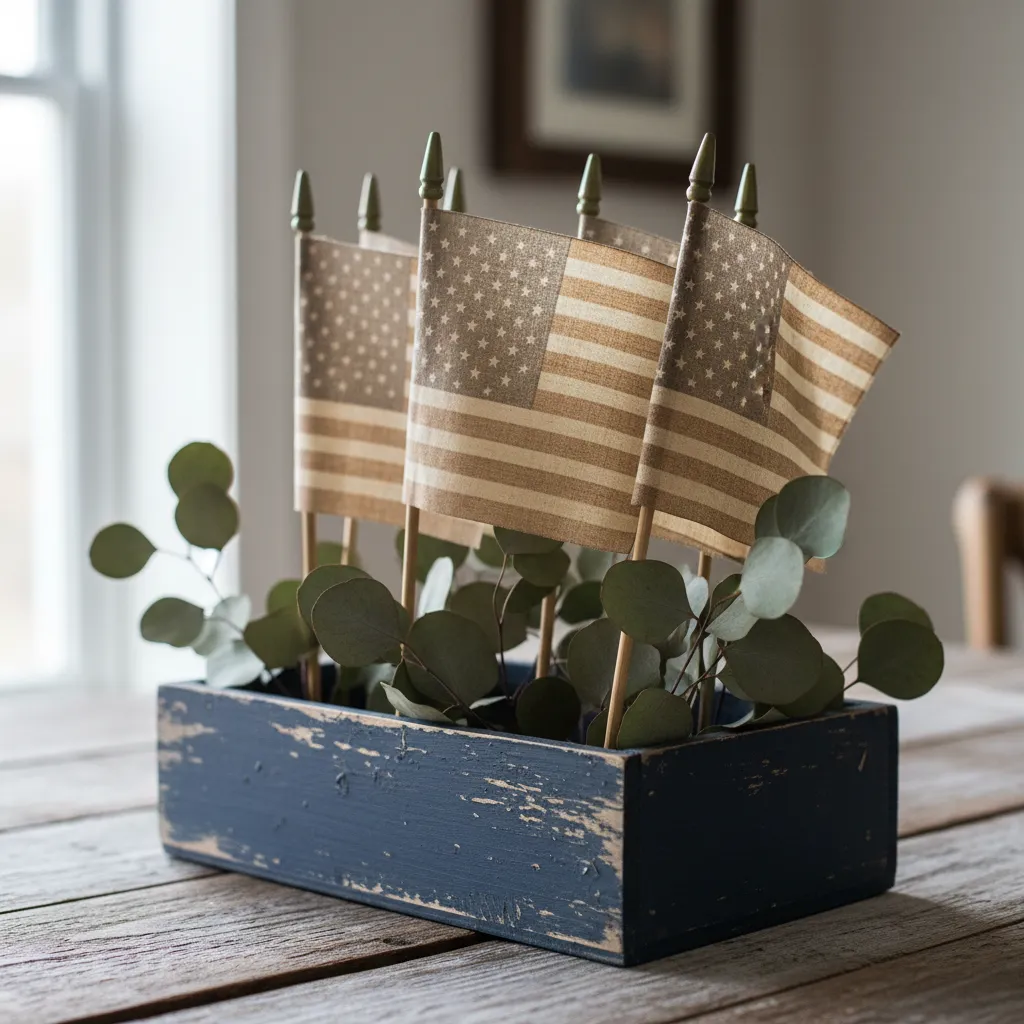
The Centerpiece: Distressed Wood Box with Tea-Stained Flags
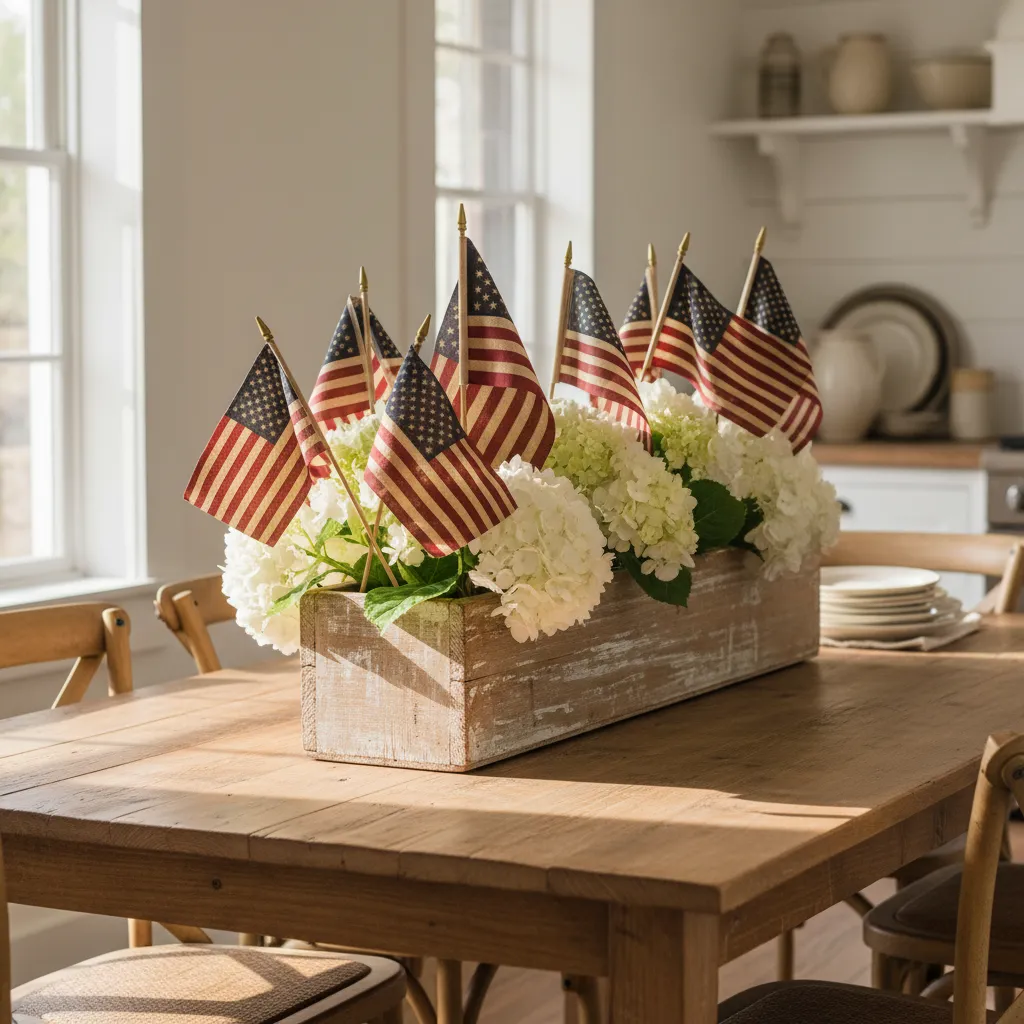
The centerpiece serves as the visual anchor for your holiday gathering. It sets the tone for the entire room’s atmosphere.
For this “Americana Crafts Diy 4th of July” project, we focus on texture. The goal is a look that feels inherited rather than bought.
A distressed wood box offers a rugged, tactile foundation. It contrasts beautifully with the soft, flowing fabric of the flags.
This design choice also improves functionality. The low profile ensures guests can see each other across the table without obstruction.
True Americana style embraces the beauty of the worn, the weathered, and the well-loved.
Constructing the Distressed Vessel
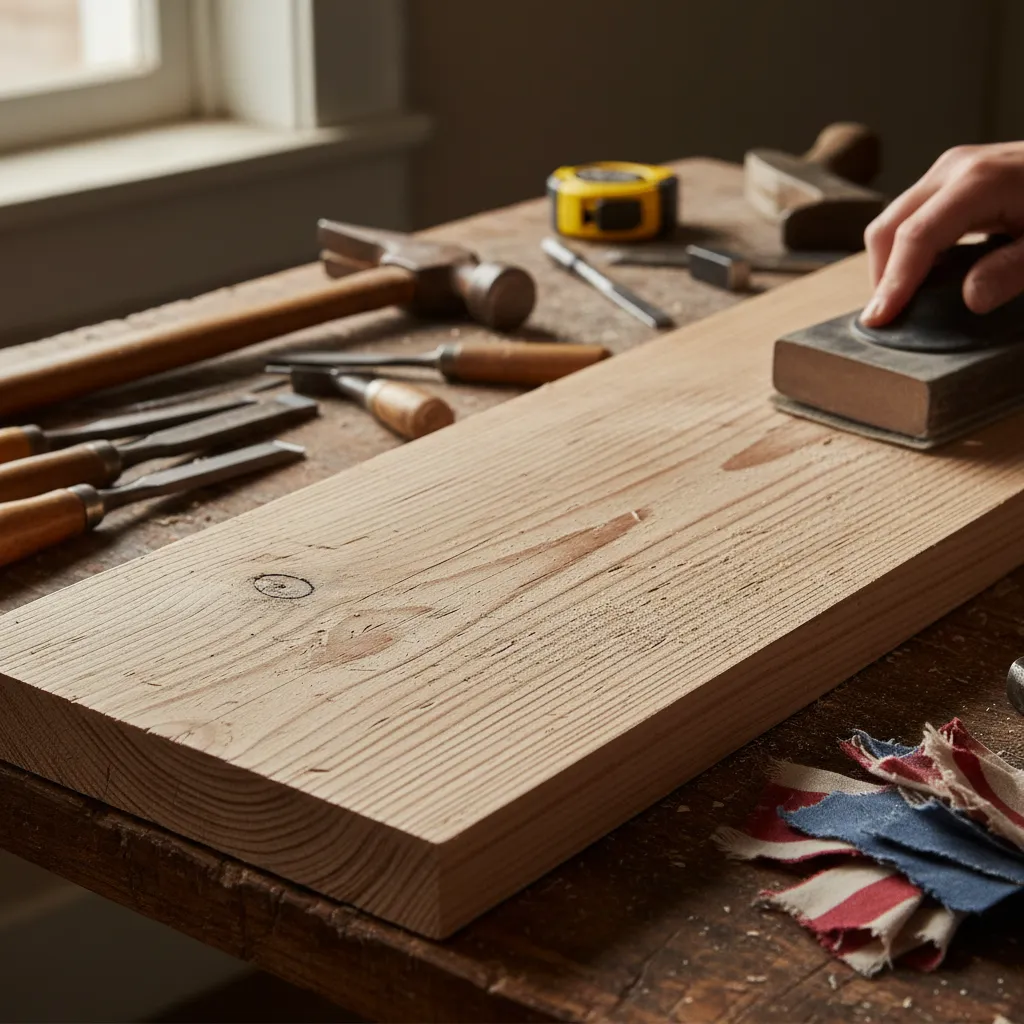
The charm of this piece lies in its imperfections. You do not need pristine lumber to achieve a high-end look.
Start with simple pine boards or reclaimed pallet wood. These materials absorb stain unevenly, creating depth and character.
Use a hammer and chain to physically distress the wood before staining. This mimics decades of wear and tear.
If you love this aesthetic, explore these vintage living room ideas for more inspiration.
Integrating these textures creates a cohesive flow throughout your home. The warmth of the wood balances cooler metal accents.
Texture is the thing that makes a room feel alive. It’s what makes us want to touch things and settle in.
Lauren Liess, Habitat: The Field Guide to Decorating
The Art of Tea-Staining
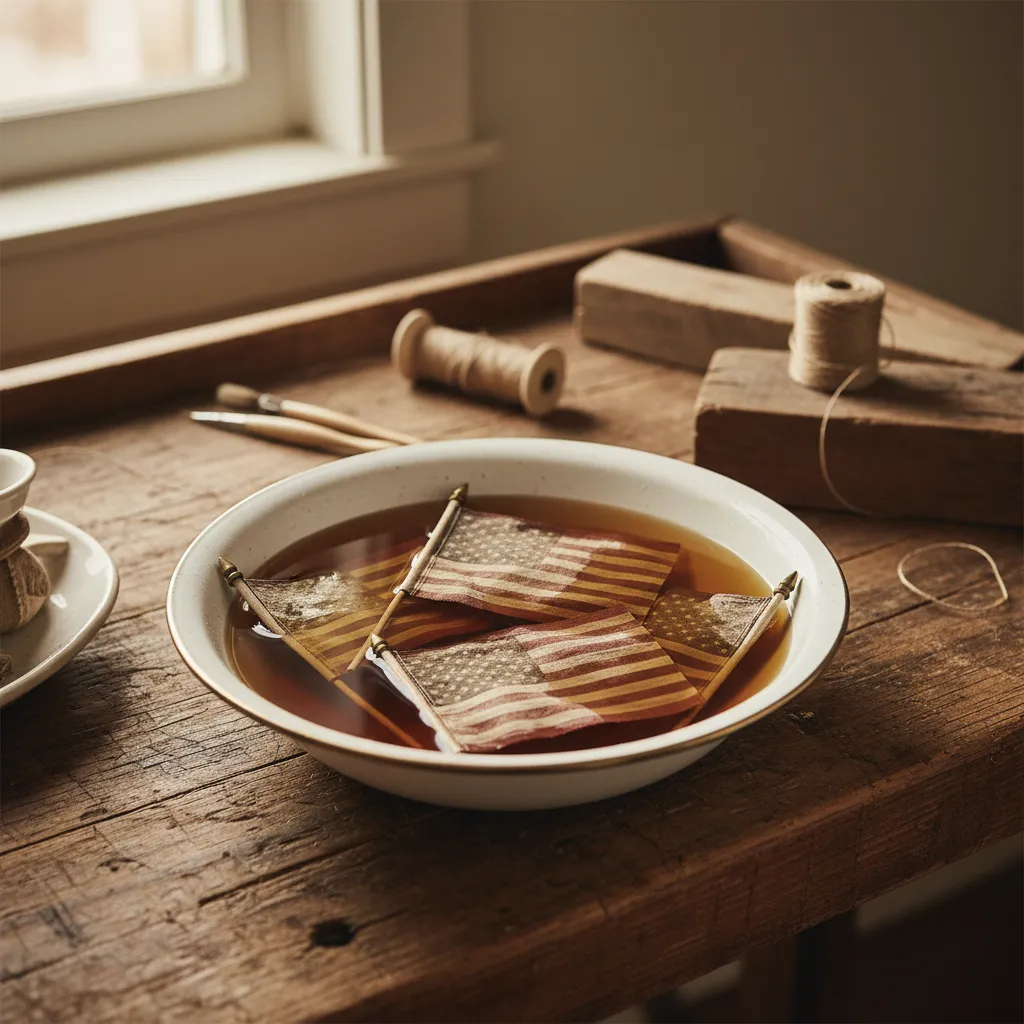
Bright synthetic flags can look harsh in a cozy setting. Tea-staining softens the white stripes into a creamy, antique beige.
This process aligns perfectly with the “Americana Crafts Diy 4th of July” theme. It creates a sense of history and nostalgia.
Follow these steps to achieve the perfect vintage patina:
- Brew Concentrate: Steep 5 black tea bags in 2 cups of boiling water for 10 minutes.
- Submerge Flags: Remove sticks if possible, or keep them dry. Soak the fabric for 3 to 5 minutes.
- Check Color: The fabric will look darker when wet. Rinse quickly with cold water to stop the dyeing process.
- Dry and Set: Lay flat to dry. Use a warm iron to set the color and add crisp wrinkles for texture.
Arrange the finished flags in the box with fresh greenery. Hydrangeas or baby’s breath add softness to the rigid wood structure.
Consider how this styling extends to your exterior. You can coordinate this look with summer door hangers for a unified curb appeal.
The result is a sophisticated, handcrafted display. It celebrates the holiday with subtle elegance rather than bright neon colors.
Vintage Style Secrets
- Accelerate the aging process on your wood box by applying a solution of steel wool dissolved in white vinegar; this turns fresh pine into a weathered gray barnwood shade.
- For a deeper, grungier patina on the flags, add a tablespoon of instant coffee grounds to your tea brew and bake the wet flags in the oven at 200°F to set permanent crinkles.
- Place mason jars inside the wooden trough to hold water for fresh hydrangeas or baby’s breath, protecting the wood from moisture damage while keeping the flags dry.
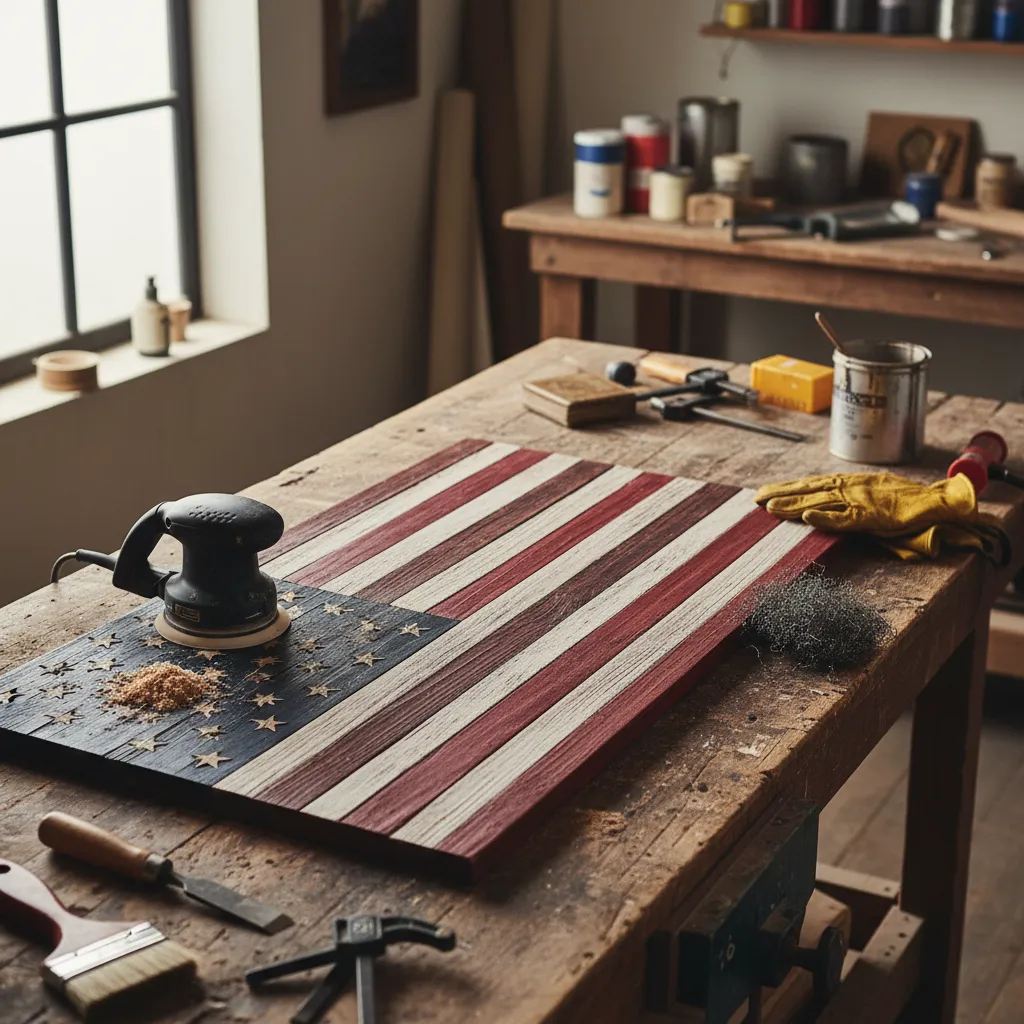
The Wall Art: Barn Quilt Star on Reclaimed Pallet Wood

A barn quilt star serves as a commanding focal point in any living space. It blends rustic craftsmanship with patriotic flair, making it perfect for year-round Americana decor.
Using reclaimed pallet wood adds grit and authenticity to the project. The rough texture catches ambient light effectively, creating deep shadows that new lumber cannot replicate.
This project also improves the acoustic quality of a room. The dense, irregular surface of the wood helps dampen sound reflections, making your living area feel cozier and quieter.
True Americana style isn’t just about the colors; it is about honoring the materials and the history they carry.
Sourcing and Prepping the Wood
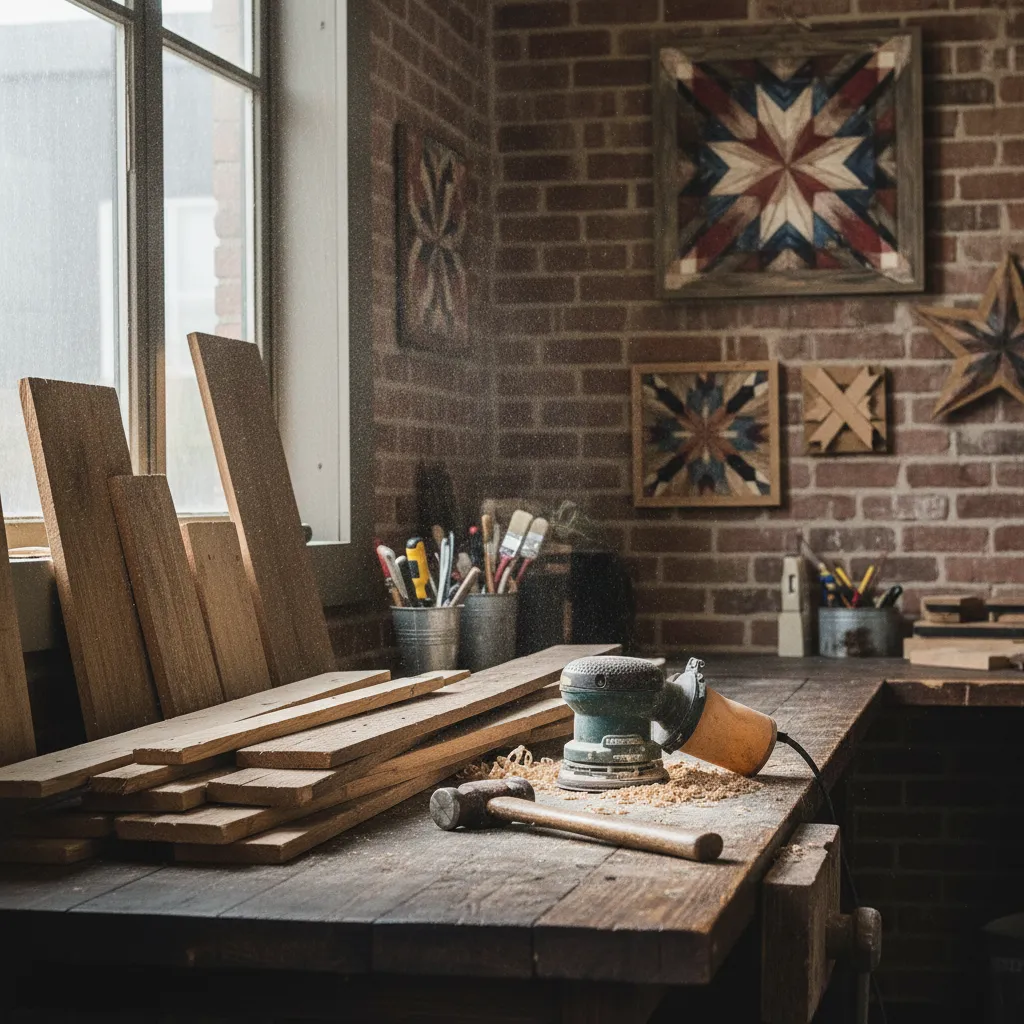
Sourcing pallets requires a keen eye for safety and quality. Look for pallets that are heat-treated rather than chemically treated to ensure indoor air quality remains safe.
Dismantling the pallets takes patience and leverage. You must remove all old nails to prevent injury and damage to your saw blades during the cutting phase.
For a safe project, look for the ‘HT’ stamp on pallets, which stands for Heat Treated. Avoid pallets marked ‘MB’, as they were treated with methyl bromide.
Bob Vila, Are Pallets Safe to Use?
Once dismantled, lightly sand the boards to remove splinters. However, leave enough roughness to maintain that weathered, vintage character that defines the style.
Drafting the Geometric Pattern
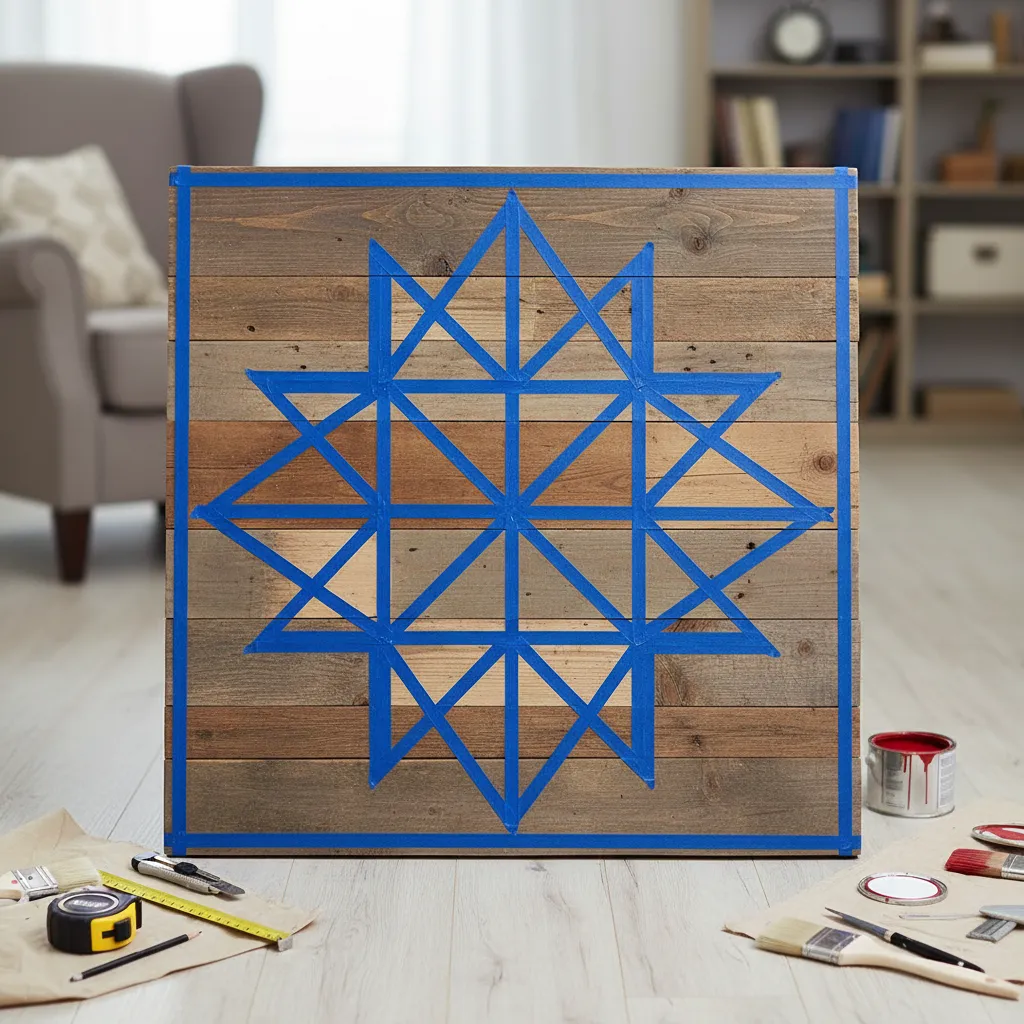
Precision is vital when laying out your star design. Start by finding the exact center of your square wooden base and drawing light pencil lines to mark the quadrants.
The taping process is very similar to techniques used in Sidewalk Chalk Art Ideas Easy: Geometric Tape Resist Art. You block off sections to keep lines crisp.
Firmly press down the edges of your painter’s tape. This prevents the paint from bleeding under the tape, ensuring your star points remain sharp against the raw wood background.
Essential Materials Checklist
Gathering the right supplies ensures a smooth workflow. The following table outlines the specific items needed to achieve a professional finish.
| Item | Purpose | Expert Note |
|---|---|---|
| Reclaimed Pallets | Main canvas structure | Choose HT stamped wood only. |
| Wood Glue & 1″ Screws | Assembly | Glue adds stability over time. |
| Painter’s Tape | Geometric masking | Use “delicate surface” grade. |
| Chalk Paint | Color application | Dries matte for a vintage look. |
| French Cleat | Hanging hardware | Supports heavy wood safely. |
Painting and Final Installation

Apply your red and blue paint using a dry-brush technique. Dip your brush, wipe most of the paint off, and drag it across the grain to let the wood texture show through.
This rustic aesthetic complements 27 Charm-packed Modern Barndominiums With Rustic Siding perfectly. It bridges the gap between modern design and traditional farmhouse roots.
Install a heavy-duty French cleat on the back for hanging. This hardware distributes the weight evenly and keeps the artwork flush against the wall for a polished look.
Artisan Design Secrets
- Before cutting your pallet boards, run a strong magnet over the surface to locate any deeply embedded nails that could damage your power tools.
- To prevent paint from bleeding through the rough wood grain, apply a thin layer of clear matte sealant over the edges of your painter’s tape before adding your colors.
- When using the dry-brush technique, work in the direction of the wood grain to highlight the natural textures and achieve that authentic weathered aesthetic.
The Wreath: Primitive Denim and Burlap Rag Design
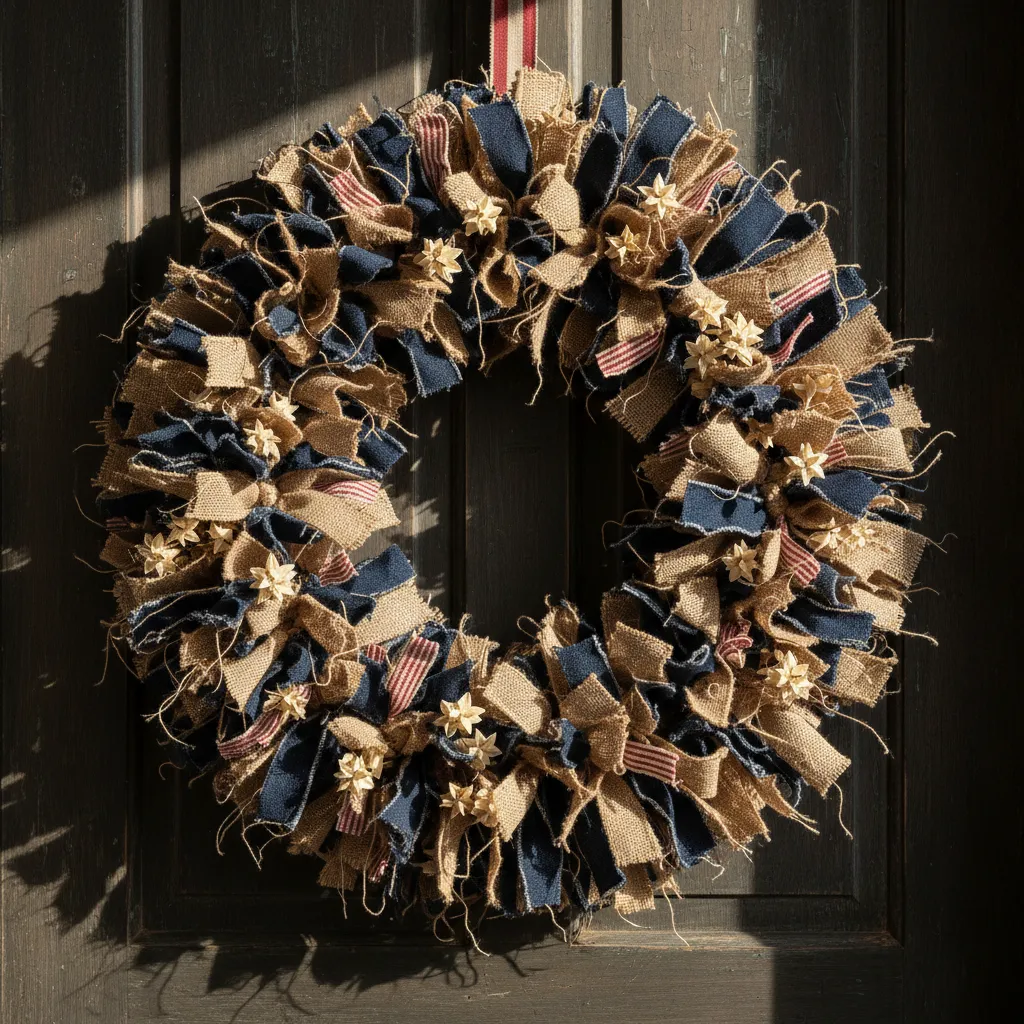
The rag wreath remains a staple of authentic farmhouse aesthetics. It perfectly captures the spirit of Americana Crafts Diy 4th of July projects.
This design utilizes the contrasting textures of rugged burlap and soft, worn denim. The combination creates a tactile experience that feels historic.
Visually, the deep indigo tones of the denim ground the piece. The burlap adds a neutral warmth that prevents the decor from feeling too cool or dark.
Functionally, this wreath is incredibly durable. Unlike fresh greenery, these heavy textiles withstand summer heat without wilting or fading quickly.
True Americana style weaves history into the present, turning worn fabrics into welcoming symbols of home.
Gathering Your Materials

Preparation is key for this project. You need sturdy scissors and a considerable amount of fabric to achieve a full, lush look for your entryway.
Start by sourcing old jeans or denim scraps. Varied washes add depth to the final piece, creating a rich mosaic of shades from sky blue to navy.
- Wire Wreath Frame: A 14-inch frame is standard for most front doors.
- Denim Fabric: Approximately two to three pairs of adult jeans are required.
- Burlap Ribbon: Choose a tight weave to minimize excessive shedding during assembly.
- Fabric Scissors: Essential for cutting through thick seams and hems effortlessly.
- Rotary Cutter: Speeds up the process of stripping fabric lengths significantly.
The Knotting Technique
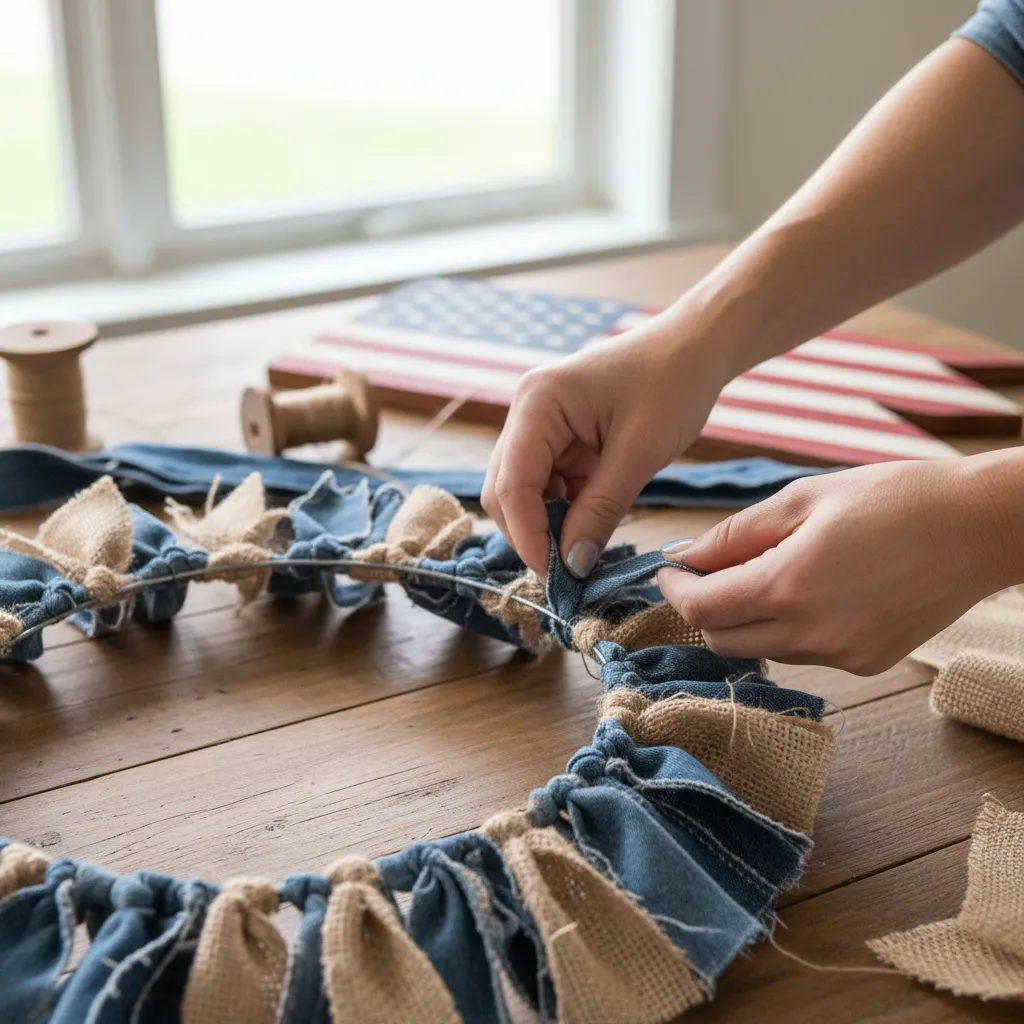
Cut your fabric into strips measuring roughly 1 inch by 6 inches. Consistency is less important than volume here, so do not stress over precision.
Tie the strips onto the wire rings using a simple overhand knot. Push the knots closely together to ensure the metal frame disappears completely.
Alternate between denim and burlap to create a balanced pattern. This rhythm ensures the Americana Crafts Diy 4th of July theme shines.
Fluff the ends of the strips after every few knots. This action maximizes the volume and exposes the charming frayed edges of the materials.
To keep your wreath looking intentional rather than messy, trim any loose threads that exceed an inch in length. A uniform raggedness is the goal, not chaos.
The Editors, MarthaStewart.com
Styling and Placement
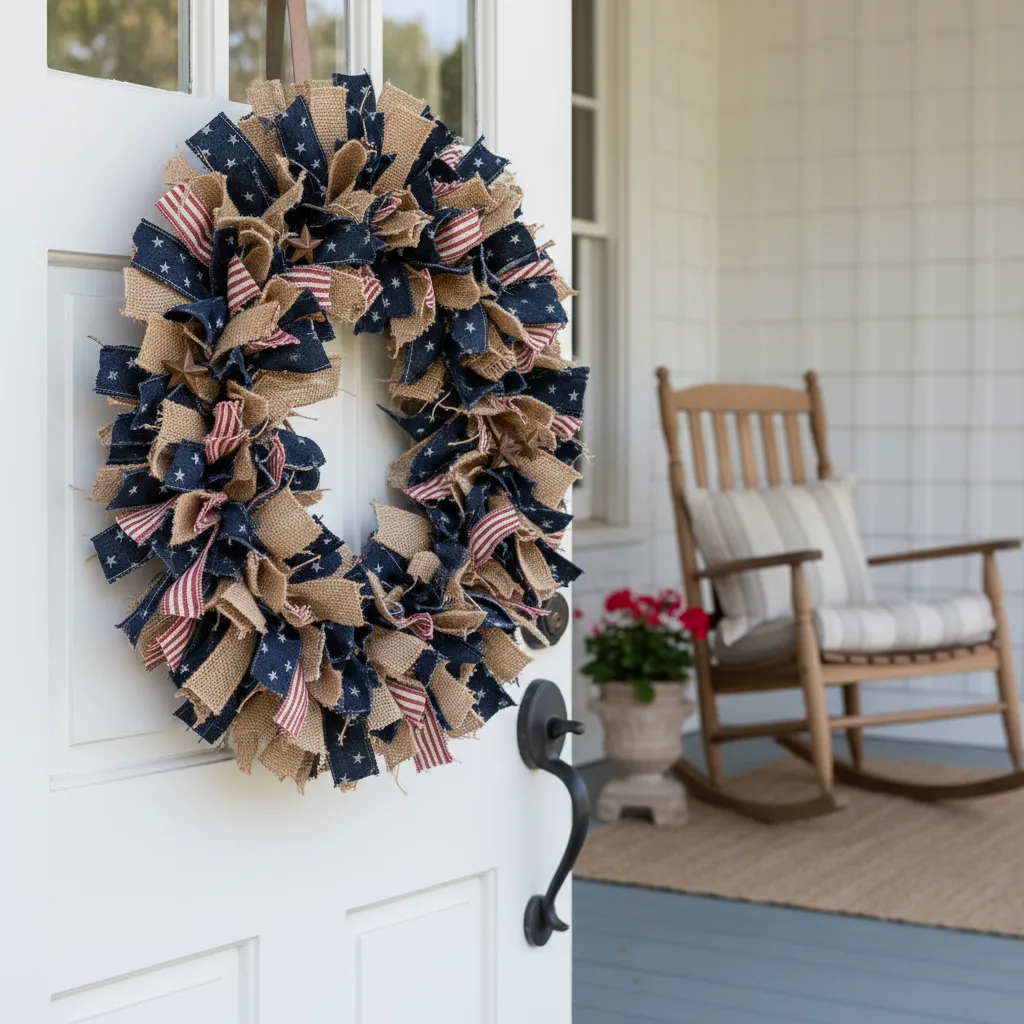
Hang this wreath on a front door to boost curb appeal. It pairs beautifully with pretty cottage exterior designs.
The rugged texture complements wood siding and brickwork. It serves as a soft focal point against harder architectural elements like stone or steel.
Indoors, this wreath works well above a mantel or sideboard. You might display it near simple home coffee bar ideas for a festive touch.
Ensure the hanging hook is sturdy. The accumulation of denim strips makes this wreath significantly heavier than traditional floral options.
Heritage Hack
- Mix multiple denim washes; from light acid-washed to deep dark indigo; to give your wreath a more multidimensional and ‘lived-in’ antique appearance.
- To minimize burlap shedding while you work, use a sharp rotary cutter for cleaner edges and lightly mist the finished strips with a matte fabric sealant.
- Because denim adds significant weight, skip the suction cup hooks and opt for a sturdy over-the-door metal hanger to ensure your wreath stays securely in place.
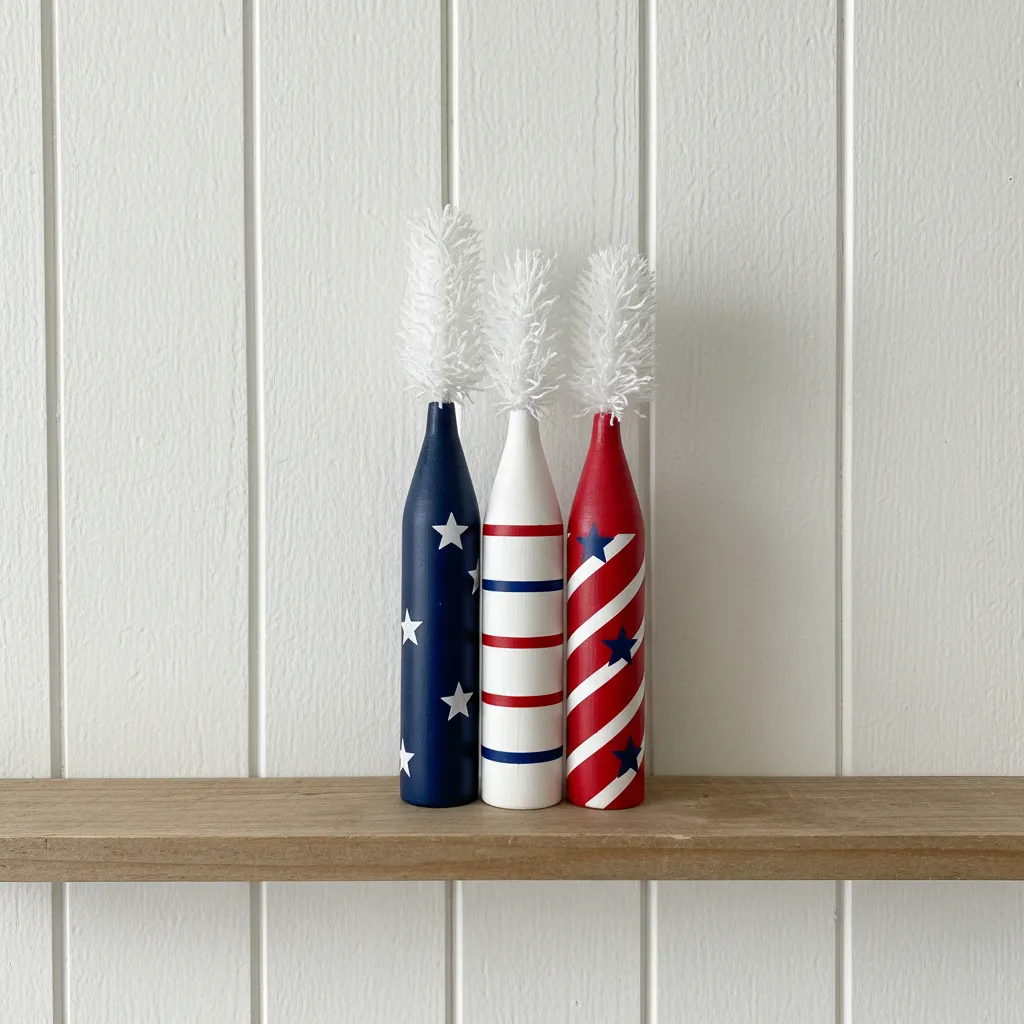
The Accent: Wooden Spindle Firecrackers for Shelf Decor
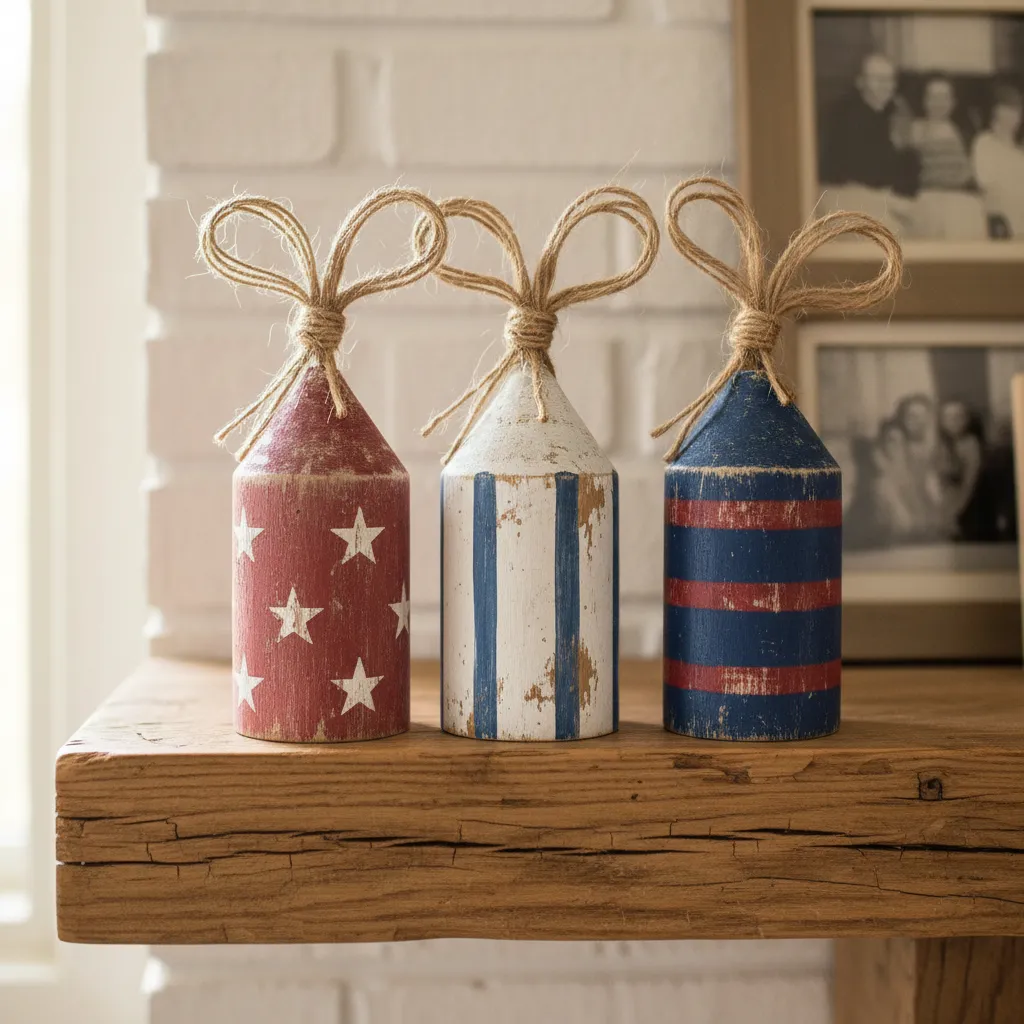
Transforming architectural salvage into holiday decor brings a sense of history to your space. Wooden spindles, often found at flea markets, possess a natural cylindrical shape.
This shape mimics the form of vintage firecrackers perfectly. By upcycling these sturdy turnings, you create accessories that are substantial and tactile. They anchor a vignette effectively.
The visual appeal lies in the texture of the wood. We recommend distressing the paint to reveal the grain beneath. This technique enhances the Americana aesthetic and adds depth.
Functionally, these wooden accents serve as excellent bookends due to their weight. They can also stabilize lighter paper decorations on a breeze-filled porch.
True Americana style honors the past by giving reclaimed materials a new, patriotic purpose.
Artisan Accents
- Group your spindles in odd numbers; three or five; at varying heights to create a more dynamic and visually balanced vignette.
- To achieve a true vintage look, use a dry-brush technique with muted red and blue tones, then lightly sand the edges to reveal the natural wood grain.
- Add a layer of texture by tying a piece of frayed twine or jute around the center of each spindle to mimic the fuse of a real firecracker.
Sourcing and Preparation
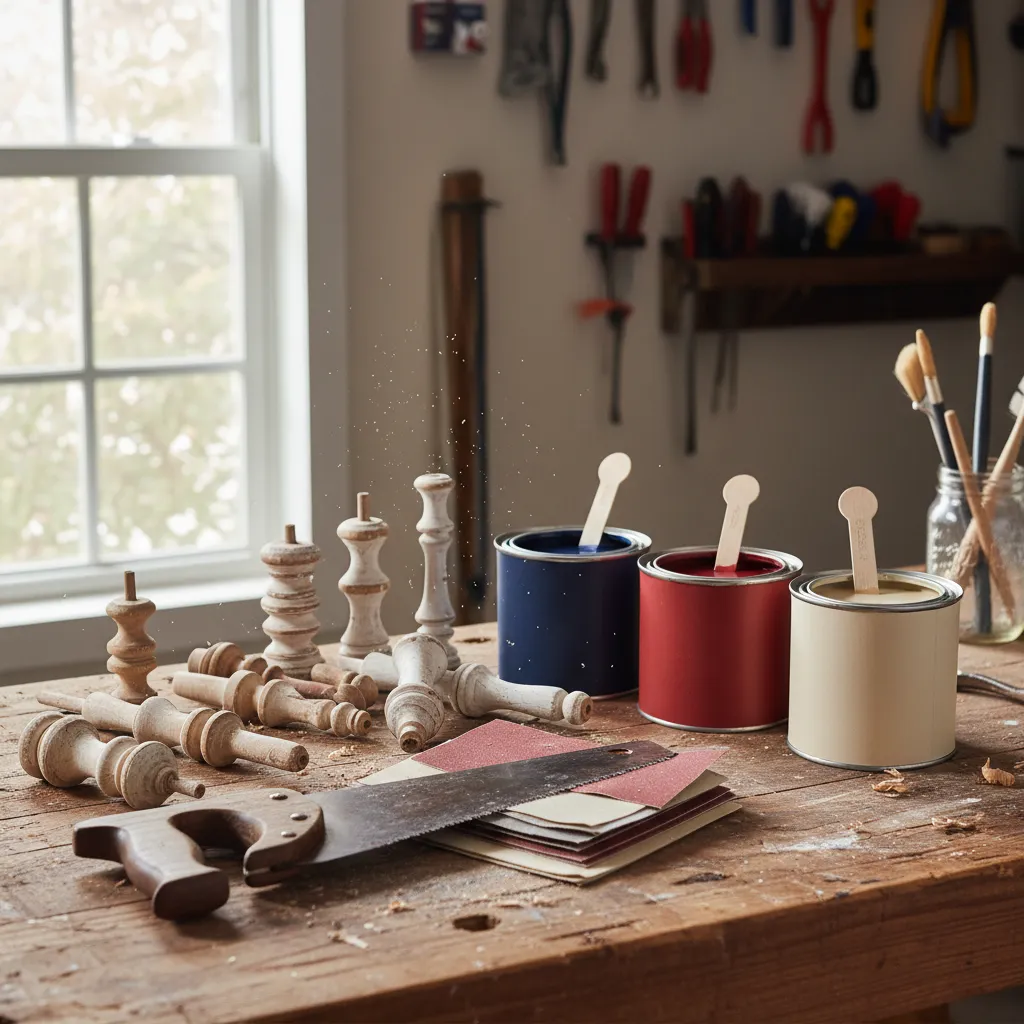
Start by locating turned wood balusters or table legs. Look for varying thicknesses to create visual interest. A mix of heights is essential for a dynamic display.
Clean the wood thoroughly to remove old varnish or wax. A light sanding provides a “tooth” for your paint to adhere to. This step is critical for durability.
If you are styling these on a bookshelf, consider the height of your shelves. For those looking to refresh their reading nooks, these spindles fit perfectly into cozy home library ideas.
The Upcycler’s Edge
- Scour local architectural salvage yards or online marketplaces for unique vintage profiles that offer more character than modern mass-produced options.
- After sanding, use a tack cloth to remove every trace of fine dust; this ensures a perfectly smooth finish when you apply your topcoat.
- Apply adhesive felt pads to the base of each spindle to prevent wobbling on uneven shelf surfaces and to protect your furniture from scratches.
Execution and Styling
Cut the spindles into segments ranging from 4 to 8 inches. Drill a small hole in the center of the top flat surface. This is where the fuse will be anchored.
Paint each segment in muted shades of barn red, creamy white, and navy blue. Bright, primary colors can look artificial. Deeper tones convey a higher level of sophistication.
Insert a length of jute twine or thick hemp rope into the drilled hole. Glue it in place to simulate a fuse. The coarse texture of the rope contrasts beautifully with the smooth painted wood.
When styling a vignette, vary the height and texture of objects to keep the eye moving. A triangular arrangement is often the most pleasing to the eye.
The Editors, The Spruce
Project Data: Spindle Sizing for Balance
To achieve the best aesthetic flow, use the “Rule of Three” when grouping your firecrackers. The following table outlines ideal dimensions for different locations in your home.
| Display Location | Ideal Height Range | Recommended Grouping | Visual Impact |
|---|---|---|---|
| Fireplace Mantel | 8″ – 12″ | Cluster of 3 or 5 | High: Acts as a primary focal point. |
| Bookshelf | 5″ – 7″ | Single or Pair | Medium: Complements books without overcrowding. |
| Entry Console | 10″ – 15″ | Cluster of 3 | High: Sets the tone for the home immediately. |
| Tiered Tray | 3″ – 5″ | Single | Low: subtle accent for detail work. |
Once your firecrackers are dry, arrange them with greenery. Dried eucalyptus or preserved boxwood adds an organic element that softens the rigid wood structure.
This project creates a lasting decoration. Unlike paper crafts, these wooden accents can be stored and reused for years, becoming a staple of your summer design rotation.
Designer Styling Secrets
- Lightly sand the edges of your painted spindles after they dry to create a weathered heirloom look that highlights the wood’s natural texture.
- Bundle a set of three different heights together using a scrap of burlap or rustic twine to create a stable and visually cohesive centerpiece.
- Dip the ends of your jute fuses into a tiny bit of charcoal-colored paint to give them an authentic charred appearance.
Curating Your Patriotic Legacy
True Americana isn’t about buying new; it is about cultivating history. By applying these aging techniques, you transform simple crafts into cherished heirlooms with visual weight.
Whether distressing wood or tea-staining bunting, the goal remains the same. You are building a narrative of resilience and celebration that resonates deeply throughout your home.
Layer these finished pieces into your existing decor. A handmade 4th of July display offers a warmth and authenticity that mass-produced items simply cannot match.
Americana Design & Crafting Insights
For exterior decor, seal your work with a marine-grade polyurethane. It protects against UV rays and moisture without yellowing the faux-aged finish you worked hard to create.
Yes, matte acrylics work best. Layer a dark base coat, apply wax, then add your top color. When sanded, the wax helps the top layer chip away authentically to reveal the base.
Natural fibers like cotton absorb tea stains best. Synthetics often resist dye. For polyester blends, use a specialized fabric dye in a warm beige tone to achieve that vintage look.