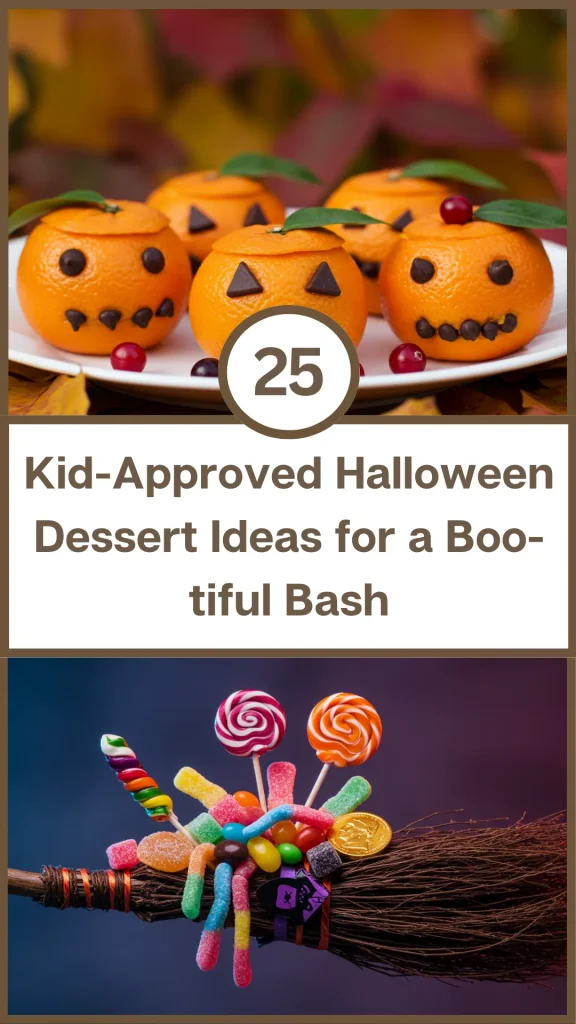
Halloween is a kid’s dream come true, a night filled with costumes, spooky fun, and, most importantly, sweets. Planning a party for your little monsters means the dessert table has to be a spectacular centerpiece of fun, festive, and delicious treats.
These 25 kid-approved ideas are designed to be easy to make, exciting to look at, and perfect for small hands. From silly monsters to creepy crawlies, get ready to whip up a boo-tiful bash that your kids and their friends will be talking about long after the last piece of candy is gone.
Spooky Critters & Goofy Ghouls
These desserts bring classic Halloween creatures to life in the most adorable and approachable way. They are all about fun, not fright.
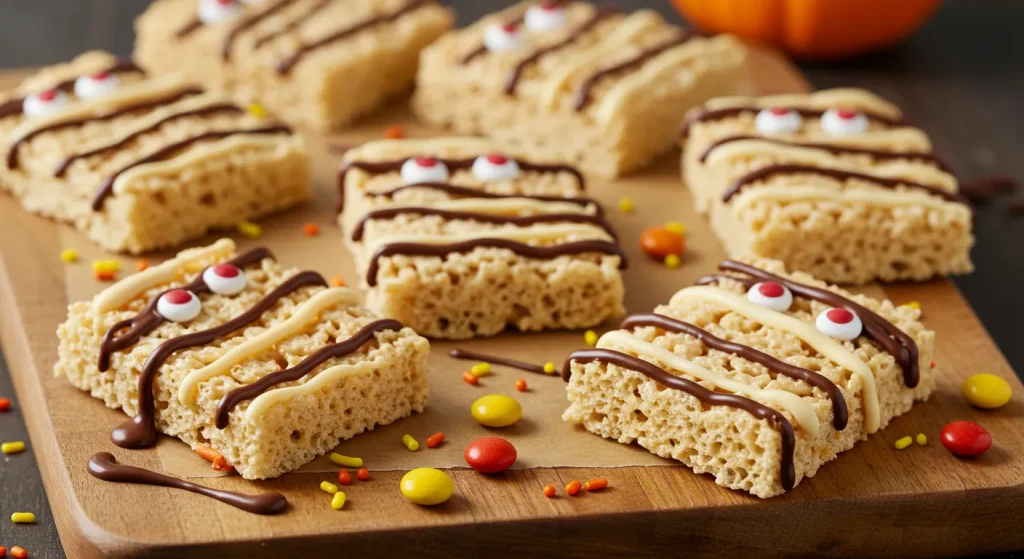
1. Mummy Rice Krispie Treats
These adorable and easy treats are a no-bake classic with a spooky, bandaged twist that kids love to help make.
DIY Tips:
- Use store-bought Rice Krispie treats to make this a lightning-fast, no-mess project.
- Melt white chocolate chips or white candy melts for the “bandages.”
- Let the kids drizzle the melted chocolate back and forth over the treats with a fork or a spoon.
- Before the chocolate sets, let them press two candy eyeballs into place, peeking out from between the bandages.
- This is a perfect, easy craft for a classroom party.
- For a fun flavor twist, add a little bit of pumpkin pie spice to your marshmallow mixture.
- Let the chocolate set completely on wax paper before serving or stacking.
- The messier the drizzle, the more authentic the mummy looks.
- These are a great gluten-free option if you use gluten-free crispy rice cereal.
- Kids are proud to eat something they helped decorate.
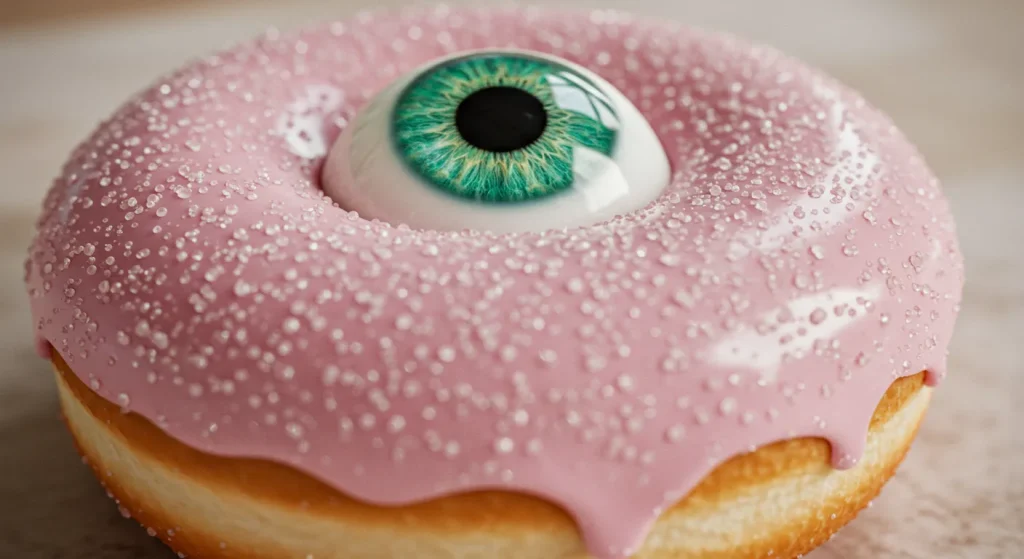
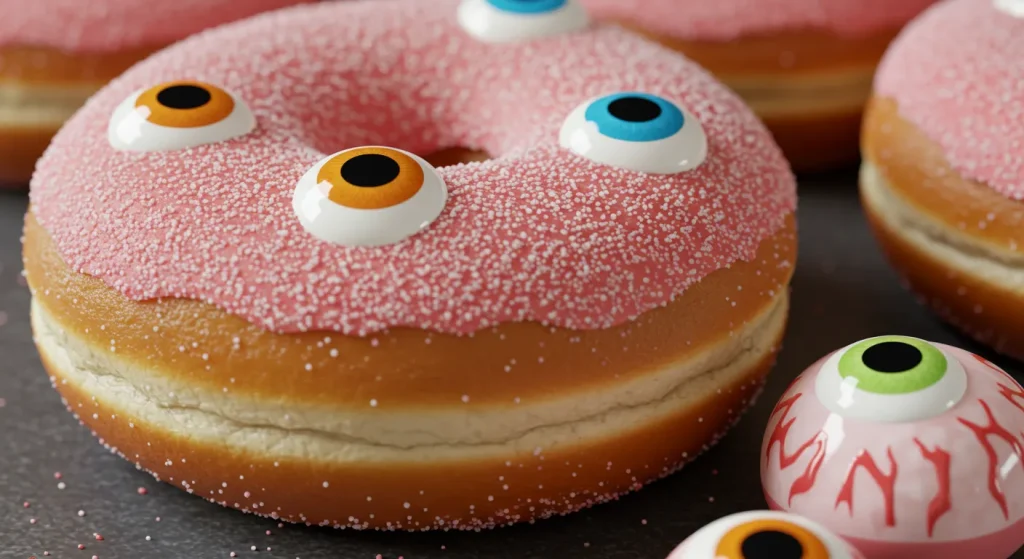
2. Monster Eye Donuts
This is the ultimate low-effort, high-impact treat that turns store-bought donuts into a horde of silly, spooky monsters.
DIY Tips:
- Start with a dozen of your favorite store-bought donuts; plain or glazed work best as a blank canvas.
- Tint some simple store-bought vanilla frosting with green, purple, or orange gel food coloring.
- Let the kids spread the colored frosting on top of the donuts with a small spatula or the back of a spoon.
- Before the frosting sets, let them go wild pressing on a variety of different-sized candy eyeballs.
- Encourage them to use more than two eyes, or just one giant eye, for a more monstrous look.
- This is a perfect, interactive activity for a kids’ Halloween party.
- You can also use different flavored donuts, like chocolate or pumpkin spice.
- Arrange them on a platter to look like a whole family of monsters invading your party.
- Use a tube of red decorating gel for them to draw on silly mouths or bloodshot veins.
- There’s no way to mess these up; the crazier, the better.
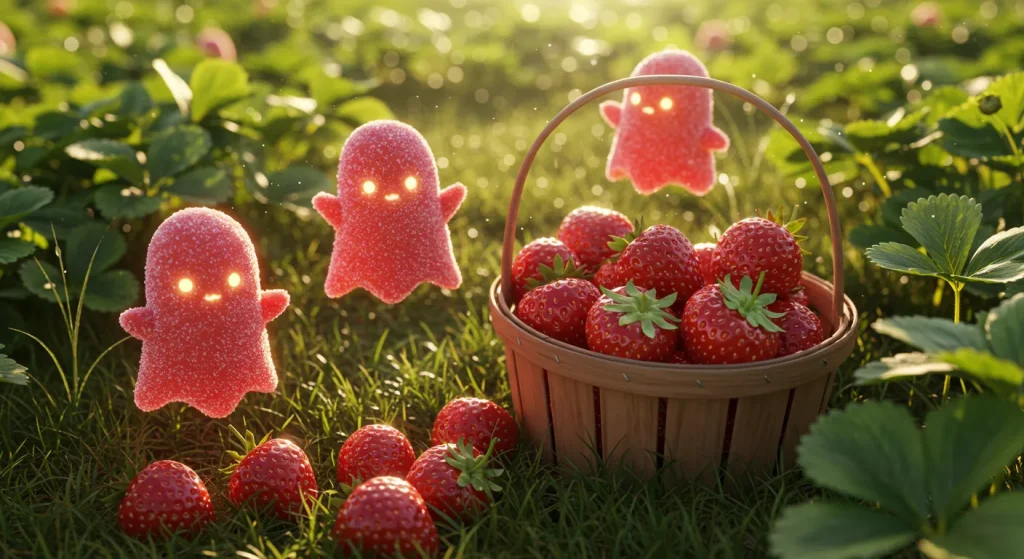
3. Strawberry Ghosts
A simple, slightly healthier, and adorable Halloween treat that is always a huge hit with younger kids.
DIY Tips:
- Wash and thoroughly dry large, fresh strawberries, leaving the green tops on to act as a “handle.”
- Melt white candy melts or white chocolate.
- Let the kids dip each strawberry into the white chocolate, leaving a little red showing near the top.
- Place the dipped strawberries on a piece of wax paper.
- While the chocolate is still wet, let them press on two mini chocolate chips for the eyes.
- You can also use a black decorating gel to pipe on a spooky, open “boo” mouth.
- Let the chocolate set completely before serving.
- These are best made the same day you plan to serve them for the freshest taste.
- The green tops of the strawberries look like little ghost hats or hair.
- This is a great, gluten-free option for a party.
4. Spooky Spiderweb Brownies
A pan of rich, fudgy brownies becomes a spooky masterpiece with a simple, elegant spiderweb design that kids can help create.
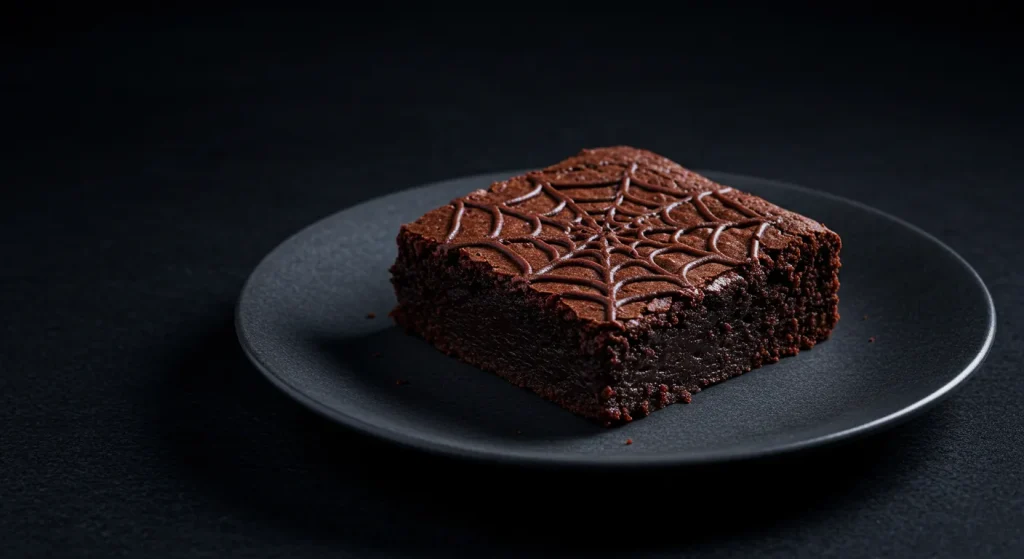
DIY Tips:
- Use your favorite boxed brownie mix as a base to save time.
- For the web, melt white chocolate chips.
- Pipe the melted white chocolate in concentric circles on top of the slightly cooled brownies.
- Let your child drag a toothpick or skewer from the center of the circles to the outer edge to create the classic web effect.
- For an extra creepy touch, let them place a single plastic spider ring on top of the finished web.
- Let the white chocolate set completely before cutting the brownies for the cleanest slices.
- A chocolate brownie base with a white chocolate web offers the best visual contrast.
- This is a great “first piping” project for a budding baker.
- You can also do a reverse web with a blondie base and a dark chocolate web.
- This is a simple way to make a classic dessert feel special and festive.
5. Bat Oreo Truffles
Classic Oreo truffles get a spooky makeover with the addition of some simple, dramatic wings.
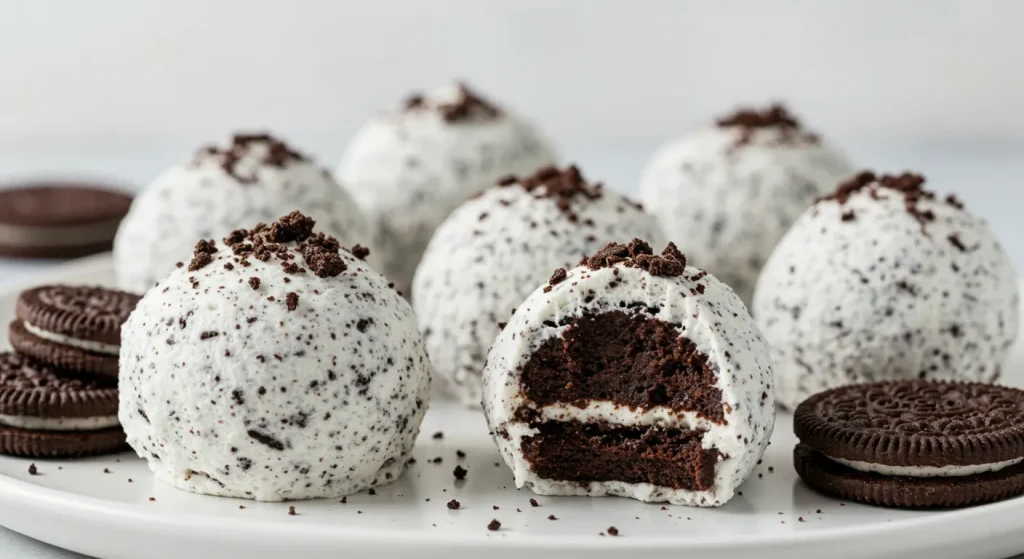
DIY Tips:
- Let the kids help crush the Oreos in a food processor or in a zip-top bag with a rolling pin.
- They can also help roll the Oreo and cream cheese mixture into balls.
- Dip the balls in melted dark chocolate.
- The “wings” are made from a large Oreo cookie, broken in half.
- While the chocolate coating is still wet, let the kids press a broken Oreo half into each side of the truffle.
- Use two small dots of red frosting or sprinkles for the eyes.
- Let them set completely on wax paper.
- These are an easy and impressive-looking no-bake treat.
- You can also use other thin, dark chocolate cookies for the wings.
- Arrange them on a platter to look like they are ready to take flight.
Gross-Out Goodies (That Taste Great)
These treats are designed to look a little gross, but their delicious, kid-friendly flavors will have everyone coming back for more.
6. Jello Worms in “Dirt”
These slimy, jiggly worms look shockingly realistic and are so much fun for kids to eat.

DIY Tips:
- The “dirt” is simply crushed Oreo cookies. Let the kids have fun smashing them in a bag.
- The key to the worms is a bundle of flexible, bendy straws. Have the kids help you stand them up tightly in a tall container.
- Pour a dark-colored Jello mixture (like raspberry or grape) into the straws and let it set.
- To remove the worms, run the straws under warm water for a few seconds and let the kids squeeze them out.
- The ridges of the bendy straws are what give the worms their realistic, segmented look.
- Serve them crawling out of a bowl of the Oreo “dirt.”
- For a grosser effect, you can mix a few drops of green food coloring into the red Jello.
- This is a great make-ahead dessert for a party.
- You can also layer the dirt and worms in clear plastic cups to create “dirt cups.”
- The tactile fun of squeezing out the worms is a huge part of the appeal for kids.
7. Graveyard Pudding Cups
A classic Halloween dessert that is easy to assemble and allows for a lot of creativity from your little ghouls.
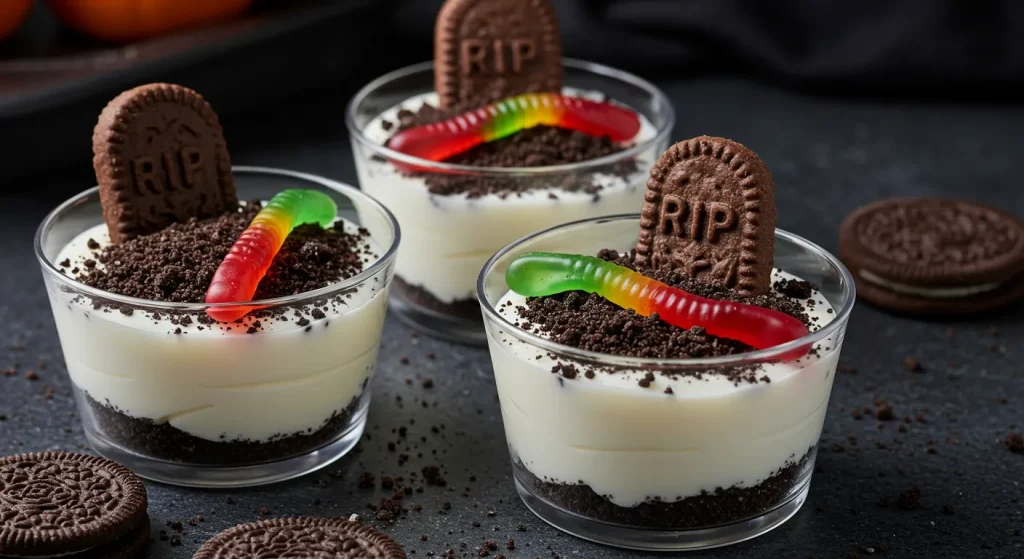
DIY Tips:
- Use clear plastic cups to show off the layers. Start with a layer of instant chocolate pudding.
- Let the kids spoon a generous layer of crushed Oreo cookies on top to look like dirt.
- For the “tombstone,” use an oval-shaped cookie like a Milano or a piece of shortbread.
- Let them use black decorating gel or a food-safe marker to write “RIP” or draw a skull on the cookie tombstone.
- Let them stick the tombstone into the pudding and “dirt” so it is standing up.
- The best part is letting them garnish it with a single gummy worm crawling out of the “grave.”
- You can create a whole “cemetery” by making a large version in a trifle bowl or a 9×13 pan.
- A small sprig of fresh mint can look like a plant growing on the grave.
- Set up a “graveyard decorating station” and let the kids assemble their own cups as a party activity.
- These can be made a few hours ahead of time and kept in the refrigerator.
8. Band-Aid Wafers
A simple, clever, and slightly gruesome treat that takes just a few minutes to assemble and always gets a reaction.
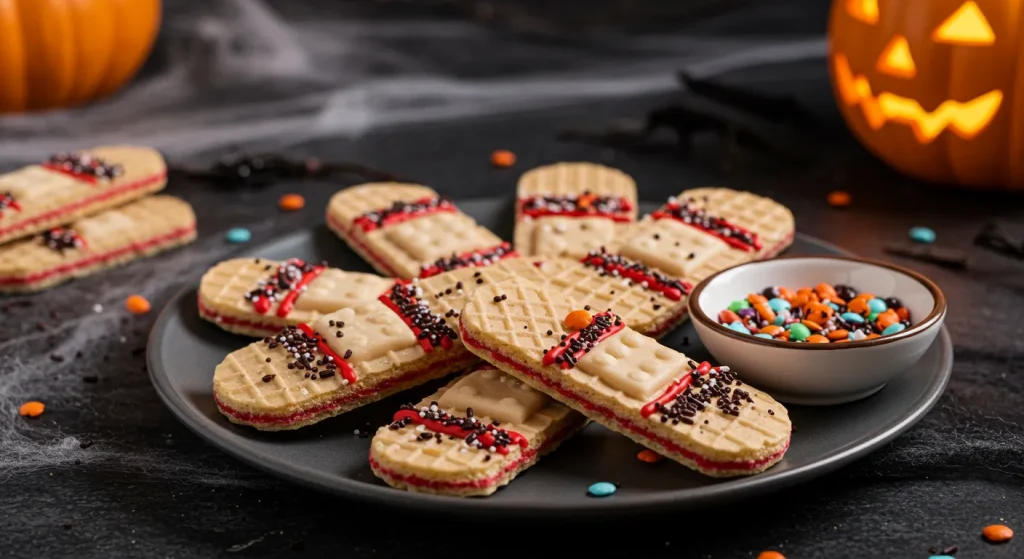
DIY Tips:
- Use rectangular cookies like vanilla wafers or graham crackers as the base “bandage.”
- Let the kids spread a small, white square of vanilla frosting in the center to create the “gauze pad.”
- The final touch is letting them add a single, small dot of red decorating gel in the center of the white square to look like a drop of blood.
- This is a no-bake, assembly-only dessert, making it perfect for a last-minute treat.
- Use a variety of different rectangular cookies for a more interesting platter.
- This is a great, easy treat for kids of all ages to help make.
- Arrange them on a platter as if they have come straight from a first aid kit.
- You only need a tiny amount of the red gel to get the effect.
- Let the frosting set for a few minutes before stacking or serving.
- This is a perfect example of a dessert that is more about the clever idea than complex flavors.
9. Donut Hole Eyeballs
A slightly gruesome, very delicious, and incredibly easy treat that kids can assemble themselves.
DIY Tips:
- Use store-bought powdered or glazed donut holes as the base “eyeball.”
- Place a round, gummy candy, like a Life Saver, in the center of the donut hole for the iris.
- Let the kids place a single chocolate chip or a brown M&M in the center of the gummy candy to create the pupil.
- For a bloodshot effect, let them use a tube of red decorating gel to draw on squiggly veins.
- This is a completely no-bake, no-mess project.
- You can also use different colored gummy rings for different colored eyes.
- Serve them in a bowl with a sign that says “I’m Watching You.”
- This is a perfect, easy treat for a classroom party.
- You can also stick a lollipop stick in them to make “eyeball pops.”
- The sillier and more bloodshot, the better.
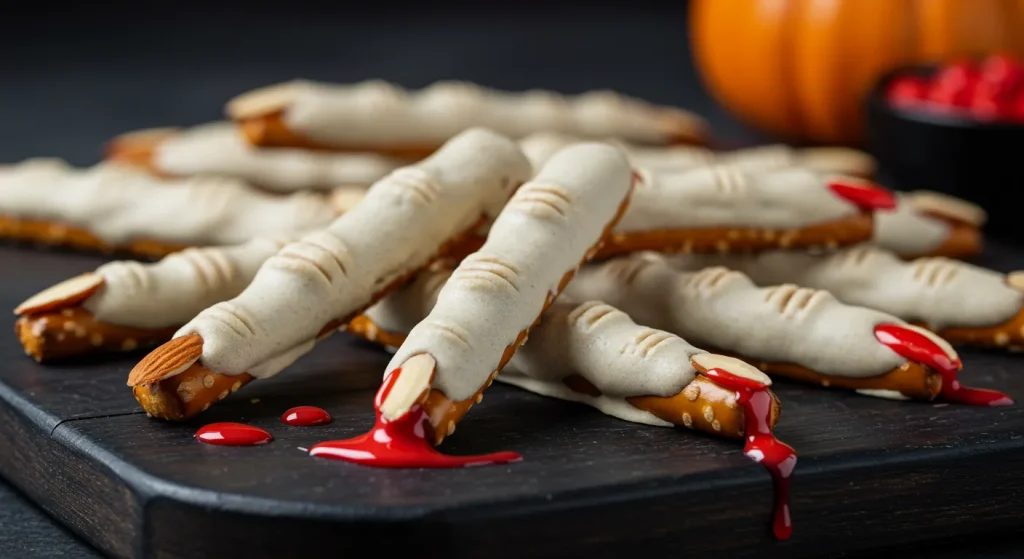
10. Witch Finger Pretzels
A classic Halloween treat that is delightfully creepy and perfectly balances sweet and salty flavors.
DIY Tips:
- Use pretzel rods as the base for the long, knobby fingers.
- Melt green candy melts according to the package directions.
- Let the kids dip the pretzel rods in the melted candy, leaving a small section at the bottom undipped.
- While the candy coating is still wet, let them press a single sliced almond onto the tip to create the witch’s fingernail.
- Let them set completely on a piece of wax paper.
- An adult can use a toothpick to gently create “knuckle” lines in the candy coating before it sets.
- For a gorier look, you can add a little red food coloring at the base of the “fingernail.”
- These can be made a day or two in advance and stored in an airtight container.
- If you can’t find candy melts, you can use white chocolate with a few drops of green gel food coloring.
- Stand them up in a tall glass or jar for a creepy and impressive display.
Frightfully Fun & Festive
These desserts are less about the gore and more about the fun, colorful, and sometimes cute side of Halloween.
11. Candy Corn Jello Cups
A simple and colorful layered dessert that looks just like the iconic Halloween candy.

DIY Tips:
- You will need three flavors of Jello: lemon (yellow), orange (orange), and a white layer.
- For the white layer, you can use pina colada Jello, or unflavored gelatin mixed with sweetened condensed milk.
- Let the kids help you pour the yellow layer into clear plastic cups and let it set completely.
- Once the first layer is firm, let them help you carefully pour the orange layer on top.
- Finish with the white layer and let it set. The key is to make sure each layer is fully set before adding the next.
- This is a great, light, and refreshing dessert.
- Let the kids top it with a dollop of whipped cream and a single piece of candy corn.
- Tilting the cups in a muffin tin while the first layer sets can create a fun, diagonal look.
- This is a fantastic, gluten-free dessert option.
- Make them a day ahead of time to ensure they are fully set and chilled.
12. Jack Skellington Cake Pops
Pay homage to the Pumpkin King with these simple and elegant black and white cake pops.

DIY Tips:
- Use your favorite chocolate or vanilla cake pop recipe, rolled into perfectly round balls.
- Dip the cake pops in melted white candy melts until they are smoothly coated.
- Let the white coating set completely.
- Use a black, fine-tipped, food-safe marker to draw on Jack’s iconic face.
- Let the kids draw on the two large oval eyes and the stitched smile.
- The key to a good-looking Jack is to keep the face simple and clean.
- You can insert the lollipop sticks into a block of styrofoam to let them dry standing up.
- For a fun twist, you can make some of them with an orange coating to look like jack-o-lanterns.
- These are a more sophisticated and less gory option for a Halloween party.
- Make sure the candy melts are not too hot when you dip, or they can melt the cake pop.
13. Melted Witch Brownies
A fun and easy decorating idea that looks like the Wicked Witch has melted right on top of your dessert.

DIY Tips:
- Start with a pan of your favorite brownies.
- Let the kids help you frost the brownies with a green buttercream frosting.
- The “witch’s hat” is a simple chocolate kiss candy placed on top of a round chocolate cookie (like a thin Oreo).
- Let the kids assemble the hats.
- The “broom” is a peanut butter cup with a pretzel stick inserted into it.
- Let them arrange the hat and broom on the green frosting to look like a melted witch puddle.
- This is a very clever and simple decorating idea.
- You can make a larger version on a sheet cake.
- Kids will love the fun, silly story behind this dessert.
- This is a great way to use up leftover Halloween candy.
14. Pumpkin Patch Dirt Cups
A cute, autumnal twist on the classic graveyard dirt cup that is perfect for younger kids.

DIY Tips:
- Layer chocolate pudding and crushed Oreo “dirt” in a clear plastic cup.
- The “pumpkins” are small, pumpkin-shaped mellowcreme candies (like the ones in the autumn mix).
- Let the kids “plant” a few of the candy pumpkins on top of the dirt.
- Use a small piece of a green sour candy strip or a sprig of mint for the pumpkin “vines.”
- This is a less spooky, more harvest-themed version of a dirt cup.
- It is a perfect treat for a classroom Halloween party.
- You can also use pumpkin spice flavored pudding for the base.
- Set up a “pumpkin patch decorating station” and let the kids assemble their own cups.
- These are incredibly easy to make and can be prepared ahead of time.
- A single gummy worm can be added for a fun, surprising touch.
15. Frankenstein Rice Krispie Treats
Classic Rice Krispie treats are transformed into the iconic monster with a little bit of green candy and some simple decorations.

DIY Tips:
- Make a batch of Rice Krispie treats. Let the kids add a few drops of green food coloring to the melted marshmallow.
- Alternatively, you can dip the set treats in melted green candy melts.
- Let the kids press on candy eyeballs for the eyes.
- Use melted dark chocolate in a piping bag for them to create the stitched mouth and the hair.
- The “bolts” on the neck can be made from a Junior Mint cut in half and stuck to the sides.
- These are a fun and colorful treat that is not too spooky.
- Let the chocolate set completely before serving.
- This is a great, easy project for kids to help decorate.
- For an easier version, simply mix green food coloring into the marshmallow before adding the cereal.
- You can make them in a pan and cut them into squares, or form them into individual monster heads.
Easy No-Bake Wonders
These desserts require no oven time at all, making them perfect for quick assembly and for getting kids involved without the worry of hot surfaces.
16. Spiderweb Chocolate Bark
A simple, colorful, and no-bake chocolate bark that is perfect for a Halloween party.

DIY Tips:
- Melt dark or semi-sweet chocolate chips and spread the mixture onto a parchment-lined baking sheet.
- Melt white chocolate chips and pipe them in circles on top of the dark chocolate.
- Let the kids drag a toothpick through the circles to create a web design.
- Sprinkle generously with Halloween-themed sprinkles before it sets.
- Let the bark set completely in the refrigerator before breaking it into irregular pieces.
- This is a very easy and visually appealing treat.
- You can also add other candies, like Reese’s Pieces, for more color.
- This is a great gluten-free dessert option.
- Store it in an airtight container in the fridge.
- This is a perfect, easy treat to make with kids.
17. Caramel Apple Nachos
A fun and shareable dessert that is a deconstructed caramel apple, making it much easier for little kids to eat.

DIY Tips:
- Slice a tart, crisp apple into thin rounds and arrange them on a plate.
- Drizzle the apple slices with melted caramel and chocolate sauces.
- Let the kids go wild sprinkling them with mini chocolate chips, toffee bits, or chopped nuts.
- You can also add mini marshmallows or Halloween sprinkles.
- This is a fun and interactive dessert that comes together in minutes.
- It is a slightly healthier dessert option.
- Serve it with forks for easy eating.
- This is a perfect, easy dessert for a fall party.
- A little bit of lemon juice on the apples will prevent them from browning.
- This is a great way to use up leftover apples and Halloween candy.
18. Witch’s Hat Cookies
A classic and incredibly simple cookie that requires no baking and just three ingredients.

DIY Tips:
- The base is a round, flat, chocolate-covered cookie, like a Fudge Stripe cookie placed upside down.
- Use a dab of colored frosting to “glue” a Hershey’s Kiss to the center of the cookie.
- Let the kids use a tube of colored icing to pipe a small buckle or a ribbon around the base of the Kiss.
- This is a perfect, easy treat for a classroom party.
- You can make a whole platter of these in just a few minutes.
- They are a fun and recognizable treat.
- You can use different colored frosting for the ribbon.
- This is a great way to use up a lot of Hershey’s Kisses.
- Let them set for a few minutes before serving.
- This is a classic for a reason.
19. Halloween Popcorn Balls
A classic, old-fashioned treat that is perfect for a party and easy to customize.

DIY Tips:
- Make a simple popcorn ball syrup with corn syrup and sugar.
- Let the kids help you mix in Halloween-themed sprinkles, candy corn, and mini M&M’s.
- Grease your hands with butter before forming the mixture into balls. This is a crucial step to prevent sticking.
- Let them cool completely on wax paper.
- You can wrap them individually in cellophane and tie with a ribbon for a great party favor.
- This is a fantastic gluten-free treat.
- You can also add a few drops of orange food coloring to the syrup for a festive color.
- Work quickly, as the mixture will become harder to shape as it cools.
- This is a fun, nostalgic treat that is always a hit.
- A little bit of salt in the popcorn helps to balance the sweetness.
20. Ghostly Pizza
Turn a regular dessert pizza into a Halloween celebration with this simple trick.

DIY Tips:
- Use a large, round sugar cookie as the pizza “crust.”
- The “sauce” can be a layer of chocolate-hazelnut spread, peanut butter, or cream cheese frosting.
- The “ghosts” are made by piping whipped cream or white frosting in a ghostly shape.
- Let the kids use mini chocolate chips for the ghost eyes.
- You can also add other “toppings” like Halloween sprinkles or candy corn.
- This is a fun and interactive dessert pizza that kids will love.
- It is a great way to use up a lot of different candies.
- You can also make individual “pizzas” on smaller cookies.
- A drizzle of caramel or chocolate sauce over the top is a great finishing touch.
- This is a fun and easy way to make a themed dessert.
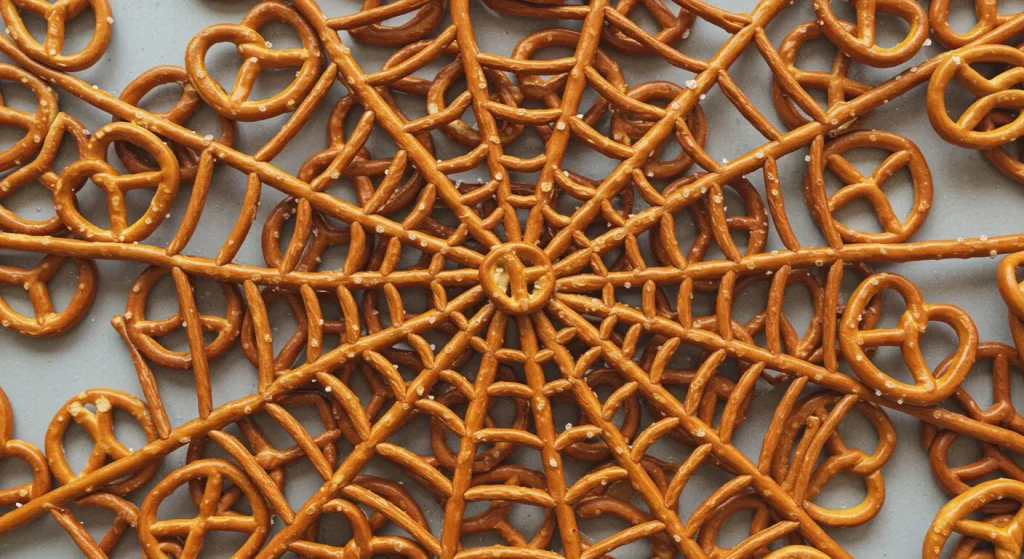
21. Pretzel Spider Webs
A simple, no-bake, sweet and salty treat that looks intricate but is very easy to make.
DIY Tips:
- Arrange three straight pretzel sticks on a piece of wax paper in a star or asterisk shape.
- Place a dollop of melted white chocolate in the center to hold them together.
- Let the kids pipe more melted white chocolate in a circular motion to create the web shape.
- Let them place a single chocolate candy or a plastic spider in the center before it sets.
- These are a fun and easy treat to make with kids.
- They are a great gluten-free option if you use gluten-free pretzels.
- Let them set completely in the refrigerator.
- These are a great, easy addition to a Halloween dessert board.
- You can also use dark or milk chocolate for a different look.
- A sprinkle of festive sprinkles on top is a great finishing touch.
22. Monster Mouths
A healthy-ish, fun, and easy snack that looks like a silly monster mouth.

DIY Tips:
- Slice a green apple into wedges.
- Spread a layer of peanut butter or cream cheese on one side of two apple wedges.
- Let the kids stick a row of mini marshmallows onto the peanut butter on one of the apple slices to look like teeth.
- Place the other apple slice on top to create the “mouth.”
- For the tongue, you can stick a sliced strawberry or a piece of a fruit roll-up out of the side.
- This is a great, healthy option for a classroom party.
- It is a fun and easy way to get kids to eat fruit.
- You can also use other spreads, like sunflower seed butter, for a nut-free option.
- These are best assembled right before serving to keep the apples fresh.
- The sillier the teeth, the better.
23. Banana Ghosts
Another simple and healthy treat that is perfect for little kids.

DIY Tips:
- Peel a banana and cut it in half crosswise.
- Stand the banana halves up on their cut end.
- Let the kids use two mini chocolate chips for the eyes and a single regular-sized chocolate chip for the open, spooky mouth.
- Gently press the chocolate chips into the banana.
- This is a great, gluten-free and dairy-free option (if you use dairy-free chocolate chips).
- For a more decadent version, you can dip the bananas in melted white chocolate first.
- These are best made right before serving.
- A little bit of lemon juice on the banana can help prevent browning.
- This is a perfect, easy treat for a toddler Halloween party.
- They are a fun and easy way to make a simple fruit feel special.
24. Clementine Pumpkins
The easiest and healthiest “pumpkin” you will ever make.

DIY Tips:
- Simply peel a clementine orange, being careful to keep it whole.
- The “stem” is a small, thin piece of a green vegetable, like celery, a green bean, or a cucumber.
- Let the kids carefully stick the green “stem” into the hole at the top of the clementine.
- This is a perfect, healthy snack for a classroom party.
- It is a great way to get kids to eat fruit.
- You can arrange a whole “pumpkin patch” of these on a platter.
- This is a completely no-cook, no-mess project.
- It is a fun and easy way to make a simple fruit feel festive.
- You can also use a small piece of a green sour candy strip for the stem.
- This is a classic for a reason.
25. Candy Filled Witch’s Brooms
A fun and easy party favor that doubles as a cute decoration.

DIY Tips:
- You will need two paper lunch bags for each broom.
- Let the kids fill one of the bags with popcorn, candy, or other small treats.
- Cut the second paper bag into long, thin strips, leaving the bottom intact.
- Slide the first bag (the one with the treats) inside the second, shredded bag.
- The “broomstick” is a straight pretzel rod or a stick from your yard.
- Gather the top of the bags around the stick and tie it tightly with a piece of twine or a festive ribbon.
- This is a fun and easy way to give out party favors.
- It is a great craft for kids to help assemble.
- You can also use them as place settings at a dinner table.
- This is a very cheap and easy way to make a big impact.
Conclusion
This Halloween, let your dessert table be a showcase of fun, creativity, and kid-approved deliciousness. These 35 ideas prove that you do not need to be a professional pastry chef to create treats that are both visually exciting and incredibly tasty. The most important ingredient for any of these recipes is a sense of fun and a willingness to get a little spooky (and maybe a little messy). So gather your little monsters, pick your favorite treat, and get ready to create some boo-tiful memories in the kitchen.