Table of Contents
- Optimizing Floor Plans for 12, 14, and 16-Foot Widths
- Zoned Furniture Placement to Avoid the Bowling Alley Effect
- Transitioning to Open Concept by Removing Partition Walls
- Brightening Interiors by Painting Over Dark Wood Paneling
- Applying Modern Farmhouse Aesthetics for a Rustic Feel
- Redefining the Narrow Narrative
- Architectural Answers for Mobile Spaces
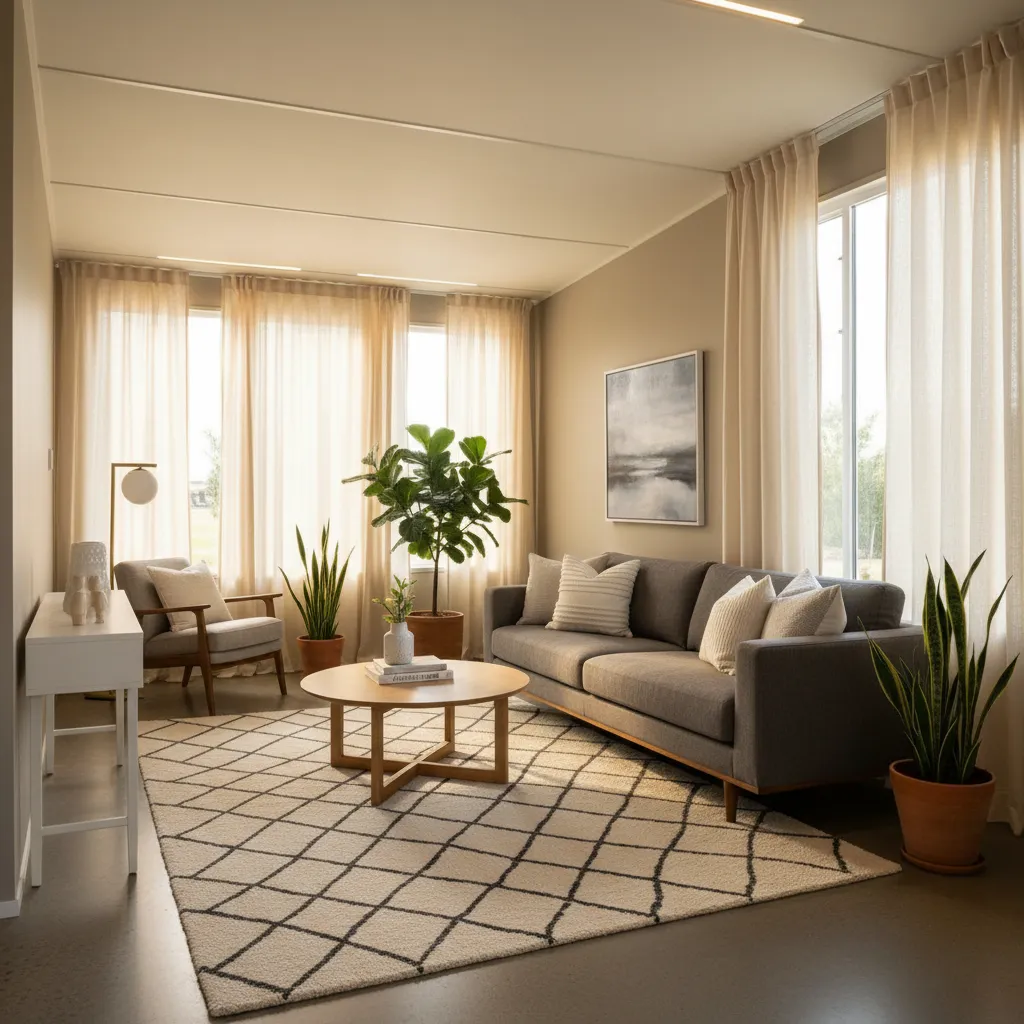
Maximizing the potential of a single wide trailer requires a sophisticated understanding of spatial dynamics and structural layout. Professional architects and seasoned developers recognize that even narrow floor plans offer substantial opportunities for innovation. By focusing on the foundational elements of interior design, one can transform a compact living area into a refined environment that balances utility with high-end aesthetics.
Practical considerations such as the selection of premium flooring materials and integrated storage solutions are essential for modern living. A master craftsman understands that the choice between hardwood and luxury laminate affects both the durability and the visual warmth of the room. These technical decisions serve as the backdrop for comprehensive office setups or inviting residential spaces, ensuring that every square foot serves a distinct purpose.
The final layer of a successful renovation involves the artful application of decor and bespoke DIY projects. Makers and homeowners alike can elevate their interiors through carefully curated color palettes and handmade accents that reflect personal style. This holistic approach ensures that your living room remains both functional and inspiring, whether it functions as a professional workspace or a comfortable sanctuary for relaxation.
Optimizing Floor Plans for Foot Widths
Understanding the spatial dynamics of your specific unit is the first step in any successful renovation. The difference of just two feet in width dramatically alters your layout possibilities.
A twelve-foot wide room requires linear thinking, while a sixteen-foot span allows for open-concept zones. You must prioritize traffic flow to prevent the space from feeling like a hallway.
In small space design, every inch is a negotiation between comfort and clearance. Let the flow dictate the furniture.
Lighting plays a massive role here as well. Proper ambient lighting can visually push the walls outward, making narrow rooms feel significantly more expansive.
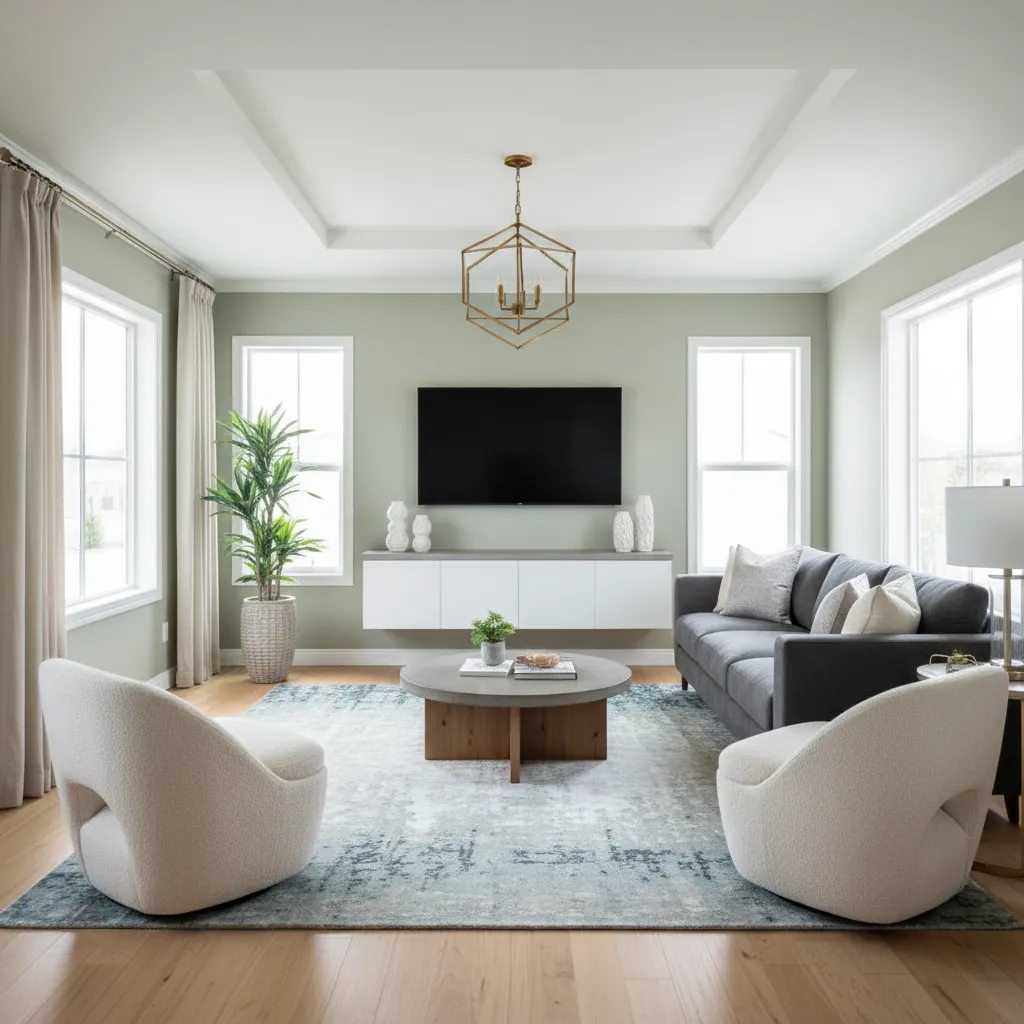
Mastering the 12-Foot Width
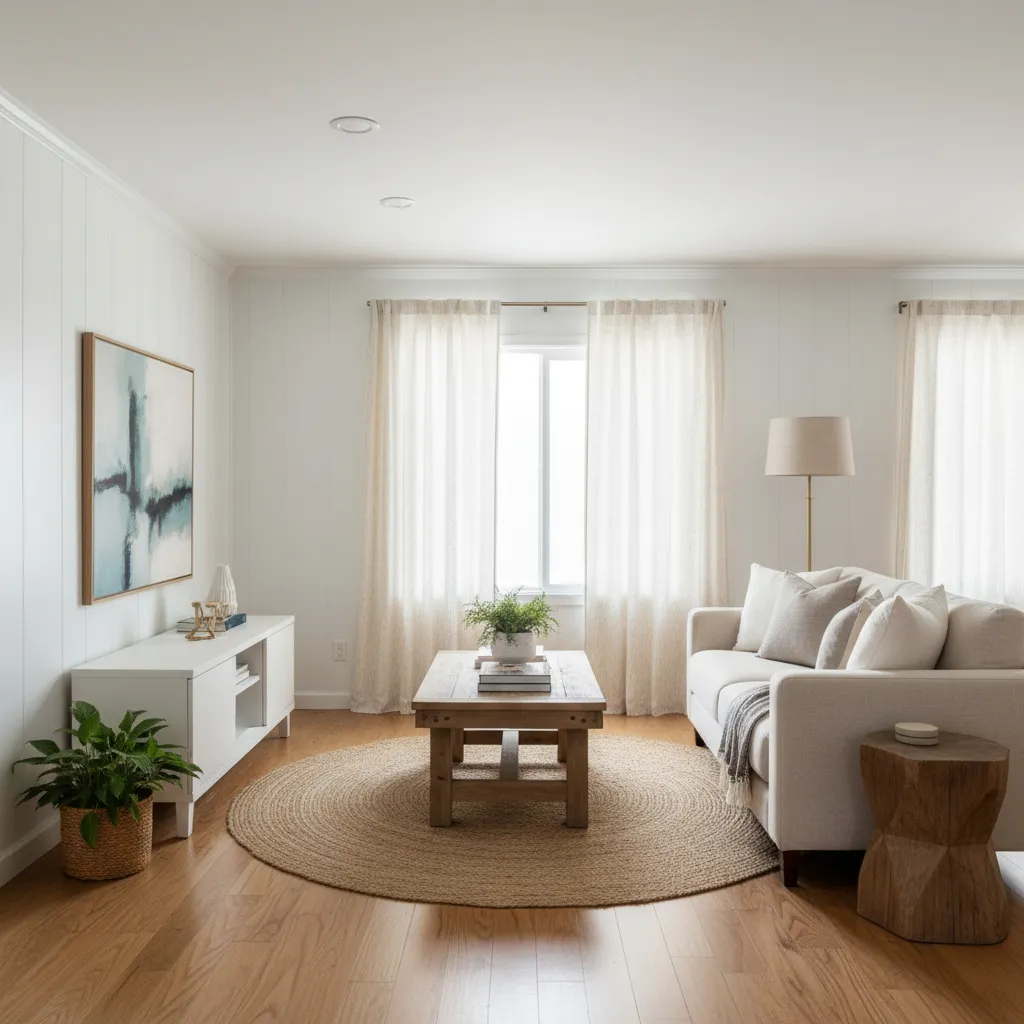
The twelve-foot width is the most challenging footprint. It often creates a “bowling alley” effect if furniture lines both walls. You must avoid this tunnel vision.
Focus on anchoring the room with a rug that does not touch the baseboards. This trick exposes the flooring edges, which visually stretches the floor plan width.
Choose streamlined furniture with exposed legs. Seeing the floor beneath the sofa maintains a sense of openness and reduces visual weight in the tight quarters.
For decor, rely on Scandinavian living room layouts that emphasize minimalism. This style naturally complements the restricted footprint by reducing clutter.
The Versatile 14-Foot Standard
Fourteen feet is the standard width for many modern single wides. This size offers enough depth to pull chairs slightly away from the wall, creating a cozier conversation circle.
You can introduce a small coffee table here without destroying the traffic flow. Round tables are superior as they lack sharp corners that catch shins in high-traffic zones.
Zoning becomes possible in this footprint. You might place a slim console table behind a sofa to separate the entryway from the main lounging area.
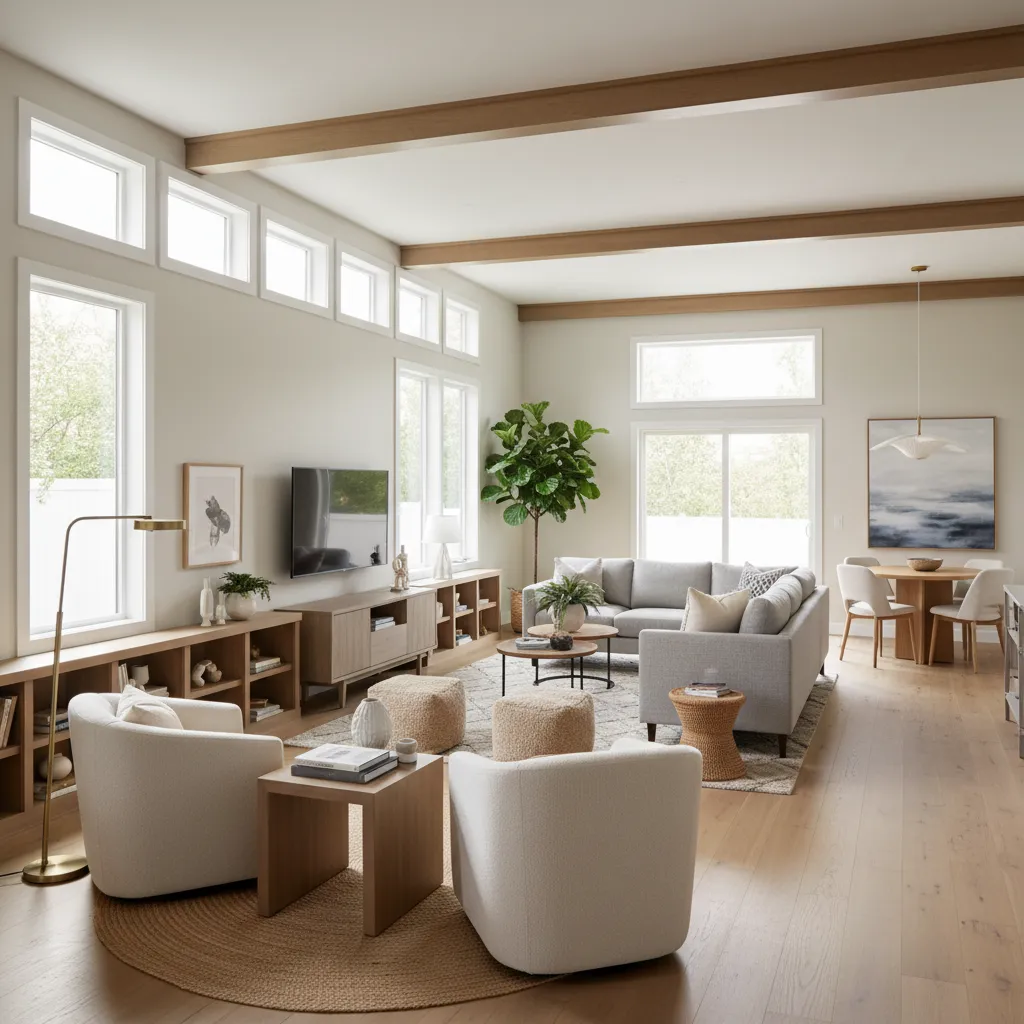
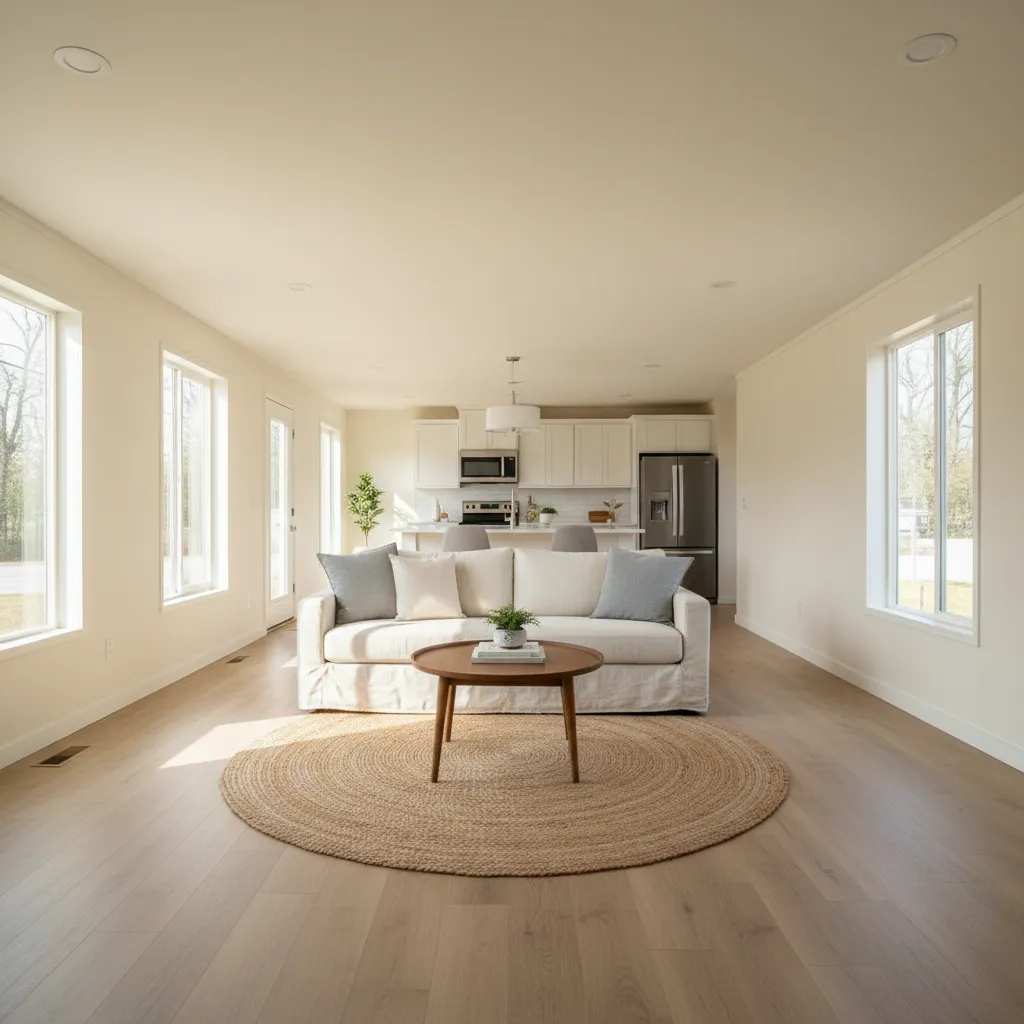
Luxury Living at 16 Feet
A sixteen-foot width feels luxurious in a trailer setting. This dimension allows you to “float” your furniture in the center of the room rather than hugging the perimeter.
Floating your seating arrangement creates a dedicated walkway behind the sofa. This preserves the main seating area as a static destination rather than a thoroughfare.
When selecting textiles, ensure you understand the proper rug size for a sectional sofa to ground these larger floating arrangements effectively.
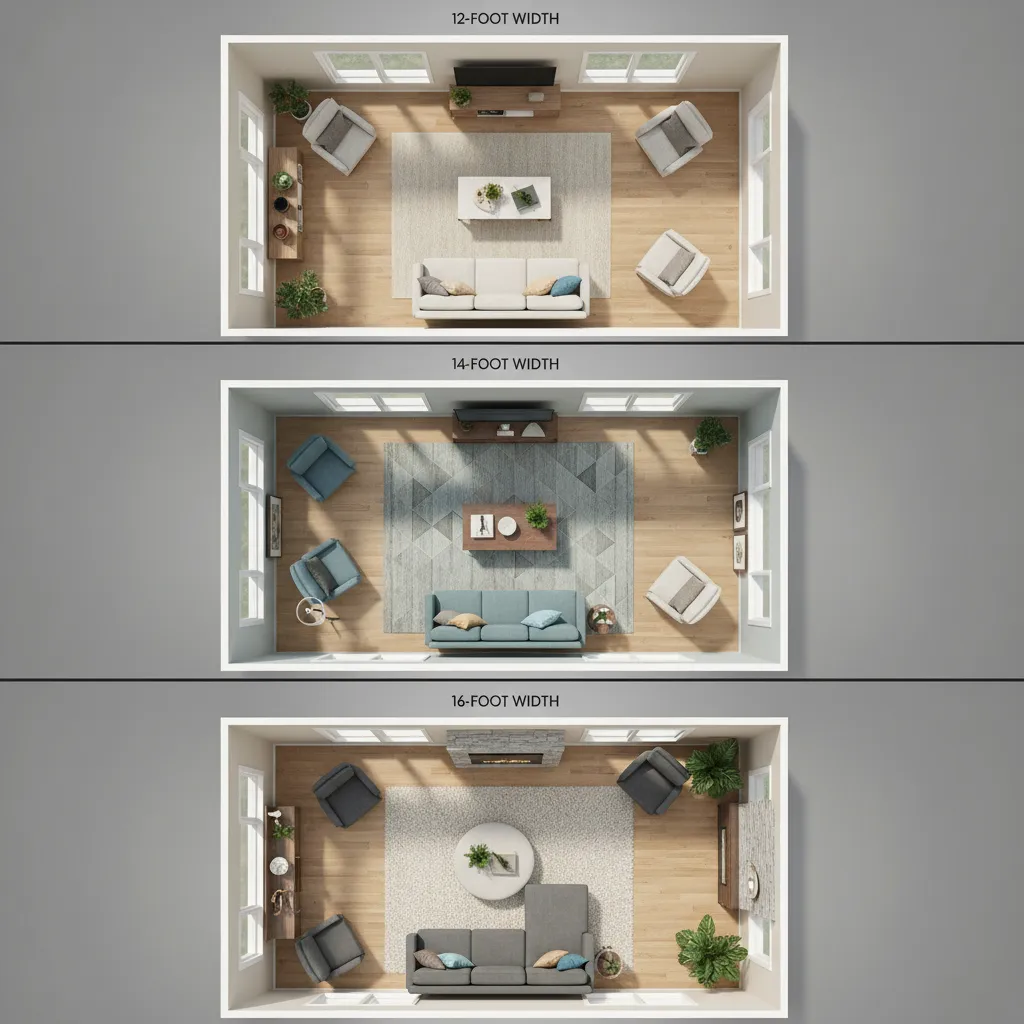
Width Capability Comparison
Choosing the right layout strategy depends entirely on these dimensions. The table below outlines realistic expectations for furniture placement across the three standard widths.
| Feature | 12-Foot Wide | 14-Foot Wide | 16-Foot Wide |
|---|---|---|---|
| Sofa Placement | Strictly against the wall | Against wall or slight angle | Can float in center |
| Coffee Table | Narrow oval or side tables | Round or small rectangular | Full-size square or rectangle |
| Traffic Flow | Straight line through room | Off-center pathway | Perimeter walkway behind seating |
| Focal Point | TV wall or window | TV unit or accent wall | Central fireplace or seating group |
| Zone Potential | Single zone only | Two distinct zones | Multi-zone (Living + Office) |
In a long, narrow living room, resist the urge to push all furniture against the walls. Even pulling a chair out just a few inches creates a shadow line that suggests more space.
Maxwell Ryan, Apartment Therapy
Regardless of width, verticality is your friend. High-mounted curtains and tall bookcases draw the eye upward, distracting from the proximity of the opposing walls.
Always prioritize durability in your flooring choices. In narrow rooms, foot traffic is concentrated in specific paths, wearing down materials faster than in square rooms.
Designer Layout Hacks
- Combat the ‘bowling alley’ effect in 12-foot rooms by selecting furniture with exposed legs; seeing the floor underneath creates a sense of openness.
- In 16-foot wide spaces, float your sofa in the center of the room to create a perimeter walkway, keeping foot traffic away from the main conversation zone.
- Create the illusion of depth by pulling furniture just a few inches off the wall to generate shadow lines, rather than pushing pieces flush against the baseboards.
Zoned Furniture Placement to Avoid the Bowling Alley Effect
The most common design challenge in a single-wide is the linear floor plan. A long, unbroken space can easily feel like a corridor rather than a home.
To fix this, you must break the visual “tunnel” effect. Creating distinct functional zones stops the eye from shooting straight to the back wall.
Design is not just about where you place the furniture, but how you direct the flow of life through the room.
Floating Furniture Arrangements
Pushing every piece of furniture against the walls creates a vast, empty middle. This emphasizes the narrow width and limits conversation.
Pull your sofa away from the wall to create a floating lounge area. This layout establishes a dedicated walkway behind the seating area.
This improves traffic flow significantly. People can walk through the house without cutting directly through your movie night or conversation.
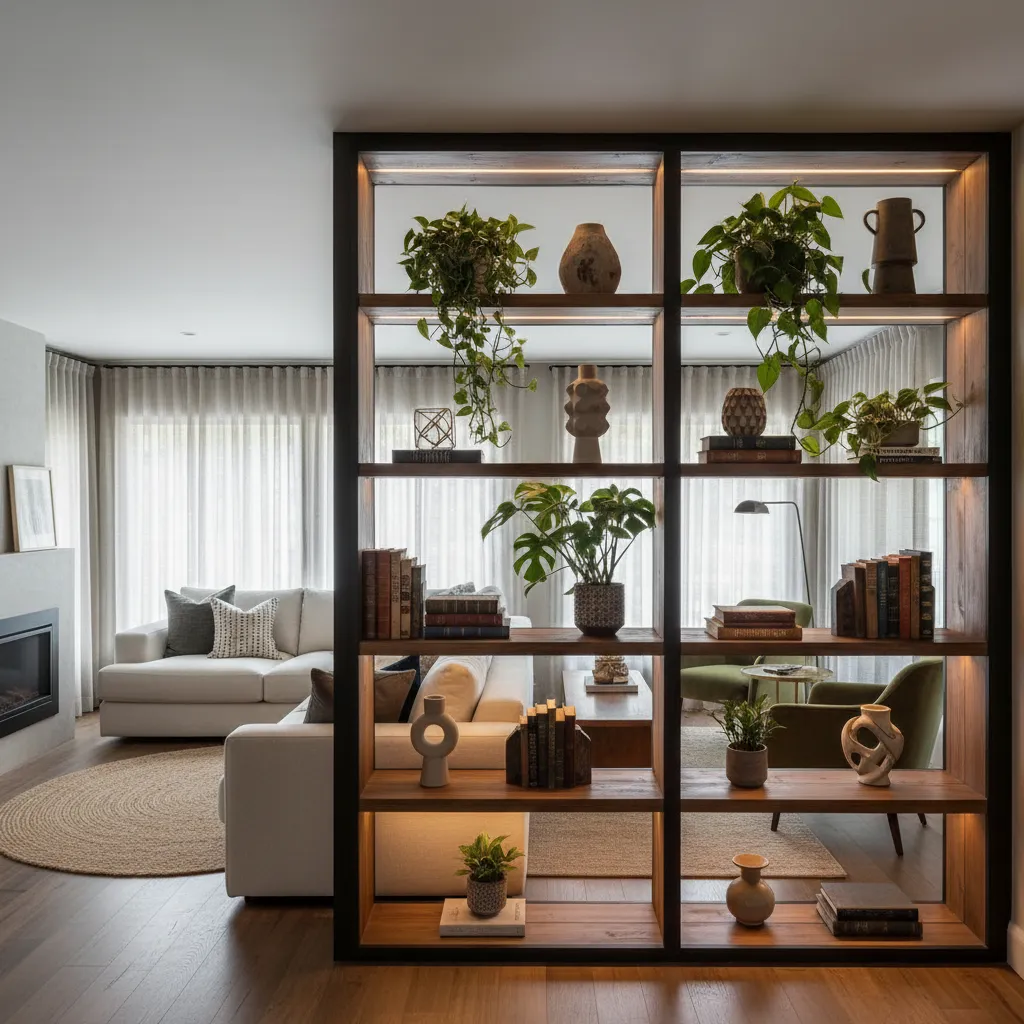
Anchoring Zones with Rugs
Visual boundaries are essential when you lack physical walls. Large area rugs act as islands that anchor your floating furniture.
Choose a rug that extends beyond the front legs of your sofa. This unifies the seating group and visually separates it from the kitchen or dining space.
Understanding the proper rug size for a sectional sofa is critical here. A rug that is too small will make the zone feel cluttered and disconnected.
In a long, narrow living room, create groupings of furniture. This will help to break up the space and make it feel more intimate.
The Spruce, Narrow Living Room Design Ideas
Vertical Breaks and Focal Points
Interrupting the horizontal line of sight is vital for creating a cozy atmosphere. Use vertical elements to stop the eye from traveling too far.
A tall bookshelf or a hanging plant can serve as a soft visual barrier. This adds height and complexity to the spatial dynamics of the room.
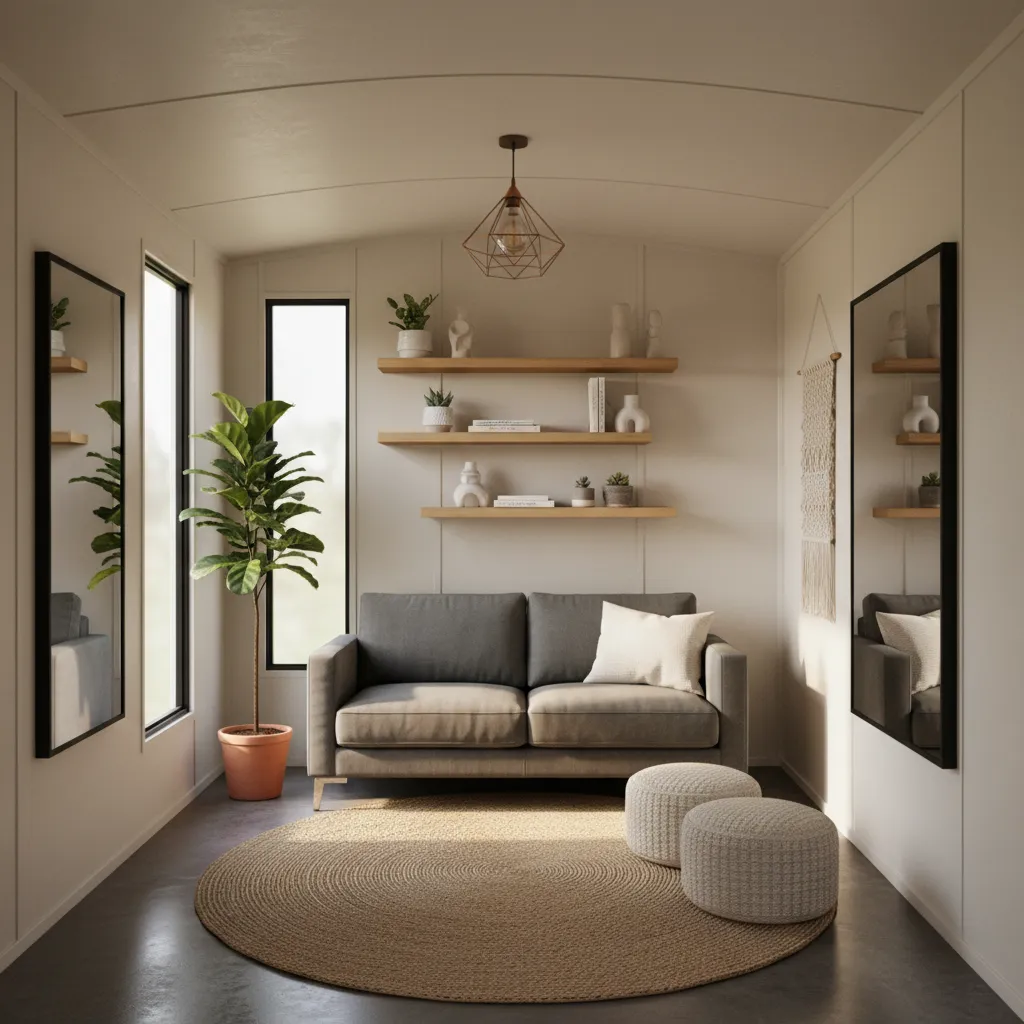
You might consider integrating cozy home library ideas into one corner. A vertical reading nook instantly creates a secondary zone away from the TV.
Checklist: The Anti-Tunnel Vision Layout
Use this checklist to ensure your furniture arrangement combats the narrow trailer feel.
- Float the Sofa: Leave at least 30 inches of walking space behind the main seating area.
- Perpendicular Placement: Position smaller chairs or loveseats perpendicular to the length of the trailer to stop the eye.
- Distinct Lighting: Give each zone its own light source, such as a floor lamp for reading or a pendant over the coffee table.
- Texture Contrast: Use different textures, like velvet pillows or raw wood tables, to add depth to the visual field.
- Console Tables: Place a slim console table behind the floating sofa to act as a definitive border between rooms.
The Layout Lowdown
- Style the back of your floating sofa with a slim console table; it hides unfinished upholstery and creates a functional border between your walkway and the lounge.
- Use painter’s tape to map out your traffic lanes before moving heavy pieces; aim for a 30 to 36-inch clearance path to keep the flow comfortable.
- Position accent chairs perpendicular to the length of the home to physically interrupt the long sightline and force the eye to pause.
Transitioning to Open Concept by Removing Partition Walls
The standard layout of many older mobile homes often feels compartmentalized and dark. This is usually due to unnecessary partition walls that block natural light.
Removing these barriers is the most impactful way to modernize the interior. It instantly creates a sense of spaciousness that defies the actual square footage.
An open plan allows for better traffic flow between the kitchen and the seating area. It also lets sunlight penetrate deeper into the home, highlighting your decor choices.
Removing walls isn’t just about adding space; it is about letting the light tell a completely new story in your home.
Assessing Structural Integrity
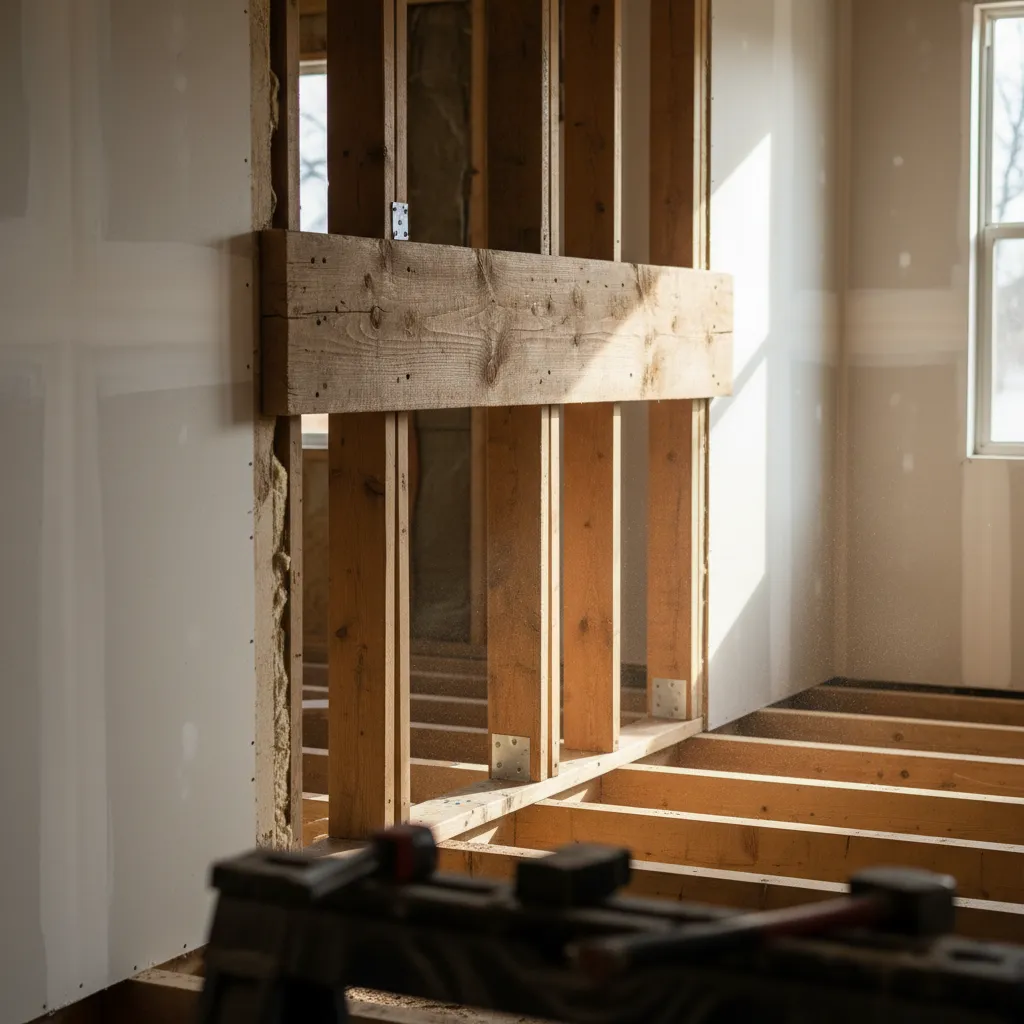
Before you swing a sledgehammer, you must determine if a wall is load-bearing. In mobile homes, interior walls often support the roof structure or stabilize the chassis.
Consulting a structural engineer or a mobile home renovation specialist is essential. Removing a vital support without adding a beam can cause the roof to sag over time.
You also need to locate electrical wiring and plumbing vents hidden inside the walls. rerouting these utilities requires careful planning and a bit of budget allocation.
In a small space, you want your eye to travel as far as possible without interruption. Open sightlines make a room feel expansive and reduce visual clutter.
Maxwell Ryan, Apartment Therapy
Creating Visual Continuity
Once the physical barriers are gone, you must address the floor gap. The area where the wall stood will leave a strip of unfinished subfloor that needs attention.
Installing continuous flooring is the best way to unify the new open space. Luxury vinyl planking is a top choice for its durability and ability to mimic real hardwood.
If replacing all flooring isn’t an option, consider a threshold transition strip. However, keep in mind that a single flooring material expands the visual perception of the room.
For inspiration on arranging furniture in your new open footprint, look at Scandinavian living room layouts that prioritize minimalism. This style works exceptionally well in long, narrow spaces.
Defining Zones Without Walls
With the walls gone, you risk the space feeling like a bowling alley. You must use visual cues to designate specific functions for the living, dining, and kitchen areas.
Area rugs are your most powerful tool for zoning. A large, textured wool rug can ground the seating area, separating it visually from the hard surface of the kitchen.
Lighting also plays a crucial role in defining these invisible boundaries. Install a statement pendant light over the dining table to create a focal point distinct from the lounge.
Finally, use the back of a sofa or a low console table as a soft divider. This maintains the open sightlines while clearly marking where the relaxation zone begins.
Pre-Demolition Safety Checklist
Ensure you have covered these critical steps before beginning any wall removal project. Safety and preparation are key to a successful renovation.
| Step | Action Required | Why It Matters |
|---|---|---|
| 1. Verify Blueprint | Check original floor plans or consult a pro. | Identifies load-bearing walls and marriage lines. |
| 2. Utility Scan | Locate electrical wires and plumbing vents. | Prevents dangerous shocks and water damage. |
| 3. Permit Check | Contact your local building department. | Ensures your renovation meets local safety codes. |
| 4. Debris Plan | Rent a dumpster or plan haul-away trips. | Keeps the workspace clean and prevents accidents. |
| 5. Support Strategy | Purchase lumber for headers or support beams. | Maintains the structural integrity of the roof. |
Successfully opening up your floor plan requires patience and precision. The result is a home that feels significantly larger and more inviting for guests.
Once the dust settles, you can focus on adding cozy room decor tips to soften the modern edges. Textiles and warm lighting will make the new layout feel like home.
Open Concept Cheat Sheet
- Turn the floor gap into a feature: If replacing all flooring isn’t in the budget, install a decorative tile strip or contrasting wood threshold where the wall stood to make the transition look intentional.
- Watch the ‘Marriage Line’: In double-wide mobile homes, the center seam almost always contains load-bearing support. Avoid removing walls along this line without installing a significant structural beam.
- Use ‘soft’ dividers: instead of building new walls, place open-backed shelving units between zones. This provides storage and visual separation without blocking the natural light flow.
Brightening Interiors by Painting Over Dark Wood Paneling
Dark wood paneling is a hallmark of older mobile homes, but it often makes a narrow space feel enclosed. It absorbs available light, creating a tunnel effect.
Painting over this paneling is the single most effective way to alter the spatial dynamics of a single-wide. It reflects light and visually pushes the walls outward.
This renovation does not require removing the walls, which preserves the structural integrity of the trailer. It is a surface-level update with structural impact.
Light is the brush that paints the true size of a room; let your walls reflect it, not absorb it.
Luminous Living Hack
- Apply a high-quality shellac-based primer first to prevent the dark wood tannins from bleeding through your fresh coat of paint.
- For a seamless look that mimics modern drywall, fill the vertical paneling grooves with paintable caulk or joint compound before you start painting.
- Choose a satin or eggshell finish rather than flat paint to improve light reflectivity while still hiding minor surface imperfections in the paneling.
Preparation and Priming Basics

The slick varnish found on vintage trailer paneling is designed to repel dirt, which means it also repels paint. Proper adhesion is critical here.
You must clean the walls thoroughly with a degreaser like TSP (Trisodium Phosphate) before starting. This removes decades of oils and dust.
After cleaning, a light sanding is mandatory. You do not need to strip the wood bare, but you must scuff the surface to create a mechanical bond.
Many renovators look to Scandinavian modern houses for inspiration, where white-washed wood adds texture without darkness.
The Essential Painting Workflow
Follow this strict order of operations to ensure a finish that withstands the flex and movement typical of mobile homes.
- Degrease: Wash walls with TSP and warm water to remove residue.
- Scuff Sand: Use 150-grit sandpaper to dull the sheen of the original varnish.
- Caulk (Optional): Fill gaps at the trim or corners, but leave vertical grooves open for character.
- Prime: Apply a high-adhesion, oil-based or shellac-based primer to block tannin bleed-through.
- Paint: Finish with two coats of high-quality acrylic latex paint in a Satin or Eggshell finish.
For the best results, use a stain-blocking primer. Wood paneling often has tannins that will bleed through regular latex primer, turning your white walls yellow over time.
The Spruce Editors, How to Paint Wood Paneling
The Prep Playbook
- Test your primer on a small hidden patch first and let it cure for 24 hours to ensure perfect adhesion before committing to the whole trailer.
- Use a tack cloth or slightly damp microfiber rag after sanding to remove every microscopic dust particle which prevents a grainy finish.
- Always wear a respirator and run fans when using shellac or oil-based primers as these are essential for blocking tannins but produce very strong fumes.
Choosing the Right Finish and Texture
The finish you choose affects both the look and durability. Flat paint hides imperfections but is difficult to clean in high-traffic zones.
A satin finish is often the best compromise for single-wide living rooms. It reflects light gently, enhancing the sense of space, and is wipeable.
Many homeowners debate filling the vertical grooves. In a mobile home, filling grooves with drywall mud is risky because the structure shifts during transport or settling.
Leaving the grooves intact mimics the look of beadboard or shiplap, which aligns well with cozy room decor tips regarding texture.
If you prefer a seamless look, use a flexible elastomeric caulk rather than rigid filler to prevent future cracking along the seams.
Pro Finish Secrets
- Opt for a satin finish to bounce natural light around small rooms while maintaining a surface that’s easy to wipe clean.
- Embrace existing wall grooves as a built-in shiplap feature rather than filling them, which prevents structural cracks later.
- Always use a flexible, paintable caulk for seams to accommodate the natural shifting of a mobile home structure.
Applying Modern Farmhouse Aesthetics for a Rustic Feel
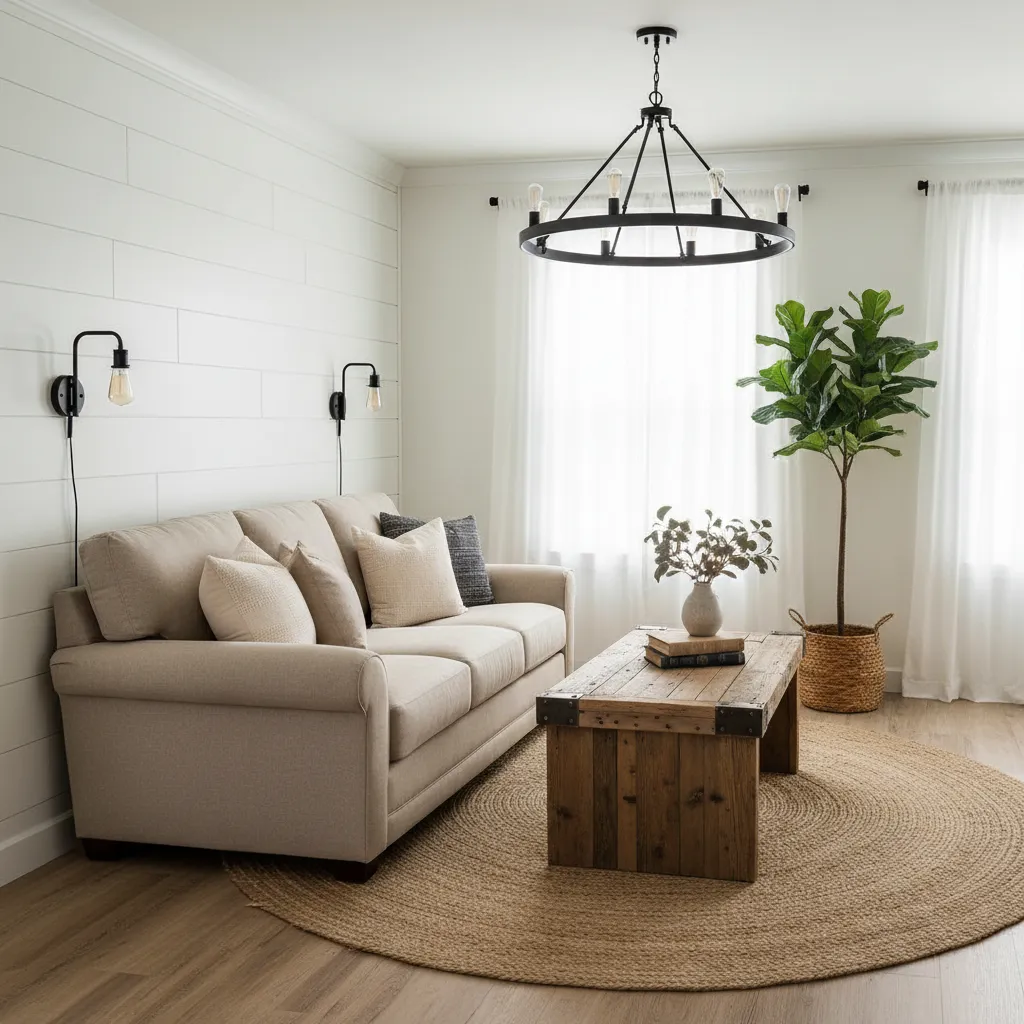
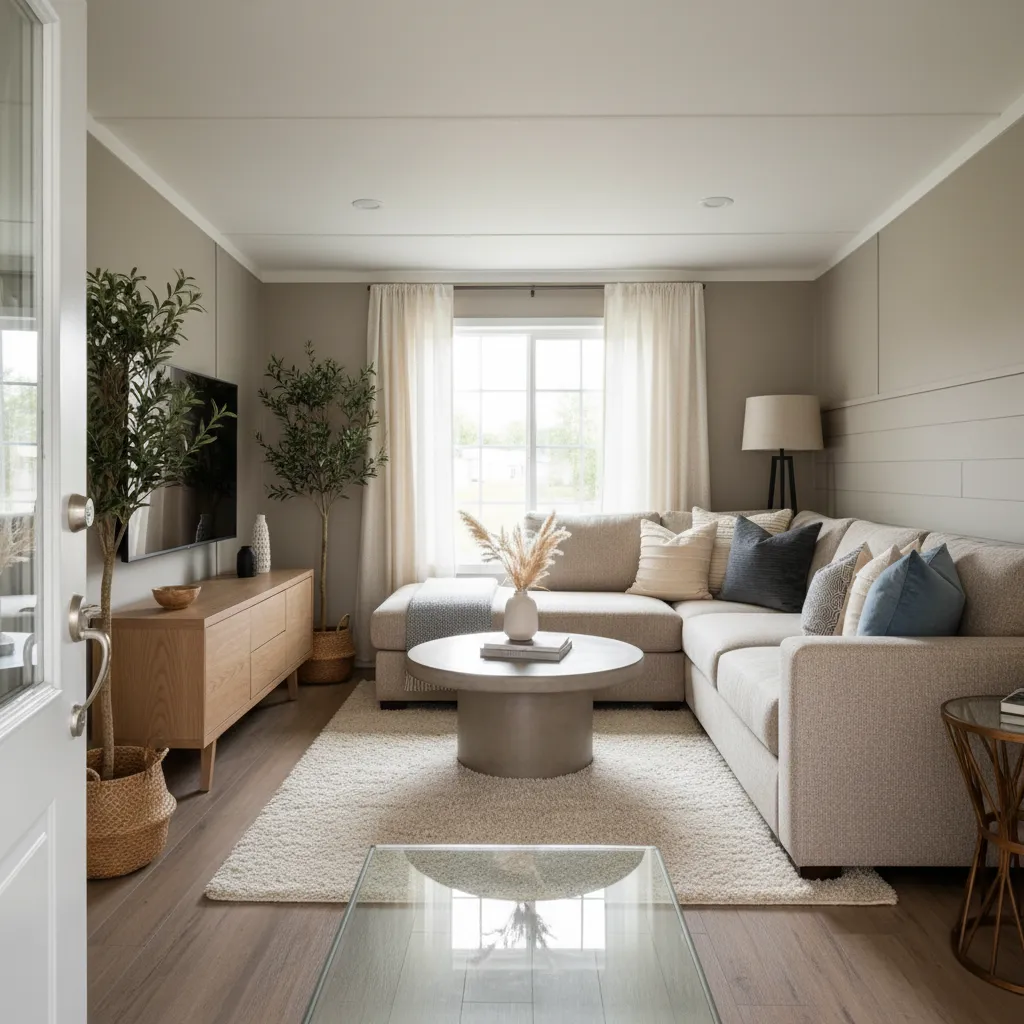
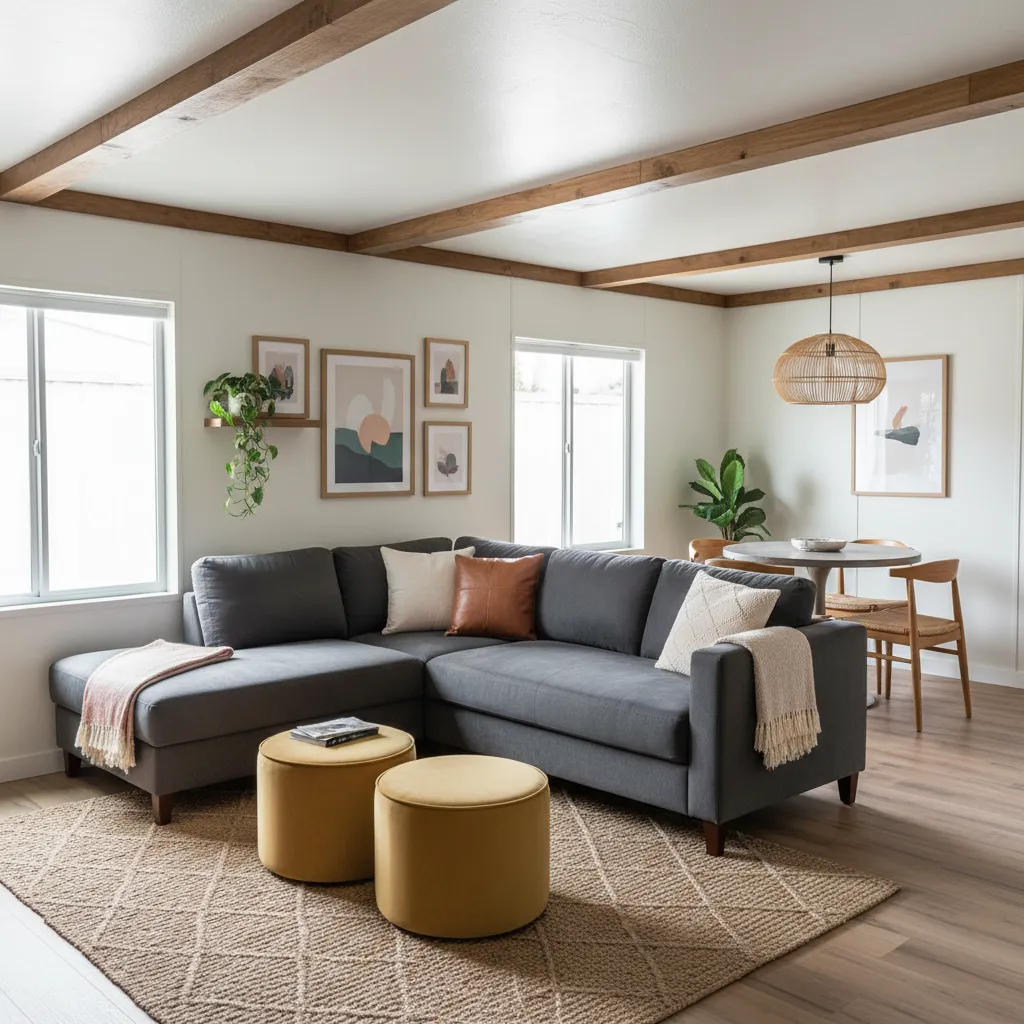
The modern farmhouse aesthetic fits single-wide trailers perfectly. This style blends cozy warmth with practical durability. It relies on a neutral palette to make narrow spaces feel wider. The result is a home that feels curated rather than manufactured.
Achieving this look requires a focus on texture over color. You want to layer natural materials like wood, leather, and linen. This approach prevents the white walls from feeling sterile. It creates a welcoming environment that handles daily wear well.
True farmhouse style balances the grit of history with the polish of modern living.
Structural Character and Wall Treatments
Standard vinyl walls often make a room feel flat. Installing vertical shiplap is a powerful visual trick. The vertical lines draw the eye upward immediately. This makes the standard 7-foot ceilings appear much higher.
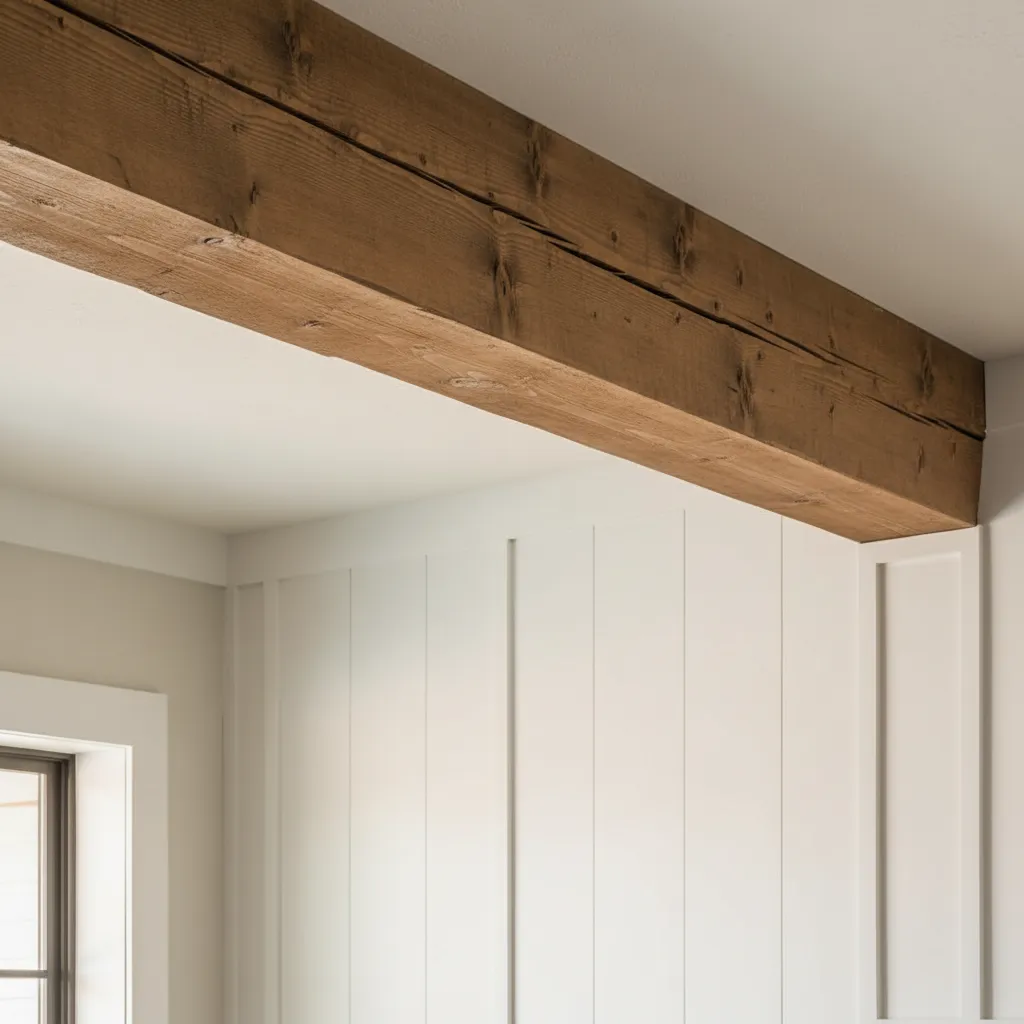
If full shiplap is out of budget, consider faux beams. Lightweight polyurethane beams add architectural weight without stress. They mimic the look of rustic siding designs found in larger homes. This adds immediate historical charm.
To keep a farmhouse room from looking too country or kitschy, stick to a sophisticated neutral palette… and use plenty of texture.
Lauren Flanagan, The Spruce
Furniture Selection and Flow
Scale is critical in a room that is only 12 to 14 feet wide. Avoid overstuffed furniture that blocks traffic flow. Choose sofas with exposed legs to maintain sightlines. This allows light to travel underneath the furniture.
Incorporate pieces that mix eras for a collected vibe. You might pair a sleek modern sofa with vintage decor elements like an antique trunk. This contrast defines the modern farmhouse look. It prevents the space from looking like a showroom.
Material Upgrade Palette
Upgrading specific materials transforms the “trailer” feel into a custom home. Focus on high-touch surfaces first.
| Design Element | Standard Mobile Home | Farmhouse Upgrade | Visual Impact |
|---|---|---|---|
| Wall Finish | Vinyl-covered gypsum | White vertical shiplap | Adds height and brightness |
| Flooring | Rolled carpet | Wide-plank luxury vinyl | Creates seamless flow |
| Lighting | Glass flush mounts | Black metal cages | Adds industrial contrast |
| Window Trim | None or thin plastic | Flat Craftsman wood | Frames the view efficiently |
Lighting and Hardware Accents
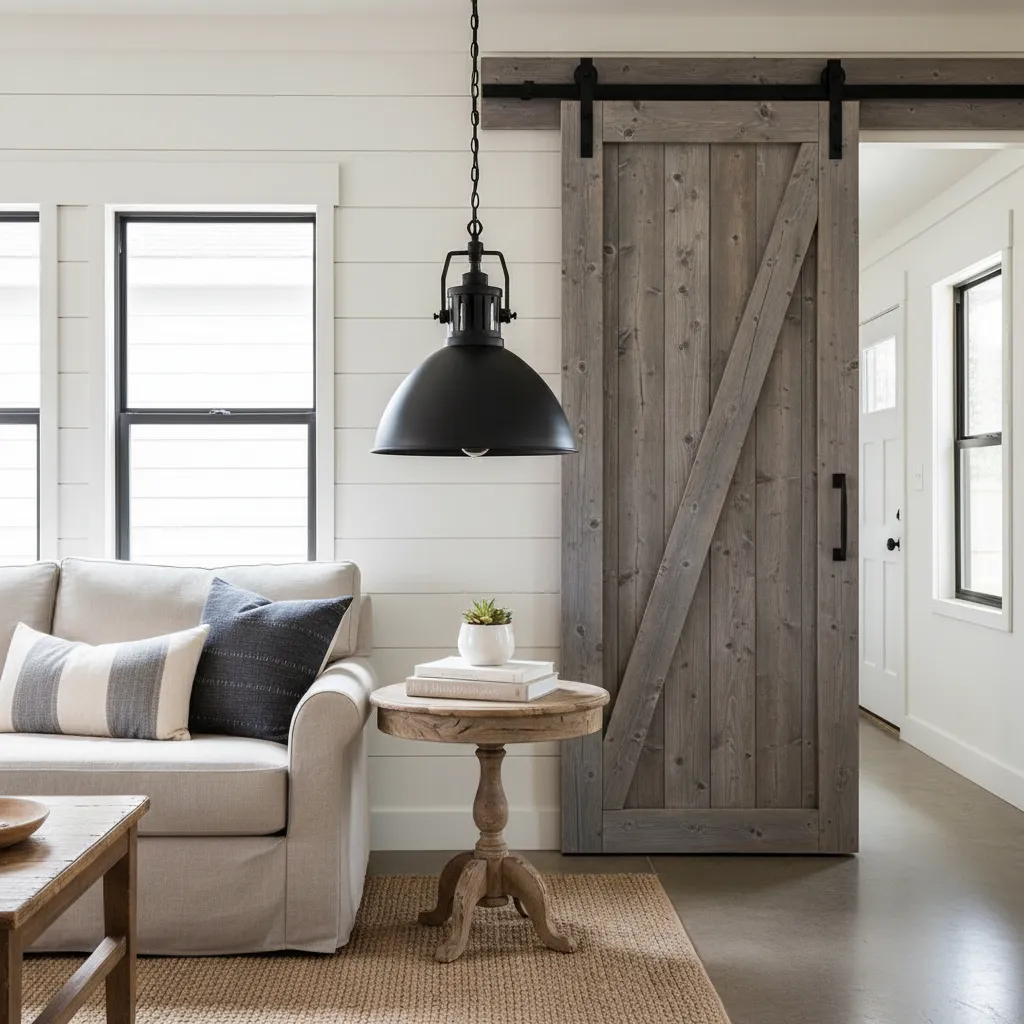
Lighting is the jewelry of the room. Replace generic dome lights with industrial-style fixtures. Matte black metal contrasts beautifully with white walls. This high-contrast look is a staple of the aesthetic.
Swap out plastic cabinet pulls for iron cup pulls. This small detail adds substantial weight to the design. It implies craftsmanship and longevity. These minor swaps offer the highest return on investment.
Rustic Refinement Hacks
- Prioritize ‘leggy’ furniture with exposed bases to keep floor-level sightlines open, which prevents narrow farmhouse living rooms from feeling cramped.
- Install vertical shiplap on a single focal wall to draw the eye upward and create the illusion of height in rooms with standard mobile home ceilings.
- Inject instant character by swapping generic plastic hardware for matte black iron cup pulls to provide the high-contrast, custom look essential to the farmhouse vibe.
Redefining the Narrow Narrative
Single wide living proves that limited square footage doesn’t mean limited style. It simply requires smart layouts and strategic scaling.
Whether working with a strict 12-foot span or a spacious 16-foot width, the goal remains the same: prioritizing functionality.
Remember to float furniture where possible and prioritize ambient lighting to push visual boundaries outward effectively.
With these architectural strategies, your trailer transforms from a simple structure into a sophisticated, curated sanctuary.
Architectural Answers for Mobile Spaces
Opt for streamlined mid-century pieces with exposed legs. Avoid overstuffed sofas that consume valuable visual floor space.
Use linear rugs that don’t touch baseboards. This trick reveals flooring edges, visually stretching the horizontal floor plan.
Yes, particularly in 14-foot or 16-foot widths. Ensure it fits the scale and allows for distinct traffic lanes behind or around it.
Rely on recessed cans and wall sconces. Avoid low-hanging pendants that visually compress the vertical space and clutter the view.