Table of Contents
- Step-by-Step Tape Resist Geometric Mosaics for Beginners
- DIY Cardboard Stencil Hacks for Perfect Nature Motifs
- Creating Interactive Sidewalk Obstacle Courses and Logic Grids
- The “Lying Down” Balloon Bunch Photo Backdrop Tutorial
- Easy Wet-Chalk Blending Techniques for Neon Glow Effects
- Elevating Your Exterior Canvas
- Pavement Art Inquiries
Transform your external walkways into sophisticated galleries by treating concrete like a high-end flooring substrate. Just as an architect relies on precision layouts, geometric tape resist art utilizes structural lines to define space and color. This approach bridges the gap between raw infrastructure and curated visual design.
The application of high-quality painters tape ensures clean boundaries that mimic professional inlay work. By applying the same attention to detail required for hardwood transitions, creators can achieve a mosaic effect that enhances any commercial or residential exterior. It is a practical method for those who value crisp edges and architectural symmetry.
This technique offers a versatile solution for temporary decor, providing an immediate aesthetic upgrade to office entryways or home patios. Whether you are a developer looking to add curb appeal or a maker seeking a structured creative project, tape resist art delivers a polished result. It remains one of the most effective ways to blend technical accuracy with vibrant artistic expression.
Step-by-Step Tape Resist Geometric Mosaics for Beginners
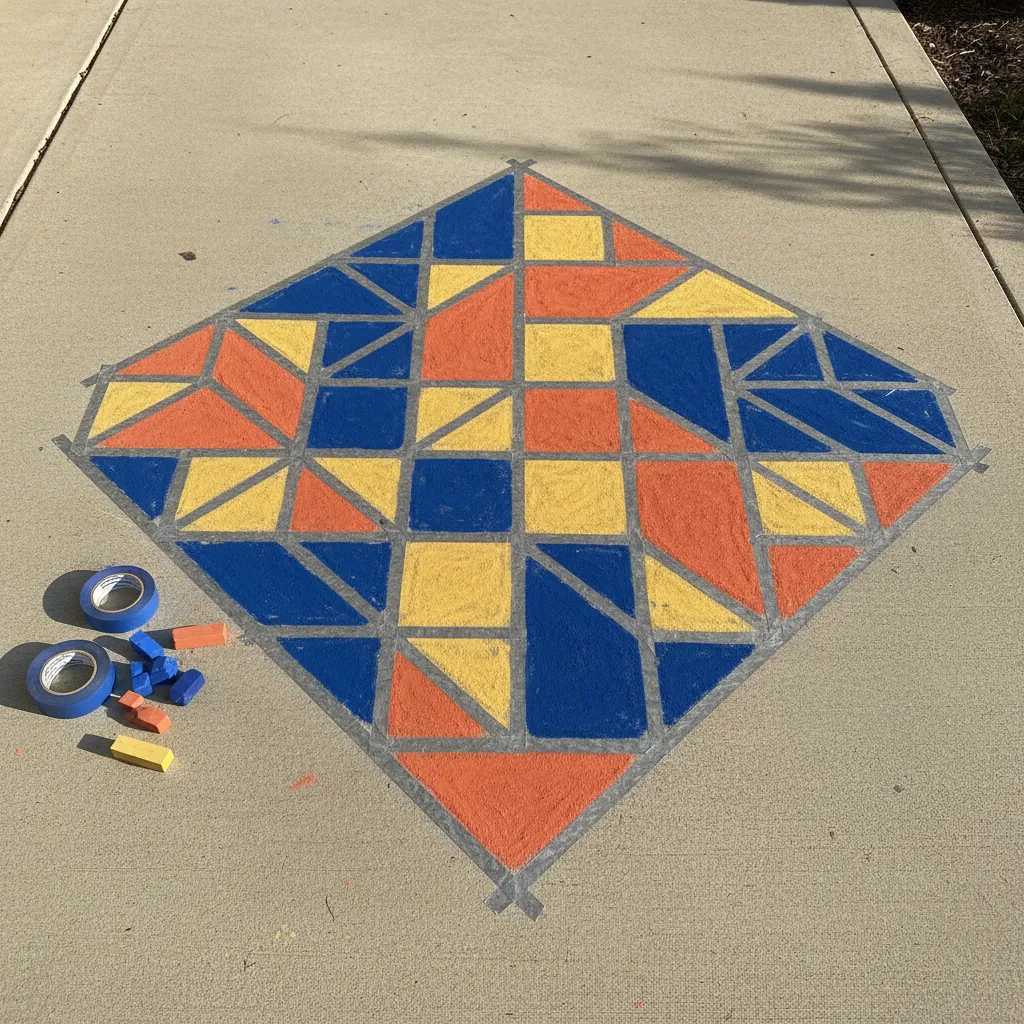
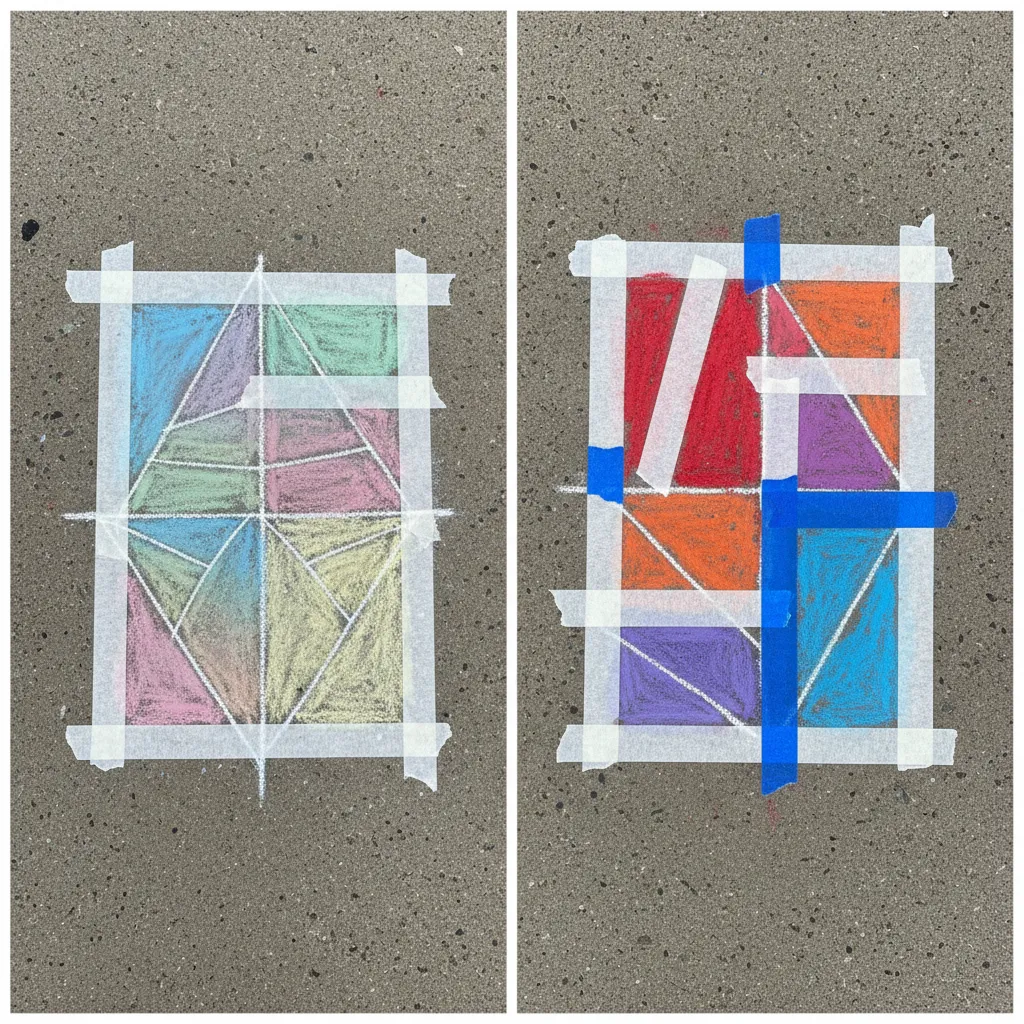
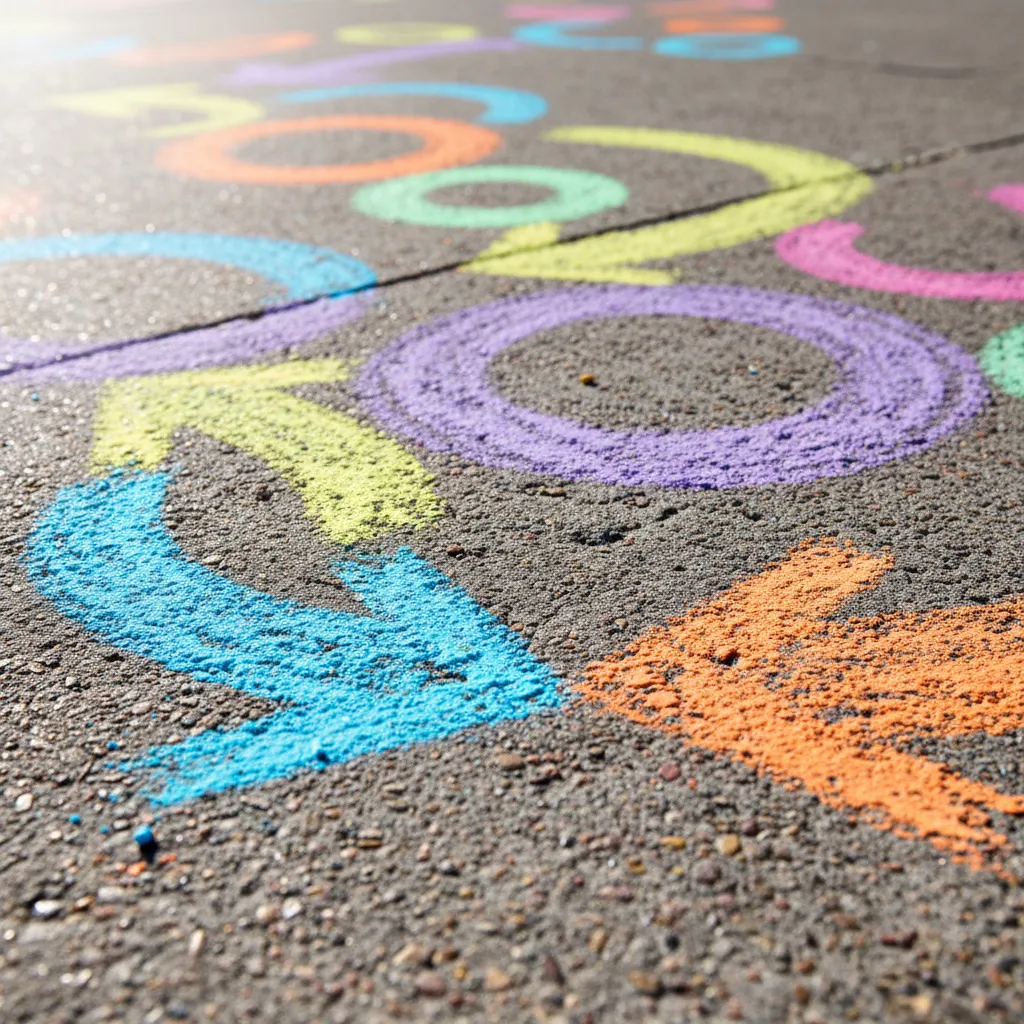
Tape resist art is the most effective method for achieving professional-looking results on pavement. It relies on the principle of negative space to create structure.
By masking off lines with tape, you create a faux “grout” effect that mimics stained glass or mosaic tiles. This technique adds instant curb appeal to your exterior entry.
The geometric lines provide a visual container for the chalk, which prevents messy edges. This structure makes the artwork feel intentional rather than chaotic.
Structure allows creativity to flourish. In design, boundaries often produce the most liberating results.
Essential Materials and Preparation
Preparation is key to ensuring your tape adheres properly to the hardscaping. You must start with a dry, debris-free surface to maintain the integrity of your lines.
Gathering the right tools beforehand ensures a smooth workflow. For a fun afternoon project, pair this activity with a refreshing beverage to keep energy levels high.
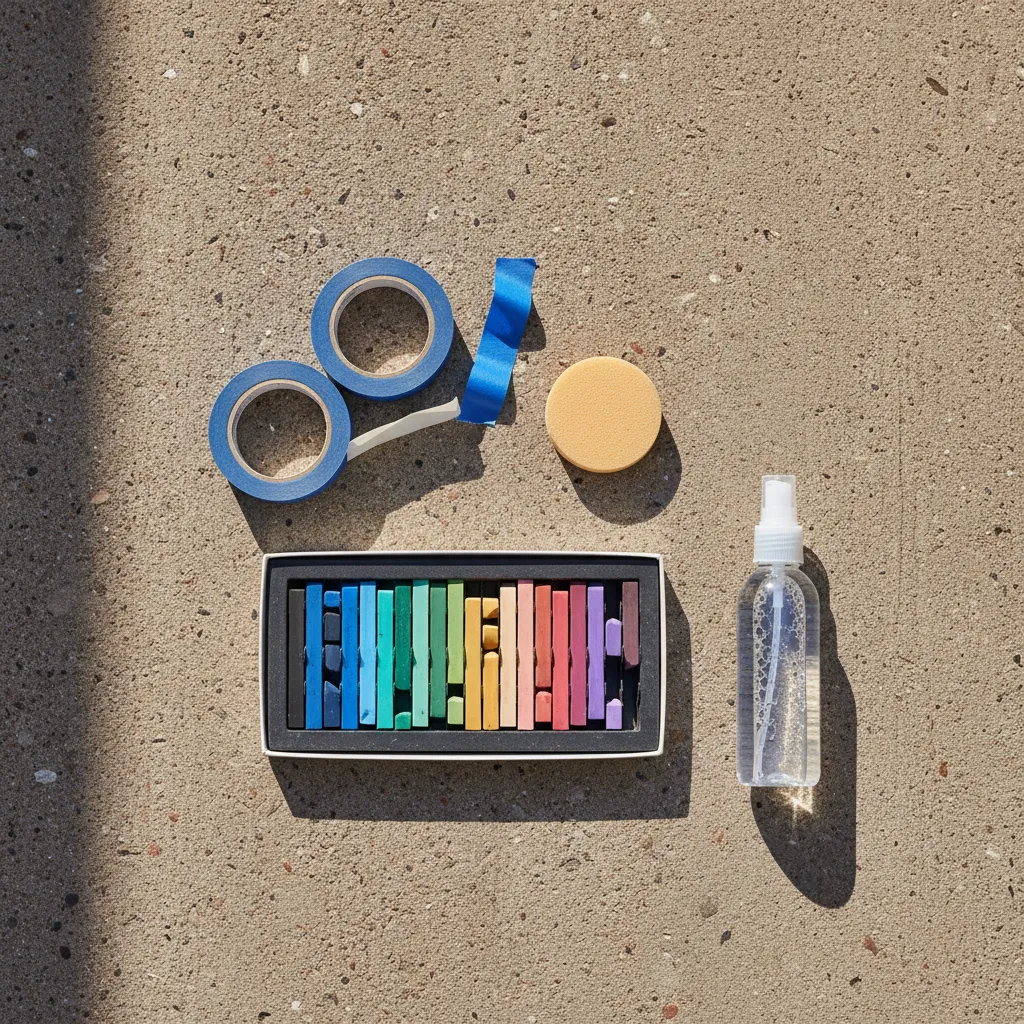
- Painter’s Tape: Blue tape (1.5 to 2 inches wide) works best on concrete.
- High-Pigment Chalk: Pastels offer a more saturated finish than standard chalk.
- Blending Sponge: A simple kitchen sponge helps drive pigment into the pavement pores.
- Broom or Blower: Essential for clearing dust before application.
The Application Process
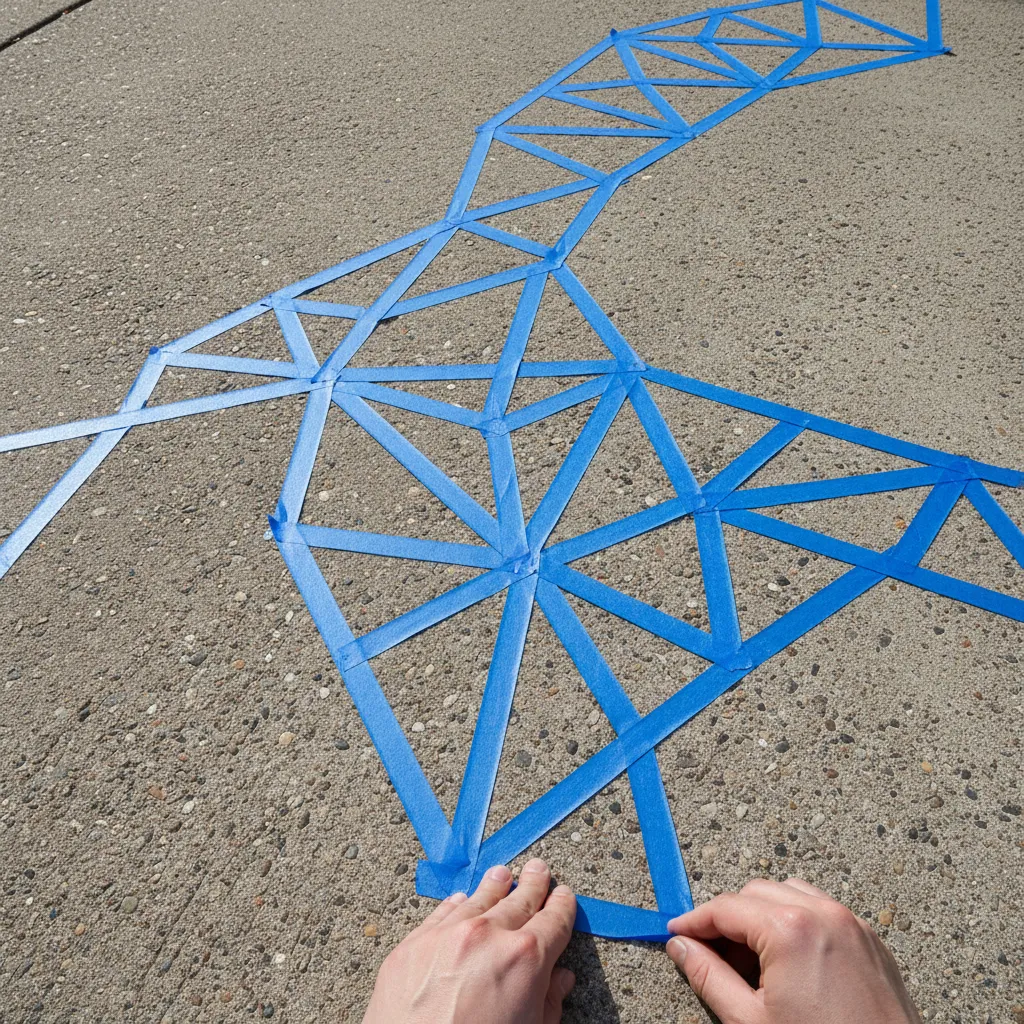
Begin by sweeping the area thoroughly. Dust is the enemy of adhesion. Lay down your tape in a random geometric lattice, creating triangles and trapezoids.
Ensure you press the tape edges down firmly. This prevents chalk dust from bleeding underneath, preserving the sharp “grout” lines that define this style.
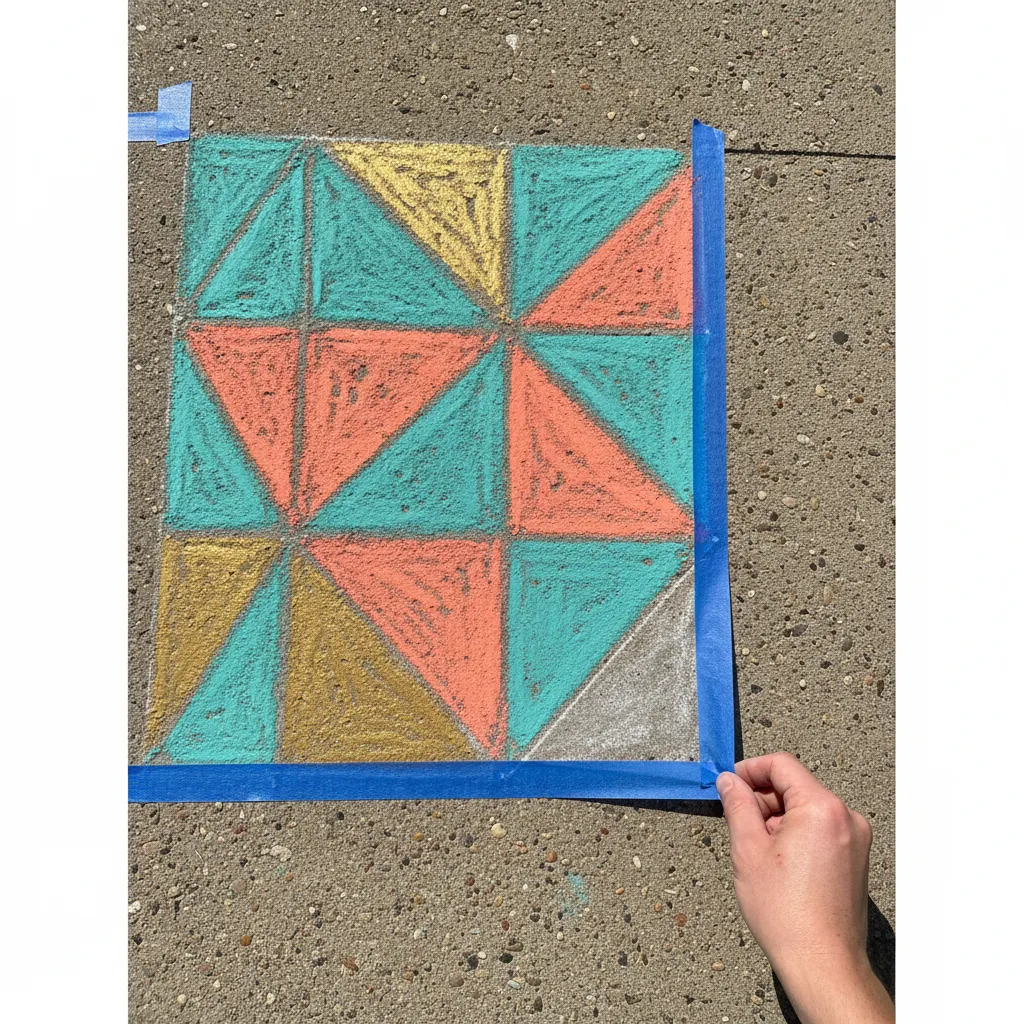
Color inside the shapes heavily. Use a sponge to rub the chalk into the texture of the concrete. This blending creates a velvet-like finish similar to high-end textiles.
Once filled, peel the tape slowly at a 45-degree angle. This reveal is incredibly satisfying and instantly elevates the curb appeal of your front walkway.
Texture is the most important thing. It’s what makes a room feel alive, and the same rule applies to outdoor spaces. The contrast between smooth color and rough stone is magnetic.
Kelly Wearstler, Elle Decor Interview
Choosing the Right Tape Width
The width of your tape drastically changes the final aesthetic. A wider tape creates a bold, modern look, while thinner tape appears more intricate.
| Tape Width | Visual Effect | Best Application | Removal Ease |
|---|---|---|---|
| 0.94 Inch | Delicate, intricate lines | Small detail work | Moderate (tears easily) |
| 1.88 Inch | Bold, structural grout lines | Large driveway mosaics | Excellent (sturdy) |
| Washi Tape | Low-tack, decorative | Smooth patio pavers | High (very gentle) |
For large driveways, the 1.88-inch painter’s tape is the industry standard for durability. It withstands the friction of coloring without lifting prematurely.
Curb Appeal Confidential
- Walk the line: After laying your geometric tape pattern, physically walk over the lines. Your body weight seals the tape into the concrete’s texture better than hand-pressing, preventing fuzzy edges.
- Dip for depth: Briefly dip your chalk sticks in water before applying. This creates a creamy, paint-like consistency that dries much more vibrant and opaque than dry chalk.
- Mix your widths: Don’t stick to just one size of tape. Combine 2-inch tape for main borders and thinner washi tape for internal details to create visual hierarchy in your design.
DIY Cardboard Stencil Hacks for Perfect Nature Motifs
Achieving professional precision in your sidewalk art often requires more than a steady hand. Cardboard stencils serve as the ultimate blueprint for crisp designs.
These simple tools allow you to replicate complex nature motifs with ease. They transform a chaotic driveway into a curated gallery of botanical shapes.
By using recycled materials, you add a layer of sustainable design to your outdoor activities. The result is a clean aesthetic that rivals high-end hardscaping.
Nature provides the perfect blueprint for design; we simply trace its elegance to create lasting impressions.
Selecting and Prepping Your Material
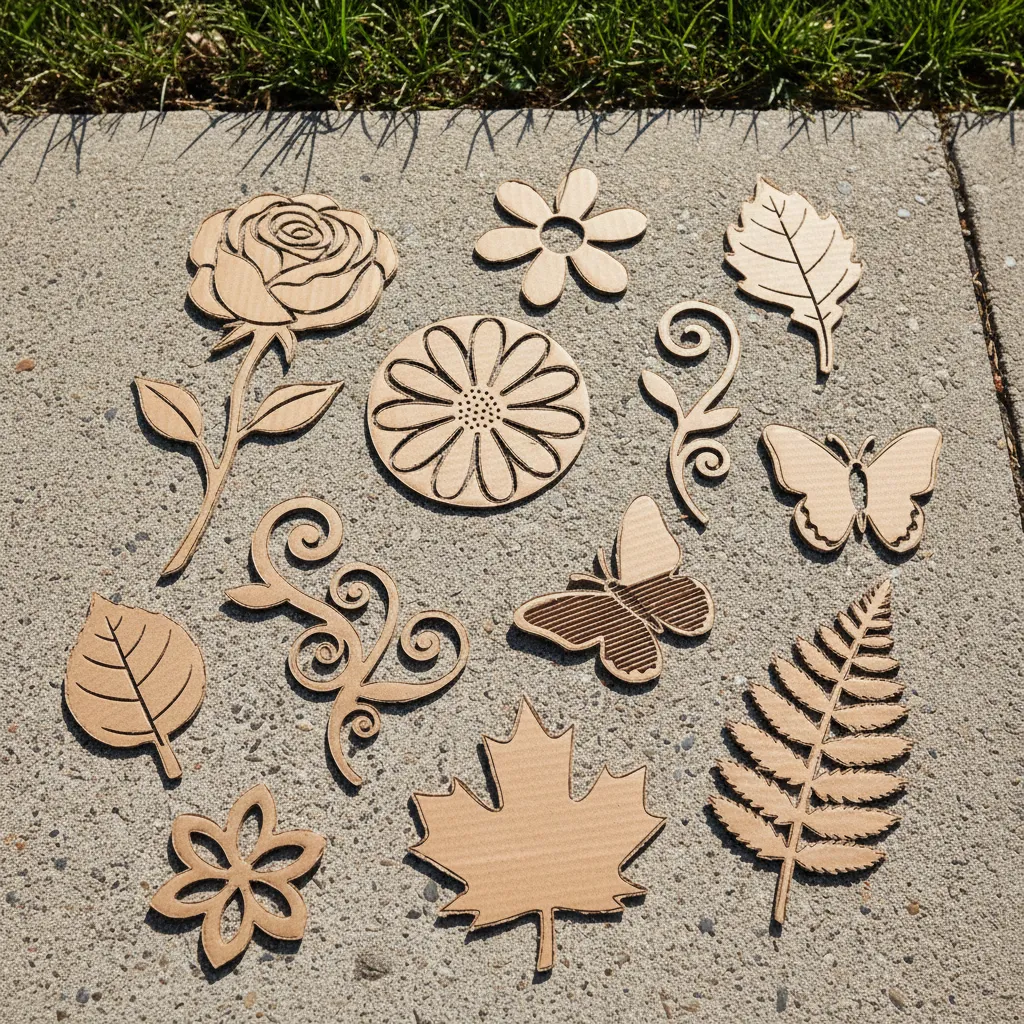
The structural integrity of your stencil dictates the quality of the final image. Thin cereal boxes work well for intricate details but lack long-term durability.
Corrugated cardboard offers robustness for repeated use in high-traffic zones. Its thickness creates a deep guide for the chalk to rest against.
However, cutting corrugated material requires patience to ensure smooth edges. A jagged stencil edge will result in a blurry visual finish on the pavement.
Consider how these outdoor accents interact with your home’s exterior. The colors should complement your summer door hangers for cohesive curb appeal.
Stencil Application Workflow
Proper execution is key to maintaining sharp lines and clean spatial dynamics. Secure the cardboard firmly to prevent shifting during the coloring process.
Layering different stencils can create a sense of depth and texture. Start with a base layer of broad leaves before adding delicate floral top notes.
Study nature, love nature, stay close to nature. It will never fail you.
Frank Lloyd Wright, Frank Lloyd Wright Foundation
Applying this architectural philosophy to your chalk art elevates it beyond simple play. It encourages an appreciation for the organic geometry found in gardens.
For those who enjoy crafting, these techniques share the same precision required for DIY teacher appreciation ideas and paper crafts.
Step-by-Step Stencil Guide
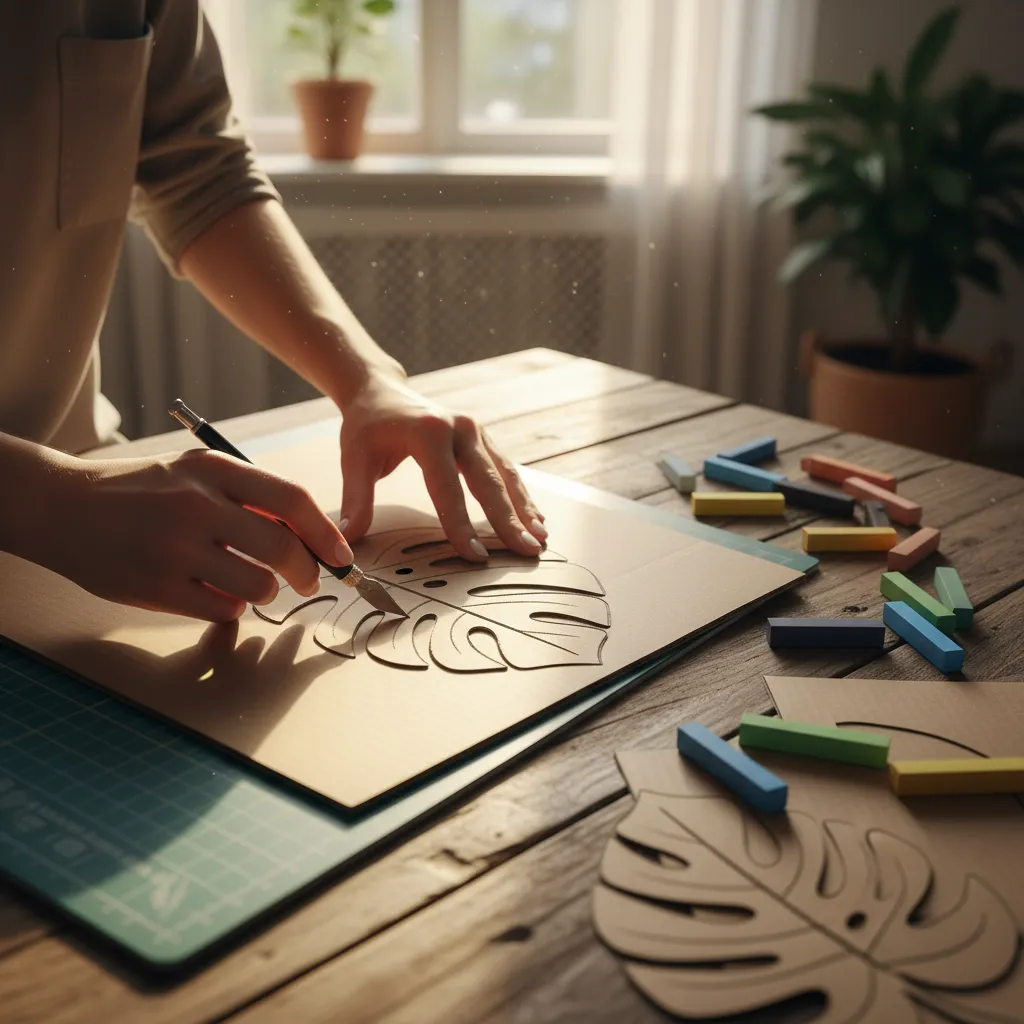
- Draft the Silhouette: Sketch a bold outline of a leaf or flower on the cardboard. Keep internal details minimal for structural strength.
- Cut for Clarity: Use a sharp utility knife on a self-healing mat. Cut away from your body and ensure corners are crisp, not torn.
- Reinforce Edges: Apply clear packing tape along the cut edges. This prevents the chalk dust from softening the cardboard over time.
- Position and Secure: Use painter’s tape to hold the stencil on the concrete. This ensures the visual flow remains uninterrupted.
- Saturate with Color: Fill the negative space heavily with chalk. Blend with a chalkboard eraser or foam brush for a smooth finish.
- Lift and Reveal: Remove the stencil vertically to avoid smudging. The result should be a sharp, vibrant motif with professional flair.
Chalk Artist Hacks
- Waterproof your work: Coat finished stencils with a layer of clear packing tape or spray sealer to prevent moisture absorption from the pavement and extend their lifespan.
- The soft touch: Instead of drawing directly on the concrete, grate your chalk into dust and apply it through the stencil using a kitchen sponge for a smooth, paint-like finish.
- Easy lifting: Attach a small duct tape tab to the center of your stencil to act as a handle, allowing you to pull it straight up without smudging the crisp edges.
Creating Interactive Sidewalk Obstacle Courses and Logic Grids
Transforming your driveway into an interactive zone requires the same attention to spatial dynamics as designing a living room layout.
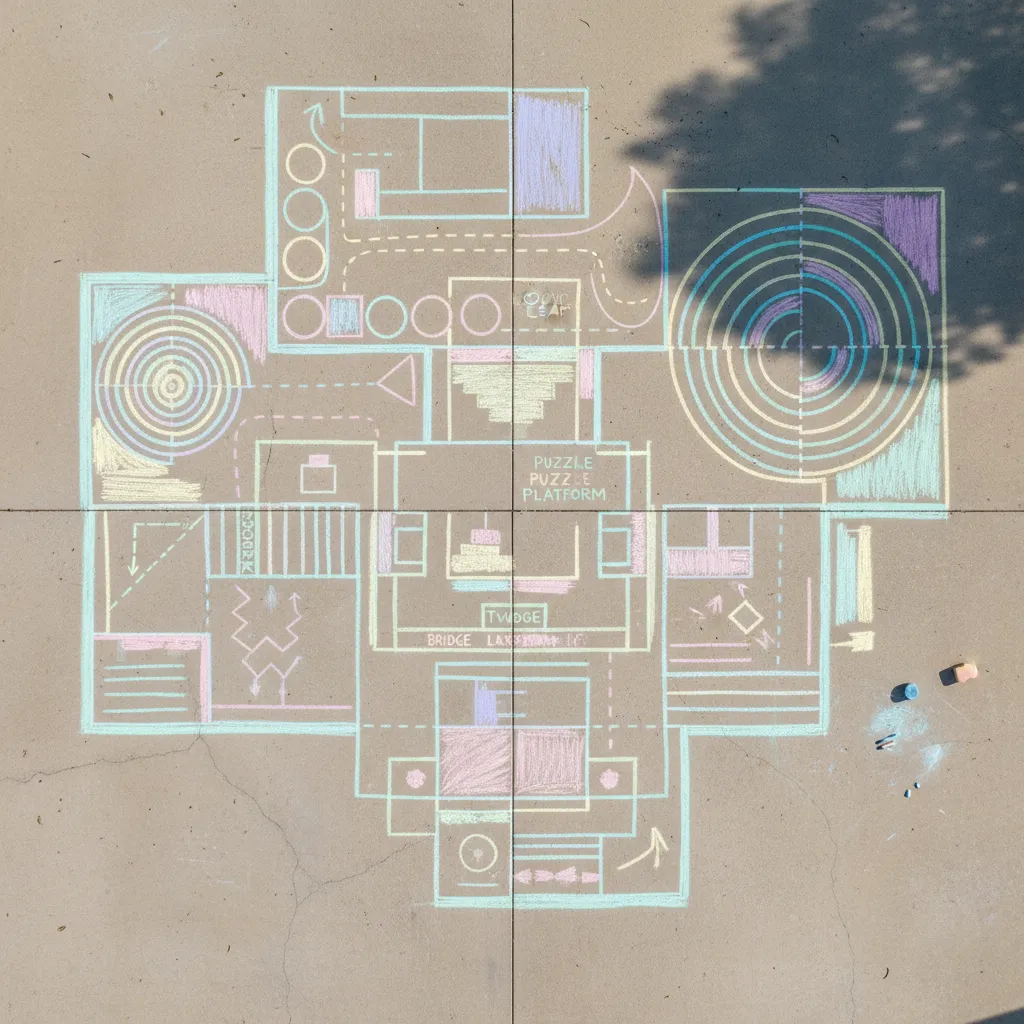
By treating the pavement as a blueprint, you can create distinct zones for physical activity and cognitive engagement.
Begin by assessing the texture of the surface to ensure your chalk adheres properly to the asphalt or concrete grain.
Designing for Traffic Flow and Ergonomics
An effective obstacle course relies on intuitive navigation and clear visual cues to guide movement safely.
Use thick, bold lines to define boundaries, ensuring there is ample space between activity stations to prevent collisions.
Incorporate spirals for spinning and straight lines for balance beams, utilizing a high-contrast palette for visibility.
Design is not just about the visual impact; it is about how the space dictates movement and joy.
Consider the “curb appeal” of your course by blending functional game mechanics with aesthetic color blocking.
For those interested in educational play, similar principles are found in elegant DIY teacher appreciation week ideas on a budget, where creativity meets function.
Logic Grids and Geometric Patterns
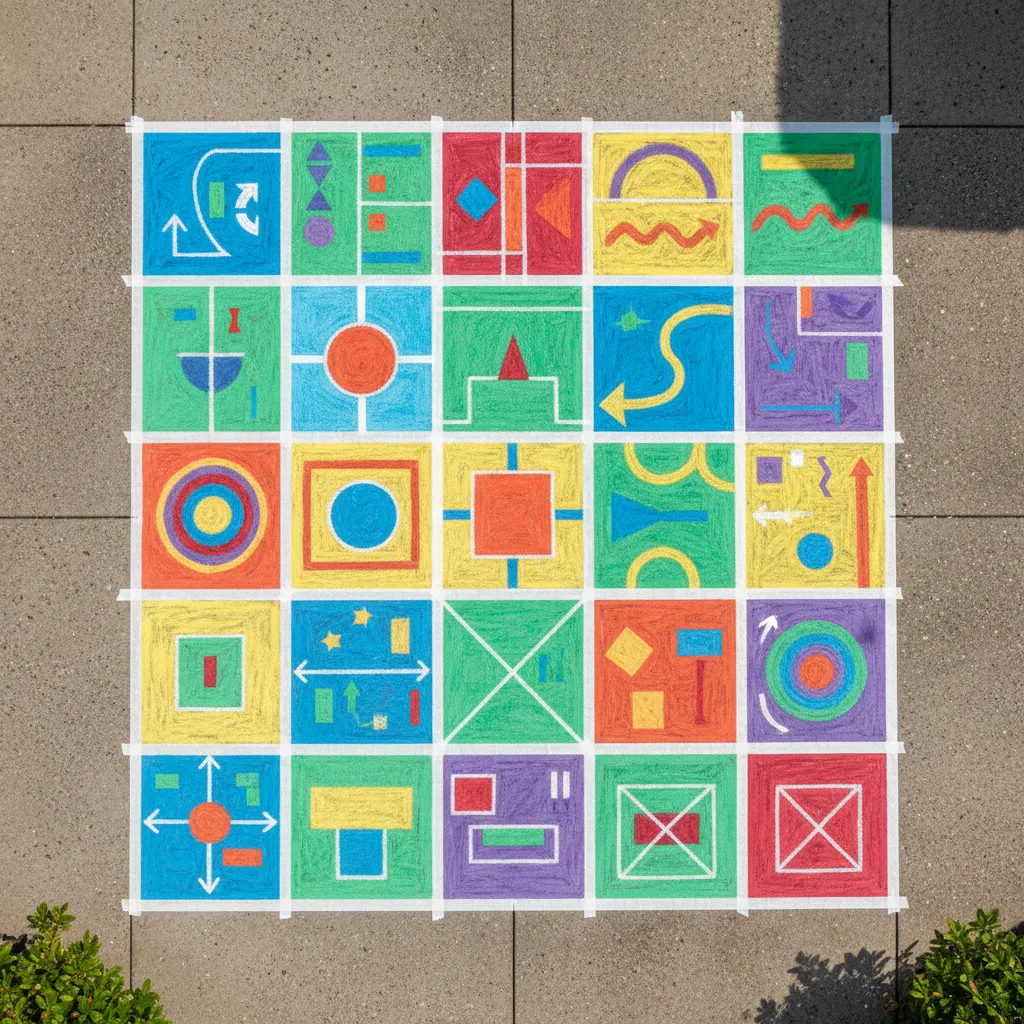
Logic grids elevate simple play into a mental workout, utilizing geometric precision to create Sudoku-style puzzles or word searches.
Apply masking tape to the hardscaping before coloring to achieve crisp, architecturally straight lines that resist smudging.
Assign specific colors to different variables or logic rules, creating a visual language that players must decode.
After a long session of strategic play, you might want to cool down with ideas from our guide on refreshing summer drinks nonalcoholic with Redbull recipes.
Play is the highest form of research.
Albert Einstein, Institute of Play Archives
The durability of your grid depends on the quality of chalk used and the porosity of the underlying stone or cement.
Below is a breakdown of interactive elements you can integrate into your floor plan to maximize engagement.
| Design Element | Spatial Function | Aesthetic Application |
|---|---|---|
| The Infinity Loop | Continuous movement without stops | Gradient shading from cool to warm tones |
| Precision Targets | Focal points for throwing accuracy | Concentric circles with high contrast |
| Mirror Grids | Dual-player simultaneous logic | Symmetrical patterns mimicking tile work |
| Balance Beam Line | Linear equilibrium testing | Thick, dashed lines resembling road markings |
Implementing these designs improves the structural integrity of your play area while providing hours of structured entertainment.
Sidewalk Studio Secrets
- Use painter’s tape to create crisp, architecturally straight lines for logic grids, removing it after coloring to reveal sharp, smudge-free boundaries.
- Map out your ‘floor plan’ with faint guide lines first to ensure adequate spacing between high-activity zones, preventing collisions during simultaneous play.
- Blend chalk dust with a foam brush or dry sponge to achieve smooth gradient shading and increase the visual impact of your geometric patterns.
The “Lying Down” Balloon Bunch Photo Backdrop Tutorial
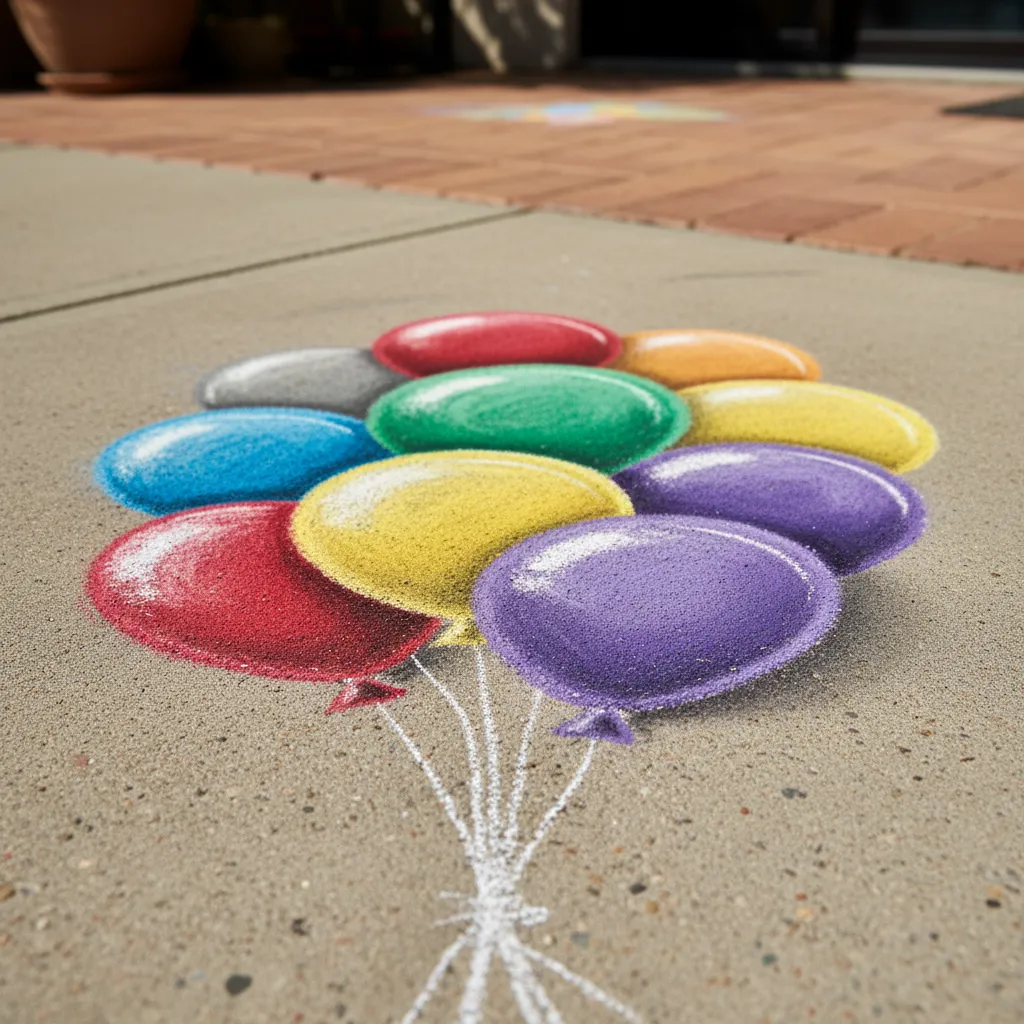
This immersive technique transforms flat concrete into a dynamic storytelling medium. By shifting perspective, simple circles become buoyant balloons.
The “lying down” backdrop relies heavily on spatial dynamics. The subject lies on the ground, but the camera captures them from directly above.
Preparing Your Canvas
Start by selecting a smooth section of the driveway or patio. Heavily textured aggregate will consume your chalk sticks rapidly and blur lines.
Sweep the area thoroughly to remove debris. Dust and pebbles create negative space that ruins the illusion of a cohesive image.
Ensure your lighting is adequate. The best photos occur during the “golden hour” when shadows are soft, adding depth without harsh contrast.
This project is perfect for involving children in the design process, much like creating 35 homemade Christmas gifts that kids can help make.
Drafting the Design
To achieve a professional look, you must plan the composition before applying heavy color. Follow these structural steps for the best results.
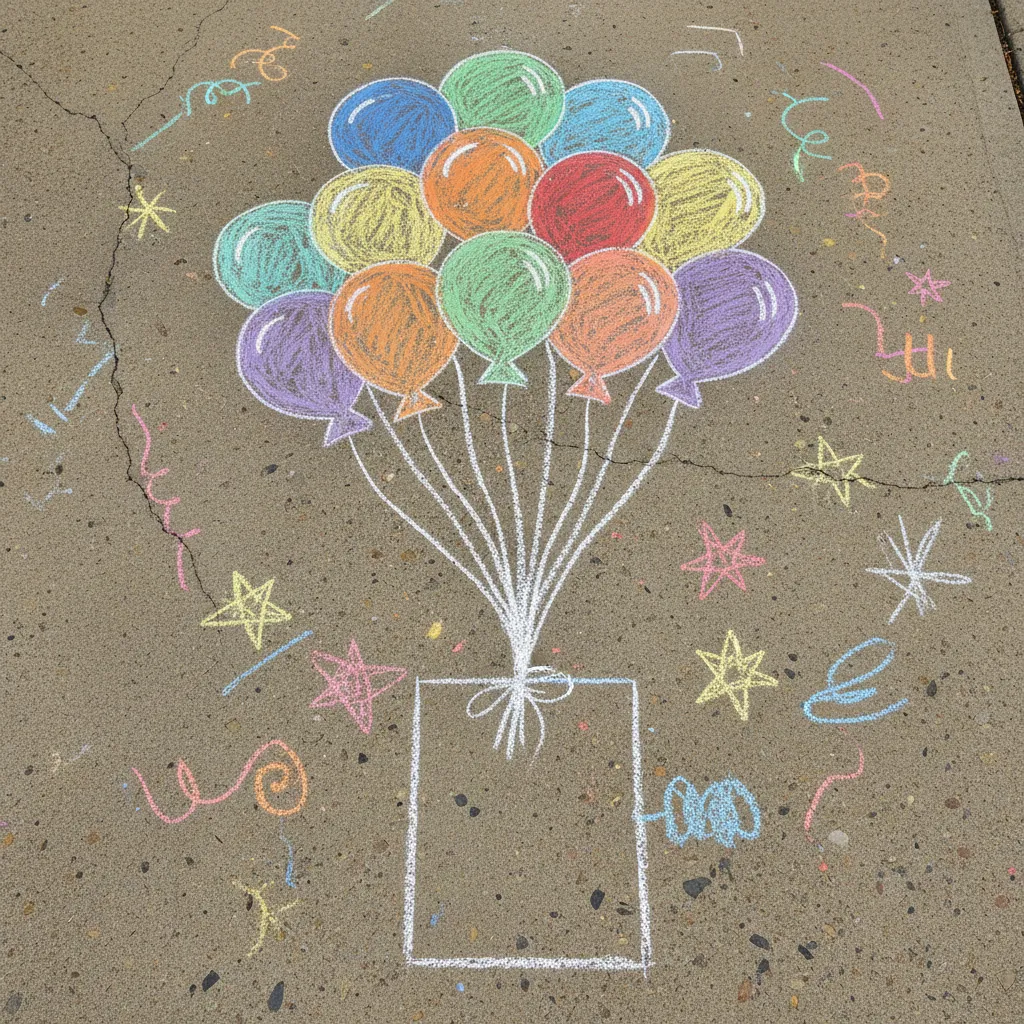
- Outline the Anchors: Have your subject lie down to mark where their hand will be. This ensures the “strings” align perfectly later.
- Draw the Balloons: Sketch overlapping circles and ovals above the subject’s head. Vary the sizes to create a sense of volume.
- Apply Base Color: Fill the shapes with saturated pigment. Use the side of the chalk stick for broad, even coverage.
- Add Highlights: Draw a small white curve on the upper right of each balloon. This simple detail mimics light reflection and adds 3D form.
- Connect the Strings: Draw clean white lines from the base of each balloon, converging exactly at the mark where the hand will be.
I believe that your home should tell the story of who you are, and be a collection of what you love.
Nate Berkus, Nate Berkus Design
Capturing the Photo
The success of this easy sidewalk chalk art idea depends entirely on the camera angle. You must shoot from a high vantage point.
Use a sturdy step ladder to gain elevation. Position your camera lens parallel to the ground to prevent distortion of the artwork.
Creativity is not about the permanence of the medium, but the joy of the moment it creates.
Instruct the subject to lift their legs slightly or flutter their clothes. This movement simulates the effect of floating mid-air.
Once the art is complete, treat yourself to a refreshment. A cold glass of an easy at-home Starbucks Pink Drink pairs well with a sunny afternoon of creativity.
Perspective Play
- Dampen your chalk sticks or the pavement slightly before drawing to achieve ultra-vibrant, paint-like colors that pop in photographs.
- Use a leaf blower on its lowest setting to clear away excess chalk dust without smearing your clean lines for a professional finish.
- Have the subject point their toes and arch their back slightly to enhance the gravity-defying illusion of being lifted off the ground.
Easy Wet-Chalk Blending Techniques for Neon Glow Effects
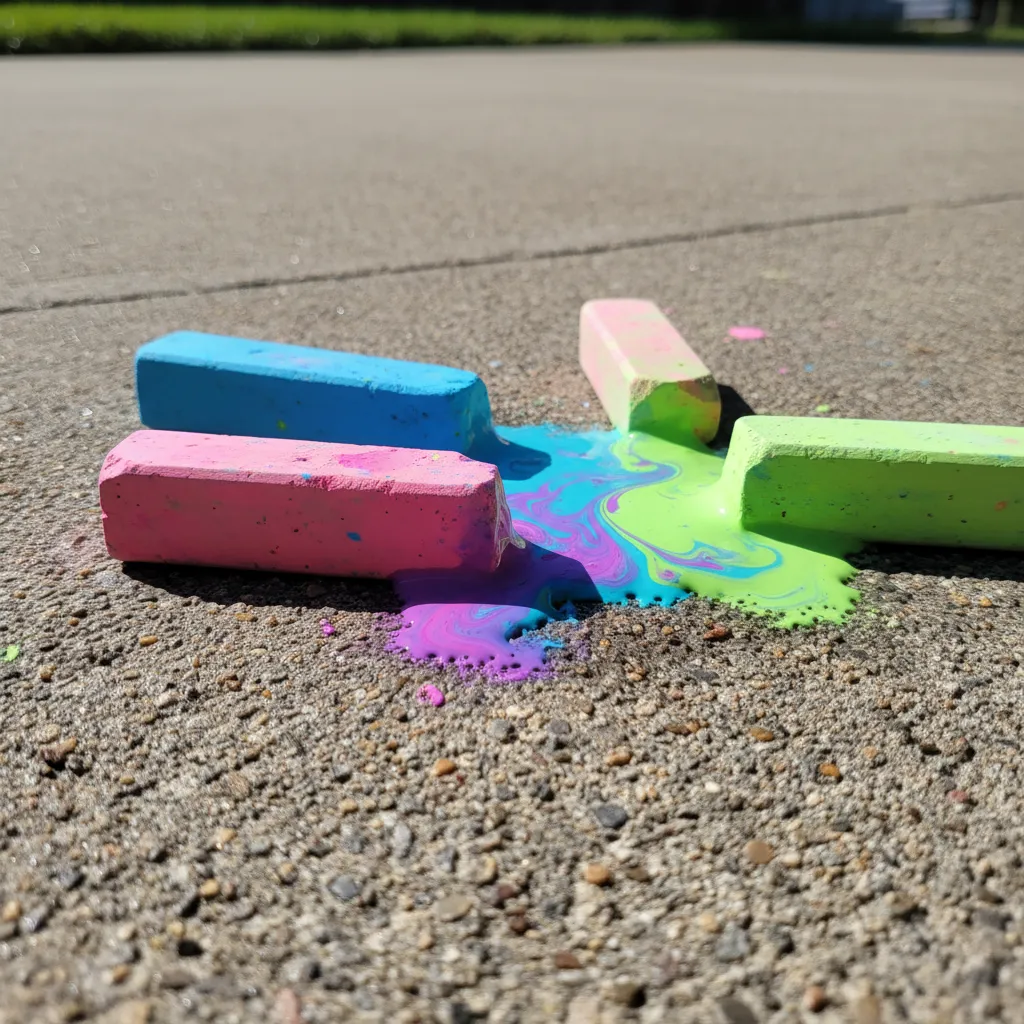
Achieving a neon glow on standard pavement requires altering the physical properties of the chalk. Dry application often results in a dusty, pastel finish.
By introducing water, you transform the binder within the chalk. This turns the dusty solid into a creamy, paint-like paste that fills concrete pores.
The result is a saturated, high-contrast pigment that reflects light more effectively than dry particles. This technique mimics the vibrancy of acrylics.
The street is a canvas where texture meets temporary brilliance; treat your chalk like fine paint to unlock its true potential.
The Glow-Up Secret
- Dip your chalk sticks in a cup of water for 5 to 10 seconds before drawing to create a super-saturated, paint-like texture instantly.
- Layer a dry white chalk base beneath your neon colors to act as a primer, making the wet pigments pop even harder against dark asphalt.
- Use a damp sponge or your fingers to feather the edges of your wet chalk while it is still damp to create a realistic soft-focus glow effect.
The Sugar-Water Soak Method
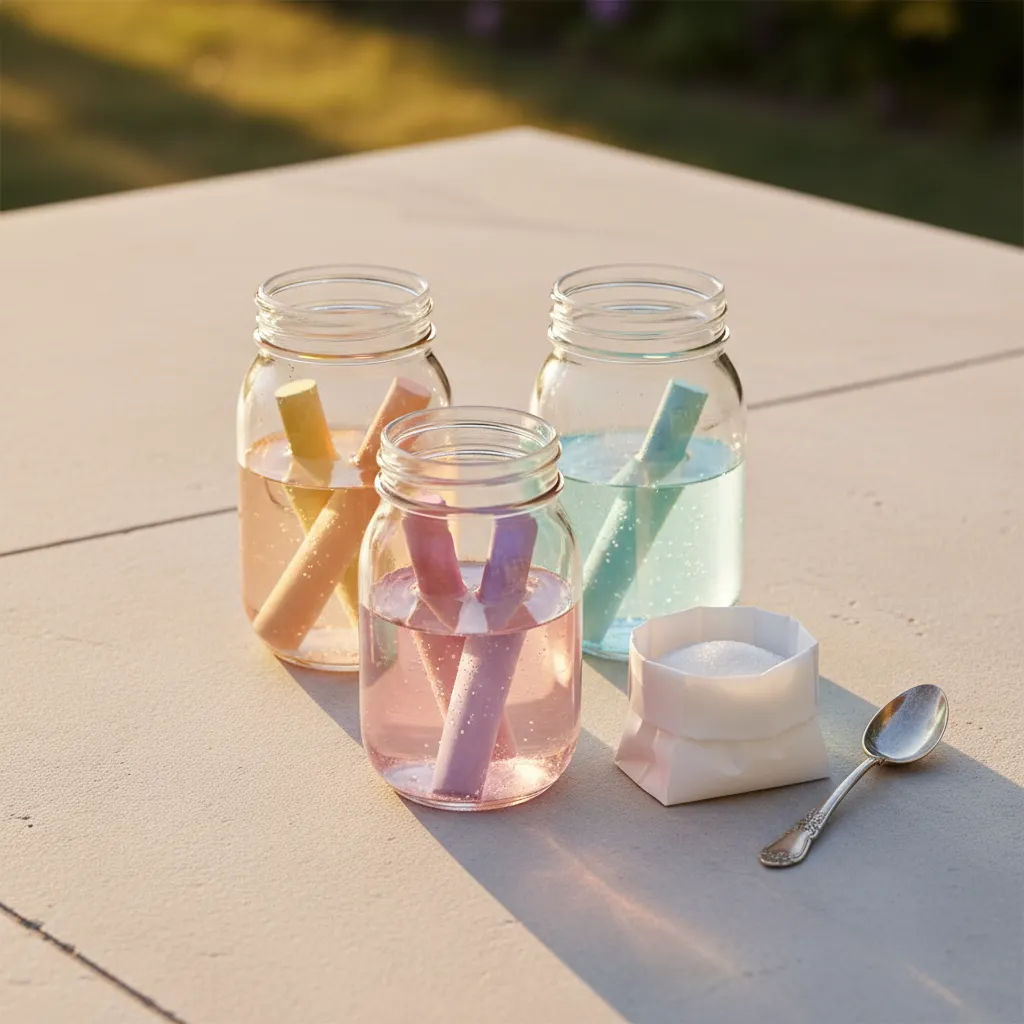
Water alone increases vibrancy, but adding sugar creates a binder that mimics professional fixatives. The sugar creates a syrup that hardens as it dries.
This glossy finish prevents the chalk from blowing away in the wind. It also creates a “wet look” even after the design has fully cured on the driveway.
Follow this precise mixing ratio for the best results:
- The Solvent: Mix one cup of warm water with two tablespoons of granulated white sugar. Stir until fully dissolved.
- The Soak: Submerge chalk sticks for 10 to 15 minutes. Do not exceed 20 minutes, or the sticks may disintegrate.
- The Application: Draw immediately. The sensation should feel like applying heavy lipstick or oil pastels.
While waiting for your supplies to soak, you might prepare refreshments. A guide to fun drinks to make at home can elevate the afternoon.
Color is not just a visual experience; it is a psychological one. The saturation of pigment can completely alter the spatial perception of an environment.
Leatrice Eiseman, Pantone Color Institute
Sweeten Your Street Art
- Work in small batches to ensure your chalk doesn’t exceed the 20-minute soak limit while you are busy drawing.
- Keep a damp cloth nearby to wipe up drips immediately as the sugar solution can become quite sticky once it begins to dry.
- Try layering colors while they are still wet to create seamless painterly gradients that look like professional street murals.
Layering for Luminosity
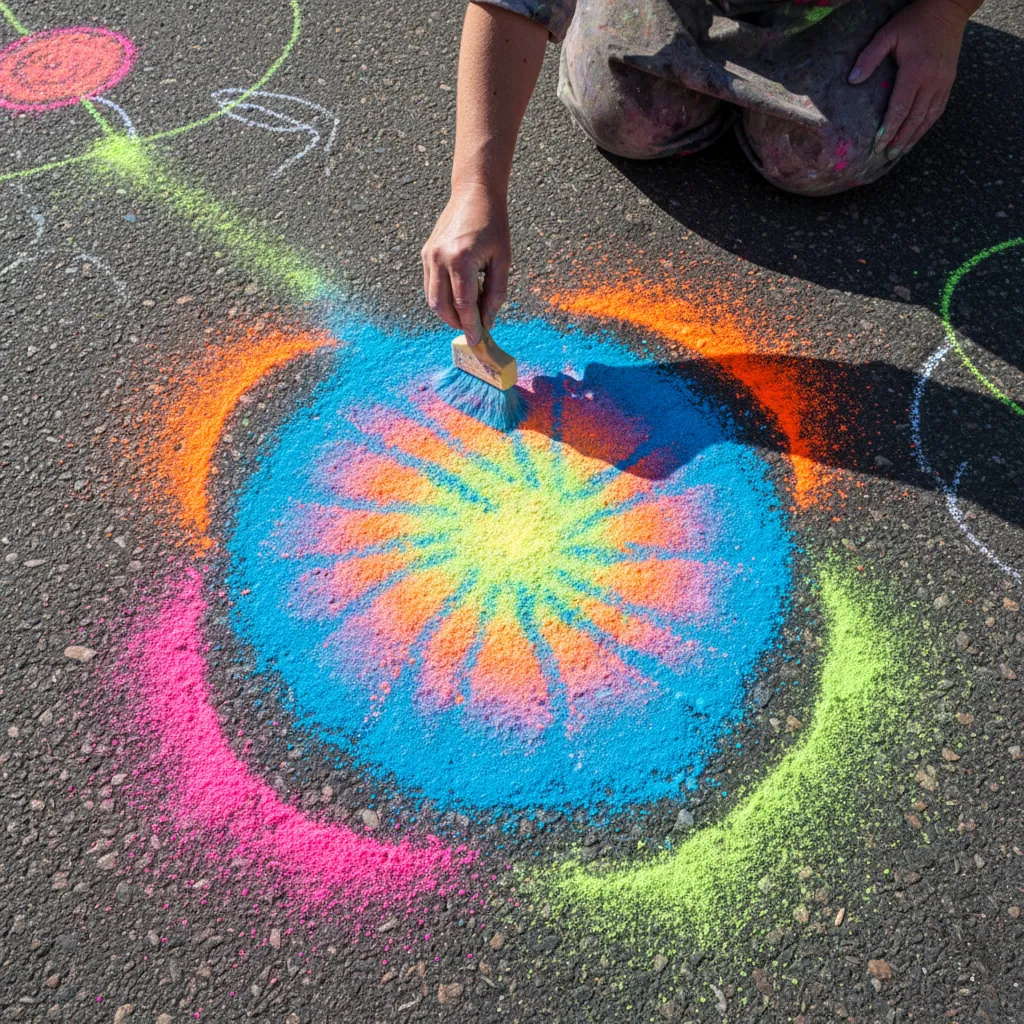
To create a true neon “glow,” you must manipulate the background contrast. Concrete is naturally grey, which absorbs light and dulls transparent colors.
Start by laying down a thick base layer of wet white chalk. This acts as a primer, neutralizing the grey tone of the sidewalk or asphalt underneath.
Apply your neon colors directly over the damp white base. Use a dense foam sponge or a wide paintbrush to blend the edges outward into the darkness.
Just as bold hues define stunning Mexican Hacienda style home exteriors, high-saturation chalk creates a focal point.
Application Consistency Guide
Understanding the drying phases of wet chalk helps you time your blending perfectly. The table below outlines the visual characteristics of each phase.
| Drying Phase | Visual Texture | Blending Capability |
|---|---|---|
| Immediate Application | Glossy, wet paint look | High (colors mix fully) |
| 2-5 Minutes | Satin, waxy finish | Medium (good for layering) |
| Fully Cured | Matte, vibrant powder | Low (permanent crisp lines) |
Avoid overworking the area once it begins to dry. If you continue to rub the surface during the satin phase, the sugar bond may begin to peel.
Glow-Getter Secrets
- Keep your white base layer damp while adding neon pigments to ensure a seamless gradient that mimics real light emission.
- Use a dense foam sponge to pull the neon color from the center into the surrounding darkness for a realistic halo effect.
- Wait for the ‘Satin’ phase to add final crisp highlights, as this is when the chalk is most receptive to layering without smudging.
Elevating Your Exterior Canvas
Mastering the tape resist technique transforms simple chalk into architectural art. It brings structure and sophistication to your driveway.
By utilizing negative space and geometric forms, you create a visual impact that rivals permanent hardscaping. It is a fleeting yet powerful design statement.
Embrace the contrast between the rough concrete texture and the velvet-smooth pigment. This simple weekend project offers high-end curb appeal with minimal investment.
Pavement Art Inquiries
Longevity depends on the elements. High-pigment chalk typically remains vibrant until the next rainfall, though heavy foot traffic may soften the crisp lines within a few days.
Blue painter’s tape is generally safe for cured sealers. To ensure integrity, remove the tape within 24 hours to prevent adhesive residue from baking into the surface.
While usable, standard chalk lacks the saturation required for a high-end look. Soft pastels or heavy-pigment sidewalk chalks are essential for that velvety, opaque finish.
A stiff bristle broom and water usually suffice. For deep-set pigment in porous concrete, a gentle pressure wash will restore the surface to its original slate.