
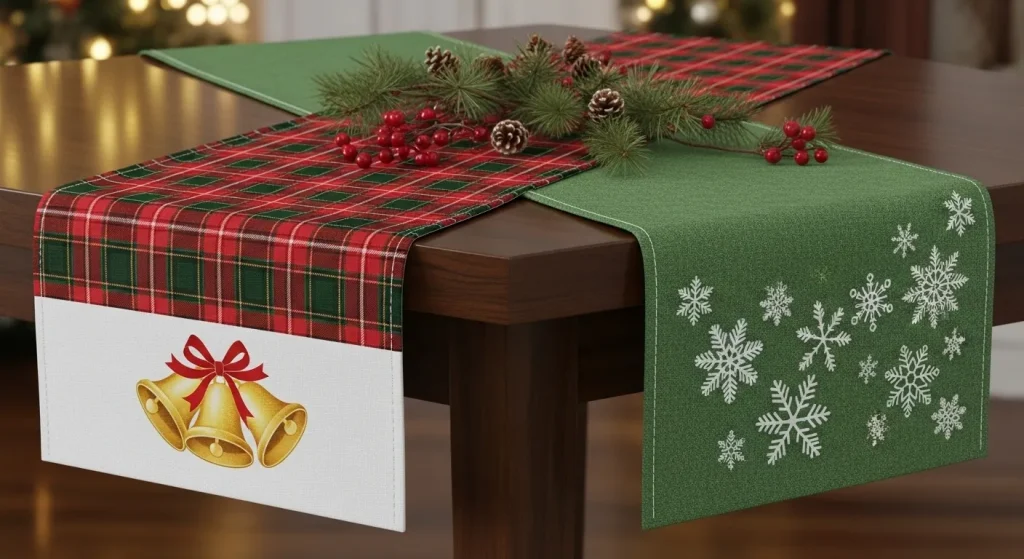
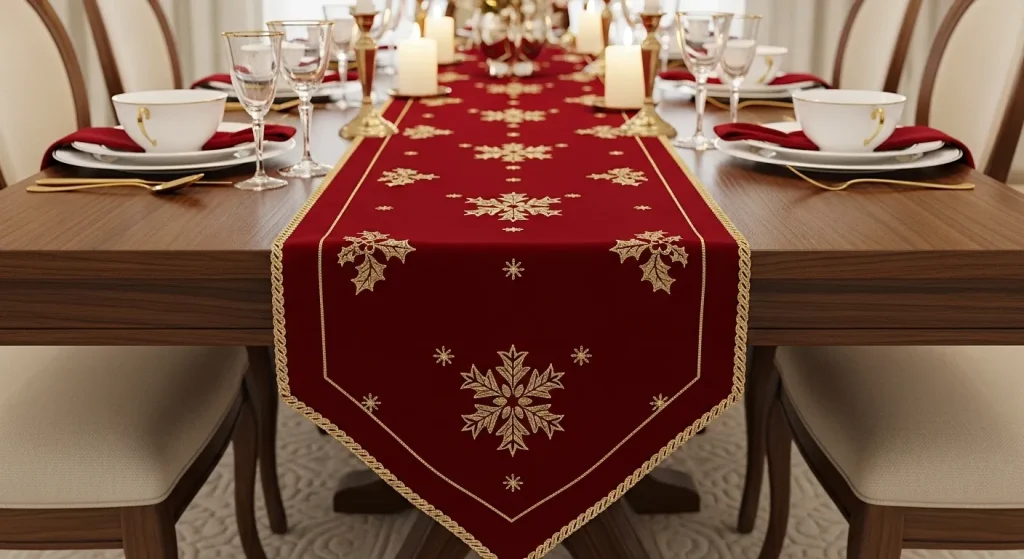
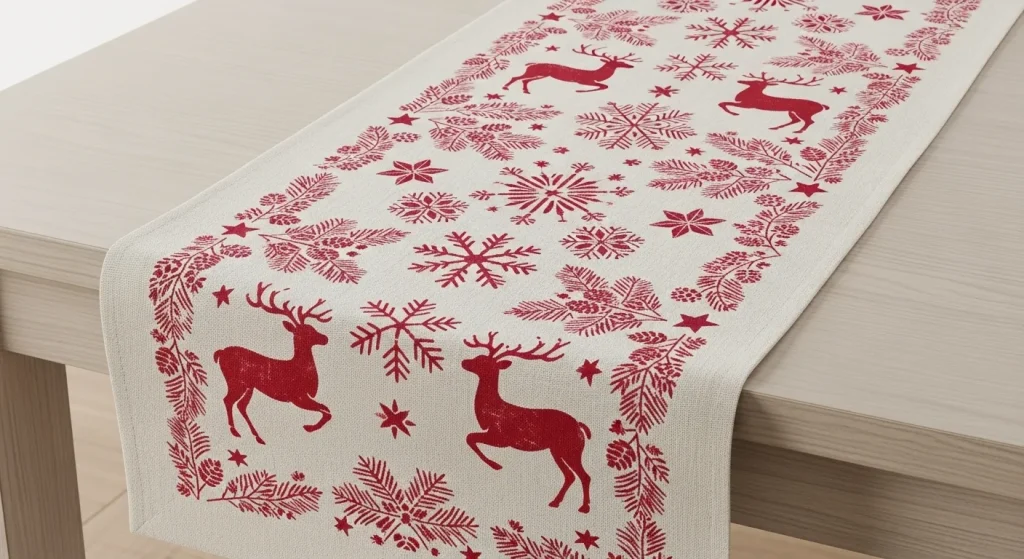
The holiday season brings with it a special kind of magic, a time when homes are transformed into cozy havens of warmth and festive cheer. The dining table, as the central gathering spot for family and friends, deserves special attention, and a beautifully crafted Christmas table runner can serve as the stunning centerpiece of your holiday decor.
This guide is dedicated to providing you with 33 distinct tips to help you create a table runner that is not only beautiful but also a reflection of your personal style and holiday spirit.


1. Choose a No-Sew Method for a Quick Project
If you’re short on time or new to crafting, a no-sew table runner is the perfect starting point. Using fabric glue or fusible hem tape allows you to create beautifully finished edges without a single stitch. This approach is ideal for simple, elegant designs.
- DIY Tips
- Select a fabric that doesn’t fray easily, like felt or burlap, for the simplest no-sew projects.
- Use a hot glue gun for a strong, instant bond when attaching embellishments like lace or ribbon.
- Ensure your fusible tape is placed neatly inside the hem to avoid any sticky residue on your iron.
2. Measure Your Table for the Perfect Fit
Before you begin, measure the length and width of your dining table to ensure your runner is perfectly proportioned. A good rule of thumb is for the runner to be about one-third the width of the table. It should also hang over each end by at least 6 to 12 inches.

- DIY Tips
- Add an extra inch to your fabric measurements for seam allowances if you plan to sew.
- For a more dramatic look on a long table, allow the runner to hang almost to the floor.
- Consider the size of your centerpiece when deciding on the final width of your runner.
3. Create a Mood Board for Inspiration
Gather ideas for your table runner by creating a mood board with fabric swatches, color palettes, and images of designs you love. This will help you visualize the final product and ensure it complements your existing holiday decor. A clear vision makes the creative process much smoother.
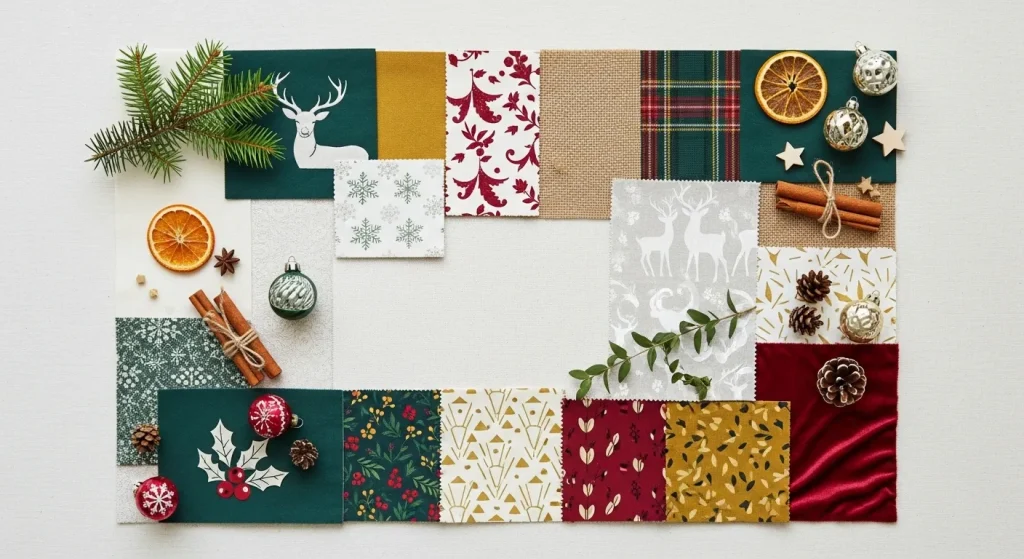
- DIY Tips
- Use platforms like Pinterest to collect digital inspiration for your project.
- Lay out fabric samples on your dining table to see how they look in the actual lighting.
- Include textures in your mood board, such as bits of ribbon, lace, or even faux fur.
4. Repurpose Old Fabrics for a Sentimental Touch
Create a table runner rich with memories by repurposing fabrics that have sentimental value. An old flannel shirt, a vintage tablecloth, or even cherished baby blankets can be transformed into a beautiful and meaningful holiday heirloom. This is a sustainable and heartfelt approach to decorating.
- DIY Tips
- Cut squares from different sentimental fabrics to create a unique patchwork design.
- Ensure all repurposed fabrics are washed and ironed before you begin your project.
- Incorporate elements like buttons or lace trim from the original garments for an extra touch of nostalgia.
5. Opt for Classic Plaid or Tartan
Nothing says “Christmas” quite like a classic plaid or tartan pattern. These timeless fabrics instantly create a warm, cozy, and festive atmosphere. They are available in a wide range of colors to match any holiday theme, from traditional red and green to modern black and white.
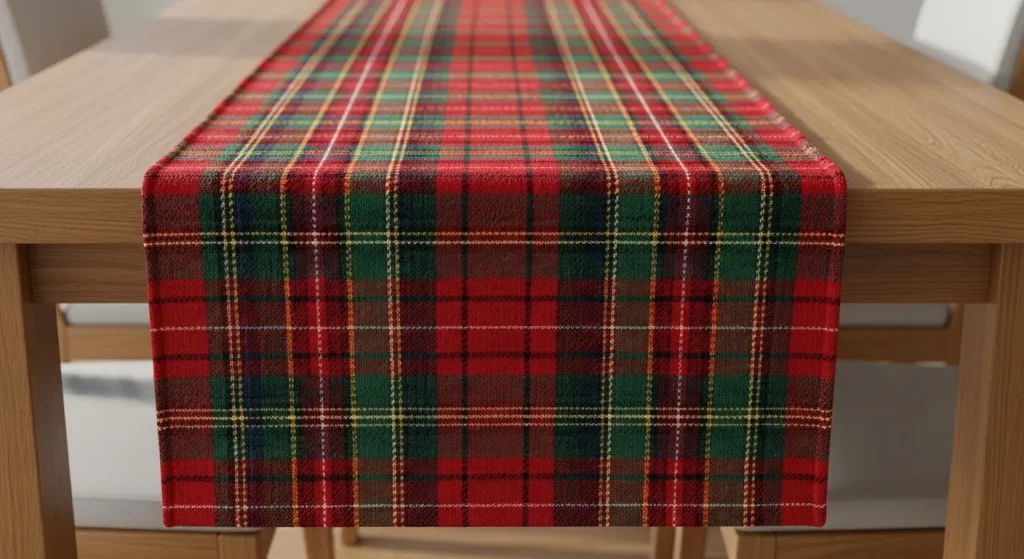
- DIY Tips
- Pay close attention to matching the plaid lines when sewing pieces together for a seamless look.
- A simple fringed edge is a perfect no-sew finish for a flannel plaid runner.
- Pair your plaid runner with solid-colored napkins and placemats to make the pattern stand out.
6. Use Burlap for a Rustic Farmhouse Look
For a charming and rustic aesthetic, burlap is an excellent and budget-friendly choice. Its natural texture provides a perfect backdrop for other decorative elements like lace, stenciled designs, or twine. Burlap is incredibly versatile and works well for no-sew projects.

- DIY Tips
- Embrace the rustic look by creating a simple frayed edge on your burlap runner.
- Layer a delicate lace trim down the center of the burlap for a beautiful contrast in textures.
- Use a stencil and white acrylic paint to add festive words like “Joy” or “Noel” to your runner.
7. Select Velvet for an Elegant and Luxurious Feel
If you’re aiming for a more glamorous and sophisticated holiday table, velvet is the perfect fabric choice. Its rich texture and subtle sheen add a touch of luxury and elegance. Deep jewel tones like emerald green, ruby red, or sapphire blue look particularly stunning in velvet.
- DIY Tips
- When sewing with velvet, be sure to use a special needle and pin within the seam allowance to avoid marks.
- A simple, unadorned velvet runner is elegant on its own and doesn’t require many embellishments.
- For a no-sew option, use a quality fabric glue to create clean, crisp hems.
8. Try Faux Fur for a Cozy, Whimsical Vibe
Add a touch of cozy whimsy to your holiday decor with a faux fur table runner. This unexpected texture creates a soft and inviting tablescape, perfect for a winter wonderland theme. A simple white or cream-colored faux fur runner looks incredibly chic and festive.

- DIY Tips
- When cutting faux fur, use a craft knife on the backing to minimize shedding.
- A simple rectangular runner with no hemming is all you need, as the fur hides the raw edges.
- Pair your faux fur runner with metallic and crystal accents for a glamorous winter look.
9. Master the Use of Fusible Hem Tape
Fusible hem tape is your best friend for no-sew projects, allowing you to create perfect, durable hems with just an iron. Simply place the adhesive tape inside a folded hem and press. This technique gives you a professional-looking finish without any sewing skills required.

- DIY Tips
- Always read the manufacturer’s instructions for the correct iron temperature for your fabric.
- Cut the fusible tape slightly shorter than the hem to prevent any adhesive from seeping out.
- For a strong bond, press down firmly with the iron rather than gliding it back and forth.
10. Create a Fringed Edge with Flannel
A fringed edge on a flannel table runner adds to its cozy and casual appeal. This no-sew technique is achieved by simply pulling threads from the cut edges of the fabric until you have created a fringe of your desired width. It’s a simple way to add texture and detail.

- DIY Tips
- Sew a straight line of stitches about an inch from the edge to create a clean stopping point for your fringe.
- Use a seam ripper or a pin to help you get started with pulling the first few threads.
- Wash and dry your flannel fabric before starting, as this can help soften the fibers for easier fraying.
11. Add No-Sew Felt Appliques
Felt is an ideal fabric for creating no-sew appliques to decorate your table runner. Use double-sided fusible webbing to iron on festive shapes like snowflakes, reindeer, or Christmas trees. This is an easy and fun way to add personality and charm to a plain runner.
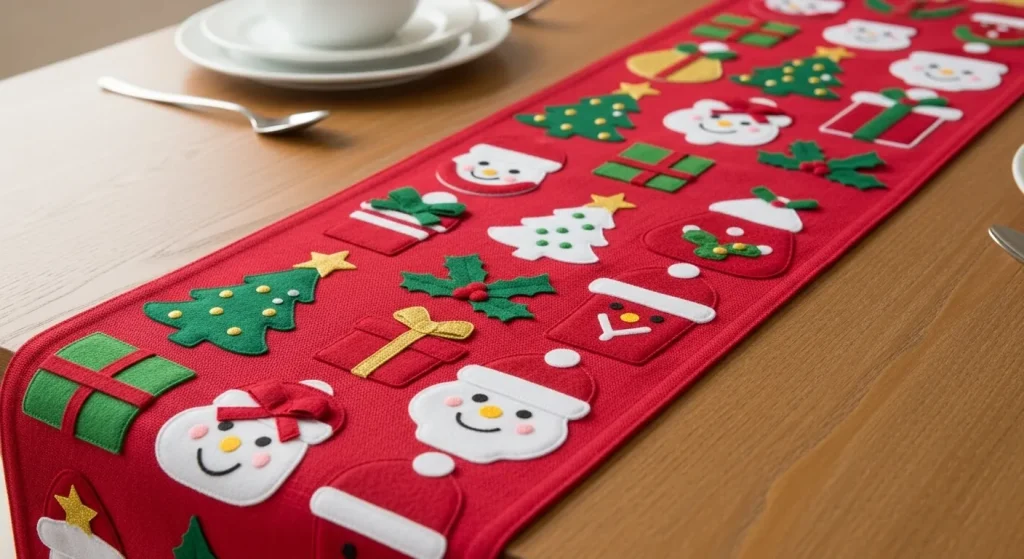
- DIY Tips
- Use cookie cutters as templates to trace perfectly shaped holiday designs onto your felt.
- Layer different colors of felt to create more detailed and dimensional appliques.
- Add small details to your felt shapes with fabric markers or glitter glue for an extra festive touch.
12. Sew a Simple Reversible Runner
Get two looks in one by sewing a reversible table runner. Choose two complementary fabrics—perhaps a festive pattern on one side and a solid color on the other—and simply sew them together. This versatile project is perfect for beginner sewers.

- DIY Tips
- Place the two fabrics right sides together, sew around the edges, and leave a small opening for turning.
- After turning the runner right side out, press it flat and topstitch around the entire perimeter for a crisp edge.
- Ensure both fabrics are the same weight and material so they hang and wash well together.
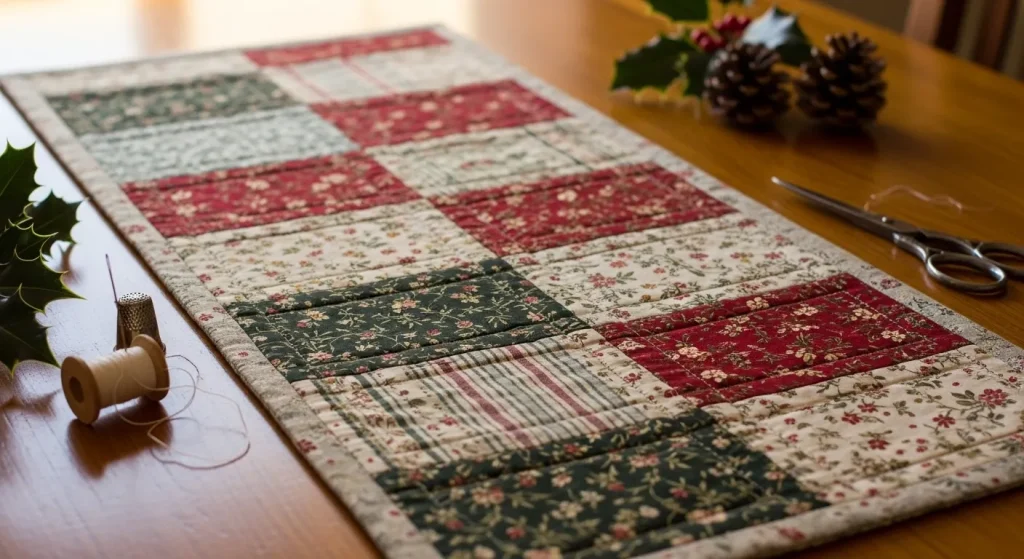
13. Create a Patchwork Design with Scraps
A patchwork table runner is a wonderful way to use up leftover fabric scraps and create a truly unique piece. Cut your scraps into squares or strips and sew them together to form a beautiful and colorful design. This is a great project for quilters or anyone who loves a homespun look.
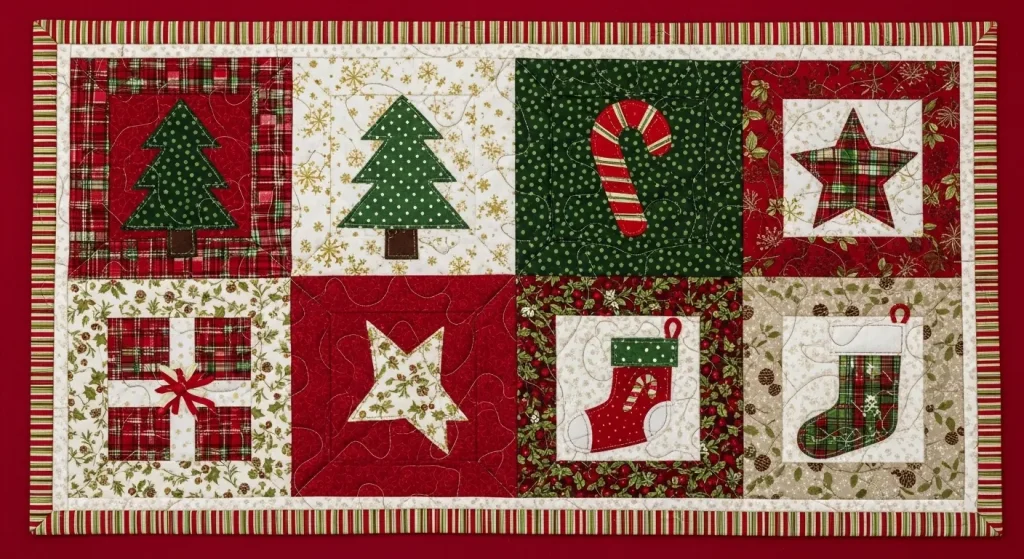
- DIY Tips
- For a cohesive look, choose fabric scraps that share a common color palette.
- Arrange your fabric pieces on a flat surface to finalize your design before you start sewing.
- Add a layer of batting and a backing fabric to turn your patchwork top into a mini quilt.
14. Try Quilting for Added Texture
Quilting your table runner adds a beautiful layer of texture, warmth, and dimension. Whether you opt for simple straight lines or a more intricate free-motion design, the quilting stitches will elevate the look of your runner. This technique is perfect for creating an heirloom-quality piece.

- DIY Tips
- Use a walking foot on your sewing machine to help keep the layers of fabric from shifting as you quilt.
- Choose a contrasting thread color to make your quilting stitches a prominent design element.
- Start quilting in the center of your runner and work your way out to the edges to avoid puckering.
15. Add a Pointed End for a Unique Shape
Instead of a traditional rectangular shape, give your table runner a more dynamic look by creating pointed or tapered ends. This can be achieved by folding the fabric at the ends to create a triangle and sewing it in place. It’s a simple detail that adds a touch of elegance.

- DIY Tips
- To create the point, fold the two corners of the runner’s end in to meet at the center and press.
- Add a decorative tassel or a jingle bell to the tip of each pointed end for a finishing touch.
- Ensure the points on both ends of the runner are symmetrical for a balanced look.
16. Attach Pom-Pom Trim for a Playful Border
For a fun and whimsical touch, attach a colorful pom-pom trim to the edges of your table runner. This playful embellishment is perfect for a more casual and festive holiday theme. You can either sew the trim on or use fabric glue for a no-sew alternative.

- DIY Tips
- Choose a pom-pom trim in a contrasting color to make it pop against your main fabric.
- For a fuller look, you can make your own yarn pom-poms and attach them individually.
- Attach the pom-pom trim to just the two shorter ends of the runner for a more subtle look.
17. Add Tassels to the Corners
Elegant tassels attached to the corners of your table runner can add a sophisticated and stylish finishing touch. You can purchase pre-made tassels or easily make your own using embroidery floss or yarn in a coordinating color. This simple addition elevates the overall design.
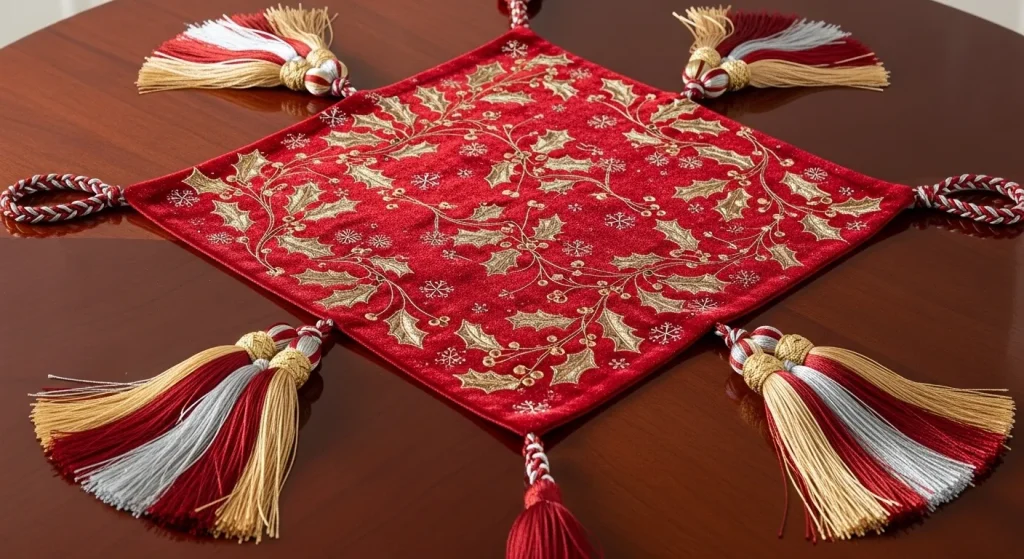
- DIY Tips
- To make your own tassel, wrap embroidery floss around a piece of cardboard, tie it off, and cut the loops.
- Securely hand-sew the tassels to each corner of the runner to ensure they stay in place.
- Consider using a metallic thread in your tassels for a touch of holiday sparkle.
18. Sew on Jingle Bells for a Festive Sound
Add a cheerful, festive sound to your holiday table by sewing small jingle bells onto your table runner. You can attach them to the corners, the ends of tassels, or scatter them along the border. They are a delightful detail that adds to the magical atmosphere of the season.

- DIY Tips
- Use a sturdy thread and a thimble to make sewing the jingle bells on by hand easier.
- Choose jingle bells in different sizes and metallic finishes for a more dynamic look.
- If you prefer a no-sew option, you can tie the jingle bells on with thin ribbon or twine.
19. Embellish with Elegant Ribbon or Braid
A beautiful ribbon or decorative braid can be used to create an elegant border on your table runner. This is a simple way to add a touch of sophistication and a pop of contrasting color or texture. You can attach the trim with either a sewing machine or fabric glue.

- DIY Tips
- For a professional finish, miter the corners of the ribbon where they meet.
- Layer different widths and textures of ribbon to create a more intricate and custom border.
- Use a ribbon with a subtle metallic thread to catch the light and add a festive shimmer.
20. Stencil on a Holiday Motif
Stenciling is an easy way to add a custom design to a plain fabric table runner. Use festive stencils of snowflakes, reindeer, or Christmas trees and apply fabric paint with a stencil brush. This technique allows you to create a professional-looking design with minimal artistic skill.
- DIY Tips
- Secure your stencil to the fabric with painter’s tape to prevent it from shifting as you paint.
- Use a dabbing motion with your stencil brush rather than a brushing one to prevent paint from seeping under the edges.
- Heat-set the fabric paint with an iron according to the manufacturer’s instructions to make the design permanent.
21. Hand-Paint a Custom Design
If you’re feeling artistic, you can hand-paint a unique design directly onto your table runner using fabric paints. From delicate holly branches to a whimsical winter scene, the possibilities are endless. This allows you to create a truly one-of-a-kind piece of holiday art for your table.

- DIY Tips
- Lightly sketch your design onto the fabric with a pencil or a disappearing ink fabric marker before painting.
- Place a piece of cardboard under the fabric as you paint to prevent any bleed-through.
- Use fabric markers for adding fine details and outlines to your painted design.
22. Embroider Names or Holiday Greetings
Add a beautifully personal touch to your table runner by embroidering your family’s name, a holiday greeting like “Merry Christmas,” or festive motifs. Hand embroidery adds a timeless, handcrafted quality to your runner, turning it into a cherished heirloom.

- DIY Tips
- Use an embroidery hoop to keep your fabric taut for more even and consistent stitches.
- A simple backstitch is perfect for outlining letters and creating clear, readable text.
- Choose an embroidery floss color that contrasts nicely with your fabric to make your design stand out.
23. Use Buttons for a Charming Detail
Vintage or festive buttons can be a charming and whimsical embellishment for your table runner. Sew them along the border, cluster them in the corners, or use them to create simple shapes like a Christmas tree or a snowflake. This is a great way to use up buttons from your collection.

- DIY Tips
- Choose buttons in a consistent color scheme, such as all-white or a mix of reds and greens.
- For a more secure attachment, use a strong thread and sew through each button several times.
- Incorporate buttons of different shapes and sizes to create more visual interest.
24. Incorporate Natural Elements like Twine
For a rustic and natural aesthetic, incorporate elements like jute twine into your table runner design. You can use it to tie on embellishments, create a decorative border, or even make small bows to attach to the corners. Twine pairs beautifully with fabrics like burlap and linen.

- DIY Tips
- Use a hot glue gun to create a decorative swirled border with the twine.
- Tie small sprigs of faux greenery or cinnamon sticks onto your runner with pieces of twine.
- Create simple twine tassels to hang from the ends of your runner for a rustic touch.
25. Add a Touch of Sparkle with Sequins
For a touch of holiday glamour, add some sparkle to your table runner with sequins or glitter. You can hand-sew individual sequins to create a delicate, shimmering design, or use glitter fabric paint for an easier application. A little bit of sparkle can make your tablescape feel extra special.

- DIY Tips
- Use a fine beading needle and thread for sewing on individual sequins.
- For a more subtle look, choose sequins that are a similar color to your fabric.
- If using glitter paint, be sure to heat-set it properly to prevent the glitter from shedding.
26. Create Matching Napkins or Placemats
Create a fully coordinated holiday tablescape by making matching napkins or placemats to go with your new table runner. Use the same fabric or a complementary one from the same collection. This will give your dining table a polished and professionally designed look.

- DIY Tips
- A simple hemmed edge is all that is needed for beautiful and functional napkins.
- If you made a reversible runner, consider making reversible placemats to match.
- Use leftover fabric scraps from your runner to create decorative napkin rings.
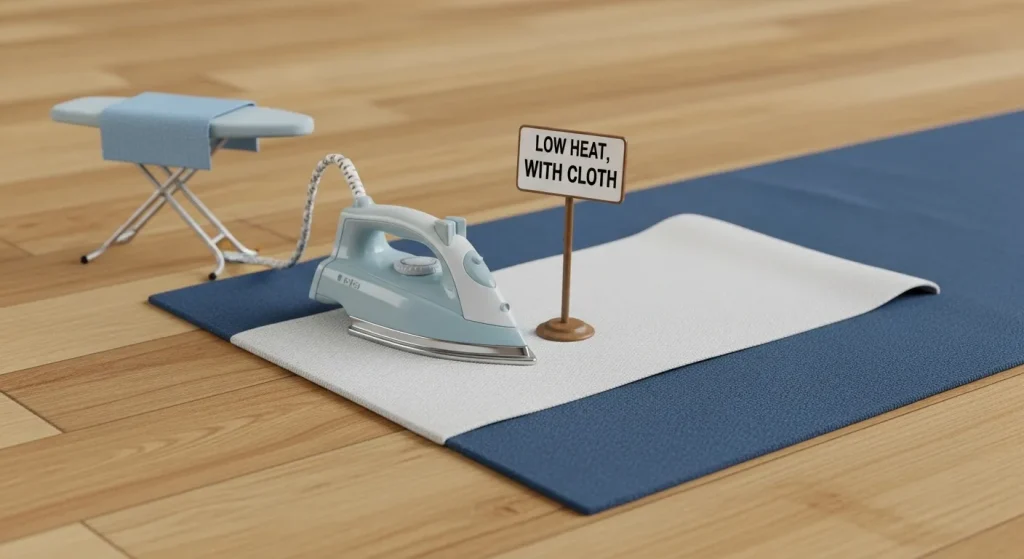
27. Care for Your Handmade Runner Properly
To ensure your handmade table runner lasts for many holidays to come, it’s important to care for it properly. The cleaning method will depend on the fabrics and embellishments you’ve used. For most runners, a gentle wash and proper storage are key.
- DIY Tips
- If your runner has delicate embellishments, it’s best to spot clean or hand wash it.
- Always iron your runner on the reverse side to protect any painted designs or appliques.
- Store your runner rolled around a cardboard tube instead of folded to prevent deep creases.
28. Style Your Runner for the Big Day
Your handmade table runner is the foundation of your holiday tablescape. Place it down the center of your table and then build your centerpiece and place settings around it. The runner will anchor your decor and create a beautiful focal point.

- DIY Tips
- Layer your runner over a solid-colored tablecloth to add depth and dimension to your table setting.
- For a more modern look, place shorter runners widthwise across the table to act as placemats for two.
- Complement your runner with natural elements like fresh greenery, pinecones, and candles.
29. Consider a Runner with Pockets
For a fun and functional twist, add pockets to the ends of your table runner. These can be used to hold silverware, napkins, or even small holiday treats for your guests. This is a unique detail that is both charming and practical.

- DIY Tips
- Use a contrasting fabric for the pockets to make them a standout design feature.
- Simply cut a rectangle of fabric, hem the top edge, and then sew the other three sides onto the end of the runner.
- Embroider your guests’ initials on the pockets for a personalized touch.
30. Make a Runner from Drop Cloth
For an inexpensive and durable fabric option, consider using a canvas drop cloth from the hardware store. This neutral-colored fabric is a perfect blank canvas for painting, stenciling, and embellishing. It has a lovely texture that is similar to linen.

- DIY Tips
- Be sure to wash and dry the drop cloth before you begin your project, as it will shrink and soften.
- The neutral color of the drop cloth makes it a perfect backdrop for bold, colorful designs.
- Create a simple frayed edge on your drop cloth runner for a rustic, farmhouse look.
31. Create a Scalloped Edge
For a charming and vintage-inspired look, create a scalloped edge on your table runner. You can do this by tracing a round object, like a glass, along the edge of your fabric and carefully cutting it out. This detail adds a soft and decorative finish.

- DIY Tips
- This technique works best on fabrics that don’t fray easily, such as felt.
- For woven fabrics, you will need to finish the scalloped edge with a tight zigzag stitch or a sewn binding.
- A scalloped edge looks particularly lovely on a simple, solid-colored runner.
32. Weave a Runner with Fabric Strips
For a highly textured and unique table runner, try weaving one using strips of fabric. You can create a simple loom out of a piece of cardboard and then weave strips of festive-colored fabric together. This no-sew technique results in a stunning, one-of-a-kind piece.

- DIY Tips
- Use a variety of fabric textures, such as cotton, satin, and burlap, for a more interesting look.
- Cut your fabric strips to a consistent width for a neat and even weave.
- Secure the ends of the woven runner by tying them off or using a line of fabric glue.
Conclusion
Creating your own Christmas table runner is a rewarding and enjoyable project that will add a personal touch to your holiday decor. It is an opportunity to unleash your creativity, learn a new skill, and create something beautiful that you will be proud to display in your home. Whether you choose a simple no sew design or a more intricate quilted masterpiece, your handmade table runner is sure to become a cherished part of your family’s holiday traditions. The joy of a DIY project extends far beyond the finished product; it is in the process of creating and in the memories that are made along the way.