As these are recipes, the costs are estimates and can vary widely based on what ingredients you already have on hand, brand choices, and local store prices. The estimates assume you need to purchase the key candy and several other main components.
Here is the complete summary table, including an estimated cost column for each of the 35 Halloween dessert ideas.
Halloween is the one night of the year when candy reigns supreme. While a bowl of fun sized treats is a classic, why not take your favorite candies to the next level?
This collection of 35 dessert ideas is a celebration of all things sweet, transforming the iconic flavors of your trick or treat haul into decadent, show stopping creations.
From gooey candy bar inspired brownies to colorful, crunchy cookie creations, get ready to raid the candy aisle and create a Halloween dessert that is truly spooktacular.
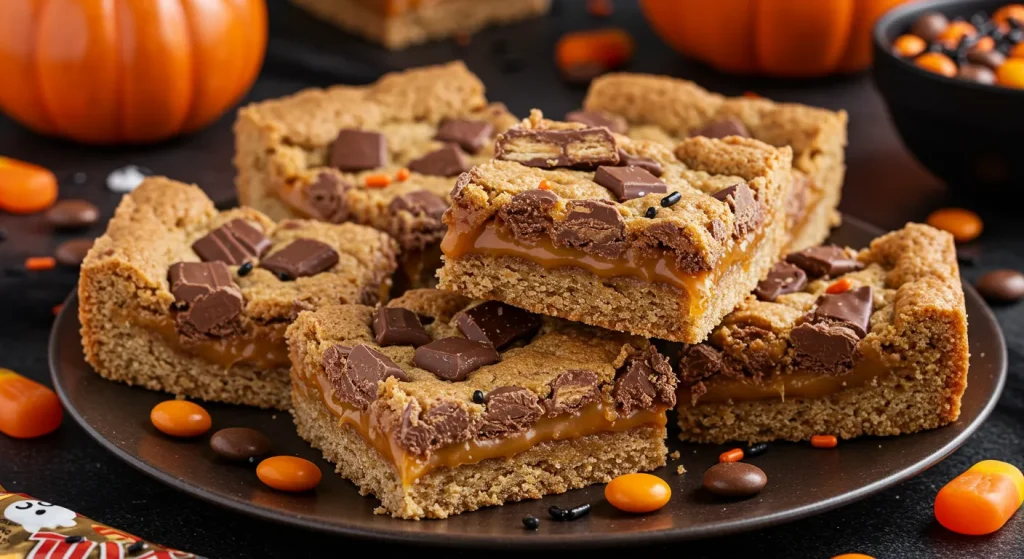
If You Love… Chocolate & Caramel
This section is for the fans of rich, gooey, and decadent candy bars. Think Snickers, Twix, and Milky Way.
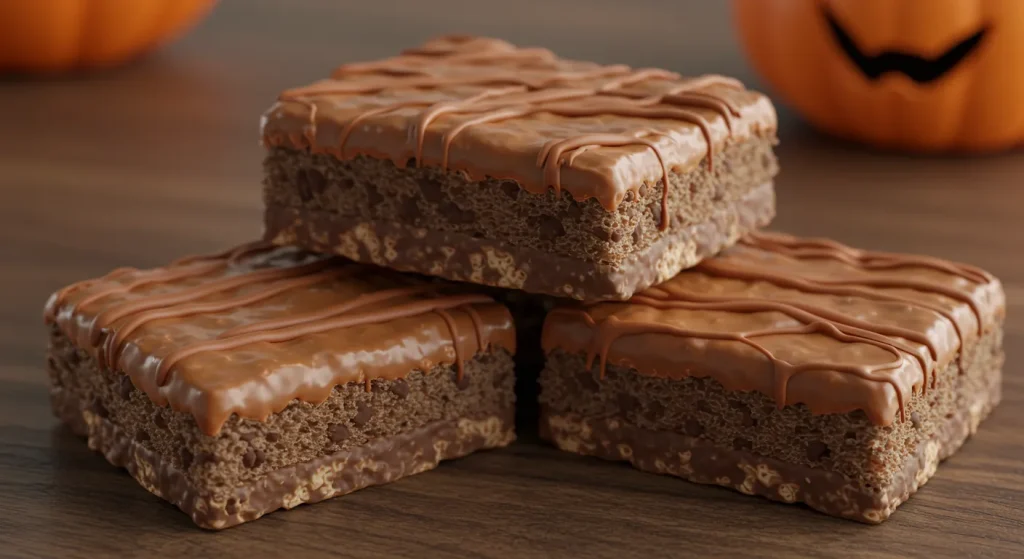
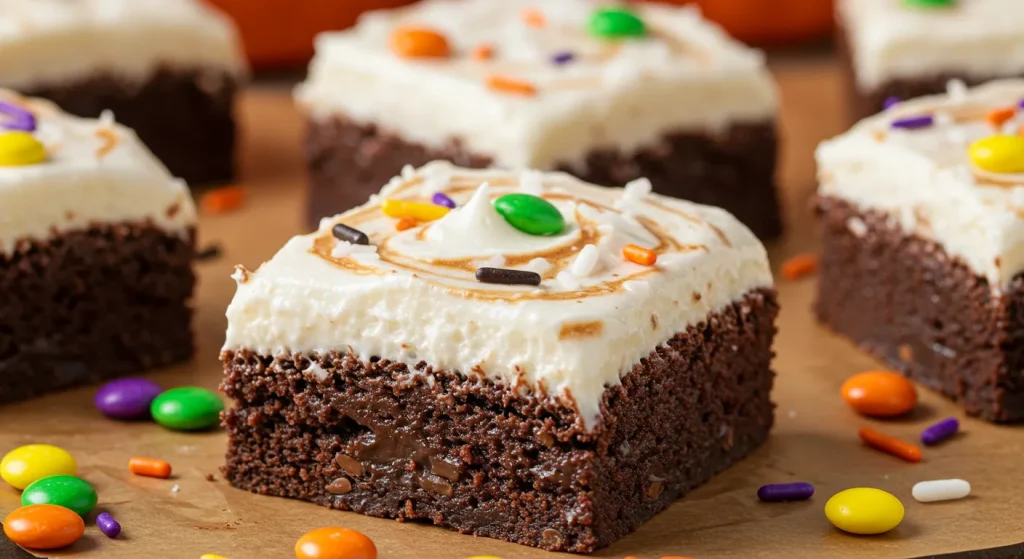
1. Snickers Brownies
A fudgy brownie base is topped with a layer of gooey caramel and peanuts, then finished with a rich chocolate ganache. It is a brownie that eats like a candy bar.

DIY Tips:
- Use a boxed brownie mix for the base to save time.
- Melt soft caramel candies with a little heavy cream in the microwave for a quick and easy caramel layer.
- Sprinkle salted peanuts over the caramel for that classic Snickers flavor.
- For the topping, melt semi sweet chocolate chips with a touch of butter until smooth.
- Let each layer cool and set slightly before adding the next one for clean, beautiful slices.
- Cut the brownies into small squares, as they are very rich.
- A sprinkle of flaky sea salt on top is a delicious finishing touch.
- You can also chop up fun sized Snickers bars and press them into the top of the brownie batter before baking.
- Store these in the refrigerator to keep the layers firm.
- This is a perfect, decadent dessert for an adult Halloween party.
2. Twix Cookie Bars
These bars feature three irresistible layers: a buttery shortbread crust, a thick, gooey caramel filling, and a smooth milk chocolate topping.
DIY Tips:
- The shortbread crust should be par baked and cooled completely before adding the caramel layer to keep it crisp.
- Use a high quality, thick caramel sauce, or make your own for the best flavor.
- Let the caramel layer set in the refrigerator before adding the melted chocolate topping.
- For the classic Twix look, you can use a fork to create a wavy pattern on the chocolate topping before it sets.
- Cut the bars into long, thin “finger” shapes to mimic the candy bar.
- These are a huge hit at any party or bake sale.
- A sprinkle of sea salt on the caramel layer is a fantastic addition.
- Store these in an airtight container at room temperature.
- This is a great make ahead dessert.
- For an easy version, use a store bought shortbread cookie crust.
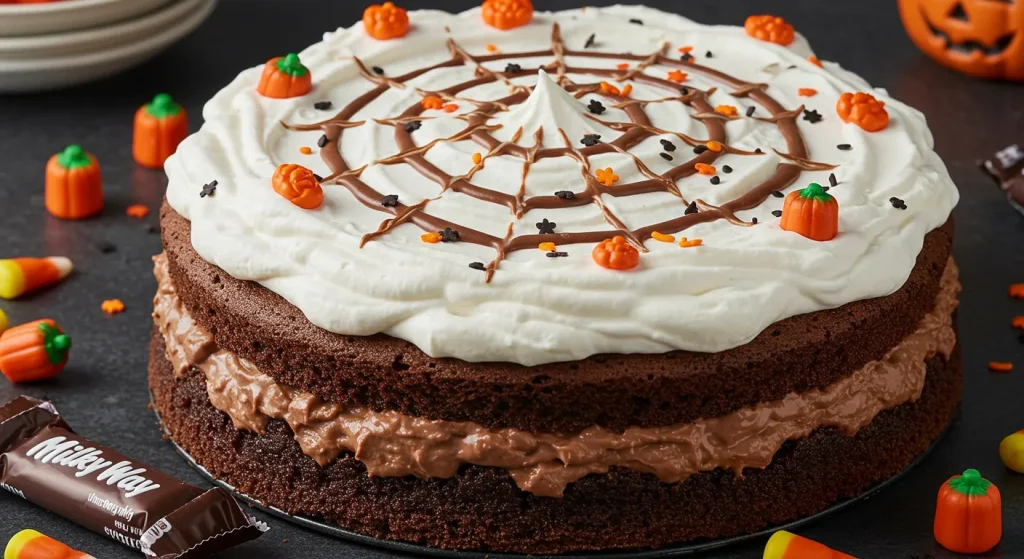
3. Milky Way Poke Cake
A rich chocolate cake is poked all over and filled with a warm caramel sauce, then topped with a fluffy, malted nougat frosting.
DIY Tips:
- Use a boxed chocolate cake mix to keep it simple.
- While the cake is still warm, use the handle of a wooden spoon to poke holes all over the top.
- Pour a jar of warm caramel sauce over the cake, allowing it to soak into the holes.
- The “nougat” frosting can be made by mixing marshmallow fluff with a little bit of malted milk powder and whipped topping.
- Garnish the top with chopped Milky Way bars or a drizzle of chocolate ganache.
- This is an incredibly moist and gooey cake.
- It is best served at room temperature.
- This is a perfect, easy dessert for a crowd.
- Let the cake cool completely before frosting.
- This is a fun and unexpected way to use a classic candy bar.
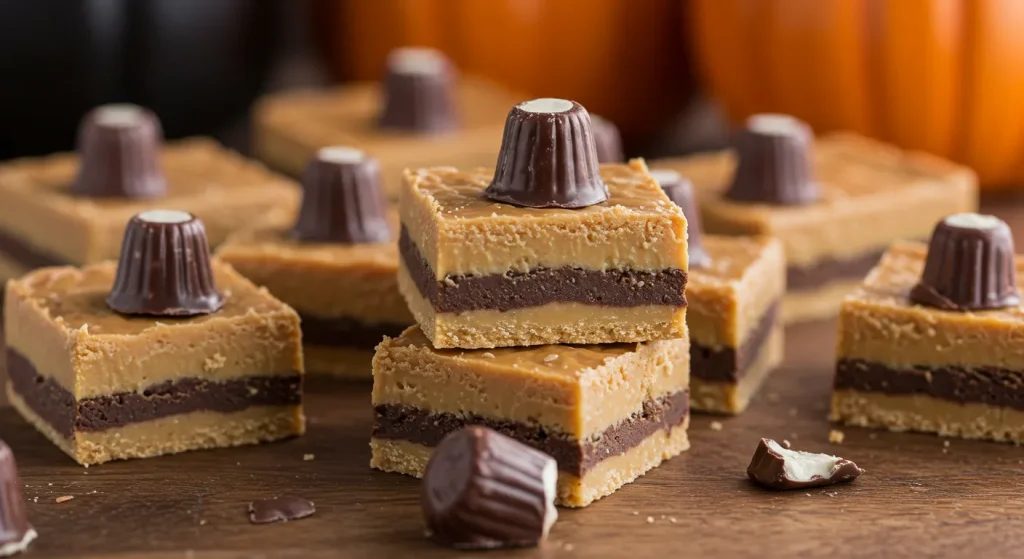
4. Rolo Stuffed Cookies
A classic chocolate chip or peanut butter cookie with a surprise, molten caramel center.
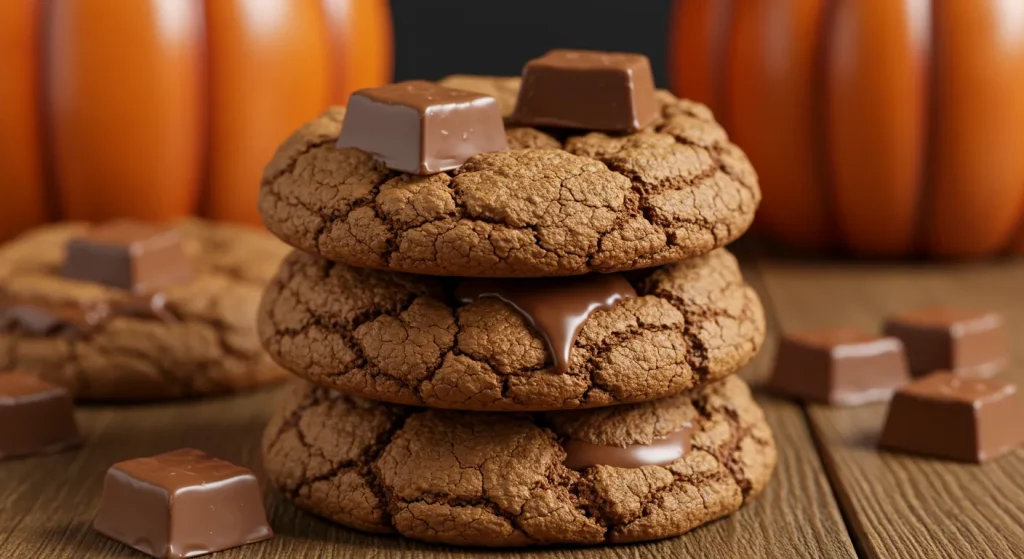
DIY Tips:
- Unwrap all your Rolo candies before you start making the cookie dough.
- Freeze the Rolos for about 15 to 20 minutes. This helps prevent the caramel from completely melting out of the cookie during baking.
- Wrap a generous amount of cookie dough completely around the frozen Rolo, making sure it is fully sealed.
- Sprinkle the tops of the cookie dough balls with a little coarse sea salt before baking.
- These are at their absolute best served warm, when the caramel is still gooey.
- You can use any thick cookie dough recipe for this.
- If you do not have Rolos, you can use any soft caramel candy.
- A chocolate cookie dough with a Rolo center is a fantastic double chocolate treat.
- Do not flatten the cookie dough balls before baking.
- This is a fun surprise for anyone biting into what they think is a normal cookie.
5. Take 5 Bark
A simple, addictive, and no bake chocolate bark that captures all the layers of a Take 5 candy bar.
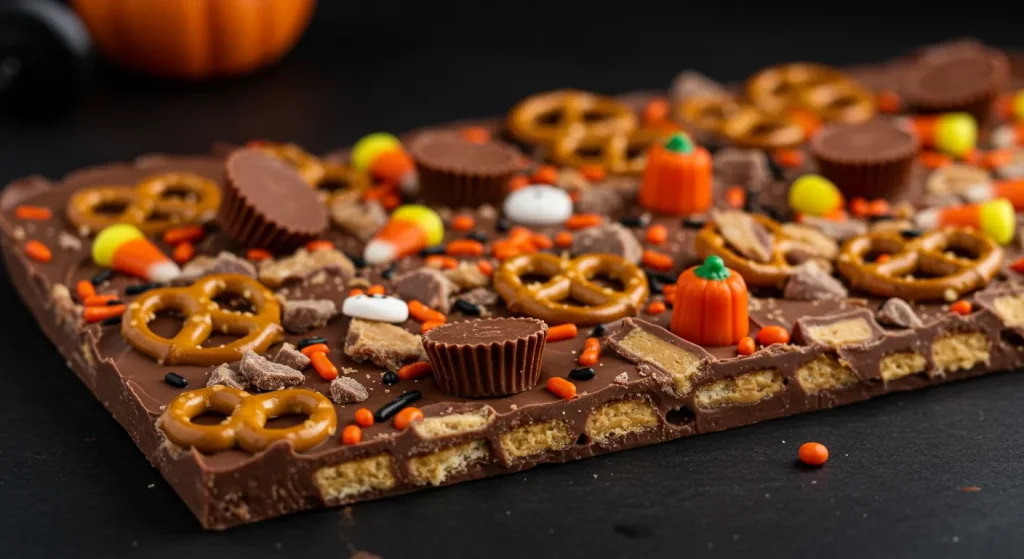
DIY Tips:
- Lay out a single layer of pretzels on a parchment lined baking sheet.
- Drizzle the pretzels with a generous amount of melted caramel sauce.
- Sprinkle with peanut butter chips or a drizzle of melted peanut butter.
- Top with a final layer of melted milk or dark chocolate.
- A sprinkle of chopped peanuts and flaky sea salt is the final touch.
- Let the bark set completely in the refrigerator before breaking it into irregular pieces.
- This is a perfect, easy treat to make with kids.
- It is a fantastic sweet and salty snack for a party.
- Store it in an airtight container in the fridge.
- You can customize it with your favorite nuts and chocolate.
If You Love… Peanut Butter & Chocolate
This is the ultimate power couple of the candy world. Think Reese’s, Butterfinger, and PayDay.
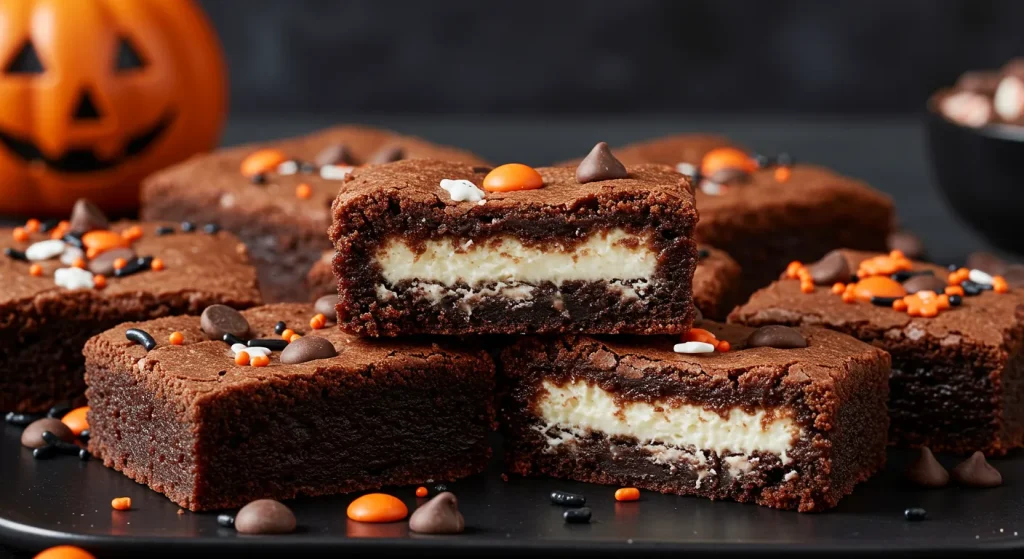
6. Reese’s Peanut Butter Cup Pie
A no bake pie that is pure peanut butter and chocolate heaven, with a creamy, rich peanut butter filling in an Oreo cookie crust.
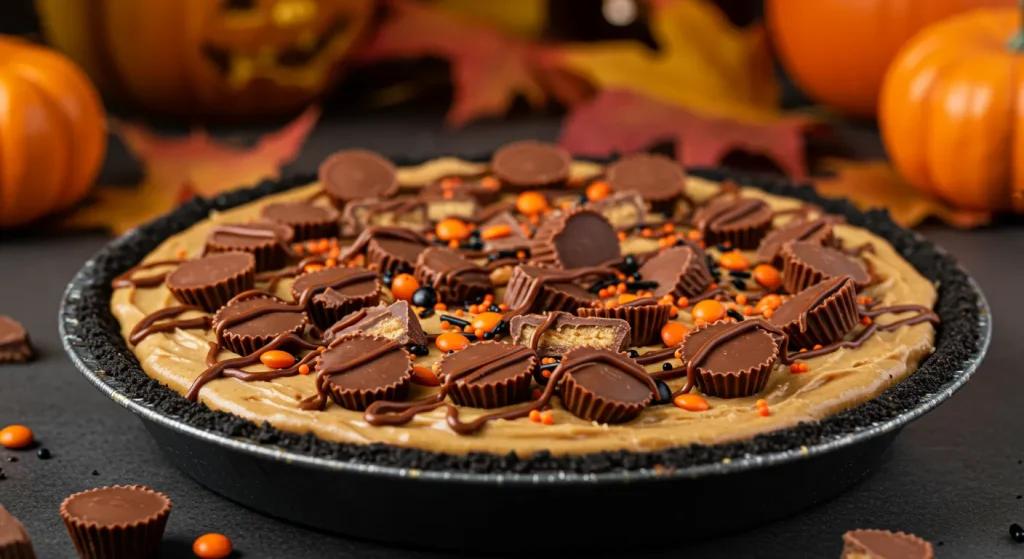
DIY Tips:
- A pre made Oreo pie crust is the ultimate time saving shortcut.
- The filling can be as simple as cream cheese, peanut butter, and powdered sugar. Fold in some whipped topping for a lighter texture.
- Top the pie with a layer of rich chocolate ganache.
- Garnish the top with chopped Reese’s Peanut Butter Cups and miniature peanut butter cups.
- Let the pie chill for at least 4 hours to set up completely.
- This is a show stopping dessert that is surprisingly easy to make.
- A drizzle of peanut butter over the chocolate ganache is a beautiful finishing touch.
- This is a perfect make ahead dessert for a party.
- Store it in the refrigerator.
- For a crunchier texture, add chopped peanuts to the crust.
7. Butterfinger Brownies
Fudgy, rich brownies are studded with the crunchy, flaky texture and unique peanut butter flavor of Butterfinger candy bars.
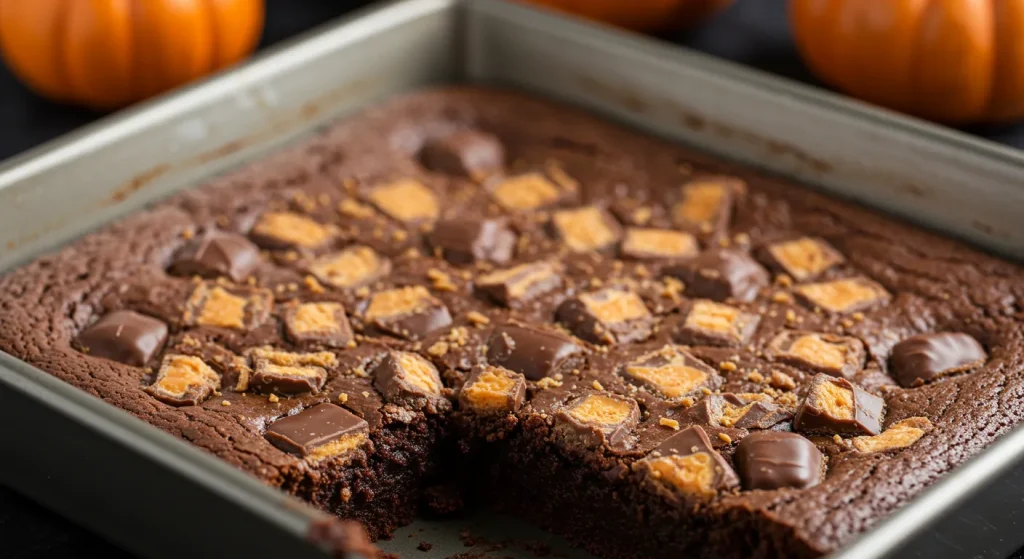
DIY Tips:
- Coarsely chop several Butterfinger bars.
- Fold half of the chopped candy into the brownie batter before baking.
- Sprinkle the remaining half on top of the batter during the last 5 minutes of baking to prevent them from burning.
- A drizzle of melted peanut butter over the top of the cooled brownies enhances the flavor.
- These are a texture lover’s dream.
- Use a plastic knife to cut the brownies for the cleanest slices.
- These are fantastic served warm with a scoop of vanilla ice cream.
- A chocolate brownie base is the perfect canvas for the candy.
- Do not overbake the brownies; a fudgy texture is best.
- This is a great way to use up leftover Halloween candy.
8. PayDay Bars
A simple, no bake bar that captures the salty peanut and sweet caramel flavor of a PayDay candy bar.
DIY Tips:
- The base is made by melting peanut butter chips with sweetened condensed milk and mini marshmallows.
- Stir in a generous amount of salted peanuts.
- Press the mixture into a greased pan and let it set.
- The marshmallows create a chewy, nougat like texture.
- This is a fantastic gluten free dessert option.
- For an extra layer of flavor, you can add a thin layer of caramel on top.
- These are very rich and sweet, so cut them into small bars.
- Store them in an airtight container at room temperature.
- This is a very easy, dump and stir recipe.
- You can also use other nuts, like almonds or cashews.
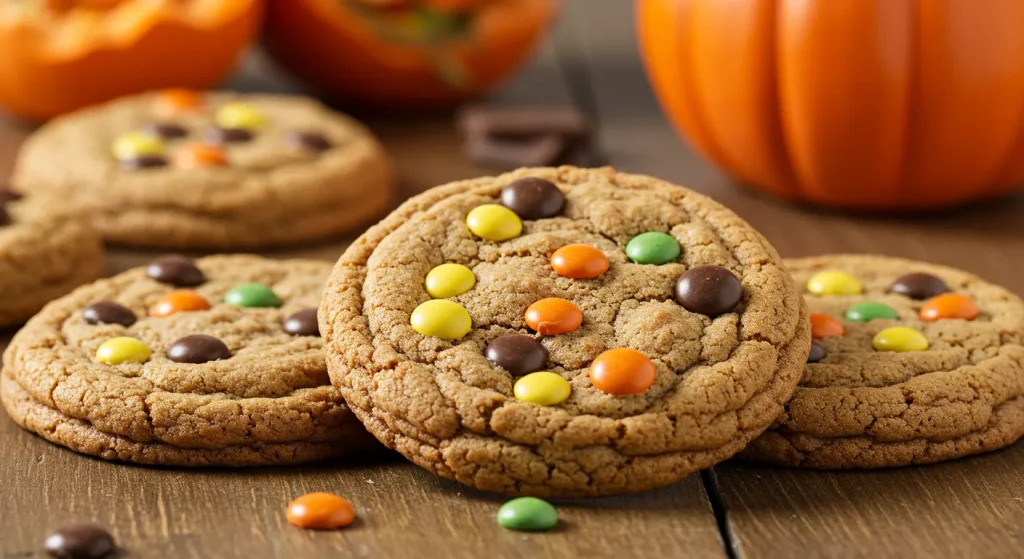
9. Reese’s Pieces Cookies
A classic peanut butter cookie gets a colorful and crunchy upgrade with the addition of Reese’s Pieces.
DIY Tips:
- Use a classic peanut butter cookie dough recipe.
- Press a few extra Reese’s Pieces onto the tops of the cookie dough balls before baking for a more colorful, professional look.
- The classic crisscross pattern with a fork is a must for a peanut butter cookie.
- The candy shells will provide a lovely, crunchy texture.
- These are a perfect, festive cookie for a fall bake sale.
- Do not overbake them to keep the centers soft and chewy.
- You can also add chocolate chips to the dough for a triple threat of flavor.
- These are a huge hit with kids.
- Store them in an airtight container.
- This is a simple way to make a classic cookie more fun and festive.
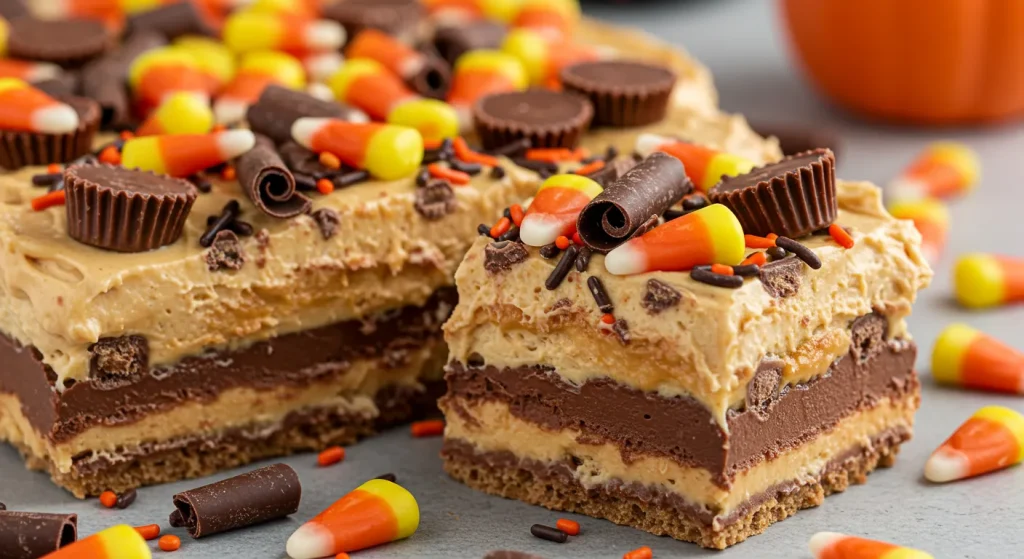
10. No Bake Peanut Butter Cup Lasagna
A decadent layered dessert featuring an Oreo crust, a peanut butter cheesecake layer, a chocolate pudding layer, and a final topping of whipped cream.
DIY Tips:
- Let each layer chill and set completely in the refrigerator before adding the next one for clean, beautiful layers.
- Sprinkle chopped peanut butter cups between each layer for an extra surprise.
- Garnish the top with a drizzle of chocolate and peanut butter sauces and more chopped candy.
- This is a perfect, impressive make ahead dessert for a party.
- Use instant chocolate pudding for a quick and easy layer.
- This dessert is best served chilled.
- It is incredibly rich, so a small slice goes a long way.
- A 9×13 pan is the perfect size for this dessert.
- This is a true showstopper.
- It is a fantastic way to combine several delicious desserts into one.
If You Love… Crunchy & Colorful Candies
This section is for the fans of Skittles, M&M’s, and other bright, crunchy, and colorful treats.
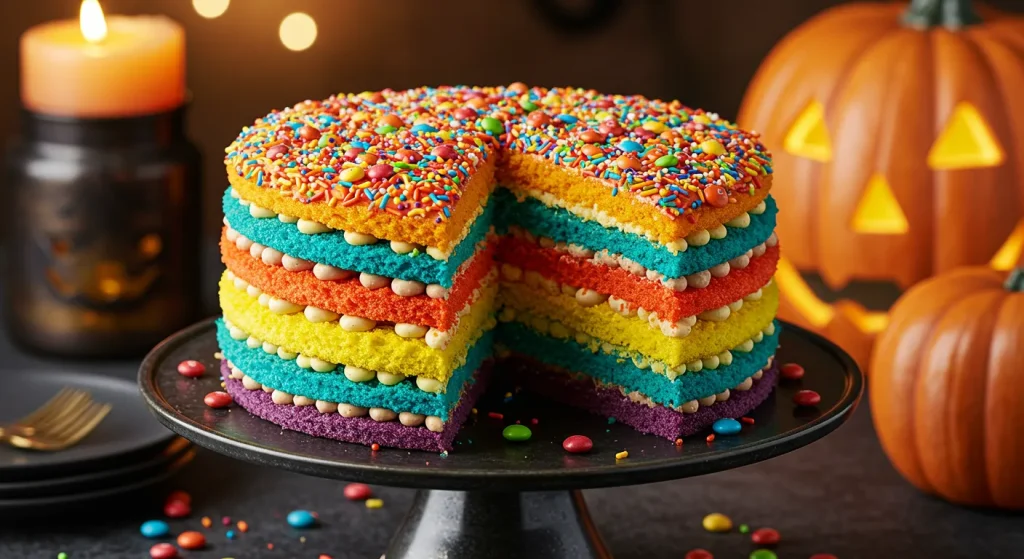
11. Skittles Rainbow Cake
A simple white cake is transformed into a vibrant explosion of color and fruity flavor.
DIY Tips:
- Use a boxed white cake mix to keep it easy.
- Gently fold a generous amount of Skittles into the cake batter right before pouring it into the pan.
- The candy will melt slightly, creating colorful streaks throughout the cake.
- Top the cake with a simple vanilla buttercream frosting.
- Decorate the top with a rainbow pattern of Skittles.
- For a fun surprise, you can create a “geode” effect by pressing crushed Skittles into a cutout in the side of the cake.
- This is a fun and whimsical cake for a kid’s Halloween party.
- Do not overmix the batter after adding the candy, or the colors will become muddy.
- This cake is best served the day it is made.
- It is a fantastic way to use up a lot of Skittles.
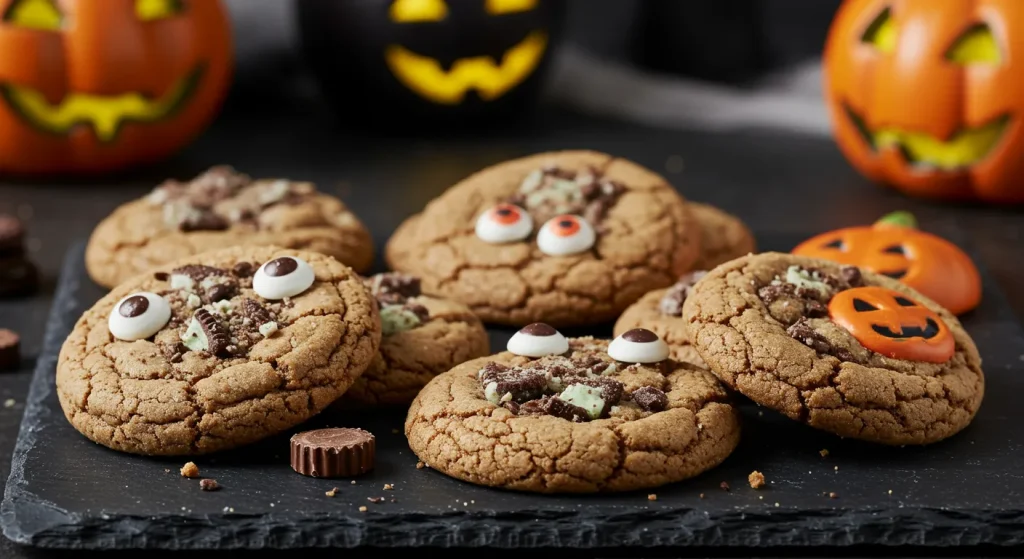
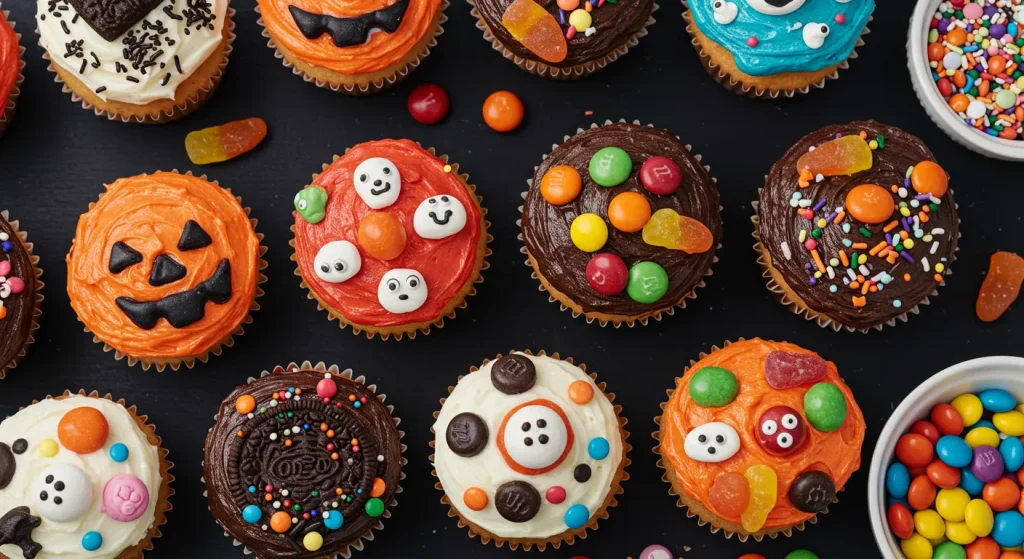
12. M&M’s Monster Cookies
A classic, chewy cookie is loaded with M&M’s, making them perfect for a festive and colorful Halloween treat.
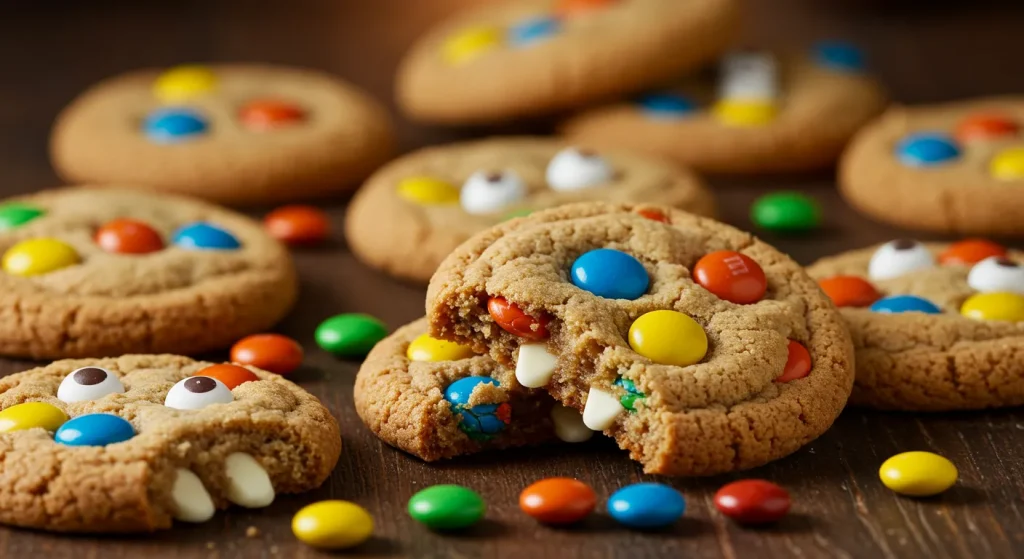
DIY Tips:
- Use Halloween themed M&M’s (with orange, green, and purple colors) for a festive look.
- Press a few extra M&M’s onto the tops of the cookie dough balls before baking for a more photogenic cookie.
- A mix of oats, chocolate chips, and M&M’s creates a fantastic “monster” cookie texture.
- These are a classic and always popular choice for a cookie swap.
- For a spooky twist, you can add a candy eyeball to the center of each cookie.
- These are a great, easy recipe to make with kids.
- Store them in an airtight container.
- A chewy cookie base is the best canvas for the crunchy candy.
- Do not overbake them to keep the centers soft.
- This is a great way to use up leftover M&M’s.
13. Candy Corn Bark
A simple, colorful, and no bake chocolate bark that is perfect for a Halloween party.
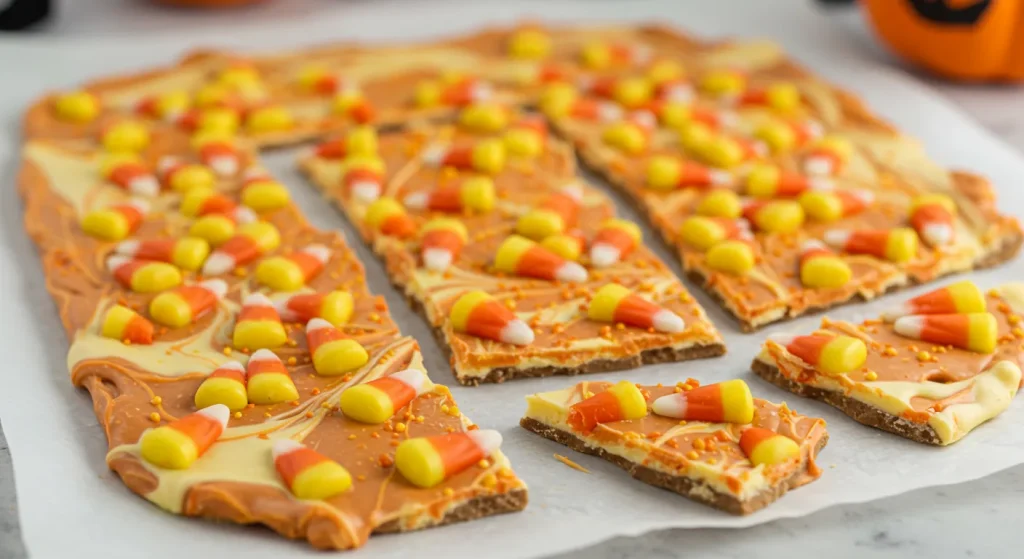
DIY Tips:
- Melt white chocolate chips and spread the mixture onto a parchment lined baking sheet.
- Sprinkle generously with candy corn and Halloween themed sprinkles.
- For a more complex flavor, you can swirl in some melted semi sweet or milk chocolate.
- Let the bark set completely in the refrigerator before breaking it into irregular pieces.
- A sprinkle of sea salt can help to balance the sweetness.
- This is a very easy and visually appealing treat.
- You can also add other candies, like Reese’s Pieces, for more color.
- This is a great gluten free dessert option.
- Store it in an airtight container in the fridge.
- This is a perfect, easy treat to make with kids.
14. Starburst Rice Krispie Treats
A fruity, colorful, and chewy twist on the classic Rice Krispie treat.
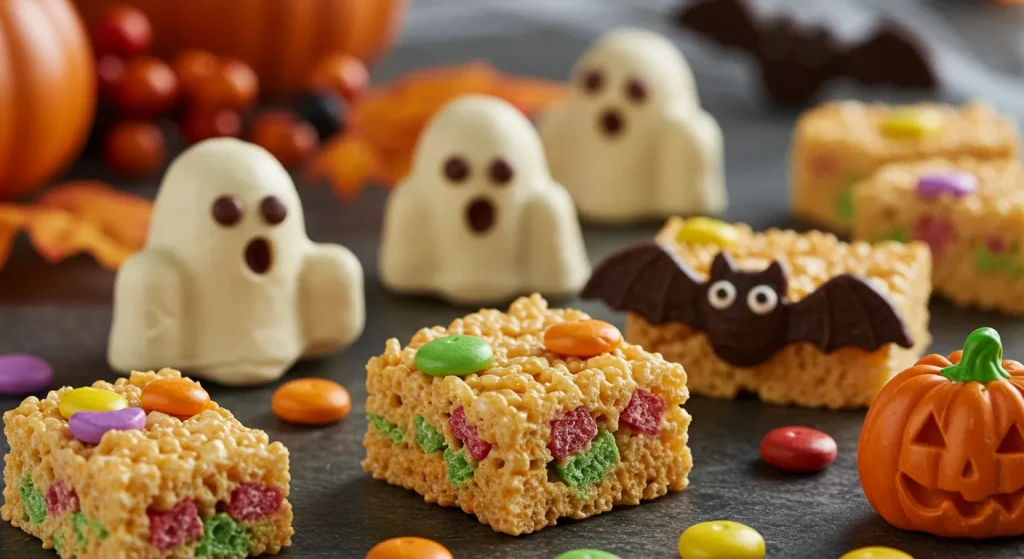
DIY Tips:
- The “marshmallow” binder is made by melting Starburst candies with a little butter.
- Use a mix of different colors of Starbursts for a rainbow effect, or use a single color for a themed treat.
- Grease your hands with butter or cooking spray when pressing the mixture into the pan, as it is very sticky.
- These have a wonderfully chewy and fruity flavor.
- They are a fun and unexpected twist on a classic.
- Cut them into squares once they are completely cool.
- Store them in an airtight container with wax paper between the layers.
- This is a great gluten free dessert option.
- Do not overheat the Starbursts, as they can become hard.
- This is a fantastic way to use up a lot of Starbursts.
15. Kit Kat Cheesecake Bars
A creamy, no bake cheesecake filling is studded with crunchy, chopped Kit Kat bars, all on a chocolate cookie crust.
DIY Tips:
- Use a pre made Oreo cookie crust to save time.
- Coarsely chop the Kit Kat bars to maintain their crunchy wafer texture.
- Fold the chopped candy into a simple no bake cheesecake filling.
- Garnish the top with more chopped Kit Kats and a drizzle of chocolate sauce.
- Let the bars chill for at least 4 hours to set up completely.
- This is a fantastic make ahead dessert.
- Store them in the refrigerator.
- You can also use other crunchy candy bars, like Heath bars or Crunch bars.
- This is a great dessert for a crowd.
- It is a fun and easy way to elevate a simple cheesecake.
If You Love… Gummy & Chewy Candies
This section is for the fans of gummy bears, worms, and other soft and chewy treats.
16. Gummy Bear Bark
A fun, colorful, and chewy chocolate bark that is a huge hit with kids.
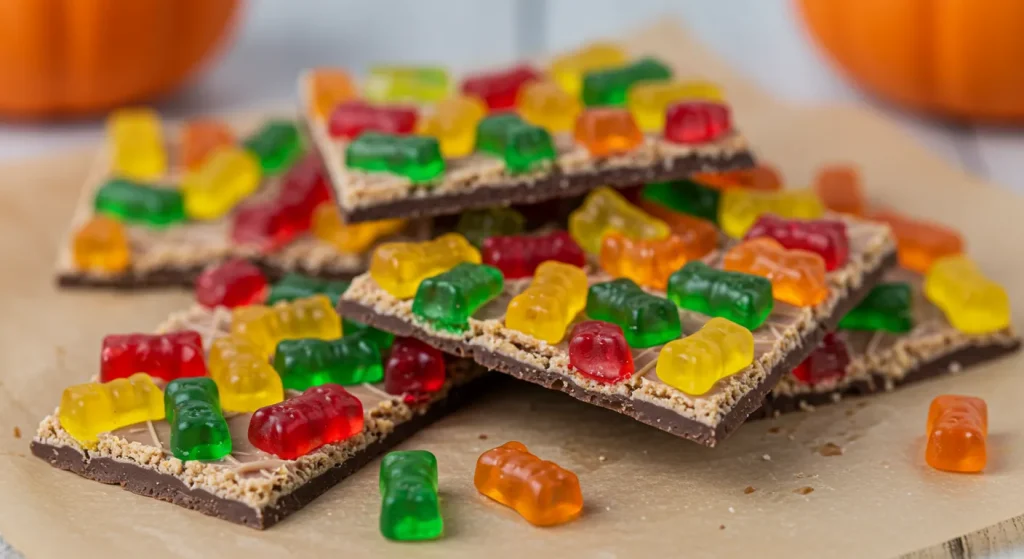
DIY Tips:
- Melt white, milk, or dark chocolate and spread it onto a parchment lined baking sheet.
- Press a generous amount of gummy bears into the melted chocolate.
- For a fun, colorful look, you can swirl different types of chocolate together.
- Let the bark set completely in the refrigerator before breaking it into pieces.
- This is a very easy and visually appealing treat.
- Store it in the fridge to keep the gummies from getting too soft.
- This is a perfect, easy treat to make with kids.
- It is a great gluten free dessert option.
- You can also use other gummy candies, like gummy worms or sour patch kids.
- A sprinkle of festive sprinkles is a great finishing touch.
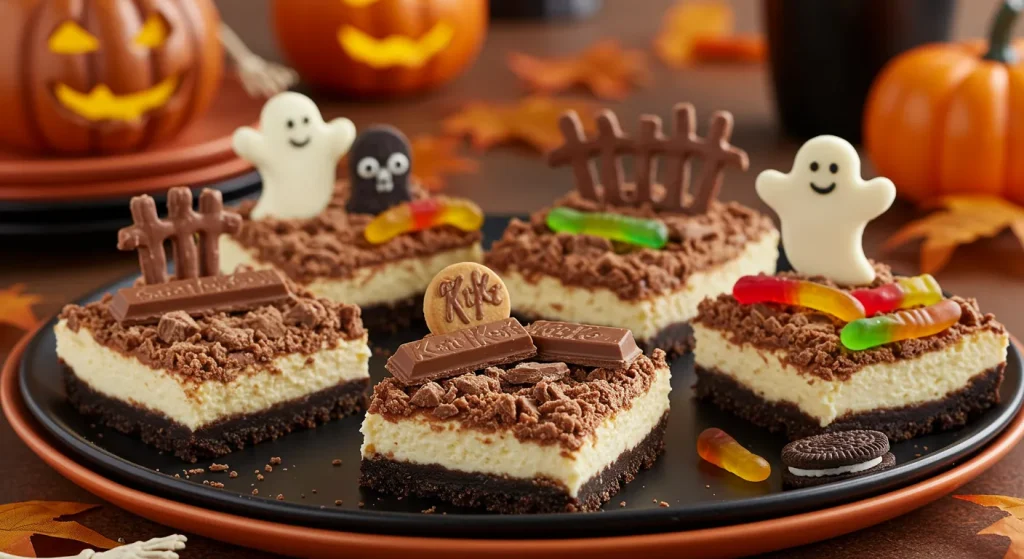
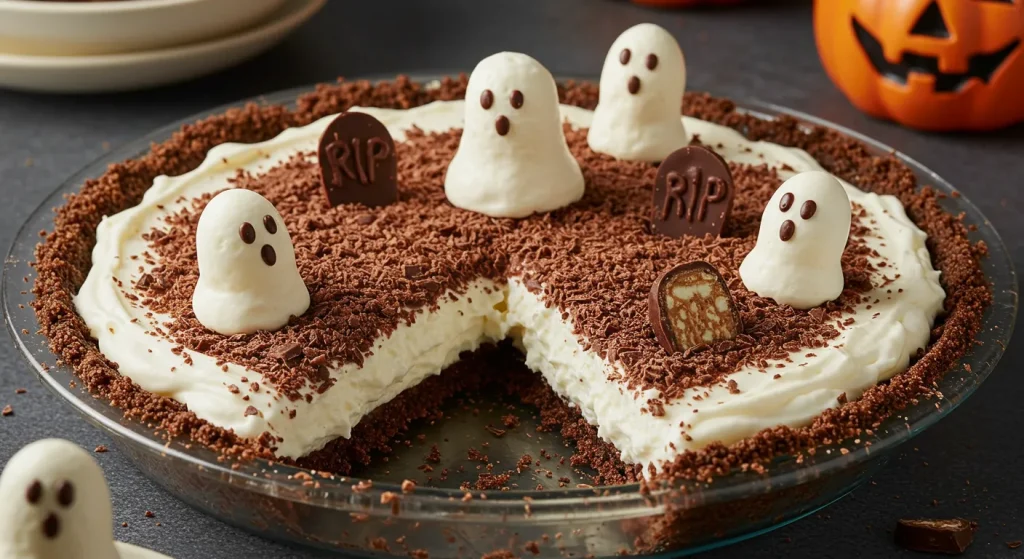
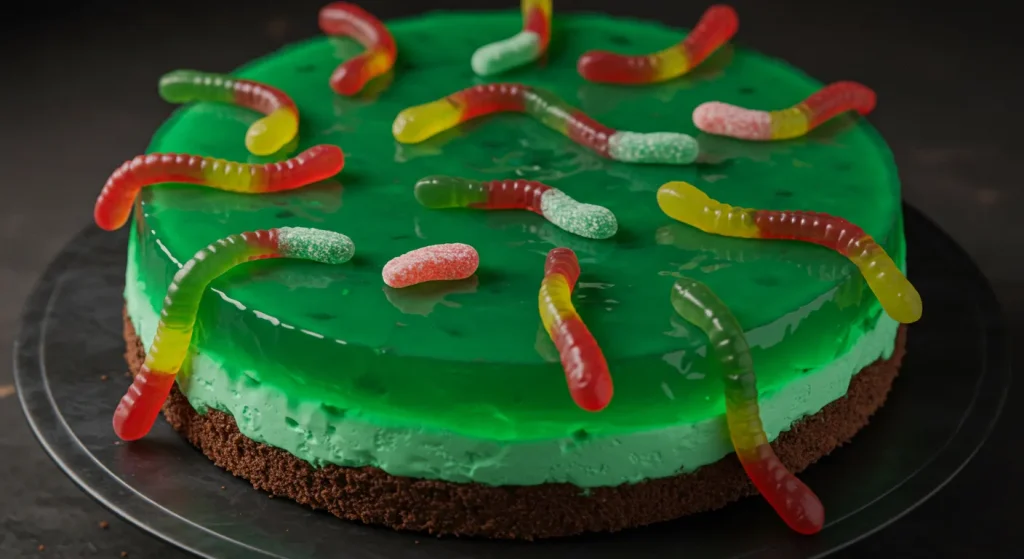
17. Jello “Worms” in Dirt Cake
A classic Halloween dessert that is both gruesome and delicious.
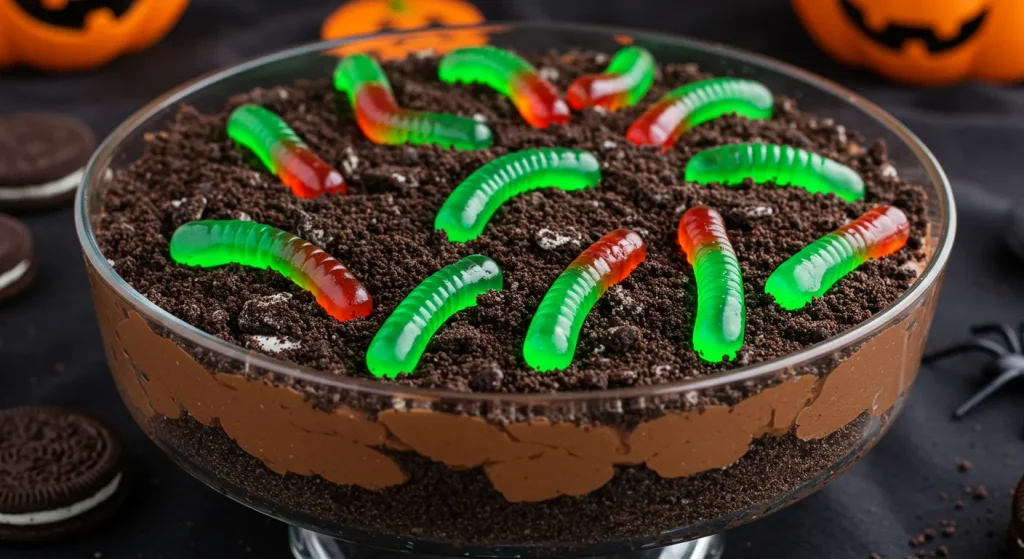
DIY Tips:
- The “dirt” is a layer of rich chocolate cake or brownies, topped with crushed Oreo cookies.
- The “worms” are made by setting Jello in a bundle of straws.
- Serve the worms crawling out of a “dirt” filled cake or individual pudding cups.
- This is a fun and interactive dessert that kids love.
- It is a perfect centerpiece for a Halloween party.
- The Jello worms can be made a day ahead of time.
- A few fresh mint sprigs can look like little plants growing in the dirt.
- This is a classic for a reason.
- It is a great way to use up a lot of Jello.
- It is a fun and easy way to make a spooky dessert.
18. Sour Patch Kids Cupcakes
A sweet and sour treat that is a fun surprise for your taste buds.
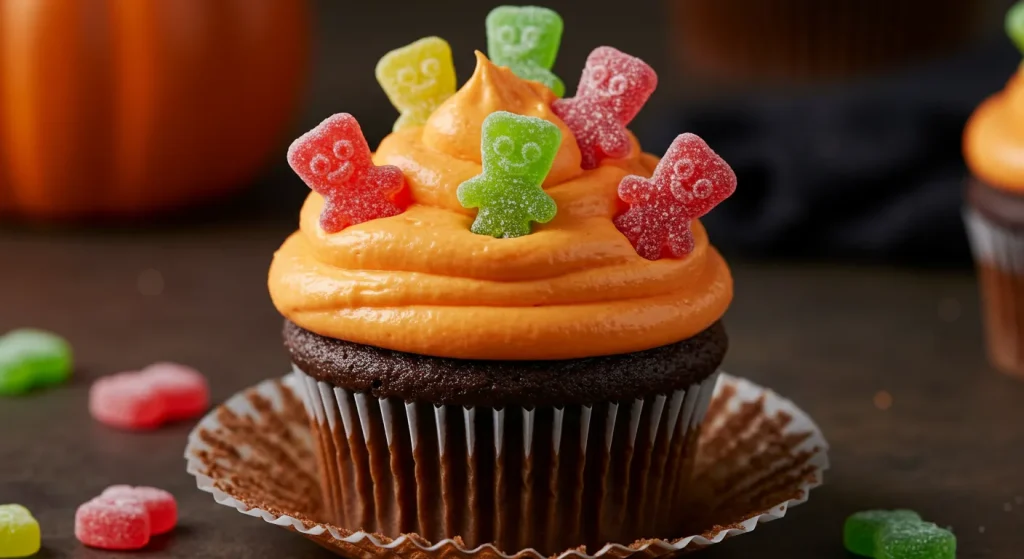
DIY Tips:
- Bake your favorite lemon or vanilla cupcakes.
- Top with a lemon or lime flavored buttercream frosting.
- Garnish the top with a generous amount of Sour Patch Kids.
- For a fun surprise, you can chop up some of the candy and fold it into the cupcake batter.
- The sour candy provides a fantastic contrast to the sweet cupcake and frosting.
- This is a fun and unique cupcake for a kid’s party.
- The bright colors of the candy look great on top of the frosting.
- This is a great way to use up a lot of Sour Patch Kids.
- A sprinkle of sour sugar on top of the frosting is a great finishing touch.
- This is a fun and unexpected flavor combination.
19. Swedish Fish Jello Aquarium
A fun and edible craft that is perfect for a kids’ party.
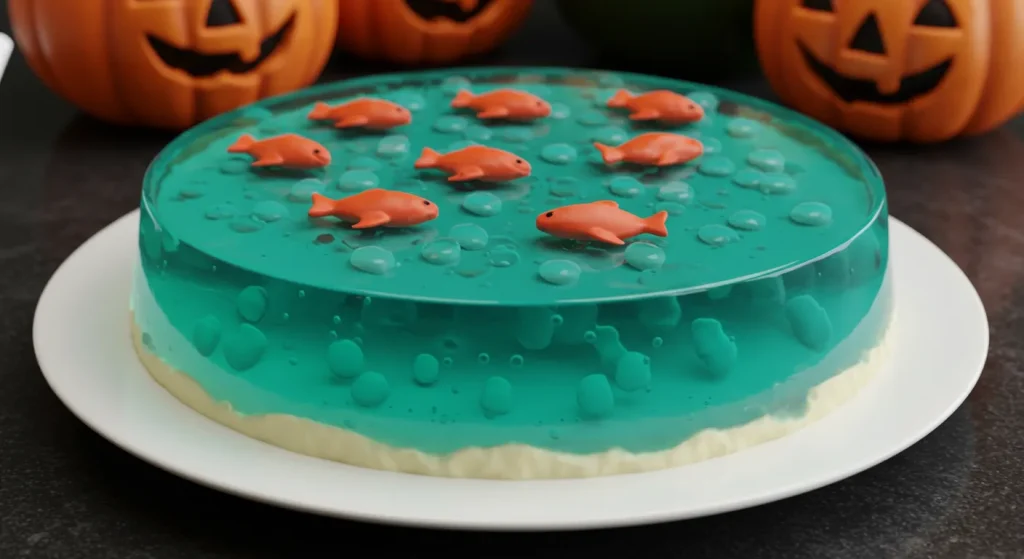
DIY Tips:
- Make a large batch of blue Jello in a clear, glass bowl or a trifle dish.
- Once the Jello is partially set, gently push Swedish Fish and other gummy sea creatures into the Jello.
- A layer of crushed graham cracker crumbs at the bottom can look like sand.
- This is a fun and interactive dessert that is also a centerpiece.
- It is a great gluten free dessert option.
- Let it set completely in the refrigerator.
- Top with whipped cream “waves.”
- This is a fun and easy way to make a themed dessert.
- It is a great way to use up a lot of gummy candies.
- Kids will love “fishing” the candy out of the Jello.
20. Tootsie Roll Fudge
A simple, no cook fudge that has the classic, chewy texture and chocolatey flavor of a Tootsie Roll.
DIY Tips:
- This fudge is made by melting Tootsie Rolls with a little butter and sweetened condensed milk.
- Stir until smooth and pour into a greased pan to set.
- This is a fun and nostalgic treat.
- It is a great way to use up a lot of Tootsie Rolls.
- Cut it into small squares, as it is very chewy and rich.
- Store it in an airtight container at room temperature.
- This is a very easy, microwave friendly recipe.
- You can also add chopped nuts for extra texture.
- This is a great gluten free dessert option.
- It is a fun and unexpected type of fudge.
If You Love… Mint & Chocolate
This is a classic, refreshing, and sophisticated flavor combination. Think Andes, Junior Mints, and Peppermint Patties.
21. Andes Mint Cookies
A rich, soft chocolate cookie is topped with a gooey, melted Andes mint right out of the oven.
DIY Tips:
- Use a chocolate cookie dough recipe, or even a brownie mix cookie.
- Unwrap all your Andes mints before the cookies come out of the oven.
- As soon as the cookies are baked, press one Andes mint onto the top of each hot cookie. Let it sit for a minute to melt, then gently spread the melted mint with the back of a spoon.
- The mint will create a beautiful, smooth, and shiny frosting.
- These are a classic holiday cookie for a reason.
- They are best served at room temperature.
- Store them in a single layer to protect the mint topping.
- A sprinkle of green sugar on top is a festive touch.
- This is a very easy and impressive looking cookie.
- The flavor is a perfect balance of rich chocolate and cool mint.
22. Junior Mints Brownies
Fudgy, dark chocolate brownies are studded with cool, creamy Junior Mints.
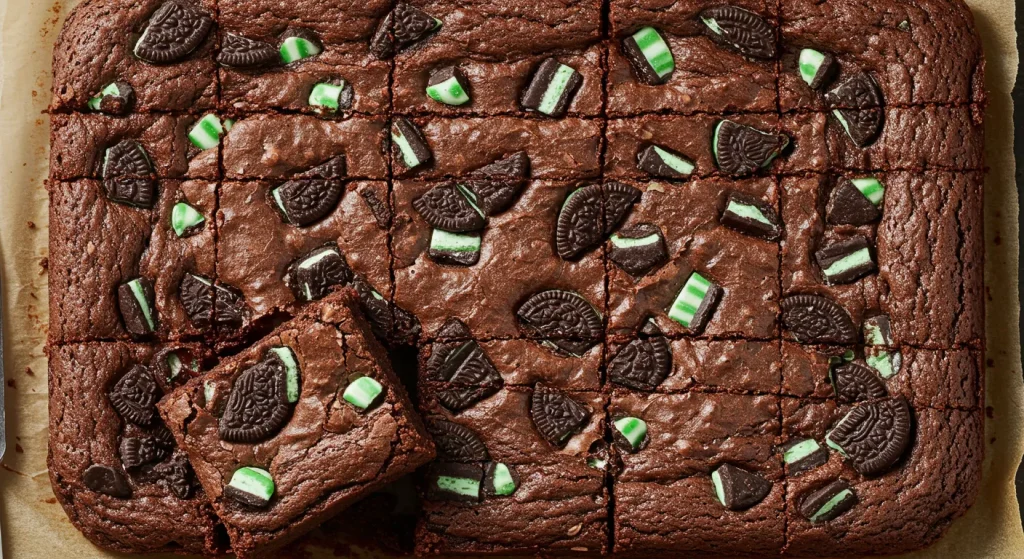
DIY Tips:
- Press a generous amount of Junior Mints into the top of the brownie batter before baking.
- The mints will melt slightly, creating pockets of gooey, minty goodness.
- A drizzle of chocolate ganache over the top of the cooled brownies is a delicious addition.
- These are fantastic served warm with a scoop of mint chocolate chip ice cream.
- A dark chocolate brownie base provides the best flavor contrast to the mint.
- Do not overbake the brownies; a fudgy texture is best.
- This is a great way to use up a lot of Junior Mints.
- Store them in an airtight container.
- This is a simple way to elevate a basic brownie.
- The cool mint flavor is a refreshing end to a meal.
23. Peppermint Patty Stuffed Brownies
A rich, fudgy brownie with a surprise, cool and creamy peppermint patty baked inside.
DIY Tips:
- Pour half of the brownie batter into the pan.
- Lay a single layer of York Peppermint Patties on top of the batter.
- Pour the remaining brownie batter over the top, covering the patties completely.
- Bake as directed. The peppermint filling will melt into a delicious, creamy layer.
- These are best served chilled, as the peppermint filling will be firmer.
- A sprinkle of crushed peppermint candies on top is a festive touch.
- This is a fantastic surprise inside dessert.
- It is a great way to use up a lot of peppermint patties.
- A dark chocolate brownie mix provides the best flavor.
- This is a sophisticated and delicious dessert.
24. No Bake Mint Chocolate Lasagna
A layered dessert with an Oreo crust, a mint cream cheese layer, a chocolate pudding layer, and a whipped topping.

DIY Tips:
- Use a few drops of green food coloring and a little peppermint extract in the cream cheese layer for a beautiful color and flavor.
- Sprinkle chopped Andes mints or Junior Mints between the layers.
- Garnish the top with chocolate shavings and more chopped mint candies.
- This is a fantastic, impressive make ahead dessert.
- It is best served chilled.
- This is a perfect dessert for a holiday party.
- It is incredibly rich, so a small slice goes a long way.
- A 9×13 pan is the perfect size for this dessert.
- This is a show stopping dessert that is surprisingly easy to make.
- It is a fun and easy way to combine several delicious desserts into one.
25. Grasshopper Pie
A classic no bake pie with a creamy, cool mint filling in a rich chocolate cookie crust.
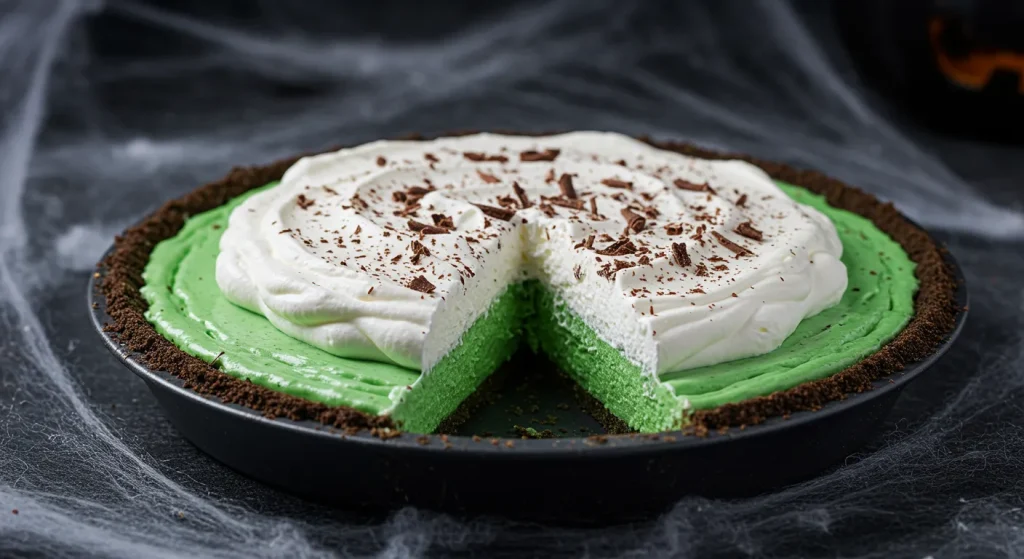
DIY Tips:
- An Oreo cookie crust is the classic choice for this pie.
- The filling is typically made with marshmallow creme, whipped topping, and a little bit of green creme de menthe for color and flavor.
- A few drops of peppermint extract will enhance the minty flavor.
- This pie is best served frozen or well chilled.
- Garnish with chocolate shavings or a drizzle of chocolate ganache.
- This is a sophisticated and refreshing dessert.
- It is a great make ahead dessert for a party.
- This is a classic for a reason.
- It is a fantastic way to use up leftover creme de menthe.
- It is a light and airy dessert that is a perfect end to a heavy meal.
If You Love… Coconut & Almond
This is a classic, tropical, and slightly more sophisticated flavor combination. Think Almond Joy and Mounds.
26. Almond Joy Cookies
A soft, chewy coconut cookie is studded with chocolate chips and whole almonds.
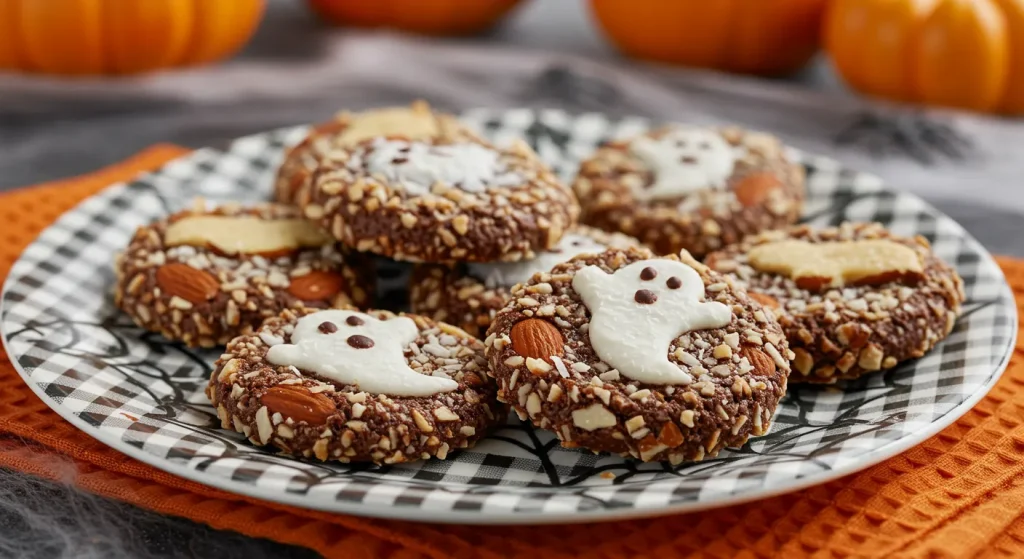
DIY Tips:
- Use sweetened, shredded coconut for the best chewy texture.
- Press a whole almond into the top of each cookie dough ball before baking.
- A drizzle of melted chocolate over the top of the baked cookies is a must.
- These are a fantastic gluten free cookie if you use a coconut or almond flour base.
- Toasting the coconut before adding it to the dough will enhance its flavor.
- These are a classic for a reason.
- They are a great way to use up a lot of shredded coconut.
- Store them in an airtight container.
- They are a delicious and easy cookie to make.
- A little bit of almond extract in the dough will enhance the almond flavor.
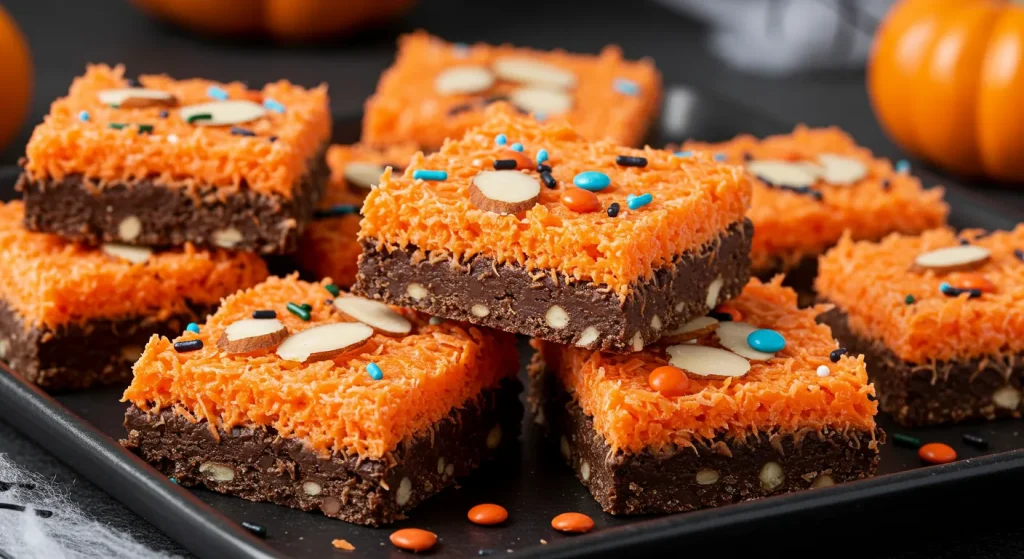
27. Mounds Bar Brownies
A fudgy, dark chocolate brownie is topped with a thick, gooey coconut filling and a final layer of dark chocolate ganache.
DIY Tips:
- A dark chocolate brownie base provides the best flavor contrast to the sweet coconut.
- The coconut filling can be made with sweetened shredded coconut, sweetened condensed milk, and a little bit of powdered sugar.
- Let each layer cool and set before adding the next one for clean, beautiful slices.
- These are incredibly rich, so cut them into small squares.
- Store them in the refrigerator to keep the layers firm.
- This is a fantastic dessert for a coconut lover.
- It is a great way to use up a lot of shredded coconut.
- A sprinkle of toasted coconut on top is a delicious finishing touch.
- This is a show stopping dessert that is surprisingly easy to make.
- It is a fun and easy way to combine several delicious desserts into one.
28. No Bake Almond Joy Bars
A simple, no bake bar with a buttery graham cracker and coconut crust, a creamy coconut filling, and a chocolate and almond topping.
DIY Tips:
- Press the crust mixture firmly into the pan to create a solid base.
- The coconut filling can be made with sweetened condensed milk, shredded coconut, and powdered sugar.
- Top the bars with a layer of melted chocolate and press whole almonds into the top before it sets.
- Let the bars chill for at least 4 hours to set up completely.
- These are a fantastic make ahead dessert.
- Store them in the refrigerator.
- This is a great gluten free dessert option if you use a nut based crust.
- This is a very easy, dump and stir recipe.
- This is a fantastic dessert for a coconut lover.
- It is a great way to use up a lot of shredded coconut.
29. Almond Joy Stuffed Dates
A simple, healthier, and no bake treat that captures the flavors of the candy bar.
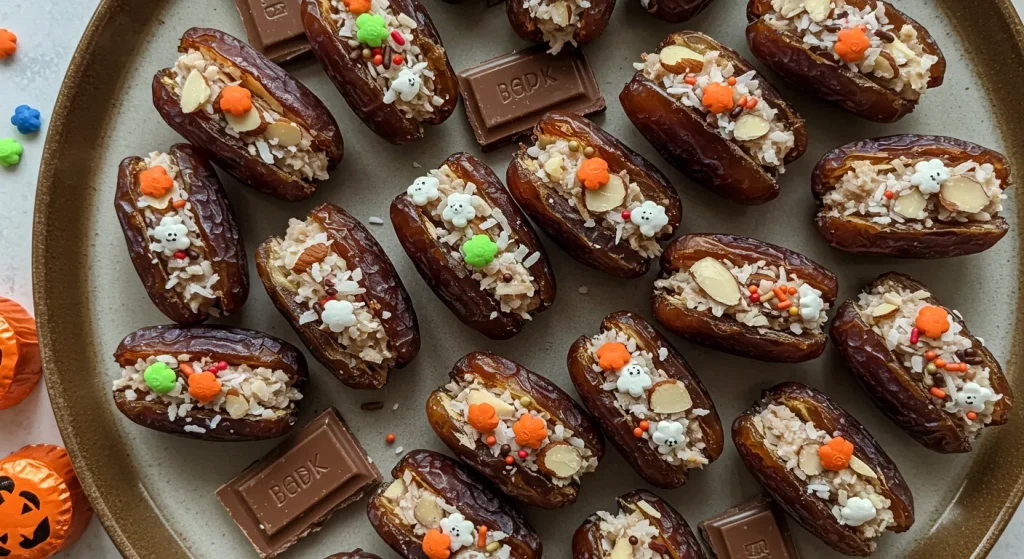
DIY Tips:
- Use large, soft Medjool dates.
- Slice the date open and remove the pit.
- Stuff the date with a whole almond and a small amount of sweetened shredded coconut.
- Drizzle the stuffed dates with melted dark chocolate.
- A sprinkle of sea salt on top is a delicious finishing touch.
- Let them set in the refrigerator.
- These are a fantastic, elegant, and easy treat.
- They are a great gluten free and paleo friendly dessert option.
- They are a great way to use up a lot of dates.
- They are a sophisticated and delicious treat.
30. Coconut Cream Pie with a Mounds Crust
A classic, creamy coconut cream pie gets an upgrade with a crust made from crushed Mounds bars and butter.
DIY Tips:
- Use a food processor to crush the Mounds bars into a fine crumb.
- Press the crust mixture into a pie plate and chill until firm.
- Fill with a classic, homemade coconut cream pie filling.
- Top with a generous amount of whipped cream and toasted coconut.
- This is a fantastic dessert for a coconut lover.
- It is a fun and easy way to elevate a classic pie.
- It is a great way to use up a lot of Mounds bars.
- This is a show stopping dessert that is surprisingly easy to make.
- It is a fun and easy way to combine several delicious desserts into one.
- It is a great make ahead dessert for a party.
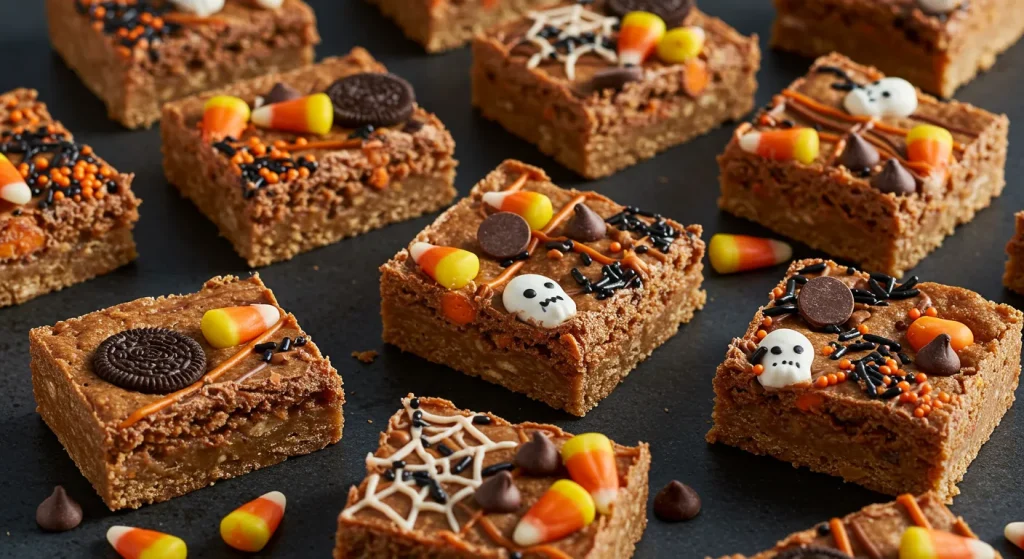
If You Love… Nostalgic & Fun Candies
This section is for the fans of the fun, colorful, and nostalgic candies that bring back childhood memories.
31. Cracker Jack Cookies
A chewy, caramel cookie is studded with salty peanuts and crunchy popcorn.
DIY Tips:
- Use a brown sugar cookie dough base for a caramel like flavor.
- Fold in a generous amount of caramel corn and salted peanuts.
- Press a few extra pieces of caramel corn onto the tops of the cookie dough balls before baking.
- These are a fun and unexpected flavor combination.
- They are a great way to use up a lot of Cracker Jacks.
- Store them in an airtight container.
- They are a delicious and easy cookie to make.
- A drizzle of melted caramel over the top is a delicious addition.
- This is a fantastic sweet and salty treat.
- This is a great cookie for a baseball themed party.
32. Pop Rocks Chocolate Bark
A fun and interactive chocolate bark that crackles and pops in your mouth.
DIY Tips:
- Melt your favorite type of chocolate and spread it onto a parchment lined baking sheet.
- Sprinkle generously with a variety of flavors of Pop Rocks candy.
- Let the bark set completely in the refrigerator.
- This is a fantastic, fun, and easy treat to make with kids.
- The popping sensation is a fun surprise.
- This is a great gluten free dessert option.
- Store it in an airtight container.
- You can also add other candies and sprinkles for more color and texture.
- This is a great party favor.
- It is a fun and easy way to make a themed dessert.
33. Gummy Worm “Jello” Cake
A fun and colorful cake that is perfect for a kid’s party.
DIY Tips:
- Bake a simple white or yellow cake in a Bundt pan.
- Once the cake is cool, poke holes all over it with a skewer.
- Pour a warm, liquid Jello mixture over the cake, allowing it to soak into the holes.
- Let the cake chill and set in the refrigerator.
- Garnish the top with a generous amount of gummy worms.
- This is a fun and easy way to make a themed cake.
- It is a great way to use up a lot of Jello and gummy worms.
- The Jello makes the cake incredibly moist and colorful.
- This is a classic for a reason.
- It is a fun and easy way to make a spooky dessert.
34. Fun Dip Cupcakes
A fun and interactive cupcake that brings back childhood memories.
DIY Tips:
- Bake your favorite vanilla cupcakes.
- Top with a simple vanilla buttercream frosting.
- Serve the cupcakes with a packet of Fun Dip on the side for dipping.
- You can also mix the Fun Dip powder into the frosting for a colorful and fruity flavor.
- This is a fun and easy way to make a themed cupcake.
- It is a great way to use up a lot of Fun Dip.
- This is a fantastic dessert for a kid’s birthday party.
- It is a fun and unexpected flavor combination.
- The candy stick can be used as a decoration on top of the cupcake.
- This is a fun and easy way to make a nostalgic treat.
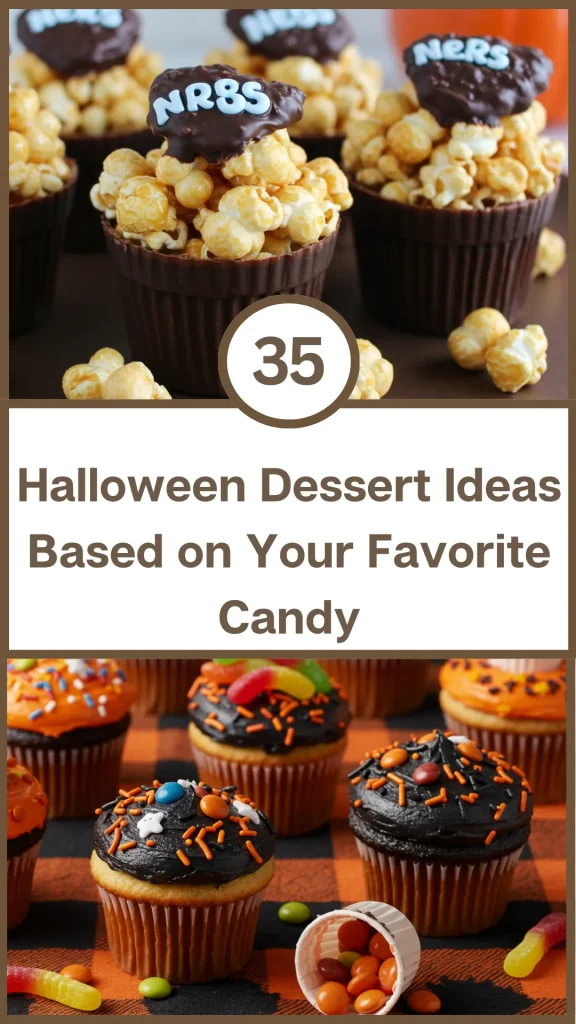
35. Nerds Popcorn
A sweet, sour, and crunchy snack that is perfect for a movie night.
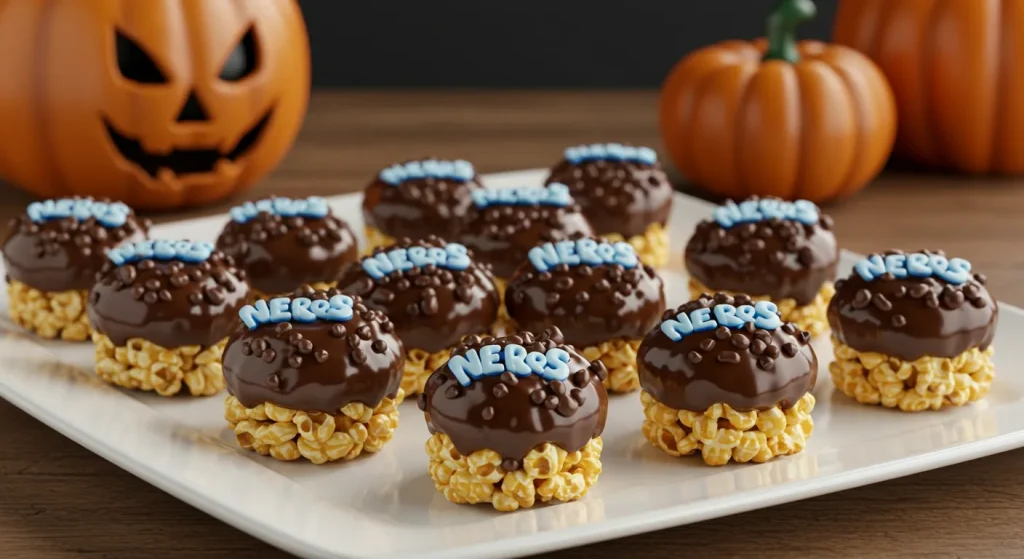
DIY Tips:
- Pop a large batch of plain popcorn.
- Melt white chocolate chips and drizzle the melted chocolate over the popcorn.
- Sprinkle generously with a variety of flavors of Nerds candy.
- Let the chocolate set completely.
- This is a fun and easy way to make a themed snack.
- It is a great way to use up a lot of Nerds.
- This is a fantastic sweet and sour treat.
- It is a great gluten free snack option.
- Store it in an airtight container.
- This is a fun and easy way to make a colorful and crunchy snack.
Conclusion
This Halloween, go beyond the candy bowl and transform your favorite trick or treat candies into a truly memorable dessert. These 35 ideas prove that the iconic flavors of your favorite candy bars, chewy treats, and colorful candies are the perfect inspiration for your next baking adventure. Whether you choose a decadent, multi layered creation or a simple, no bake treat, these candy inspired desserts are guaranteed to be the star of your Halloween celebration. So raid your candy stash, get creative in the kitchen, and get ready to whip up something scary good.