
The most effective haunted houses tap into the collective fears shaped by decades of iconic horror films.
Recreating these moments of cinematic terror in your own home can elevate your haunt from a simple spooky walkthrough to an unforgettable experience. Here is the summary table for the 27 creepy haunted house ideas inspired by horror movies.
This guide offers 27 creepy ideas, inspired by some of the most famous horror movies, that will make your guests feel like they have stepped directly onto a terrifying film set. Get ready to bring the horror home.
Setting the Scene: Locations of Terror
Transforming a room into a recognizable, dreaded location is the first step in immersing your guests in the horror.
1. The Overlook Hotel Hallway from The Shining
The geometric carpet and eerie silence of this hallway are instantly recognizable and deeply unsettling.

DIY Tips:
- Print a large format banner of the iconic orange and brown geometric pattern and affix it to the floor of a hallway.
- The hallway should be brightly and evenly lit, which is counterintuitive and thus, more unnerving than darkness.
- Find two identical blue dresses at a thrift store for twin actors (or two similarly sized friends).
- Have the twins stand silently at the far end of the hall, holding hands and staring blankly.
- Play a faint, distant sound of a tricycle rolling on a wooden floor from a hidden speaker.
- The walls should be bare except for a single, generic hotel art print.
- For a bigger scare, have the twins whisper, “Come play with us, Danny,” as guests get close.
- Make the hallway feel unnaturally long by using a slight perspective trick with a narrowing runner.
- The key is silence. There should be no other noises in this section of the haunt.
- Have the actors remain perfectly still until the very last guest in a group has passed them.
2. The Sawyer Family Dining Room from The Texas Chainsaw Massacre
A gruesome and chaotic scene of backwoods horror that is all about the disgusting, sensory-overloading details.

DIY Tips:
- Drape the dining table in a dirty, stained tablecloth. You can use coffee and tea to create authentic looking stains.
- Create “furniture” out of fake bones and skulls from a Halloween store, hot gluing them to old chairs.
- Scatter fake chicken feathers and use a rubber chicken as a grim centerpiece.
- A hidden speaker playing a loop of buzzing flies, squealing pigs, and a rattling camera flash is a must.
- The lighting should be a single, harsh, bare bulb hanging low over the table.
- Create a “head cheese” prop by using a gelatin mold with unsettling objects suspended inside.
- The room should smell awful. Use a combination of dirt, liquid smoke, and a hint of something sour.
- Have an actor dressed as the Hitchhiker rocking maniacally in a corner.
- Drape the windows with tattered, dirty burlap sacks.
- For the ultimate scare, have a Leatherface actor burst through a door at the end of the room with a (chainless) chainsaw.
3. The Amityville Horror Room
The iconic, quarter-moon “evil eye” windows are the key feature. This room plays on the idea of a house that is inherently evil and watching you.

DIY Tips:
- Create the famous “evil eye” windows by cutting the shape out of black poster board and taping them to the inside of your real windows.
- Have a deep, booming voice whisper “Get out!” from a hidden speaker as soon as guests enter the room.
- A single, empty rocking chair slowly rocking in the corner adds a powerful element of unseen presence. You can achieve this with a hidden string.
- The room should be decorated like a normal, slightly dated living room to make the paranormal elements stand out.
- Have red, “blood like” liquid slowly ooze from the walls. This can be done with a hidden tube and a pump, or simply by pre-splattering the walls with washable red paint.
- Use a hidden fan to make the curtains billow as if from an unseen force.
- The temperature in the room should be noticeably colder than the rest of the house.
- A swarm of fake flies (cutouts or plastic toys) taped to the inside of the windows is a classic detail.
- The sound of buzzing flies should be audible from a hidden speaker.
- Have a cross on the wall that slowly inverts itself using a simple pivot mechanism and a hidden string.
4. The Well from The Ring
A simple, low light vignette that is instantly recognizable and full of dread for what might emerge from the darkness.

DIY Tips:
- Create a low, circular “well” wall out of grey painted cardboard or a large, painted tractor tire.
- Place a small television with a static screen playing on a loop near the well. You can find hour long static videos on YouTube.
- The room should be very dark, with the only light coming from the TV screen.
- Drip water from the ceiling into the well using a small, hidden tube and a bucket, so guests hear a constant, unnerving drip.
- The floor around the well should be damp and muddy.
- The ultimate scare is to have an actor with long, black hair hiding inside the well, who can slowly begin to climb out as guests approach.
- Have a phone in the corner that rings once with a creepy, distorted voice on the other end.
- The walls of the room should be covered in black plastic sheeting to look like the inside of a well.
- The actor playing Samara should move in a jerky, unnatural way.
- Have a copy of the “cursed” video tape sitting next to the TV.
5. The Children’s Bedroom from Poltergeist
A seemingly normal child’s bedroom is the setting for some of cinema’s most famous and terrifying scares.

DIY Tips:
- The centerpiece is a small, old-fashioned television set to a static screen. This should be the main light source.
- Scatter classic 1980s toys around the room. Thrift stores are great for this.
- Have a creepy clown doll sitting in a chair, staring at the guests.
- The ultimate scare is to have the clown be a live actor who remains perfectly still until the very last moment.
- Stack the bedroom chairs on the kitchen table in the center of the room in an impossible, balanced arrangement.
- Use fishing line to make the toys on the floor appear to move on their own.
- Have a closet door that is slightly ajar with a bright, otherworldly light pulsing from within.
- A hidden speaker should be playing the faint, eerie sound of Carol Anne whispering, “They’re heeeere.”
- Have a fake tree branch that can tap against the window, operated by a hidden helper outside.
- Use a fan to make the curtains and the closet door move slightly, as if from a ghostly wind.
6. The Basement from The Evil Dead
A terrifying, trapdoor entrance leads to a damp, dark, and demonic space where the Book of the Dead has been read.
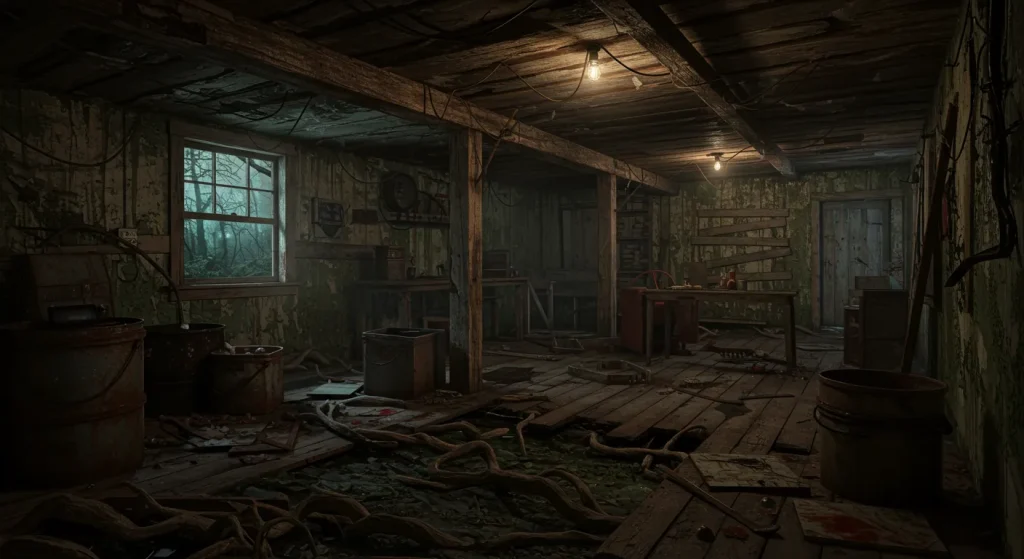
DIY Tips:
- If you have a basement, this is the perfect location. If not, a dark, small room will work.
- Hang rusty-looking chains (you can get plastic ones at a Halloween store) from the ceiling.
- The only light source should be a single, bare bulb hanging from a cord, which can be made to flicker.
- Play a recording of a demonic, laughing voice from a hidden speaker, specifically the “Join us” scene.
- Have an actor dressed as a Deadite hidden in a dark corner who can lunge out.
- Create a fake “Necronomicon” book and leave it open on a rickety table.
- Make the floor feel damp and sticky with a little bit of spilled soda.
- Have a “possessed hand” prop (or an actor’s hand) that can pop out from behind a box.
- The entrance to the room should be a “trapdoor” made from a piece of cardboard on the floor that guests have to step over.
- Use a fan and some torn, dirty sheets to create a sense of frantic, chaotic movement.
Iconic Villains & Monster Encounters
These ideas are all about bringing the most terrifying movie monsters to life for an up close and personal scare.
7. The Michael Myers Closet Scare from Halloween
The slow, silent, and relentless nature of Michael Myers is what makes him so terrifying. This scare is all about the suspenseful, non-jump-scare reveal.

DIY Tips:
- In a dimly lit bedroom, have an actor dressed as Michael (a simple blue jumpsuit and a white mask) stand perfectly still inside a closet with the door slightly ajar.
- As guests pass, he should not lunge, but simply turn his head slowly to watch them.
- The lack of a jump scare is what makes this so unnerving.
- Play the iconic, simple piano score from the movie softly from a hidden speaker.
- The room should look like a normal teenage girl’s bedroom to create a sense of violated sanctuary.
- Have a “body” under a sheet on the bed with a fake knife stuck in it.
- The actor should breathe heavily and audibly, but remain otherwise silent.
- For a bigger scare, after the guests have passed, the actor can slowly step out of the closet and begin to follow them.
- The lighting should be low, with light coming from a hallway, silhouetting the figure in the closet.
- The scare is about the anticipation and the feeling of being watched by an unstoppable force.
8. The Freddy Krueger Boiler Room from A Nightmare on Elm Street
A hot, steamy, and industrial space where the infamous dream demon feels right at home.

DIY Tips:
- This is a great scene for a garage or basement. Hang chains and old pipes from the ceiling.
- Use a fog machine to create a steamy, boiler room effect.
- The key sound effect is the scrape of Freddy’s glove against a metal pipe, which can be done live by a hidden actor.
- The lighting should be dim, with a single, harsh red light bulb creating a hellish glow.
- Have an actor in the iconic striped sweater, fedora, and glove hide behind a large object.
- The actor can scrape their (fake, safe) glove along a wall as they reveal themselves.
- Write “Freddy’s Coming For You” on a dirty wall.
- Have the sound of the children’s “one, two, Freddy’s coming for you” rhyme playing faintly.
- Use a space heater to make the room uncomfortably warm.
- For a great scare, have the gloved hand burst through a false wall made of cardboard.
9. The Jigsaw “Game” from Saw
Create a deeply unsettling room that makes your guests feel like they are the next participants in one of Jigsaw’s twisted games.

DIY Tips:
- The room should be lit like a dirty, industrial bathroom, with flickering fluorescent lights.
- Have a “body” lying in the middle of the floor with a fake “trap” device attached to them.
- Place a television in the corner with the iconic Billy the Puppet image on the screen.
- Have a hidden speaker play a distorted voice saying, “I want to play a game.”
- Scatter fake, rusty tools and saws around the room.
- Chain a live actor to a pipe in the corner. They can be begging for help or rattling their chains.
- The door to exit the room can be “locked” with a puzzle that the guests have to solve (make it very easy).
- Splatter fake blood on the walls and floor.
- The sound of a ticking clock will add to the suspense.
- The key is to create a sense of hopelessness and dread, rather than a simple jump scare.
10. The Georgie Encounter from It
Recreate the iconic and terrifying storm drain scene for a truly memorable scare.

DIY Tips:
- This is a great scare for a dark hallway or a corner.
- Create a “storm drain” opening at the bottom of a wall using a black painted cardboard box with a grate drawn on it.
- Have an actor hidden behind the wall, holding a single red balloon on a string.
- The actor’s face (as Pennywise) should be the only thing visible in the dark opening.
- Have a small, yellow paper boat sitting near the drain.
- A hidden speaker should be playing the sound of rain and distant thunder.
- The actor should whisper, “You’ll float too,” as guests get close.
- For a jump scare, the actor can suddenly reach out from the drain opening.
- The lighting should be very dim, with a single light focused on the storm drain.
- The red balloon is the most important visual cue for this scene.
11. The Blair Witch Woods from The Blair Witch Project
A low-tech, high-dread experience that plays on the fear of being lost and watched in the dark.

DIY Tips:
- This is a perfect theme for a backyard or a garage.
- Hang dozens of the iconic “stickman” figures from tree branches or the ceiling. You can make these easily with twigs and twine.
- Have a tent set up in a corner with the contents thrown around as if in a panic.
- The only light should be the guests’ own (provided) cheap flashlights.
- The key sound effect is the sound of cracking twigs, children laughing, and rocks being stacked, all coming from hidden speakers.
- Have an actor stand silently in a corner, facing the wall, just like the end of the movie.
- Pile small stacks of rocks (cairns) in various places.
- The scare is psychological. The feeling of being watched is more important than a monster.
- For a jump scare, have a hidden actor violently shake the tent as guests pass it.
- The lighting should be minimal to non-existent, forcing reliance on flashlights and creating frantic, moving shadows.
12. The Xenomorph Hive from Alien
Create a biomechanical, claustrophobic nightmare with a truly alien feel.

DIY Tips:
- Cover the walls of a hallway with black trash bags and spray foam insulation that you can paint black and grey to create a textured, organic look.
- The lighting should be dim and blue, with a single, flashing emergency strobe.
- Hang “egg sacs” (large, water-filled balloons covered in paper mache and painted) from the ceiling.
- Have a hidden actor in a black costume who can emerge silently from a camouflaged part of the wall.
- The key sound effect is the pinging of the motion tracker, which should get faster and faster as guests move through the hall.
- Use a fog machine to create a steamy, otherworldly atmosphere.
- Have a “facehugger” prop that can drop from the ceiling on a string.
- The hallway should be narrow to create a sense of claustrophobia.
- Use blacklights to make certain painted details glow.
- The scare comes from the alien’s silent, predatory movements.
13. The Hannibal Lecter Cell from The Silence of the Lambs
A simple, minimalist setup that is all about the unnerving performance of a single actor.

DIY Tips:
- Create a “cell” using a simple barrier like PVC pipes or even just tape on the floor.
- The room should be brightly lit and sterile.
- Have a single actor dressed in a white jumpsuit, standing perfectly still in the center of the cell.
- The actor should not move, but should follow the guests with their eyes and offer a single, chilling line, like “I can smell you.”
- The only prop needed is a simple dolly or a chair.
- The scare is entirely psychological and relies on the actor’s creepy, intense performance.
- Have a hidden speaker playing the sound of someone drawing, referencing Hannibal’s sketches.
- The wall of the cell can have detailed, creepy drawings taped to it.
- This is a great scare for a small, contained space.
- The actor should never break character, even when guests are leaving the room.
14. The Zombie Apocalypse from The Walking Dead
An interactive and chaotic scene that makes guests feel like they are in the middle of a zombie horde.

DIY Tips:
- Have several actors dressed as zombies, with simple torn clothes and makeup.
- Instruct the actors to move slowly and moan, but to never actually touch the guests.
- Set the scene in a “ransacked” room, with overturned furniture and debris on the floor.
- Have the zombies try to reach for the guests through “barricaded” windows and doors made of cardboard planks.
- A flickering, dying light source adds to the sense of hopelessness.
- The key sound is the constant, low moaning of the walkers.
- For a big scare, have a seemingly dead zombie on the floor that suddenly grabs at a guest’s ankle.
- Use a strobe light to create a chaotic, disorienting attack sequence.
- Have a “survivor” actor who can try to guide the guests through the room, only to be “attacked” by a hidden zombie.
- The scare comes from the overwhelming number of zombies and the feeling of being surrounded.
15. The Tethered from Us
A deeply unsettling and visually striking scare that uses a simple, iconic costume.

DIY Tips:
- The costume is a simple red jumpsuit and a single brown leather glove.
- Have an actor (or several) dressed as a “Tethered” standing in a hallway, holding a pair of large, golden scissors.
- The actor should stand silently and only move in a slow, creepy, and slightly off-kilter way.
- Play a slowed down, distorted version of the “I Got 5 On It” theme.
- The scare is not a jump scare, but the unnerving sight of the character and the unnerving way they move.
- For a bigger scare, have a doppelgänger of one of your guests (a similarly dressed actor) be the Tethered.
- The lighting should be stark and create long shadows.
- This is a great scare for a minimalist, modern-looking room.
- The actor can slowly snip the scissors open and closed.
- The creepiness comes from the silent, menacing presence.
Terrifying Transitions & Corridors
The spaces between your main rooms are just as important. Use these hallways to build suspense or deliver a surprise scare.
16. The Claustrophobic Hallway
Forcing guests into a tight, enclosed, and moving space is a powerful way to induce a primal sense of panic.

- You will need several large, heavy duty black trash bags and a roll of duct tape.
- Inflate the trash bags about three quarters of the way and tape them securely to the walls of a hallway.
- The bulging, yielding bags will press in on the guests as they try to squeeze through, making the space feel like it is breathing.
- The hallway should be dark, so guests have to feel their way through.
- The crinkling sound of the plastic bags adds an unsettling audio element.
- This is a high impact scare that only costs a few dollars in supplies.
- For a more advanced version, have a hidden actor gently push on the bags from behind a false wall.
- The space should be narrow enough that guests have to turn sideways to get through.
- This is a purely physical and psychological scare; no actor is needed in the hallway itself.
- Ensure the bags are securely taped so they do not fall and become a trip hazard.
17. The Spider Web Passage
A simple but incredibly effective tactile scare that preys on a common phobia, reminiscent of a journey into Mirkwood or Shelob’s Lair.

DIY Tips:
- Buy several bags of cheap, stretchy spider web material.
- The secret to making it look and feel creepy is to stretch it as thin as possible until it is barely visible.
- Stretch the material across a dark hallway at varying heights, from the ankles to the face.
- The feeling of the sticky, unseen webs brushing against guests’ faces and arms as they walk through is deeply unsettling.
- Add a few very lightweight plastic spider rings to the web so they occasionally fall on guests.
- This is a low cost, high impact scare that is very easy to set up.
- The hallway should be dark to maximize the surprise and the unpleasantness of the sensation.
- Combine this with a sound effect of skittering spiders for a multi sensory assault.
- This is a great transitional hallway between two major scare rooms.
- Make sure there are no heavy props in the web that could fall and hurt someone.
18. The Laser Swamp from Resident Evil
A visually stunning and disorienting effect that makes guests feel like they are in a high tech death trap.

DIY Tips:
- Fill a hallway with thick fog from a fog machine.
- Set up several cheap, green or red laser pointers on tripods or stands, aimed across the room at various heights.
- The fog will make the laser beams visible, creating a “laser grid” that guests must carefully navigate.
- The scare is psychological; guests will be afraid to touch the harmless beams of light.
- A sound effect of a humming, high tech security system will enhance the effect.
- This is a no-actor scare that is all about the visual atmosphere.
- Make sure the lasers are aimed low and not at anyone’s eyes.
- This is a great way to control the pace of your haunt, as guests will move very slowly and carefully.
- For a finale, have a siren go off and the lasers start moving wildly.
- This is a high tech look that is surprisingly cheap to create.
19. The Blackout Maze
Total sensory deprivation is terrifying. This forces guests to rely on touch alone to find their way out of a disorienting, completely dark space, just like in The Descent.

DIY Tips:
- Use black plastic sheeting and a staple gun or strong tape to create a simple, winding maze in a larger room like a garage or basement.
- The walls of the maze should be soft and yielding, not rigid.
- The path should be simple enough to navigate but have a few dead ends to create confusion and panic.
- Have an actor dressed in all black waiting silently in one of the dead ends for a huge scare.
- There should be absolutely no light in the maze.
- The floor can be uneven (using the unstable floor trick) to add to the disorientation.
- The only sound should be the guests’ own panicked breathing and footsteps, and perhaps a faint, monstrous clicking.
- This is a very intense experience, so it may be wise to have an easy “chicken” exit for those who cannot handle it.
- The feeling of being lost and vulnerable is the primary source of fear.
- The actor at the end should not grab, but can simply breathe loudly or whisper right behind a guest.
20. The Unstable Path
The feeling of the ground shifting beneath your feet is a deeply primal fear, reminiscent of a crumbling ancient tomb or a rickety bridge.

DIY Tips:
- In a small, dark room, place a layer of soft, yielding objects on the floor. Pillows, cushions, or even empty plastic bottles work well.
- Cover the entire floor with a large, heavy duty black tarp or an old, dark blanket, securing it tightly at the edges of the room.
- Guests will be completely unnerved as they try to walk across the shifting, unstable surface in the dark.
- This is a great way to control the pace of your haunt, as guests will be forced to move slowly and carefully.
- You do not need an actor in this room; the environment itself is the scare.
- Make sure the room is dark so guests cannot see what is causing the instability.
- This is a great physical scare that is completely safe.
- The sound of the plastic bottles crunching underfoot adds another layer of unease.
- This can be combined with other scares, like whispers or a sudden cold breeze.
- The path through the room should be short, as this is a mentally taxing experience.
The Grand Finale: One Last Scream
The final scare is the one your guests will remember and talk about the most. It should be a high energy, terrifying climax to their journey.
21. The Chainsaw Pursuit from The Texas Chainsaw Massacre
This is the ultimate, classic haunted house finale. It is pure, adrenaline fueled terror that provides an explosive end to the experience.

DIY Tips:
- SAFETY FIRST. This is the most important tip. Use a real chainsaw, but you absolutely must remove the chain. The terrifying noise and the smell of gasoline are what create the scare, not any actual danger.
- Have your scariest looking actor, in a terrifying mask and costume, wait just outside the final exit door, hidden from view.
- As guests emerge from the haunt, thinking they are finally safe, the actor should suddenly start the chainsaw and run towards them.
- The actor should never get too close to the guests, the goal is to chase them out into the yard or designated safe zone.
- This is most effective at night, where the darkness adds to the chaos.
- Have a clear, well lit “safe zone” for guests to run to.
- The actor’s costume should be intimidating, like a Leatherface or hillbilly-style character.
- Practice starting the chainsaw beforehand to ensure it works reliably.
- The sudden, deafening roar is the most important part of this scare.
- Make sure the chase-out area is clear of any trip hazards.
22. The Parting Shot from Friday the 13th
Give them one last jump scare when they least expect it, proving that the horror is not over just because you have escaped.

DIY Tips:
- This takes place after the main haunt is over, as guests are leaving and saying their goodbyes in a well lit, “safe” area.
- Have an actor in a terrifying mask (like Jason Voorhees) suddenly appear and slam their hands against the outside of a nearby window.
- The scare works best when everyone’s guard is completely down and they are laughing and talking about the haunt.
- The actor should appear and disappear very quickly.
- This is a perfect, final punctuation mark of fear.
- You can also have an actor hidden in a bush near the sidewalk who lunges out as guests walk to their cars.
- The key is the element of complete surprise in a supposedly safe space.
- Make sure the actor at the window is careful not to actually break the glass.
- This creates a final scream and a lasting memory.
- It reinforces the idea that the horror is not contained to just the haunted house.
23. The Lingering Stalker from It Follows
A silent, psychological scare that creates a lasting sense of dread that follows your guests home.

DIY Tips:
- This requires a dedicated actor and a safe, visible area like a sidewalk.
- As the last group of guests is leaving your property, have one of your scariest, most silent actors (dressed as a simple, creepy figure) slowly emerge from the shadows.
- The actor should begin following the guests down the street from a significant distance.
- The actor must never run, speak, or get too close. They should just walk at a steady, relentless pace.
- One of the guests will eventually look back and see the figure, creating a final, authentic, and deeply personal scream.
- The actor should stop and turn around once they have been clearly spotted.
- This is an advanced scare that requires a responsible actor and a safe neighborhood environment.
- The power of this scare is that it breaks the fourth wall of the haunt and brings the fear into the real world.
- The costume should be simple and non threatening from a distance.
- This creates a story that guests will tell for years.
24. The Redrum Revelation from The Shining
A final, psychological twist that relies on a simple mirror trick.

DIY Tips:
- In the final room before the exit, have the word “REDRUM” written backwards on a wall in fake blood.
- Most guests will not immediately understand what it means.
- Place a large mirror on the opposite wall, right next to the exit door.
- As guests are about to leave, they will look in the mirror and see the word correctly spelled as “MURDER.”
- This is a brilliant, dawning-realization scare.
- Have the sound of a child whispering “redrum” playing faintly in the room.
- The room should be otherwise simple, to focus attention on the writing.
- This is a great, low-tech, high-impact scare.
- The lighting should be good enough to read the word clearly in the reflection.
- This is a perfect final scare for a haunt with a “haunted hotel” or “ghostly” theme.
25. The Deceptive Door from Insidious
Lead your guests to a door that they think is the exit, only for it to open into one final, terrifying, and intimate scare.

DIY Tips:
- Label a door clearly with a glowing, friendly-looking “EXIT” sign.
- When they open the door, it should lead into a very small, closet-sized room, not the outside.
- Have your most terrifying, detailed monster or actor (like the red-faced demon) waiting inside this small room.
- The sudden proximity to the monster in such a confined space is the scare.
- The real exit should be an unassuming, hidden door on another wall of the same small room.
- The “EXIT” sign creates a false sense of security, which makes the final scare much more powerful.
- The small room should be well lit to properly show off the final monster.
- The actor in this room should be your best performer, as it is a very up close and personal scare.
- The contrast between the promise of safety and the reality of the final monster is what makes this so effective.
- Make sure the real exit is easy to open and leads directly to safety.
26. The Final Girl’s Plea
An interactive finale that makes the guests part of the story.

DIY Tips:
- The final room should look like a scene of carnage, with fake bodies and debris.
- Have a single “final girl” actor, covered in fake blood, who is hiding in a corner.
- She will beg the guests for help, telling them, “He’s still here!”
- The scare comes when the killer (a second actor) bursts into the room from a hidden entrance, seemingly in pursuit of the final girl.
- This creates a chaotic and panicked exit for the guests.
- The “final girl” can point them to the real exit, telling them to run.
- This is a great, story-driven finale.
- The two actors can stage a brief, fake struggle to add to the chaos.
- The room should feel frantic and desperate.
- This makes the guests feel like they have just escaped a movie scene.
27. The Carrie Finale
A truly shocking and unexpected final scare, perfect for a haunt that exits into a garage or yard.

DIY Tips:
- This scare takes place after the guests think the haunt is over.
- Set up a “graveyard” scene in your yard as a final bit of decoration.
- Have an actor buried in a shallow pile of leaves or loose dirt, with only their arm visible, holding a bouquet of fake flowers.
- As the last guest in the group walks past the “grave,” the actor should thrust their arm out and grab their leg.
- This is a direct homage to the final scare of the movie Carrie.
- It is completely unexpected and a massive shock.
- Make sure the actor is well-hidden and the ground is soft.
- This works best on the last person in a group, as their scream will scare everyone else.
- The prop arm should look bloody and dirty.
- This is a guaranteed final scream for your haunt.
Conclusion
A truly terrifying haunted house is a carefully orchestrated symphony of fear, built on a foundation of suspense and punctuated by moments of pure terror. By borrowing from the masters of horror and recreating these iconic cinematic moments, you can create an unforgettable and thrilling experience for your guests. Remember that safety is paramount, always use battery operated lights, ensure clear pathways, and make sure your actors know their boundaries. Now go forth, embrace the darkness, and get ready to bring the horror home.