Halloween is that magical time of year when creativity runs wild, and the hunt for the perfect costume begins. But the pressure to find a great costume can be intense, and store-bought options can be expensive and often lack a personal touch.
This year, why not look inside your own home for inspiration? Creating a homemade costume is a fantastic way to bond with your kids, save money, and make something truly unique that will stand out in a crowd.
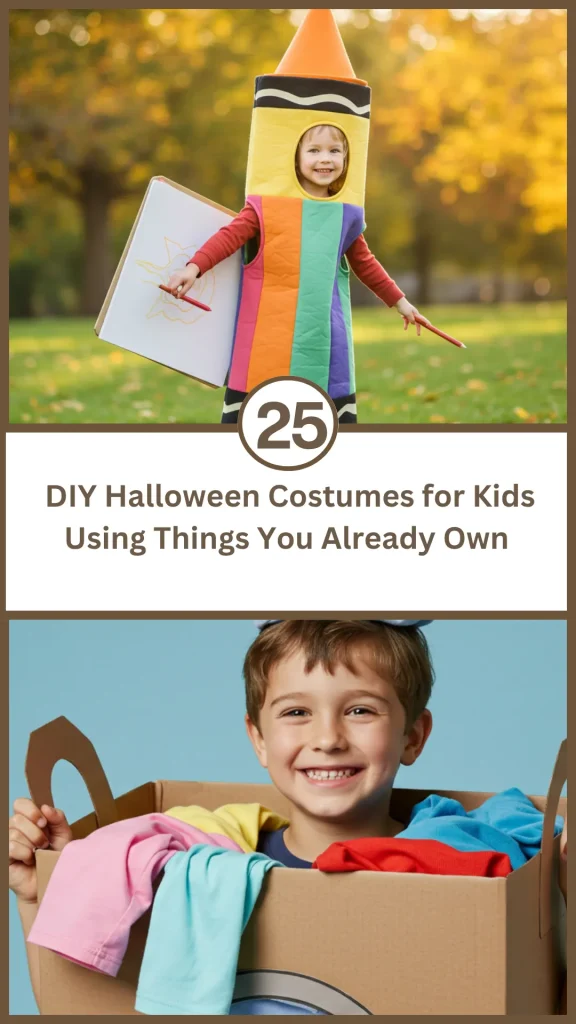
This guide is your ultimate inspiration station. It is packed with 25 clever and adorable DIY costume ideas that are perfect for kids of all ages, using simple things you likely already have. Get ready to transform your recycling bin into a treasure chest of costume gold.
Classic & Spooky Standbys
You can never go wrong with a classic. These costumes are the heart and soul of Halloween and can be easily created with household staples for a timelessly spooky look.
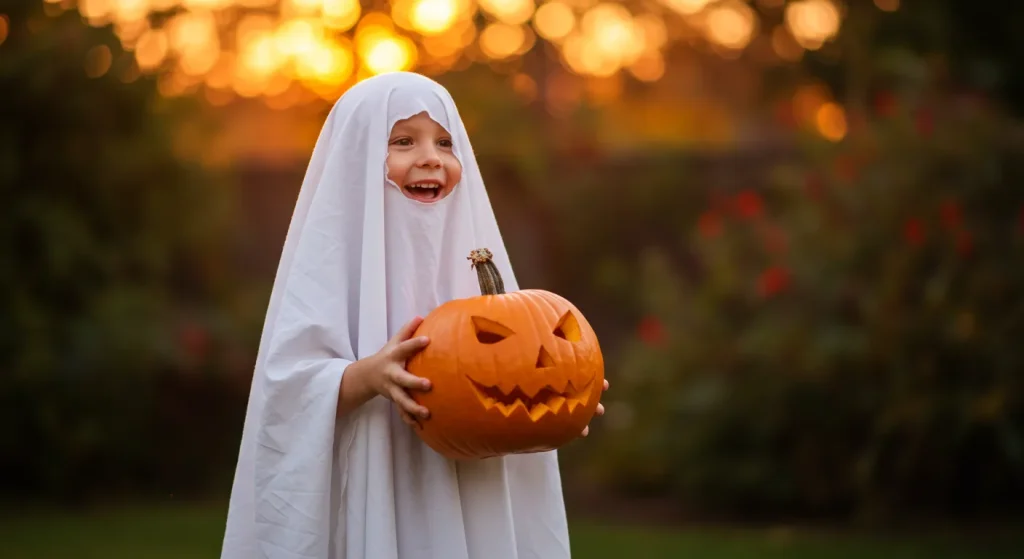
1. The Classic Ghost
This is the most timeless Halloween costume of all. It is simple, instantly recognizable, spooky, and can be made in about five minutes.
DIY Tips
- Start with an old, white flat bedsheet that you no longer need.
- Drape the sheet over your child to determine the correct length.
- Trim the bottom of the sheet so it does not become a tripping hazard.
- While the sheet is on your child, gently mark the spot for the eye holes with a washable marker.
- Take the sheet off and have a parent carefully cut out the eye holes with scissors.
- For a more finished look, you can hem the edges of the eye holes.
- For a “friendlier” ghost, you can use a black permanent marker to draw a simple, smiling mouth.
- For a more rustic, spooky look, you can tear the bottom edge of the sheet into tattered strips.
- You can also add some chains made from loops of aluminum foil.
- This is the ultimate, no-fuss, last-minute costume solution.
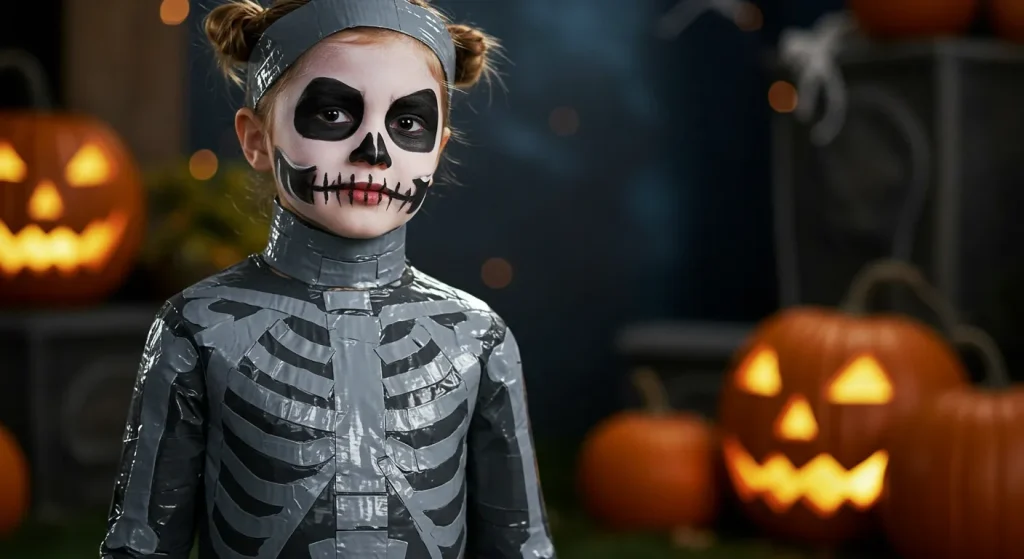
2. The Duct Tape Skeleton
A very cool, graphic, and modern take on a classic skeleton costume that requires no sewing and looks incredibly effective.
DIY Tips
- Start with a set of plain, solid black, long-sleeved pajamas or a black sweatsuit.
- You will need a roll of white duct tape or electrical tape.
- Look up a simple diagram of a human skeleton online for reference.
- Cut strips of the white tape to create the “bones” of the skeleton.
- Arrange the tape strips on the front of the black clothing to mimic a rib cage, spine, and arm and leg bones.
- You can create the spine by using a series of small, horizontal tape strips down the center of the back.
- For the face, you can use non-toxic white and black face paint to create a simple skull look.
- This costume is great because it is warm and comfortable for a cool Halloween night.
- The tape will hold securely for the night but can be peeled off afterward.
- This is a fantastic, high-impact costume with very minimal effort.
3. The Ripped-Sheet Mummy
A classic monster costume that is all about texture. This DIY version uses an old bedsheet for a more authentic, less wasteful look than toilet paper.
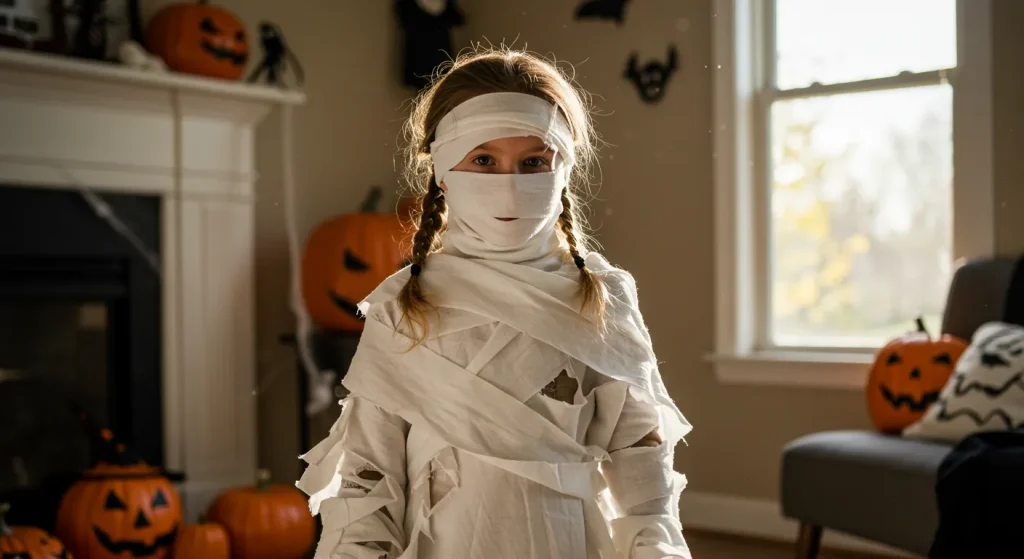
DIY Tips
- Start with an old, white or off-white flat bedsheet.
- To make it look aged, you can soak the sheet in a bath of cooled black tea for an hour to give it a dingy, ancient color.
- Once the sheet is dry, tear it into long strips about 2 to 3 inches wide. Do not cut them; tearing will create a better, frayed edge.
- Have your child wear a base layer of comfortable, light-colored clothing.
- Begin wrapping the strips of fabric around your child’s body, starting with the legs and working your way up.
- Tuck the ends of the strips into other wrapped sections to secure them. You can also use a few safety pins where needed.
- Leave some of the strips dangling and loose for a more unraveled, spooky effect.
- Leave a gap for the eyes and wrap the head carefully.
- Use a little dark eyeshadow around the eyes to make them look sunken.
- This costume has a wonderful, authentic texture and movement.
4. The Flannel Scarecrow
A charming, rustic, and very comfortable costume that you can easily assemble from clothes already in your child’s closet.
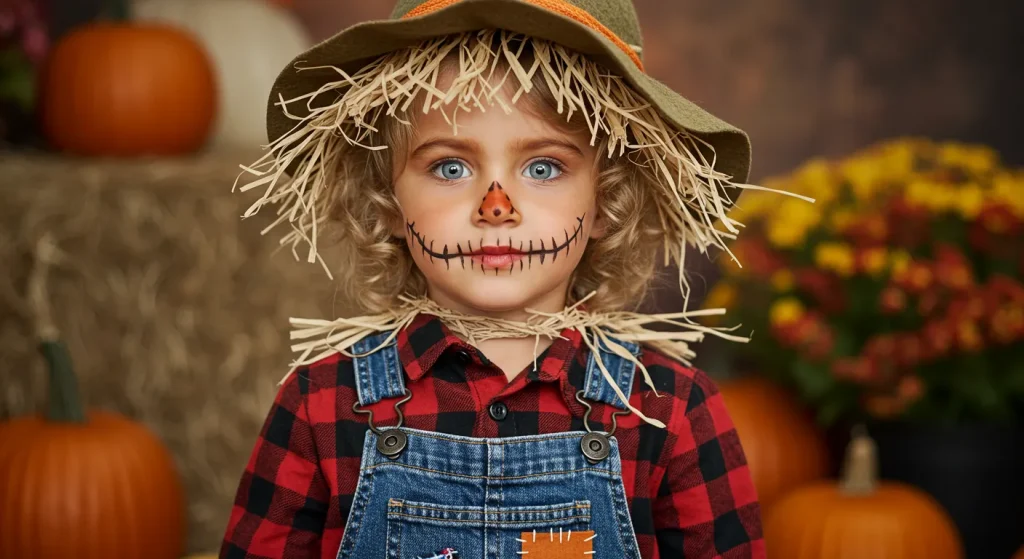
DIY Tips
- The base of the costume is a simple plaid or flannel button-down shirt and a pair of old jeans or overalls.
- For the “straw,” you can use raffia from a craft store, or you can shred a brown paper grocery bag into thin strips.
- Tuck clumps of the straw or paper so they are sticking out of the cuffs of the shirt and the bottom of the pants.
- Use a few safety pins to attach a few colorful fabric patches onto the jeans.
- For the face, use face paint or even an eyeliner pencil to draw a stitched smile and two rosy circles on the cheeks.
- A simple straw hat or a floppy felt hat is the perfect accessory. You can hot glue a few pieces of straw to the inside rim.
- For an extra touch, you can add a small, faux crow (from a craft store) to their shoulder.
- This is a very comfortable and warm costume for a chilly evening.
- The look is meant to be a little bit messy and mismatched.
- It is a classic, friendly, and non-scary Halloween option.
5. The Messy Zombie
A perfect costume for using up old clothes that are already stained or torn. The more destroyed it looks, the better.
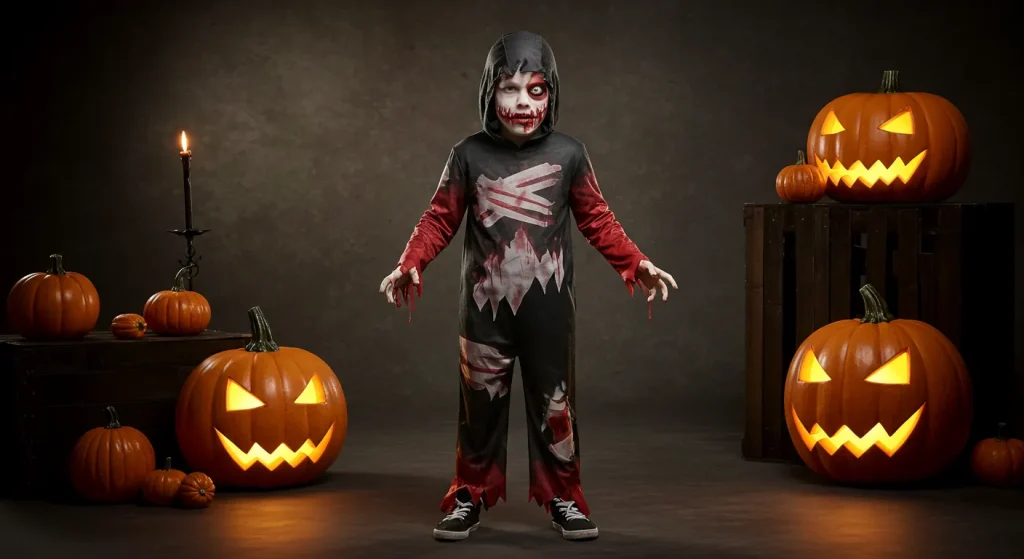
DIY Tips
- Find an old t-shirt and a pair of old pants or jeans that you do not mind ruining.
- Use scissors to carefully cut a few rips and tears into the clothing.
- Take the clothes outside and rub some dirt and grass on them to make them look like they have just climbed out of the ground.
- You can create “blood” stains by splattering the clothes with red food coloring or paint.
- For the makeup, use a pale foundation or a light layer of white face paint.
- Use dark eyeshadow around the eyes to create a sunken, tired look.
- Tease and mess up your child’s hair, and you can even add a few leaves or twigs to it.
- Practice a slow, stiff-legged “zombie walk” and a low groan.
- This is a costume that is all about the distressed details and the performance.
- It is a fun way to get creative with destruction.
Imaginative Creatures & Animals
These costumes are perfect for kids with a big imagination. They transform everyday materials into magical creatures and adorable animals.
6. The Magical Umbrella Jellyfish
This is a viral DIY costume that is stunning, ethereal, and surprisingly easy to make. The main component is a simple, clear umbrella.
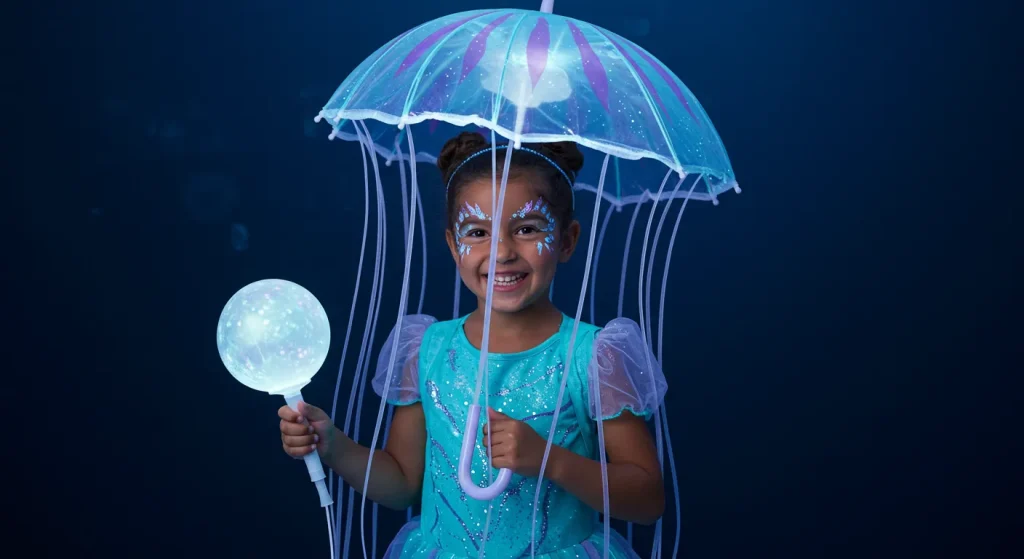
DIY Tips
- Start with a clear, dome-shaped umbrella. This will be the bell of the jellyfish.
- Cut long, thin, wavy strips of various materials to be the tentacles.
- Good materials for tentacles include iridescent ribbon, bubble wrap, strips of cellophane, and curling ribbon.
- Use a variety of colors like blue, purple, pink, and white for a magical look.
- Use a hot glue gun or clear packing tape to attach the ribbon and plastic tentacles to the inside edge of the umbrella.
- Vary the lengths of the tentacles to make them look more organic and flowy.
- For a truly magical effect, weave a string of battery-operated, cool-white fairy lights up through the inside of the umbrella.
- Secure the small battery pack to the umbrella handle with tape.
- Have your child wear all white or all blue clothing underneath.
- When they hold the umbrella over their head and walk, the tentacles will flow around them, creating a beautiful, otherworldly effect.
7. The Cardboard Butterfly
A beautiful and classic costume that allows for a lot of artistic creativity. The wings are the star of the show.
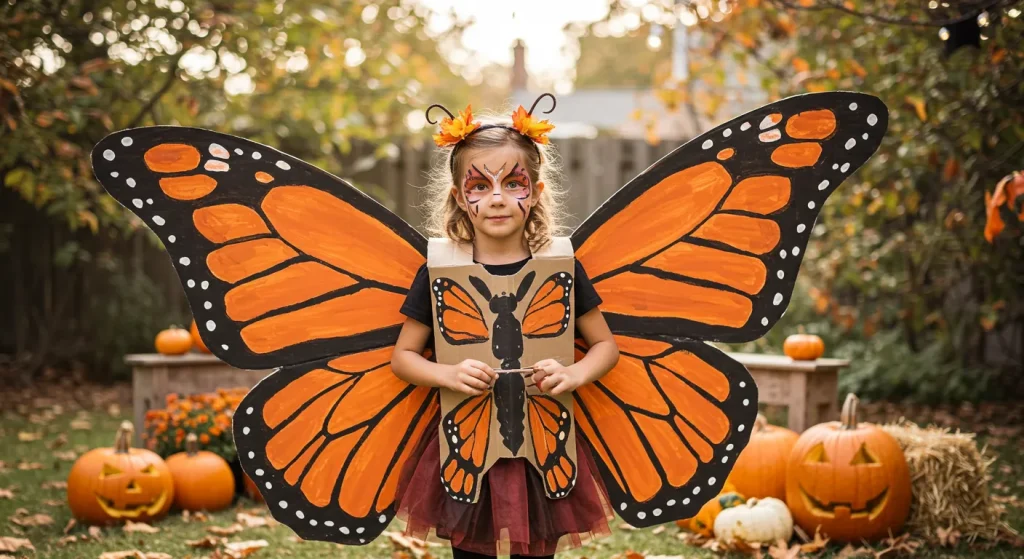
DIY Tips
- Draw a large, symmetrical butterfly wing shape on a big piece of cardboard.
- Have a parent carefully cut out the wing shape with a box cutter.
- This is the fun part: let your child paint and decorate the wings however they want. Use craft paint, markers, and glitter.
- A classic monarch butterfly pattern is a great option.
- To wear the wings, you will need to create backpack-style straps.
- Punch two holes in the center of the wings and thread two loops of elastic or ribbon through them for the shoulder straps.
- For the antennae, attach two pom-poms to the ends of two pipe cleaners.
- Wrap the other ends of the pipe cleaners around a simple headband.
- Have your child wear all black clothing so the colorful wings are the main focus.
- This is a costume that they can be really proud of because they designed it themselves.
8. The Eight-Legged Spider
A creepy, crawly, and very clever costume that is easy to make with some old socks and a bit of stuffing.
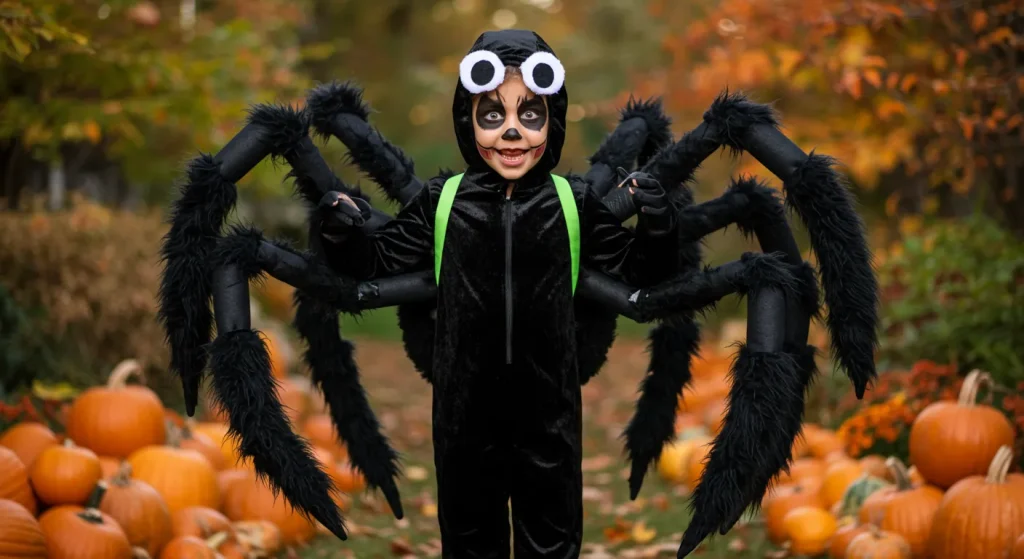
DIY Tips
- Start with a solid black sweatsuit or long-sleeved pajamas as your base.
- You will need four pairs of long, black tube socks for the extra legs.
- Stuff each sock with cotton batting, old rags, or crumpled newspaper until they are firm.
- Have your child put on the black shirt.
- Use safety pins to attach the four stuffed sock “legs” to the sides of the shirt, two on each side.
- To make the legs move together, you can attach a piece of fishing line that connects the two legs on one side, and another that connects them to your child’s wrist.
- When they move their arm, the spider legs will move too.
- For a headpiece, you can hot glue several large googly eyes onto a black winter hat or a headband.
- This is a comfortable, warm, and very effective costume.
- It is sure to get a lot of fun reactions.
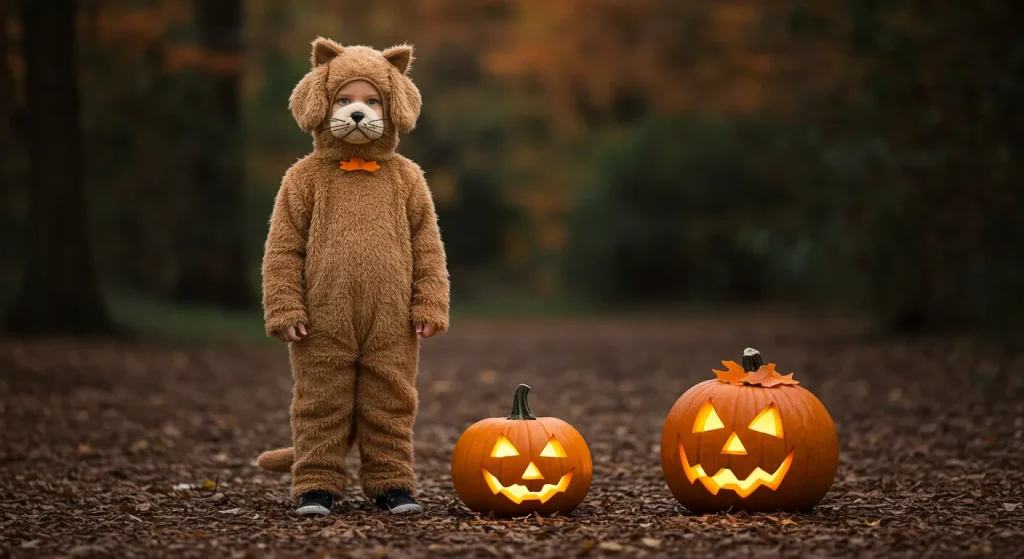
9. The Fluffy Lion
A sweet and classic animal costume that is all about creating a big, beautiful, fluffy mane.
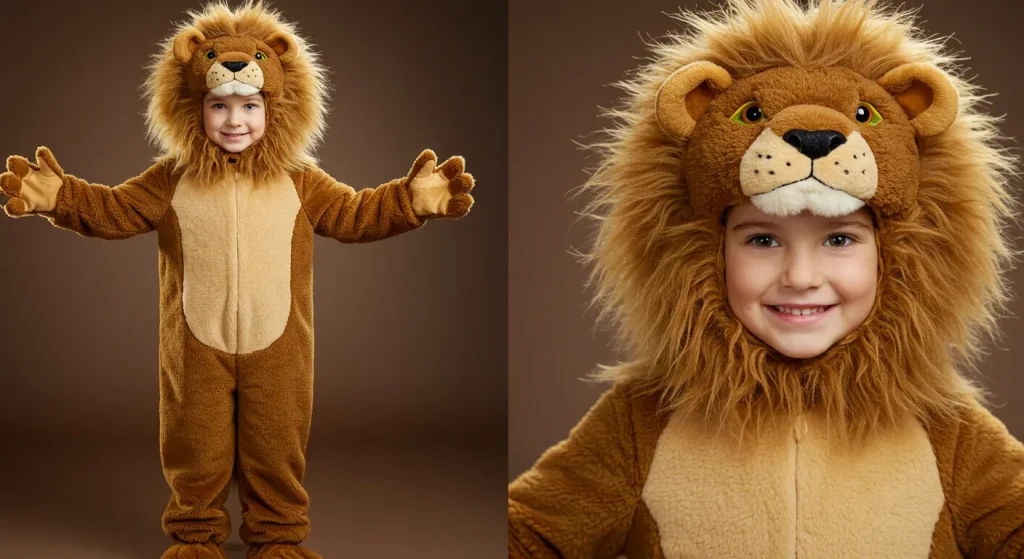
DIY Tips
- The base of the costume is a simple sweatsuit in a tan, yellow, or light brown color.
- The mane is the main event. You will need a lot of chunky yarn in various shades of brown, tan, and gold.
- Cut the yarn into many 6-inch long strips.
- Take a simple, stretchy headband or a piece of cardboard cut to fit your child’s head.
- Attach the yarn strips to the headband by folding them in half and creating a simple loop knot.
- Continue adding yarn all around the headband until you have a big, full, and fluffy mane.
- You can also create a tail by braiding a few long pieces of yarn together and pinning it to the back of their pants.
- Use a little bit of face paint to draw a small, triangular nose and some whiskers.
- This is an adorable costume for younger children.
- The yarn mane is soft, comfortable, and looks fantastic.
10. The Cardboard Box Snail
This is a very clever and unique DIY costume that is sure to get a lot of compliments. The main feature is the snail’s shell, worn like a backpack.
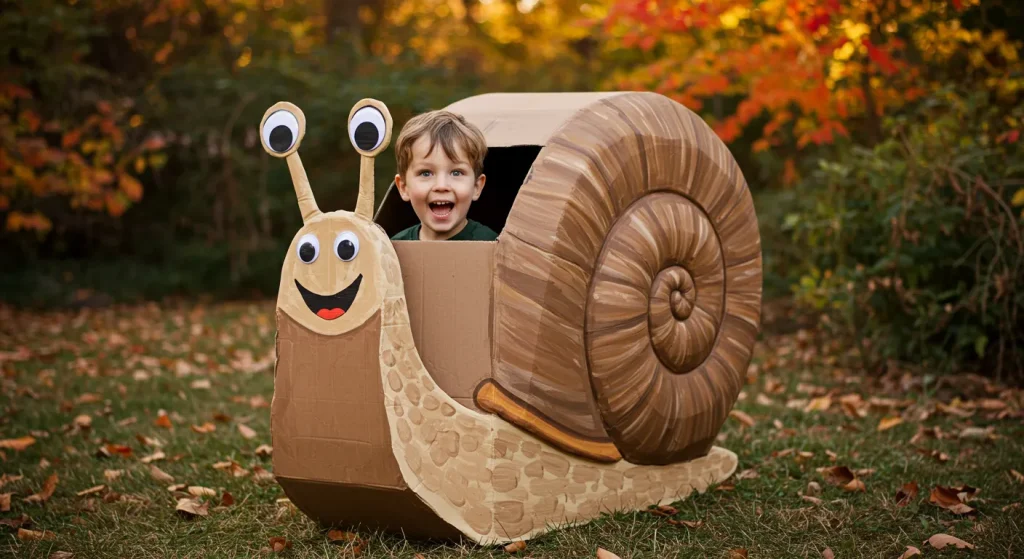
DIY Tips
- To create the shell, you will need a large roll of brown kraft paper or packing paper.
- Roll the kraft paper up tightly into a very long tube.
- Then, begin to coil the long tube of paper around itself into a tight, spiral shape, like a snail’s shell.
- Use a hot glue gun or strong packing tape to secure the spiral as you go.
- Once you have your shell shape, you will need to attach straps to wear it like a backpack.
- Hot glue two loops of wide ribbon or elastic to the flat side of the paper shell.
- For the antennae, hot glue two large pom-poms onto the ends of two pipe cleaners.
- Wrap the other ends of the pipe cleaners around a simple, plain headband.
- Have your child wear neutral-colored clothing, like all brown or all beige, to mimic the snail’s body.
- This is a lightweight, comfortable, and incredibly creative costume.
Clever & Funny Ideas
For the kid with a great sense of humor, a clever costume is always a huge hit. These ideas are all about thinking outside the box.
11. A Bunch of Grapes
A very simple, classic, and funny costume that is easy to make with a pack of balloons.
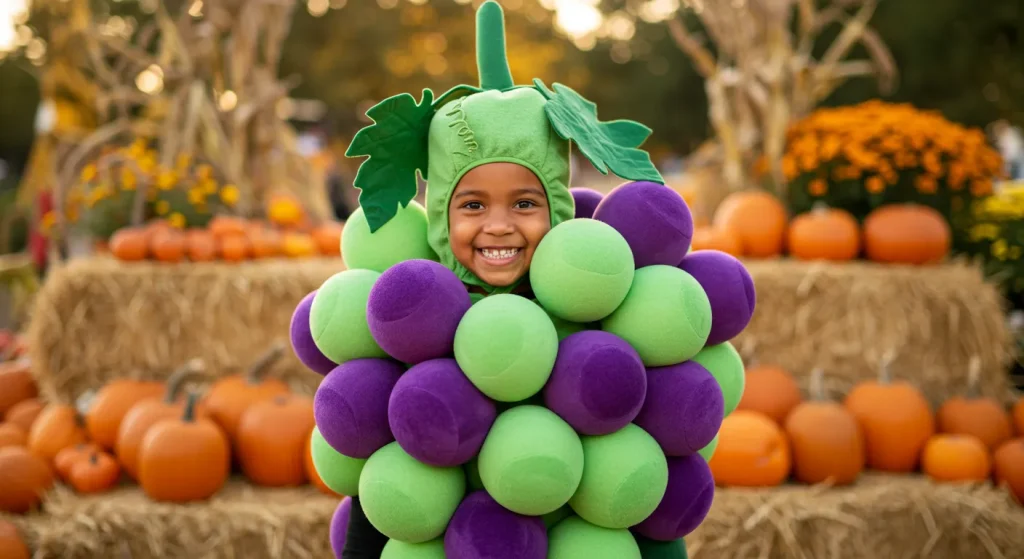
DIY Tips
- Have your child wear a solid-colored sweatsuit in either green or purple.
- Blow up a pack of green or purple balloons. Do not over-inflate them, so they are less likely to pop.
- Use safety pins to attach the tied ends of the balloons all over the front of your child’s sweatshirt.
- Cluster the balloons closely together to create the look of a bunch of grapes.
- For a headpiece, you can create a simple “stem” by taping a few green leaves (real or fake) to a brown winter hat.
- This is a very quick, affordable, and high-impact costume.
- Be sure to bring a few extra, un-inflated balloons with you for any emergency repairs.
- This costume is guaranteed to get a lot of smiles.
- It is a bit bulky, so it is best for kids who do not mind taking up a little extra space.
- It is a sweet and classic choice.
12. The Cereal Killer
This is a classic pun costume that is very easy and quick to put together, making it perfect for a last-minute idea with a dark sense of humor.
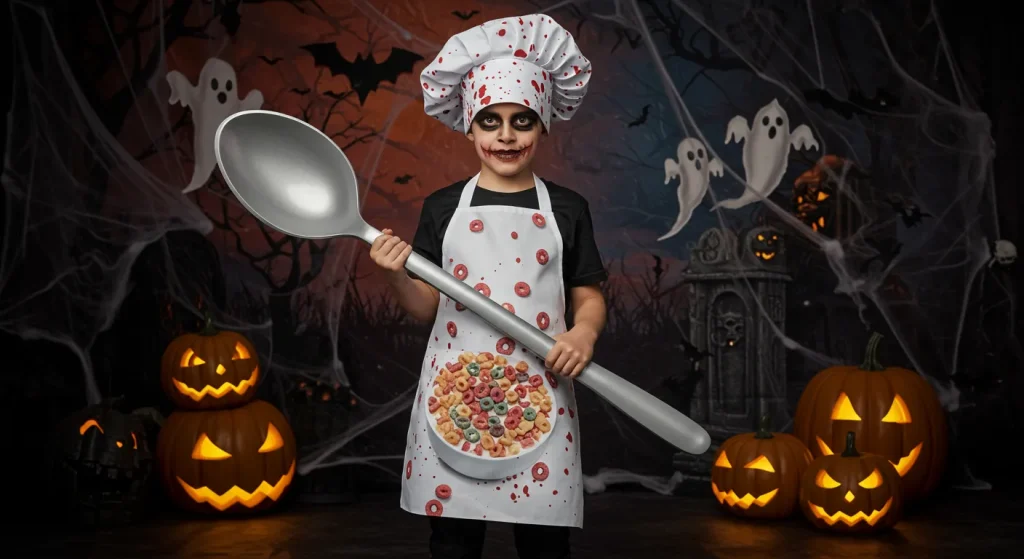
DIY Tips
- Start with a plain t-shirt that your child can wear. An old, light-colored one is best.
- Collect a few small, single-serving boxes of various types of breakfast cereal.
- Use a hot glue gun to attach the mini cereal boxes to the front of the t-shirt.
- For a more dramatic effect, you can crush a few of the boxes to make them look damaged.
- Find a lightweight, plastic toy knife or dagger from a dollar or party store.
- Use a few dabs of hot glue to attach the plastic knife to the shirt, among the cereal boxes.
- To make it look more “gruesome,” you can use a red fabric marker or paint to create some “splatter” marks on the shirt and boxes.
- This costume is meant to be funny and is not for everyone, so know your audience.
- Pair the shirt with simple jeans or leggings.
- It is a costume that is guaranteed to get a lot of groans and laughs.
13. Static Cling
This is another very clever, funny, and incredibly easy-to-make costume that uses items you definitely already have.
DIY Tips
- The base of this costume is a simple, solid-colored sweatsuit. Black or gray works well.
- The “static cling” is created by attaching various lightweight laundry items all over the clothing.
- Use safety pins to attach things like mismatched socks, a pair of underwear, a dryer sheet, and a few small washcloths.
- Scatter the items randomly all over the front and back of the sweatsuit.
- For an extra touch, you can mess up your child’s hair and even use a little bit of hairspray to make some strands stick straight up.
- This is a very comfortable costume to wear.
- It is a subtle but very funny costume that people will love once they “get” it.
- You can easily add or remove items throughout the night.
- This is a perfect last-minute costume idea.
- It is a celebration of a common laundry mishap.
14. A Bag of Jelly Beans
A very sweet, colorful, and creative costume that is easy to make with a clear trash bag and a bag of balloons.
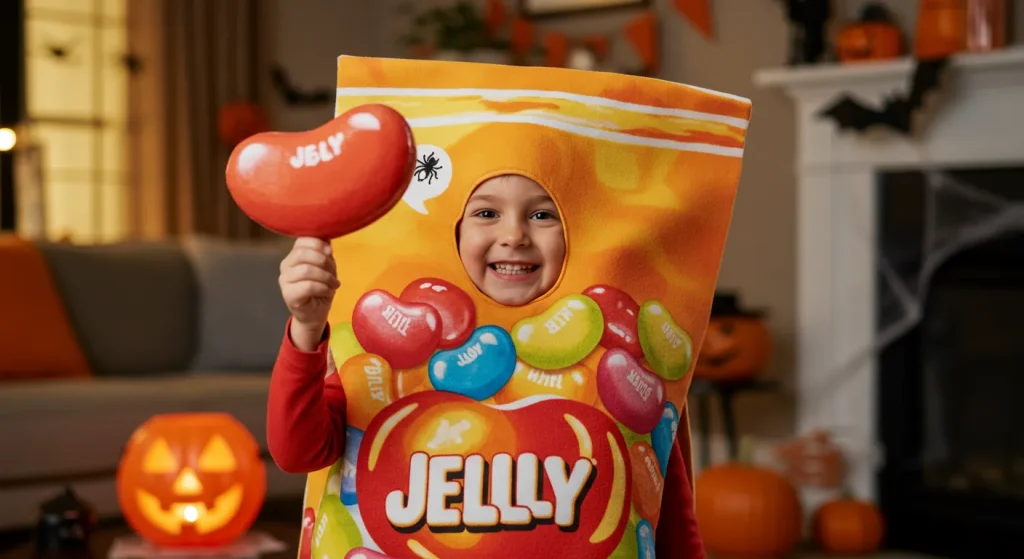
DIY Tips
- You will need a large, clear trash bag.
- Carefully cut leg holes in the bottom of the bag and arm holes in the sides.
- You will also need a bag of small, multi-colored balloons.
- Have your child step into the trash bag.
- Once they are inside, begin to fill the bag up with the colorful balloons.
- Gently gather the top of the trash bag around your child’s neck, leaving plenty of room for them to be comfortable. Secure it loosely with a ribbon.
- Print out a “Jelly Belly” or a generic “Jelly Beans” logo from the internet.
- Tape the logo to the front of the clear bag.
- For an extra touch, you can write the “Nutritional Facts” on the back.
- This is a very high-impact and adorable costume that is very inexpensive to make.
15. Raining Cats and Dogs
A classic, punny costume that is perfect for a rainy Halloween night. It is very easy to assemble.
DIY Tips
- The main prop for this costume is a simple umbrella.
- Print out several small pictures of various cats and dogs from the internet.
- Carefully cut out each animal picture.
- Take a needle and some thread or fishing line.
- Create several dangling strands by taping the cut-out pictures to the fishing line.
- Tape the other end of the strings to the inside edge of the umbrella, so the pictures hang down.
- Have your child wear a simple raincoat and a pair of rain boots.
- When they hold the umbrella, it will look like it is “raining cats and dogs.”
- This is a very clever and charming costume.
- It is also very practical if the weather is not great on Halloween night.
Heroes & Adventurers
Kids love to dress up as their heroes. These DIY costumes allow them to step into the shoes of brave knights, daring pirates, and powerful superheroes.
16. The Cardboard Knight
Transform your little one into a brave knight in shining armor using the humble cardboard box and some aluminum foil.
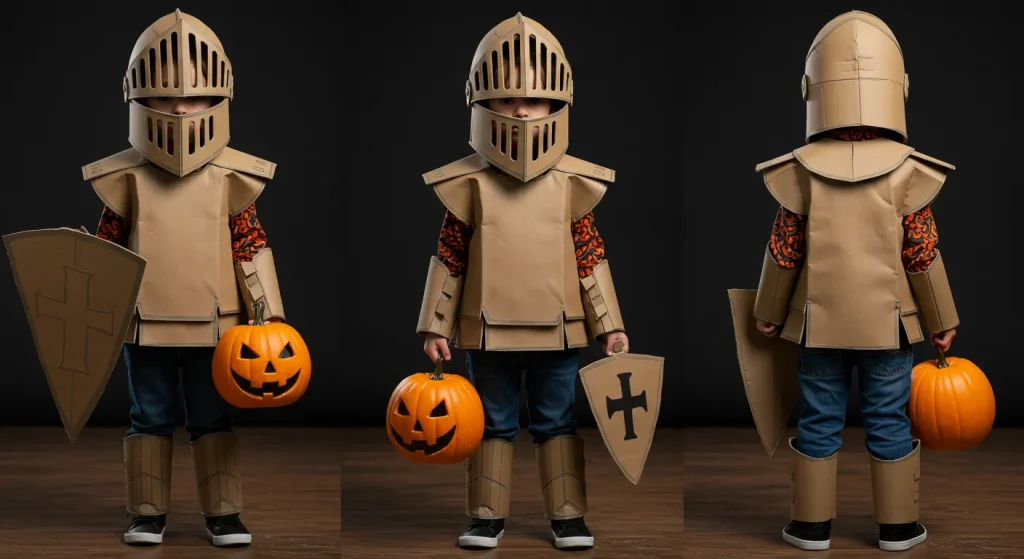
DIY Tips
- Use a cardboard box to create a simple chest plate. Cut it to size and attach ribbon or rope straps.
- Cover the cardboard chest plate with aluminum foil for a “shining armor” look.
- Create a shield out of another piece of cardboard. Let your child design their own family crest on it with markers.
- Make a simple sword out of a cardboard tube (from a wrapping paper roll) and another piece of cardboard for the hilt.
- A gray sweatsuit worn underneath makes the perfect “chainmail” base.
- A simple gray or silver winter hat can serve as a helmet.
- This is a costume that is all about creativity and imagination.
- It is a fantastic way to recycle all those shipping boxes.
- You can add other details, like foil-covered shin guards made from paper towel tubes.
- Get ready for a noble and brave Halloween adventure.
17. The No-Sew Superhero
Every kid wants to be a superhero. This no-sew version is incredibly easy to make and completely customizable.
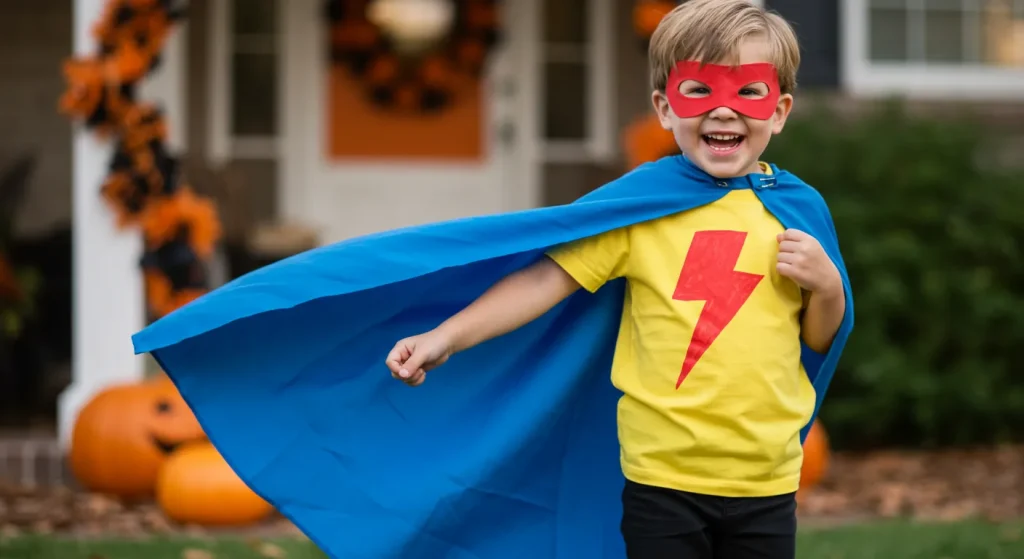
DIY Tips
- The most important part of any superhero costume is the cape. An old, solid-colored pillowcase or a small blanket makes a perfect, no-sew cape.
- Simply attach the cape to the back of your child’s shirt with a few safety pins.
- Create a simple mask by cutting out a mask shape from a piece of felt or craft foam.
- Punch two holes in the sides of the mask and tie a piece of elastic to it.
- Create a “superhero logo” out of another color of felt. It could be your child’s first initial.
- Use fabric glue or safety pins to attach the logo to the front of a plain, solid-colored t-shirt.
- Have them wear matching leggings or pants.
- You can create “power cuffs” by cutting a paper towel tube in half and having them decorate them.
- This is a costume that allows your child to invent their very own superhero.
- The possibilities are endless.
18. The Swashbuckling Pirate
A classic adventure costume that is all about the accessories. You can easily pull this look together from items in your closet.
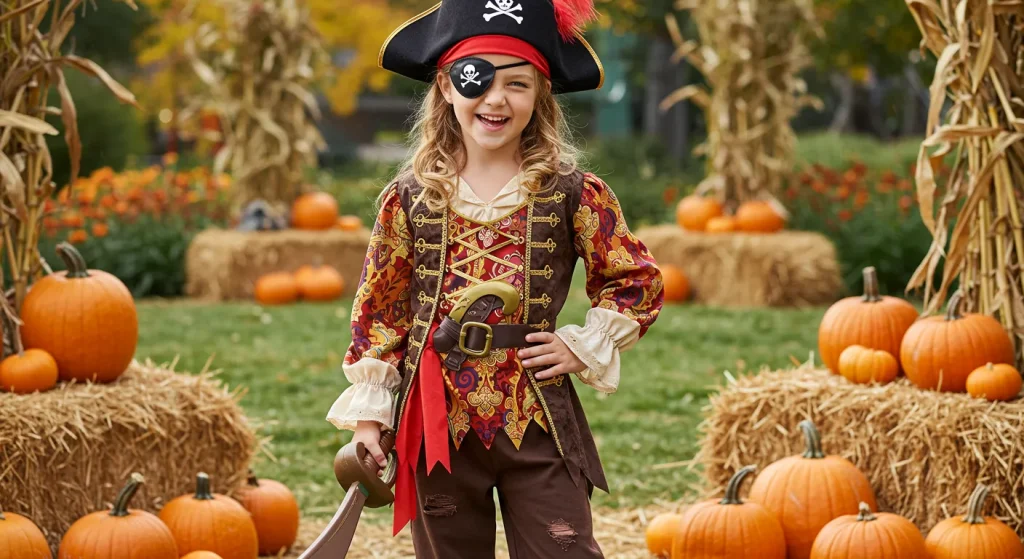
DIY Tips
- Start with a simple, striped t-shirt. A classic black and white or red and white is perfect.
- Use a pair of old, dark-colored pants or leggings and cut the bottom edge in a jagged, zigzag pattern.
- A red bandana tied around the head is an essential pirate accessory.
- Create a simple eye patch out of a piece of black felt and a piece of elastic.
- A wide, black belt or a long, red sash tied around the waist is a great detail.
- You can make a simple sword out of cardboard and cover the blade with aluminum foil.
- Use a little bit of face paint or an eyeliner pencil to draw a simple mustache or a goatee.
- A clip-on gold hoop earring adds a perfect finishing touch.
- You can create a simple “treasure map” by drawing on a piece of a brown paper bag and crumpling it up.
- This is a fun and adventurous costume that is easy to assemble.
19. The Backyard Astronaut
For the kid who dreams of exploring the cosmos. You can create an amazing astronaut costume using a few key household items.
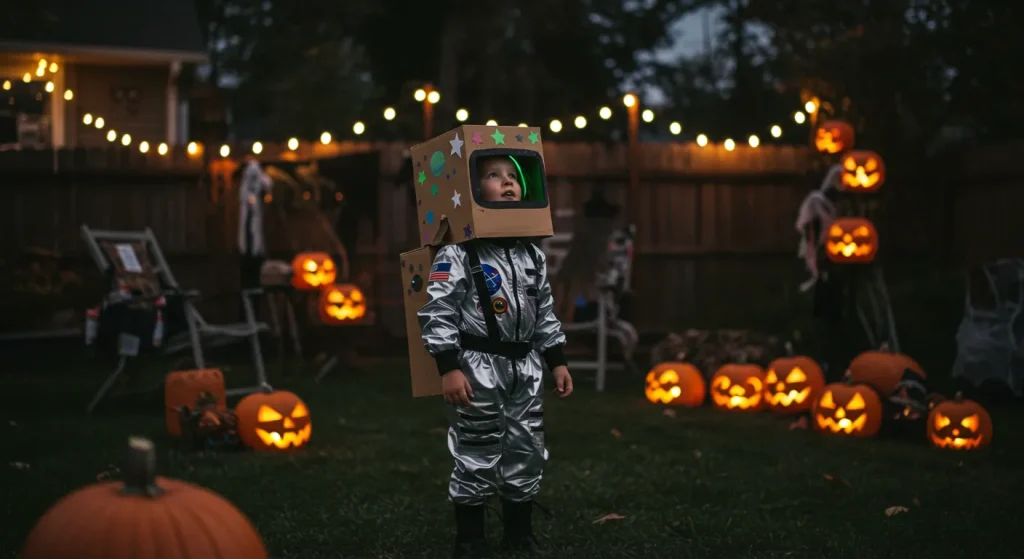
DIY Tips
- The base of the costume is a simple, all-white sweatsuit or white pajamas.
- The jetpack is the main event. Take two empty 2-liter soda bottles and spray paint them silver.
- Hot glue the two silver bottles together.
- Glue some strips of red, orange, and yellow tissue paper or crepe paper to the bottom openings of the bottles to look like flames.
- Attach two ribbon or elastic straps to the bottles so your child can wear the jetpack like a backpack.
- You can print out a NASA logo from the internet and tape it to the front of their white shirt.
- A simple bicycle or skateboard helmet can serve as the astronaut’s helmet.
- Use silver duct tape to add details to their white shoes to make them look like space boots.
- This is an incredibly creative and impressive-looking DIY costume.
- Get ready for a Halloween mission that is out of this world.
20. The Crafty Wizard or Witch
A magical costume that can be made with some very simple and clever household materials.
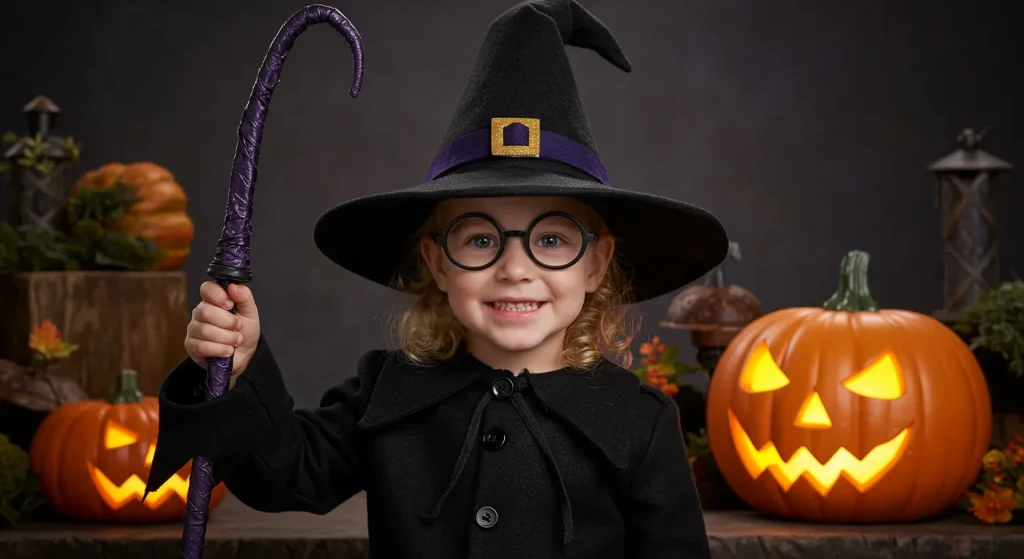
DIY Tips
- The robe is the main part of the costume. A large, black trash bag can be turned into a no-sew robe.
- Carefully cut a hole in the bottom center of the bag for the head and two holes in the sides for the arms.
- Cinch the robe at the waist with a piece of rope or a simple belt.
- To make a classic, pointy hat, take a large piece of black construction paper or poster board.
- Roll the paper into a cone shape and secure it with tape or staples. Cut the bottom edge so it is even.
- A wand is essential. Find a nice, straight stick from the backyard. You can peel off the bark or paint it.
- For an extra magical touch, you can use a hot glue gun to create a swirly, textured handle on the wand and then paint it.
- You can use star-shaped stickers to decorate the robe and the hat.
- A long, white beard for a wizard can be made from cotton balls glued to a piece of paper with an elastic strap.
- This is a classic costume that allows for a lot of magical, creative fun.
Funny Inanimate Objects
Some of the most creative and memorable costumes come from thinking outside the box and dressing up as an everyday object.
21. The Cardboard Box Robot
A classic DIY costume that is a blast to build and wear. It is a perfect way to use up all those shipping boxes.
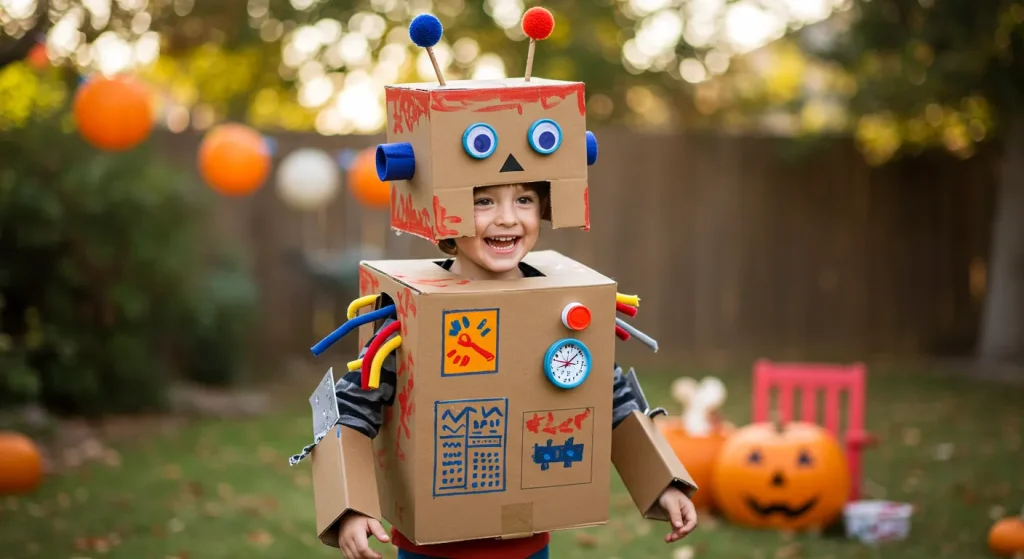
DIY Tips
- You will need two cardboard boxes: a larger one for the body and a smaller one for the head.
- Cut head and arm holes in the larger box and a hole for the head in the bottom of the smaller box.
- This is the fun part: decorate the robot! You can spray paint the boxes silver or cover them in aluminum foil.
- Use bottle caps, plastic lids, and other small recycled items as knobs, buttons, and dials. Hot glue them onto the front of the robot’s body.
- A great material for robot arms and legs is flexible dryer vent tubing. You can find this at a hardware store.
- You can create antennae for the headpiece by attaching two pipe cleaners with pom-poms on the ends.
- Let your child help with the design and decoration.
- Practice a stiff, robotic walk and a monotone robot voice.
- This costume is a true DIY masterpiece.
- It is a fantastic and creative use of recycled materials.
22. A Human Vending Machine
A very clever, funny, and surprisingly easy costume to make from a single cardboard box.
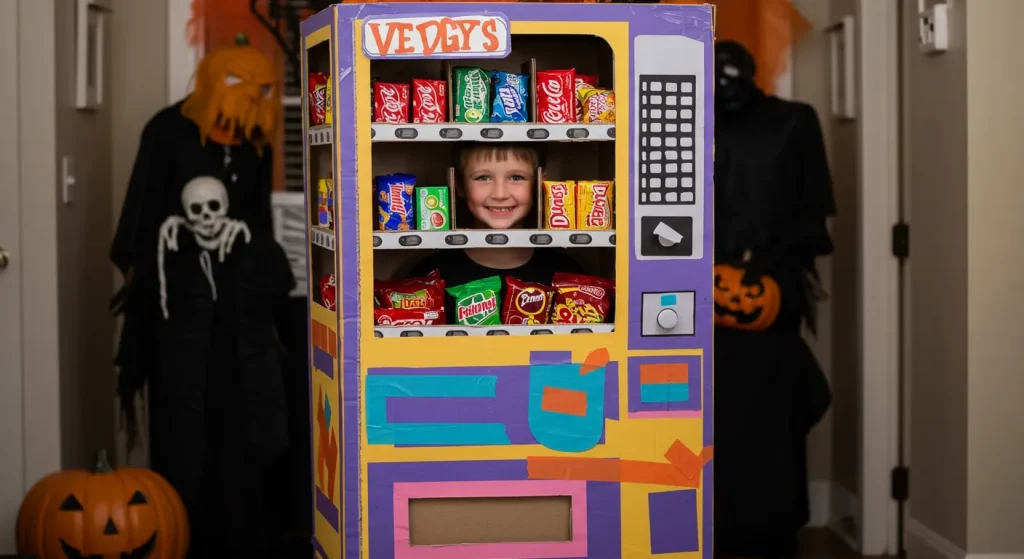
DIY Tips
- Find a large, rectangular cardboard box that fits your child.
- Cut out head and arm holes.
- Paint the entire box a single color, like black or red.
- The front of the vending machine will be a clear “window.” Cut a large, rectangular window out of the front of the box.
- Cover this window opening with a piece of clear plastic. A clear plastic report cover or a piece of a clear storage bag works well.
- Behind the plastic window, hot glue several small, single-serving bags of chips or candy bars in neat rows.
- Make a “coin slot” and a “dispenser slot” out of smaller pieces of cardboard and glue them to the front.
- You can create a logo for the vending machine, like “Mom’s Snacks.”
- This is a very funny and interactive costume.
- It is sure to be a huge hit at any Halloween party.
23. A Colorful Crayon
A very simple, cute, and colorful costume that is perfect for younger children and can be made in any color of the rainbow.

DIY Tips
- The base of this costume is a simple, solid-colored sweatsuit or pajamas in a bright color like red, blue, or green.
- To create the crayon “label,” use a piece of black construction paper or felt.
- Cut the black paper to create the two classic, wavy stripes of a crayon label.
- Glue the black stripes around the chest area of the shirt.
- In the space between the stripes, you can write the word “Crayon” or the name of the color.
- The most important part is the pointy hat. You will need a piece of poster board that is the same color as the sweatsuit.
- Roll the poster board into a cone shape to create the pointy tip of the crayon. Secure it with staples or tape.
- Attach a piece of elastic or a string to the cone hat to keep it on your child’s head.
- This is a very comfortable and easy-to-wear costume.
- For a fantastic group costume, have several kids go as a whole box of different colored crayons.
24. A Laundry Basket
A very funny and clever costume that is incredibly easy to put together. It is a perfect last-minute idea.
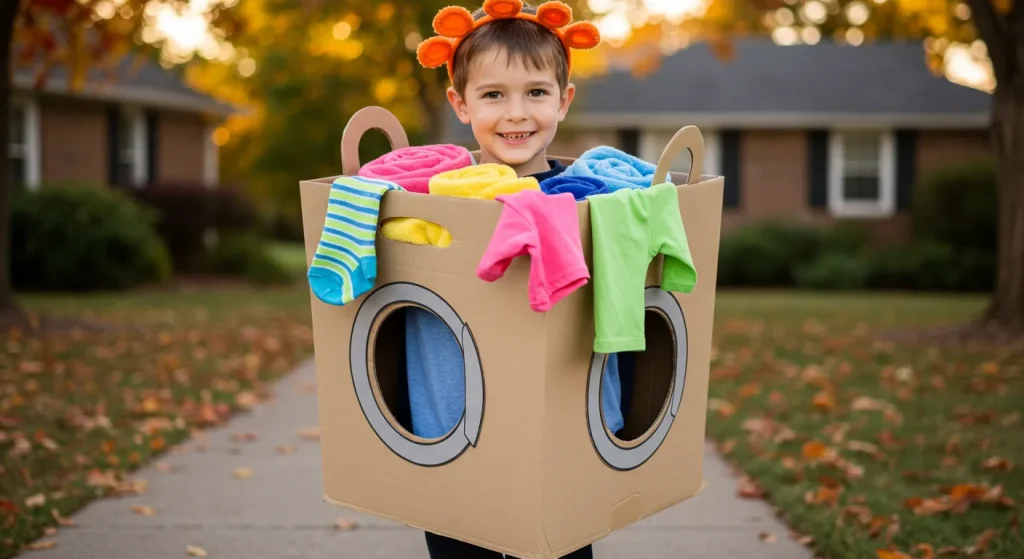
DIY Tips
- You will need a plastic laundry basket. It is best to use one that is not too deep.
- Carefully have a parent cut out the bottom of the laundry basket, creating a hole that is large enough for your child to step through.
- Your child will essentially be “wearing” the laundry basket around their waist.
- You will need to create simple suspenders to hold the basket up.
- Use two long pieces of wide ribbon or rope. Attach them to the front and back of the laundry basket rim.
- The final touch is to fill the basket with a few pieces of lightweight, clean laundry.
- You can also add an empty bottle of laundry detergent or an empty dryer sheet box.
- This is a very silly and recognizable costume.
- It is best for kids who do not mind a slightly bulky costume.
- It is a hilarious take on a common household chore.
25. A Pair of Dice
A classic, simple, and graphic costume that is perfect for a pair of siblings or best friends.
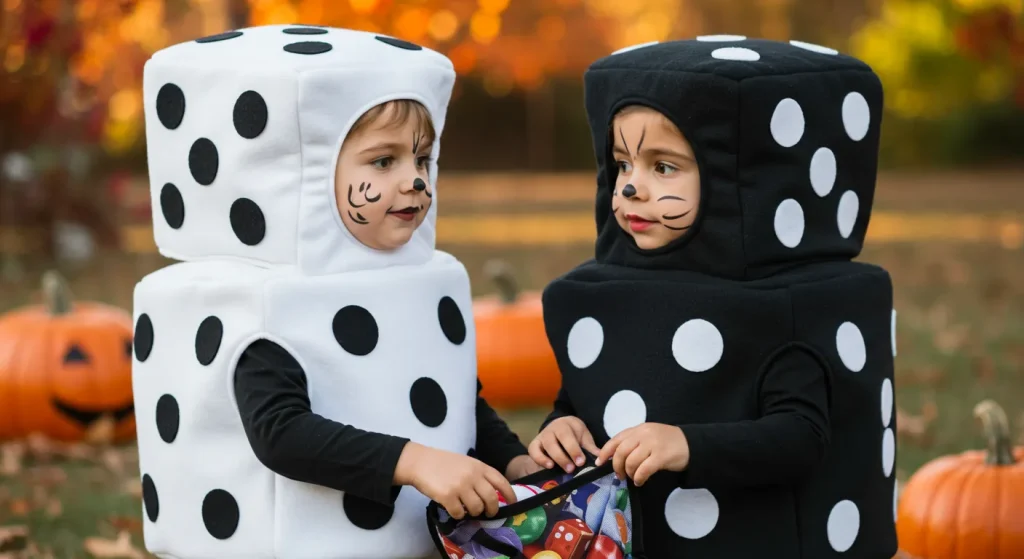
DIY Tips
- You will need two identical, square-shaped cardboard boxes.
- Cut head and arm holes in the boxes.
- Paint both boxes a solid white.
- Once the paint is dry, you will need to add the black dots.
- Cut out several large, black circles from construction paper or felt.
- Use a real die as a reference to make sure you glue the dots on in the correct configuration on each side of the box.
- Have the kids wear all black or all white clothing underneath.
- This is a very simple and graphic costume that is instantly recognizable.
- It is a fantastic and easy costume for a pair.
- It is a fun and comfortable costume that allows for easy movement.
Conclusion
Making a DIY Halloween costume from scratch does not have to be difficult or stressful. It is a fantastic opportunity to get creative and make something truly special.
These 25 ideas prove that you do not need to spend a lot of money to have an amazing costume. With a little imagination and a few simple household materials, you can create a costume that is viral, memorable, and full of personality.
The real magic of a DIY costume is not just the final product, but the fun memories you make while creating it together with your child.
So this year, raid your recycling bin, look in your closets, and get ready to create some Halloween magic. Happy crafting and have a spooktacular Halloween.