
Welcome, kindred spirits, to a realm of enchantment and creativity. If you yearn to infuse your living space with a touch of the mystical, you have come to the right place. Transforming your home into a witch’s haven does not require expensive store bought items.
Instead, we invite you to explore the magic of do it yourself projects. These crafts are designed to awaken your inner artisan. They will help you craft a home that truly reflects your unique, magical essence. Prepare to weave some spells into your decor.
1. Enchanting Potion Bottles
Transform ordinary glass bottles into vessels of mystery. These potion bottles will add an air of ancient alchemy to your shelves. They look like they hold powerful elixirs.
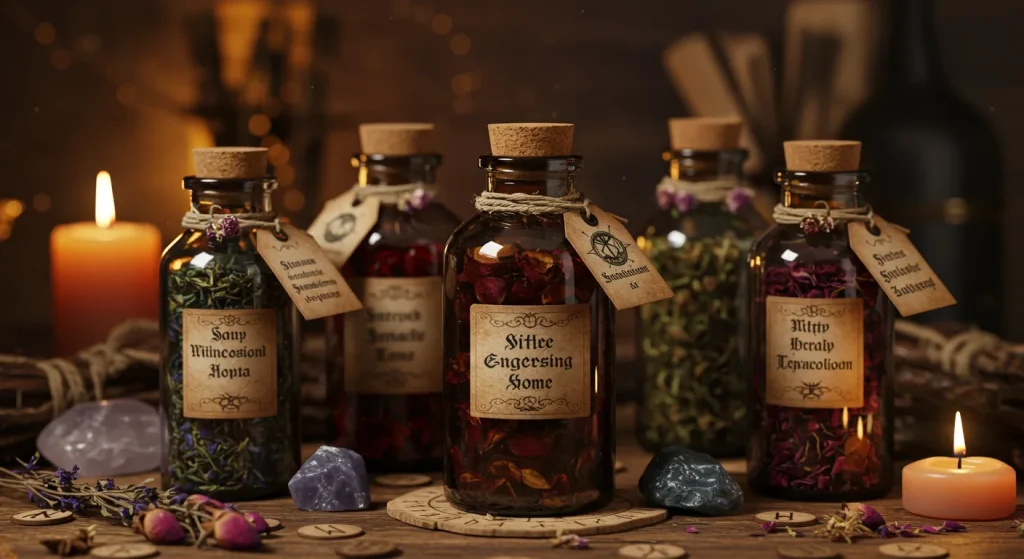
Gather Your Magickal Supplies:
- Assorted glass bottles, various shapes and sizes.
- Craft paint (dark colors, metallics).
- Twine or rustic string.
- Paper for labels (parchment style is ideal).
- Coffee or tea (for aging labels).
- Glue or Mod Podge.
- Optional: glitter, dried herbs, food coloring, corks, wax.
Weaving Your Spell (Instructions):
- Clean your bottles thoroughly. Let them dry completely.
- If desired, paint the bottles. A dry brushing technique with metallic paint over a dark base works well.
- Create your labels. Write mystical names like “Dragon’s Breath” or “Elixir of Moonbeams.”
- Age the labels by soaking them briefly in cool coffee or tea. Let them dry, then gently tear the edges.
- Glue the labels onto the bottles.
- Fill bottles with colored water, glitter, or small dried herbs.
- Seal with corks. For an extra touch, drip melted wax over the cork and down the bottle’s neck.
- Wrap twine around the neck of the bottles for a rustic finish.
Witchy Wisdom & Embellishments:
- Group bottles of different heights together for an interesting display.
- Use unique charms or beads tied to the twine.
- Consider adding small, symbolic drawings to your labels.
- Place them on bookshelves, mantels, or your altar space.
2. Mysterious Spellbook Covers
Give ordinary notebooks or old books a new, mystical life. Turn them into ancient looking grimoires or spellbooks. They will look like they hold forbidden knowledge.
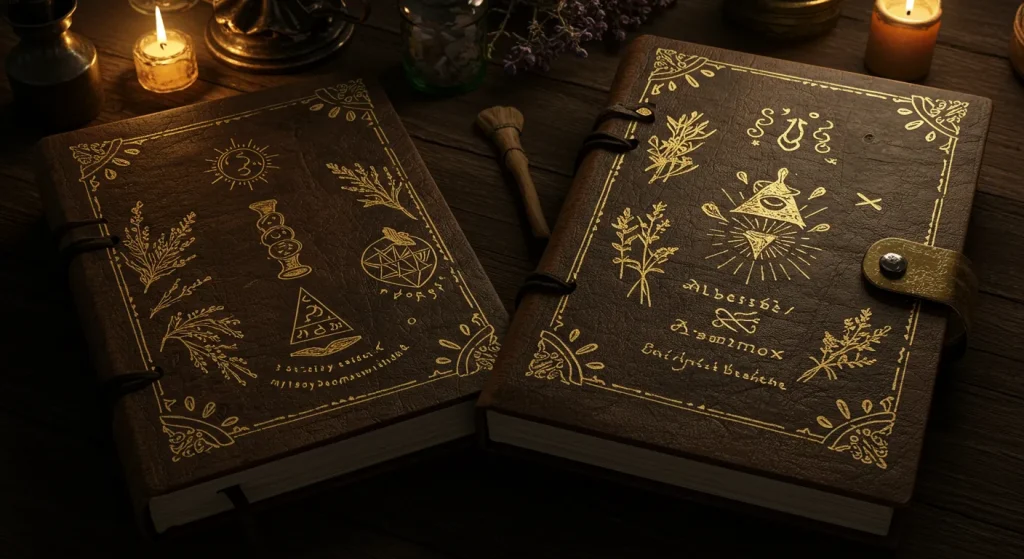
Gather Your Magickal Supplies:
- Hardcover notebooks or old books.
- Craft glue (PVA or Mod Podge).
- Brown paper bags or craft paper.
- Acrylic paints (browns, black, gold, silver).
- Sponges or textured cloths.
- Optional: raised embellishments (craft foam, hot glue designs), metallic markers, faux leather.
Weaving Your Spell (Instructions):
- If using a notebook, ensure the cover is plain.
- Crumple your brown paper bag or craft paper. Smooth it out slightly to retain texture.
- Cover the book with the textured paper using glue. Wrap the edges neatly inside.
- Once dry, paint the cover with a base coat of dark brown or black.
- Use a sponge to dab on lighter browns or metallic paints for an aged effect.
- Create raised designs before painting using hot glue, or cut shapes from craft foam and glue them on. Think moons, stars, or swirling patterns.
- Add details with metallic markers once the paint is dry.
Witchy Wisdom & Embellishments:
- Consider adding a faux leather strap with a buckle.
- Use stencils for intricate symbols.
- Rub a bit of cinnamon or coffee grounds into the wet paint for texture and scent.
- These look wonderful stacked on a side table or desk.
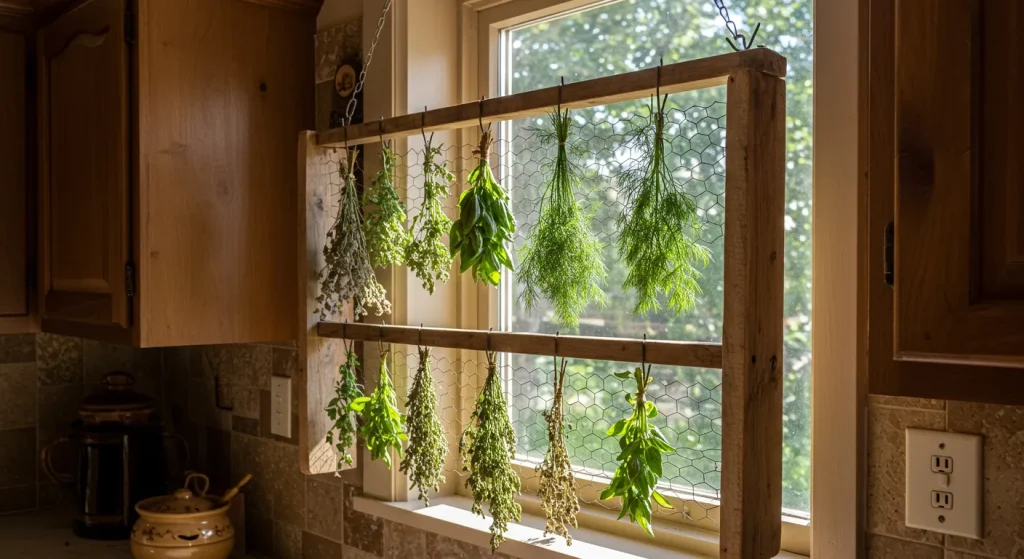
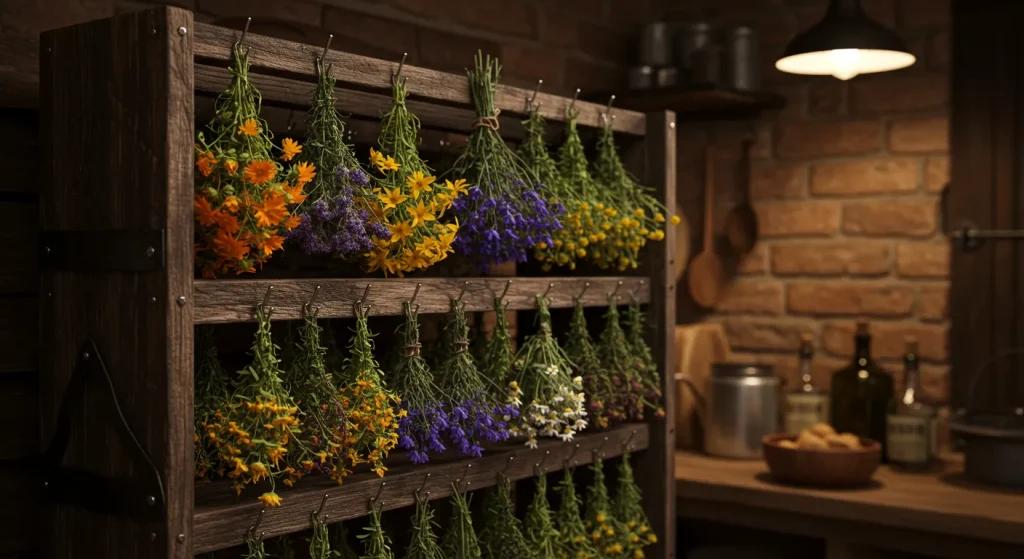
3. Rustic Herb Drying Rack
Every witch needs a place to dry their precious herbs. This simple rack is both functional and beautifully rustic. It adds an authentic touch to your kitchen or sacred space.
Gather Your Magickal Supplies:
- A sturdy branch or wooden dowel (about 2-3 feet long).
- Twine or natural string.
- Small S hooks or more twine for hanging herbs.
- Fresh herbs for drying (rosemary, lavender, sage).
- Screw eye hooks (if hanging the rack).
Weaving Your Spell (Instructions):
- Clean your branch or dowel. Let it dry if necessary.
- If you plan to hang the rack from the ceiling, screw an eye hook into each end of the branch.
- Tie a long piece of twine to these eye hooks for hanging.
- Alternatively, you can rest the branch across two wall hooks.
- Bundle your fresh herbs with twine, leaving a loop for hanging.
- Hang the herb bundles from the branch using S hooks or by tying them directly with more twine.
Witchy Wisdom & Embellishments:
- Choose a branch with interesting character.
- Hang different types of herbs for variety in color and texture.
- Place the rack in a well ventilated area away from direct sunlight.
- Add small charms or crystals tied to the rack itself.
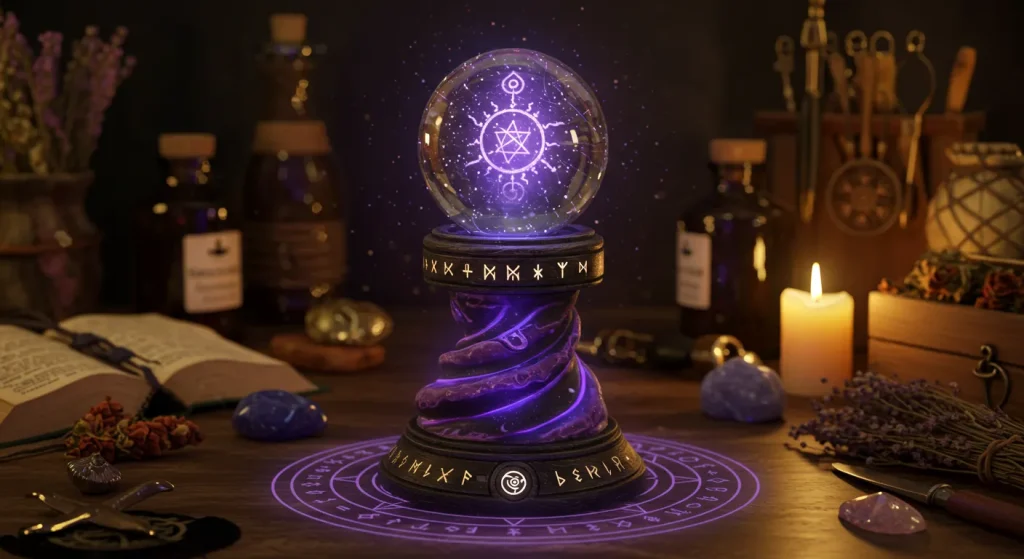
4. Mystical Crystal Ball Stand
A crystal ball is a classic witchy tool. Elevate its presence with a unique, handcrafted stand. This project makes your scrying orb a true centerpiece.
Gather Your Magickal Supplies:
- A crystal ball or a clear glass sphere.
- Air dry clay or polymer clay.
- Acrylic paints (dark, metallic).
- Optional: small decorative stones, moss, twigs.
Weaving Your Spell (Instructions):
- Take a portion of your chosen clay.
- Mold the clay into a base that will securely hold your crystal ball.
- You can create a simple cup shape, or more elaborate designs like three intertwined branches or dragon claws.
- Ensure the base is stable and can support the weight of your sphere.
- If using air dry clay, let it dry completely according to package instructions.
- If using polymer clay, bake it according to instructions.
- Once dry or baked, paint your stand. Dark colors like black or deep purple work well, with metallic highlights.
- You can glue small stones, moss, or tiny twigs onto the base for added detail before or after painting.
Witchy Wisdom & Embellishments:
- Consider sculpting symbols into the clay base.
- A velvet or silk cloth placed under the stand can add a luxurious touch.
- Ensure the stand is placed where the crystal ball will not easily be knocked over.
- This makes a wonderful focal point for an altar.
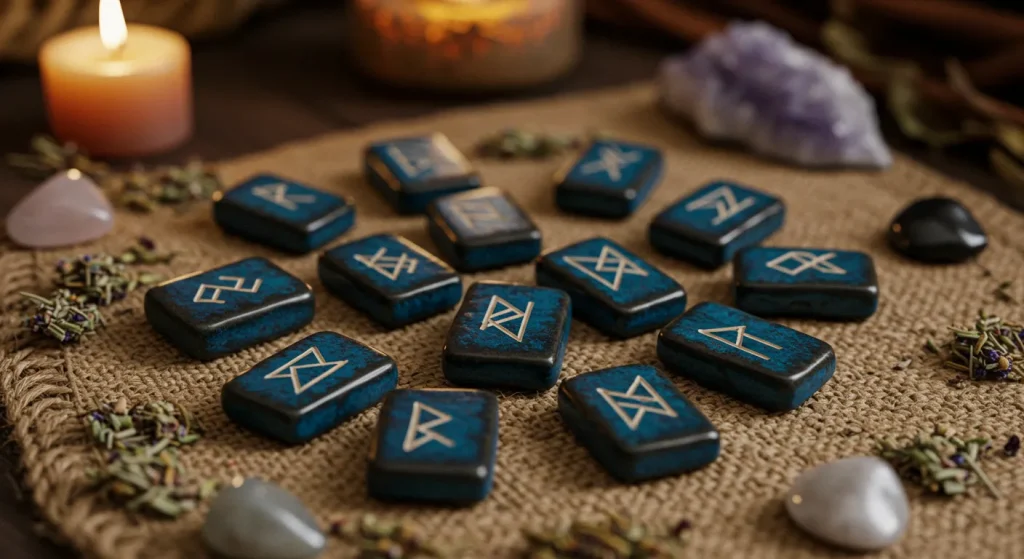
5. Handcrafted Rune Stones
Create your own set of rune stones for divination or decoration. This personalizes your connection to this ancient oracle. They feel powerful in your hands.
Gather Your Magickal Supplies:
- 24 small, smooth stones (river rocks work well) or wooden discs.
- Permanent marker (fine tip) or paint pen (gold, silver, or black).
- A small pouch or box for storage.
- Optional: clear sealant or varnish.
Weaving Your Spell (Instructions):
- Clean your stones or wooden discs thoroughly. Let them dry.
- Research the Elder Futhark runes (the most common set of 24).
- Carefully draw or paint one rune symbol onto each stone or disc.
- Take your time to ensure the symbols are clear and accurate.
- Let the ink or paint dry completely.
- If desired, apply a thin coat of clear sealant or varnish to protect the symbols.
- Store your completed rune set in a special pouch or box.
Witchy Wisdom & Embellishments:
- Choose stones that feel good in your hand.
- You can gather stones from a place that is meaningful to you.
- Embroider a symbol onto the storage pouch.
- Practice with your runes to build a connection with them.
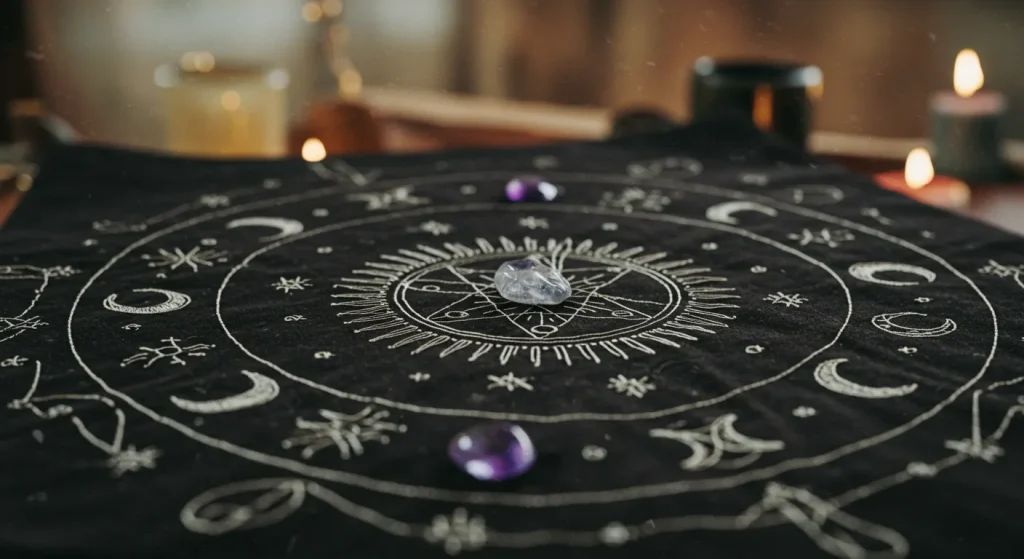
6. DIY Altar Cloth or Tarot Mat
Design a special cloth for your altar or tarot readings. This craft adds a personal and sacred touch to your practice. It defines your magical workspace.
Gather Your Magickal Supplies:
- A piece of fabric (velvet, cotton, linen in a dark color like black, purple, or deep blue).
- Fabric paint or embroidery floss and needle.
- Stencils (optional).
- Measuring tape and scissors.
Weaving Your Spell (Instructions):
- Measure and cut your fabric to the desired size. A square or rectangle works well.
- Hem the edges of the fabric to prevent fraying.
- Plan your design. You might choose a central pentacle, moon phases, or other symbols meaningful to you.
- If using fabric paint, you can use stencils or freehand your design.
- If embroidering, sketch your design lightly onto the fabric first.
- Let paint dry completely according to instructions.
Witchy Wisdom & Embellishments:
- Consider adding fringe or tassels to the edges.
- Sew small beads or sequins onto your design for extra sparkle.
- Choose colors for your design that have symbolic meaning for you.
- Always treat your altar cloth with respect.
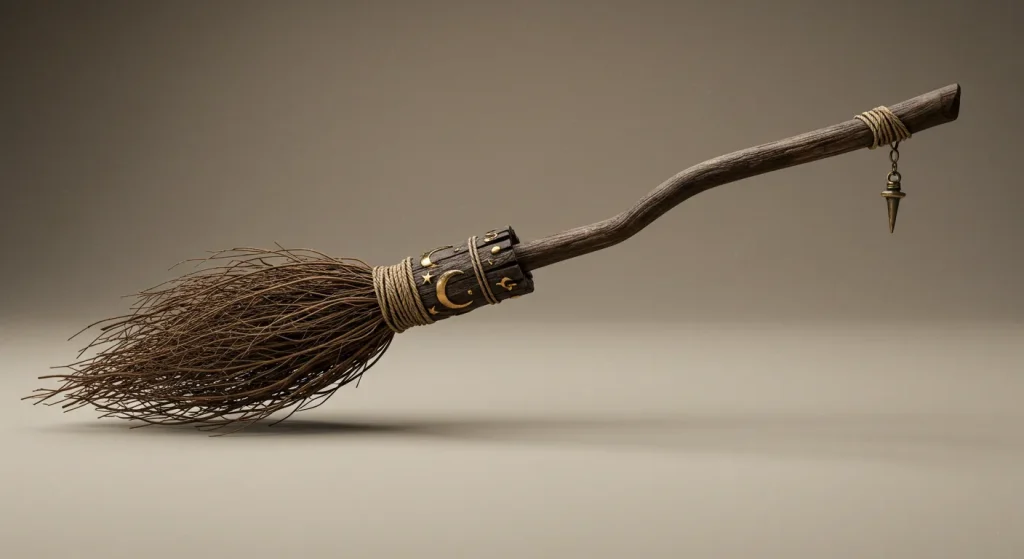
7. Decorative Witch’s Besom (Broom)
A besom is a witch’s traditional broom. Create a decorative version to hang on your wall or prop in a corner. It symbolizes sweeping away negative energy.
Gather Your Magickal Supplies:
- A sturdy branch for the handle (about 3-4 feet long).
- Natural twigs or straw for the bristles (birch twigs are traditional).
- Strong twine or thin wire.
- Optional: charms, ribbons, dried herbs.
Weaving Your Spell (Instructions):
- Clean the branch for the handle.
- Gather your twigs or straw into a bundle for the bristles.
- Attach the bristle bundle securely to one end of the branch handle using twine or wire. Wrap it tightly.
- Trim the ends of the bristles so they are relatively even.
- You can decorate the handle by wrapping it with ribbon or more twine.
- Attach small charms, dried herbs, or crystals to the besom with twine.
Witchy Wisdom & Embellishments:
- Hang your besom bristles up or bristles down, according to your tradition or preference.
- A smaller version can be made for an altar.
- Use different types of twigs for varied textures.
- This is a great item to place near your doorway.
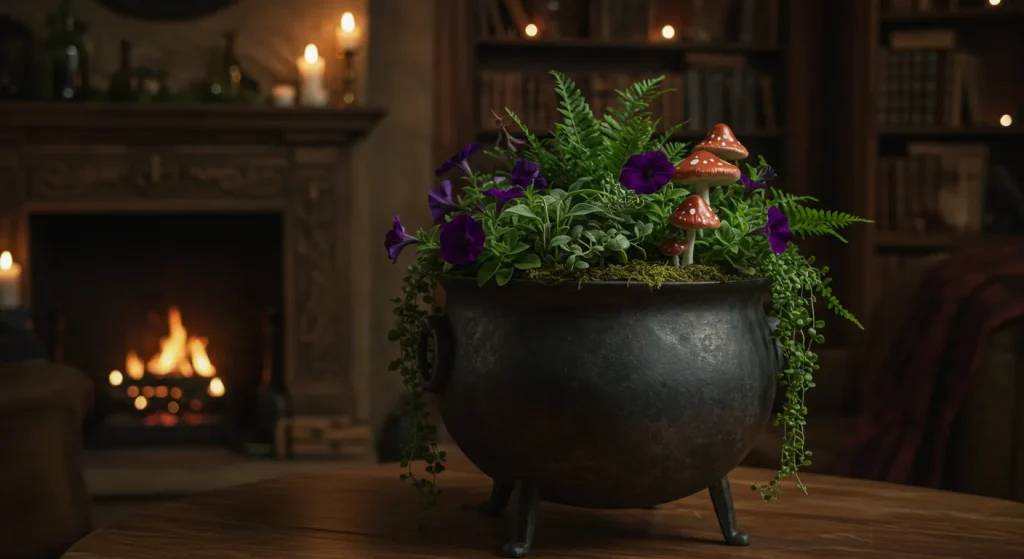
8. Cauldron Planter
Transform a simple cauldron into a charming planter for your magical herbs. This brings a touch of green witchery indoors. It connects earth magic with your home.
Gather Your Magickal Supplies:
- A small cast iron cauldron or a cauldron shaped pot (ceramic or plastic).
- Potting soil.
- Small plants or herbs (e.g., succulents, ivy, kitchen herbs).
- Gravel or small stones for drainage (if your cauldron has no drainage holes).
Weaving Your Spell (Instructions):
- If your cauldron does not have drainage holes, place a layer of gravel at the bottom.
- Fill the cauldron with potting soil, leaving space for your plants.
- Carefully plant your chosen herbs or plants into the soil.
- Water lightly.
- Place your cauldron planter in a spot that receives appropriate sunlight for the plants chosen.
Witchy Wisdom & Embellishments:
- Trailing plants like ivy look particularly good spilling over the cauldron’s edge.
- Choose herbs that you associate with magic, like rosemary for remembrance or sage for cleansing.
- You can paint a plain pot to look like a cauldron if you cannot find one.
- A tiny “bubbling over” effect can be made with moss.
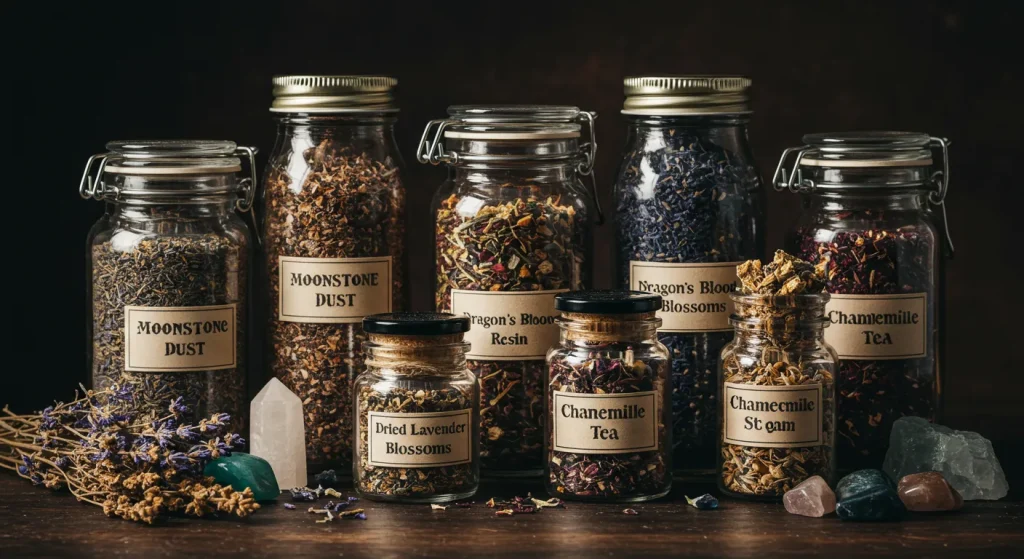
9. Labeled Apothecary Jars
Organize your herbs, spices, or craft supplies in beautifully labeled apothecary jars. These add an old world charm to your kitchen or workspace. They evoke a sense of a working witch’s laboratory.
Gather Your Magickal Supplies:
- Glass jars with lids (various sizes).
- Paper for labels (parchment style or kraft paper).
- Fine tip permanent marker or calligraphy pen.
- Twine or ribbon.
- Glue.
- Optional: small charms.
Weaving Your Spell (Instructions):
- Clean your glass jars thoroughly and let them dry.
- Create your labels. Write the names of herbs, ingredients, or curiosities.
- Use an old fashioned script or a simple, elegant font.
- Age the labels if desired (using the tea/coffee method from potion bottles).
- Glue the labels onto the jars.
- You can tie twine or ribbon around the neck of the jar or over the lid.
- Attach a small charm to the twine for an extra touch.
Witchy Wisdom & Embellishments:
- Use a consistent style for all your labels for a cohesive look.
- Fill jars with colorful spices, dried flowers, or even small stones and shells.
- Arrange them on open shelving for easy access and visual appeal.
- Consider using wax seals on the labels for an authentic touch.
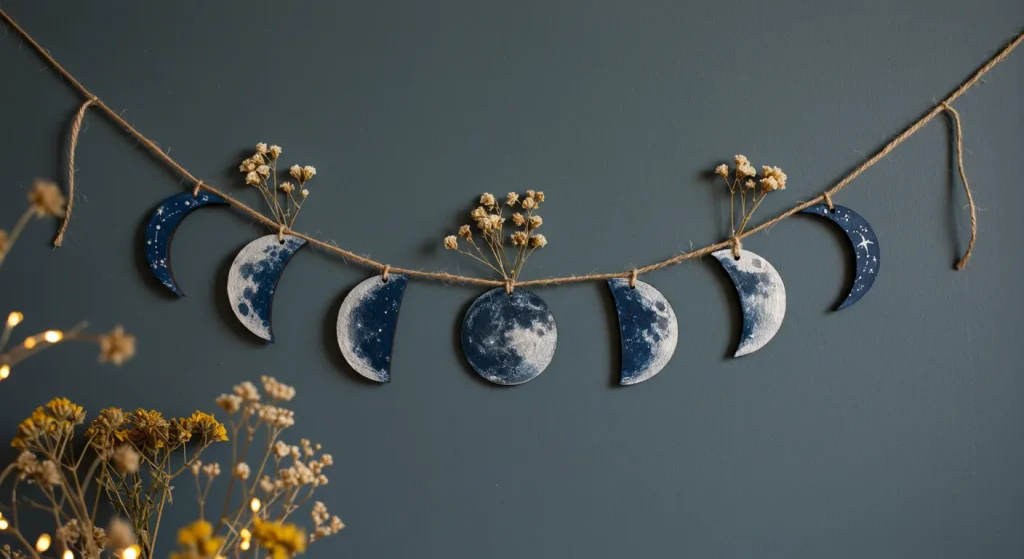
10. Celestial Moon Phase Garland
Bring the magic of the lunar cycle into your home with a DIY moon phase garland. This is a beautiful decoration for any wall or window. It honors the ever changing moon.
Gather Your Magickal Supplies:
- Black or dark blue craft foam, cardstock, or polymer clay.
- Silver or gold metallic paint or pen.
- Twine or string.
- Scissors or craft knife.
- Hole punch.
- Circular objects for tracing (various sizes for different moon phases, or a compass).
Weaving Your Spell (Instructions):
- Trace and cut out your moon shapes from your chosen material. You will need a full moon, new moon (can be a black circle or omitted), waxing/waning crescents, and gibbous moons. Aim for at least 5-7 phases.
- If using foam or cardstock, paint your moon shapes with metallic paint if they are not already a metallic color. Let dry.
- If using polymer clay, shape and bake the moons, then paint if desired.
- Once dry, punch a hole (or two for better hanging) at the top of each moon shape.
- Arrange the moons in the correct order of the lunar cycle.
- Thread the twine through the holes, spacing the moons evenly along the string.
- Secure the moons by tying small knots or using a dab of glue on the back.
Witchy Wisdom & Embellishments:
- Add small star shapes cut from metallic paper between the moons.
- Hang vertically or horizontally.
- Use glitter paint for extra sparkle.
- This looks lovely above a bed or altar.
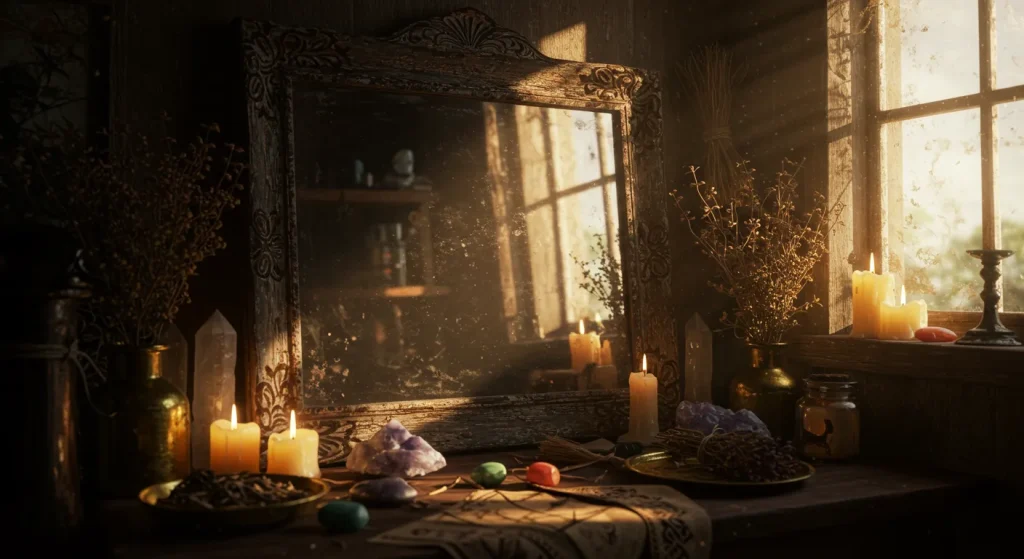
11. Mystical Aged Mirror
Transform an ordinary mirror into a portal to another realm with an aged or decorated frame. It adds an element of mystery and introspection. It reflects more than just your image.
Gather Your Magickal Supplies:
- A mirror with a frame (thrift store find is perfect).
- Black or dark colored paint.
- Metallic paint (gold, silver, bronze).
- Sponge or cloth.
- Optional: air dry clay or hot glue for embellishments, faux gems.
Weaving Your Spell (Instructions):
- Clean the mirror frame thoroughly.
- Protect the mirror glass with painter’s tape.
- Paint the frame with a base coat of black or a dark color. Let it dry.
- Using a sponge or cloth, lightly dab metallic paint onto the frame to create an aged, distressed look. Focus on raised areas and edges.
- Alternatively, sculpt designs onto the frame with air dry clay (like vines, moons, or symbols) before painting. Or use hot glue to create raised patterns.
- You can glue faux gems or cabochons onto the frame for extra allure.
- Remove the painter’s tape carefully once everything is dry.
Witchy Wisdom & Embellishments:
- Look for ornate frames in thrift stores for a good starting point.
- Consider “foxing” the mirror glass itself for a truly antique look (tutorials available online, requires specific chemicals and caution).
- Hang the mirror in a dimly lit corner or hallway.
- Surround it with candles for a scrying atmosphere.
12. Personalized Wand Display
Every witch has a wand, or perhaps several. Create a special display to honor these tools of will and intention. This showcases your magical instruments beautifully.
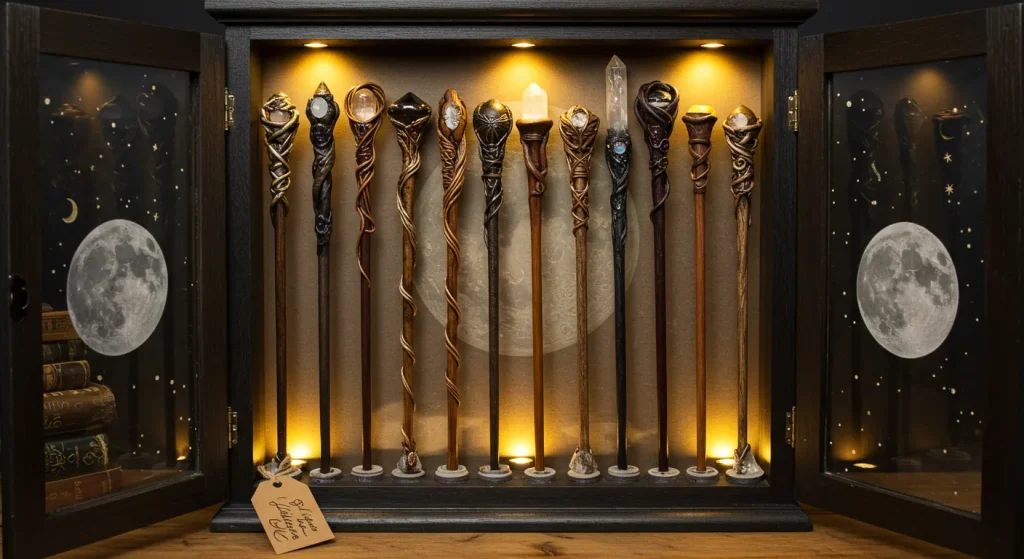
Gather Your Magickal Supplies:
- A piece of wood (plank, driftwood).
- Small cup hooks or leather strips and tacks.
- Sandpaper.
- Paint or wood stain (optional).
- Drill (if using cup hooks).
- Measuring tape.
Weaving Your Spell (Instructions):
- Sand the piece of wood until smooth.
- Paint or stain the wood if desired. Let it dry.
- Decide on the placement of your wands. Measure and mark where the supports will go.
- If using cup hooks, pre drill small pilot holes and then screw in the hooks. Space them to hold wands horizontally.
- If using leather strips, cut small strips. Create loops large enough to hold a wand and tack them to the wood.
- Mount the display on a wall or rest it on a shelf.
Witchy Wisdom & Embellishments:
- Burn symbols or sigils into the wood before staining.
- Use velvet or felt to line the areas where the wands rest.
- Display wands of different woods or styles.
- This can be a focal point above a desk or altar.
13. Enchanted Bell Chimes
Hang bells near doorways or windows to cleanse energy and ward off negativity. These DIY chimes add sound magic to your home. Their tinkling is a gentle protection.
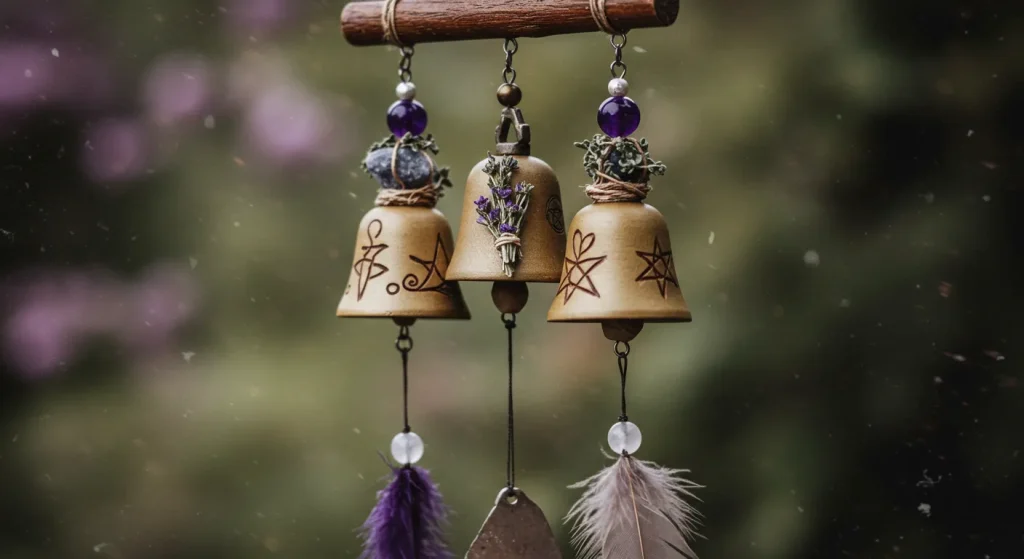
Gather Your Magickal Supplies:
- Small bells (various tones and sizes).
- A small branch, wooden ring, or embroidery hoop.
- Twine, fishing line, or colorful ribbons.
- Optional: beads, charms, feathers.
Weaving Your Spell (Instructions):
- Take your branch or hoop as the base for the chimes.
- Cut varying lengths of twine or ribbon.
- Tie a bell to the end of each piece of twine.
- You can thread beads or charms onto the twine above the bells.
- Tie the other end of the twines to the branch or hoop, spacing them out.
- Add a longer piece of twine to the top of the branch or hoop for hanging.
Witchy Wisdom & Embellishments:
- Use bells with different tones for a more complex sound.
- Incorporate natural elements like small shells or feathers.
- Hang them where a breeze can catch them.
- Silver bells are often associated with psychic protection.
14. Shadowy Black Cat Silhouettes
Black cats are iconic witch’s familiars. Create elegant silhouettes to place on windowsills, shelves, or walls. They add a subtle nod to your feline companions.
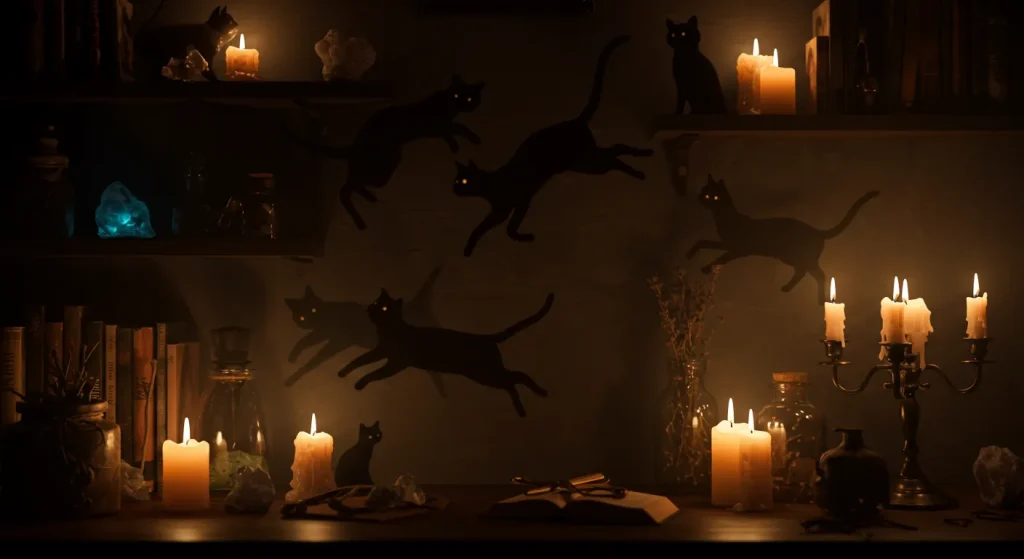
Gather Your Magickal Supplies:
- Black cardstock or thin black craft foam.
- Pencil.
- Sharp scissors or a craft knife.
- Cat silhouette templates (search online or draw your own).
- Optional: small LED tealights, double sided tape.
Weaving Your Spell (Instructions):
- Find or draw cat silhouettes in various poses (sitting, stretching, arching back).
- Trace the templates onto the black cardstock or craft foam.
- Carefully cut out the cat shapes using scissors or a craft knife.
- If you want them to stand, you can create a small triangular base from the same material and glue it to the back.
- Alternatively, use double sided tape to affix them to walls or windows.
Witchy Wisdom & Embellishments:
- Place them so they are backlit by a window or a lamp for a striking effect.
- Cut out yellow or green paper eyes and glue them on for a pop of color.
- Create a series of cats walking along a mantelpiece.
- Small LED tealights placed behind them can create a glowing eyes effect at night.
15. Raven’s Perch Decoration
Ravens and crows are often seen as messengers and symbols of magic. Create a perch for a faux raven figure. This adds a touch of gothic mystique.
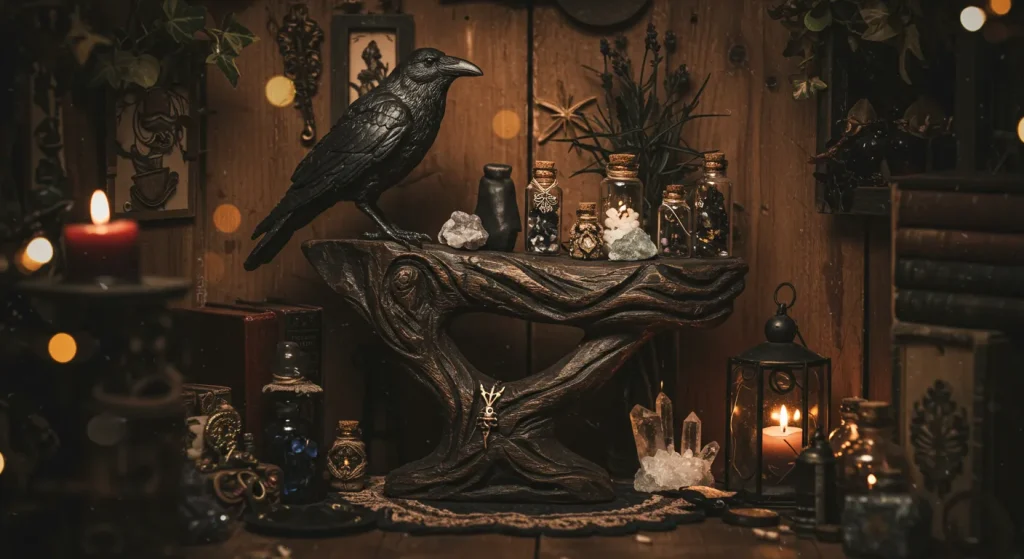
Gather Your Magickal Supplies:
- A realistic looking faux raven or crow figure.
- A sturdy, interesting branch.
- Hot glue gun or strong adhesive.
- Optional: black paint, moss, small chains.
Weaving Your Spell (Instructions):
- Clean your branch. You can paint it black for a more gothic look, or leave it natural.
- Find a stable position on the branch where the raven can be perched.
- Secure the raven to the branch using hot glue or strong adhesive. Ensure its feet are firmly attached.
- You can add bits of moss around the raven’s feet or along the branch.
- The branch can be propped in a corner, laid on a shelf, or even hung.
Witchy Wisdom & Embellishments:
- Drape a small, delicate chain from the raven’s beak or around its perch.
- Place it high on a bookshelf so it appears to be overseeing the room.
- Consider adding a tiny scroll tied with ribbon to its foot.
- This pairs well with a stack of old books.
16. Eerie Spiderweb Coasters
Protect your surfaces with these spooky yet chic spiderweb coasters. They are perfect for your witch’s brew. A practical craft with a web of intrigue.
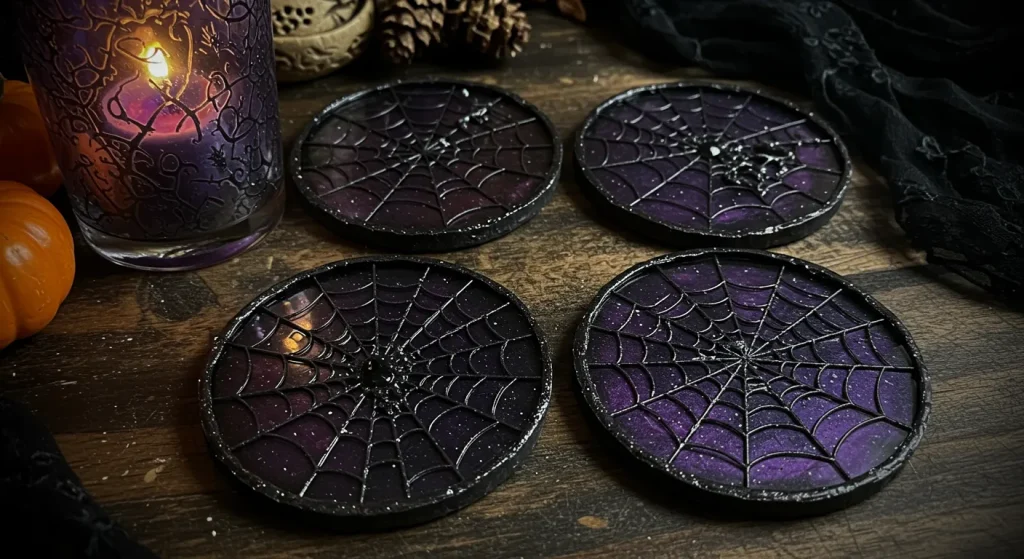
Gather Your Magickal Supplies:
- Black craft foam or cork sheets.
- White or silver paint pen or dimensional fabric paint.
- Scissors or craft knife.
- Circular object for tracing (mug or glass).
Weaving Your Spell (Instructions):
- Trace circles onto your black foam or cork using your circular object.
- Cut out the circles.
- Using your white or silver paint pen, draw a spiderweb design onto each circle.
- Start with lines radiating from the center, then connect them with curved lines.
- Let the paint dry completely.
- If using dimensional paint, allow it to puff up and dry thoroughly.
Witchy Wisdom & Embellishments:
- Add a tiny plastic spider glued to the corner of one web.
- Make a set of four or six.
- You can also use clear acrylic discs and paint the web on the underside.
- These make great little gifts for fellow witchy friends.
17. Enchanted Forest Terrarium
Create a miniature magical world within a glass container. An enchanted forest terrarium brings nature’s magic indoors. It is a tiny ecosystem of wonder.
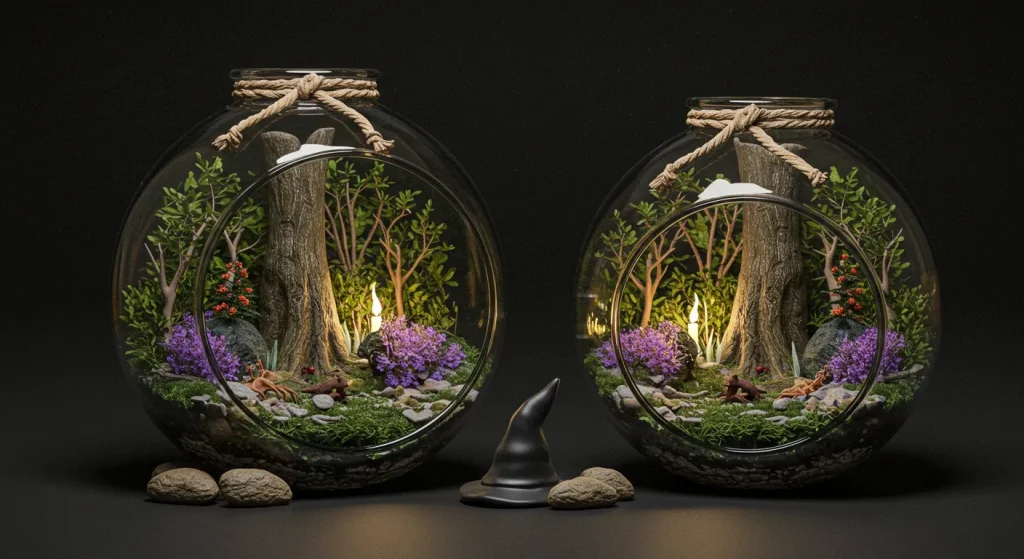
Gather Your Magickal Supplies:
- A clear glass container (jar, bowl, old fish tank).
- Small pebbles or gravel for drainage.
- Activated charcoal (aquarium charcoal).
- Potting soil suitable for terrariums.
- Small, shade tolerant plants (moss, ferns, tiny succulents).
- Optional: miniature figurines (fairies, mushrooms), small crystals, twigs.
Weaving Your Spell (Instructions):
- Clean your glass container thoroughly.
- Place a layer of pebbles at the bottom for drainage.
- Add a thin layer of activated charcoal over the pebbles. This helps keep the terrarium fresh.
- Add a layer of potting soil.
- Carefully arrange your chosen plants in the soil.
- Add your decorative elements: moss, tiny twigs, crystals, or miniature figurines.
- Water lightly. If your terrarium has a lid, it will require less frequent watering.
Witchy Wisdom & Embellishments:
- Choose plants with different textures and heights for visual interest.
- A layer of preserved moss can create a lush forest floor.
- Incorporate elements that represent the four seasons or magical creatures.
- Place it where it receives indirect light.
18. Mystical Floating Candles Illusion
Recreate the magical ambiance of a great hall with “floating” candles. This uses LED candles for safety and ease. It gives an ethereal glow to any room.
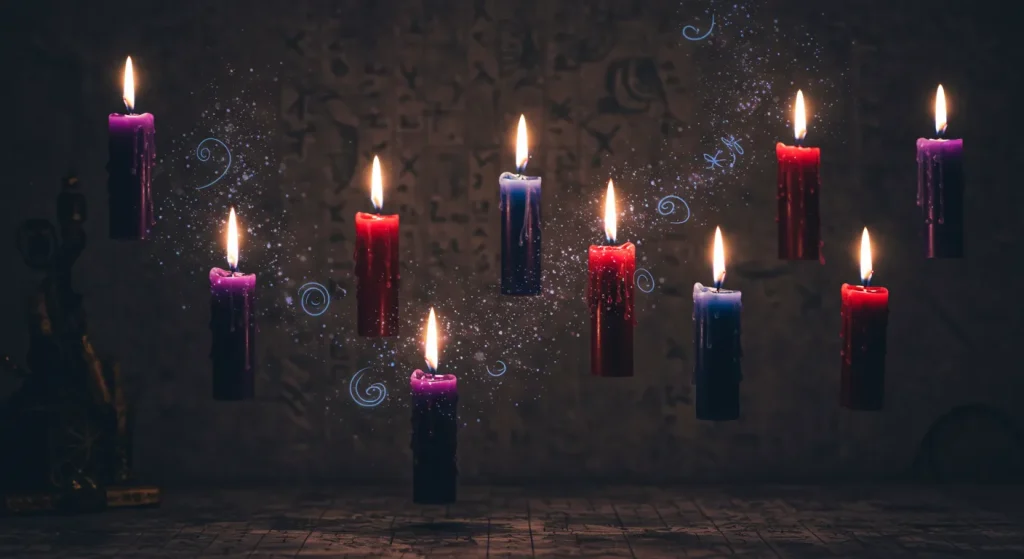
Gather Your Magickal Supplies:
- LED taper candles (battery operated).
- Fishing line or clear nylon thread.
- Thumb tacks or clear adhesive hooks.
- Scissors.
Weaving Your Spell (Instructions):
- Cut varying lengths of fishing line for each candle.
- Tie one end of a piece of fishing line securely around the base of an LED candle. You might need to make a small notch or use a dab of hot glue to secure it if the candle is very smooth.
- Repeat for all your candles.
- Decide where you want to hang them (e.g., from the ceiling over a dining table, in a hallway).
- Attach the other end of the fishing line to the ceiling using a thumb tack or a clear adhesive hook.
- Vary the heights of the candles for a more magical effect.
- Turn on the LED candles.
Witchy Wisdom & Embellishments:
- Use candles that have a “flicker” effect for more realism.
- Hang them in clusters or in a scattered pattern.
- Ensure they are hung high enough to not be a hazard.
- This effect is especially potent in rooms with high ceilings.
19. Ornate Grimoire Box
Keep your most treasured magical items, notes, or tarot decks safe in a decorated box. This Grimoire Box will look like it holds ancient secrets. It protects your personal magic.
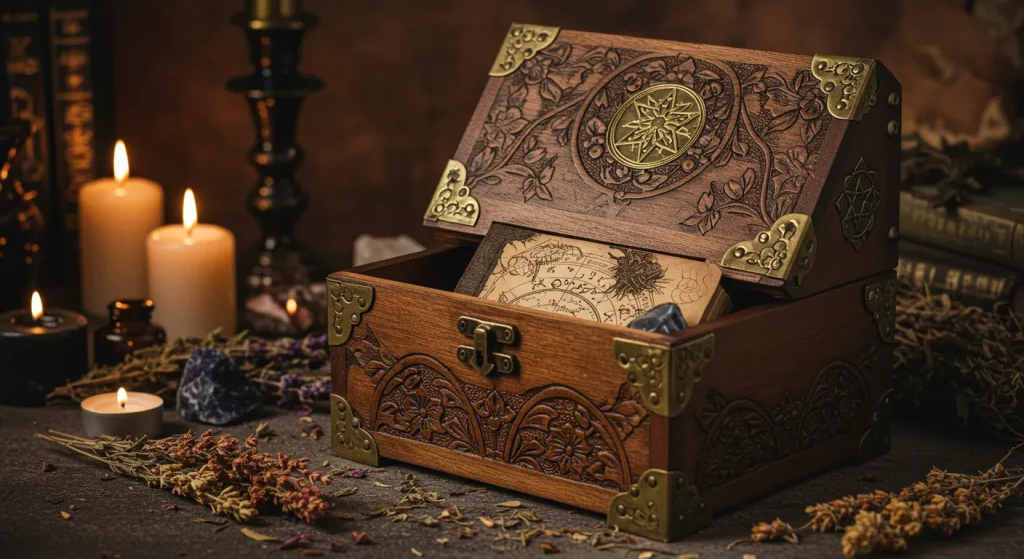
Gather Your Magickal Supplies:
- A plain wooden or sturdy cardboard box with a lid.
- Acrylic paints (dark colors, metallics).
- Craft glue.
- Raised embellishments (craft foam cutouts, metal findings, buttons, modeling paste).
- Optional: fabric lining (velvet, satin), clasp or lock.
Weaving Your Spell (Instructions):
- Paint your box with a base coat of a dark color. Let it dry.
- Plan your design. You can make it look like an old, bound book.
- Add raised embellishments. Glue on craft foam shapes (like a faux spine or corner pieces), or use modeling paste with stencils to create texture.
- Paint over the embellishments and the box with layers of color to create an aged look. Use metallic paints for highlights.
- You can add a title like “Book of Shadows” or a personal sigil using a paint pen.
- Line the inside of the box with fabric for a luxurious touch.
- Add a decorative clasp if desired.
Witchy Wisdom & Embellishments:
- Decoupage images or textured paper onto the box before painting.
- Use faux leather or textured wallpaper to cover the box.
- Rub a little gold or silver wax paste onto raised areas to make them pop.
- This makes a beautiful and functional piece for your altar or shelf.
20. Handcrafted Divination Pendulum
Create your own pendulum for dowsing and divination. A personalized pendulum can strengthen your connection to its energies. It becomes an extension of your intuition.

Gather Your Magickal Supplies:
- A crystal point, a special bead, a metal charm, or a small weighted object for the bob.
- A chain or strong cord (about 6-10 inches long).
- A small bead or ring for the holding end (optional).
- Jewelry pliers (if using chain and jump rings).
Weaving Your Spell (Instructions):
- Choose your bob. Ensure it has a hole or can be securely attached.
- If your bob has a loop, attach the chain or cord using a jump ring or by tying a secure knot.
- If using a crystal point that needs to be wire wrapped to create a loop, there are many tutorials online for simple wire wrapping.
- Cut your chain or cord to your desired length. Typically, a pendulum chain is 6 to 10 inches.
- Attach a small bead or ring to the other end of the chain for easier gripping. This is optional but helpful.
- Ensure all connections are secure.
Witchy Wisdom & Embellishments:
- Cleanse your chosen crystal or object before making the pendulum.
- Choose a material for the bob that resonates with you.
- Keep your pendulum in a special pouch when not in use.
- Practice regularly to learn its unique movements and responses.
21. Sacred Offering Bowls
Craft small bowls to hold offerings for deities, spirits, or ancestors. These bowls add a dedicated space for your devotional practices. They honor the unseen.
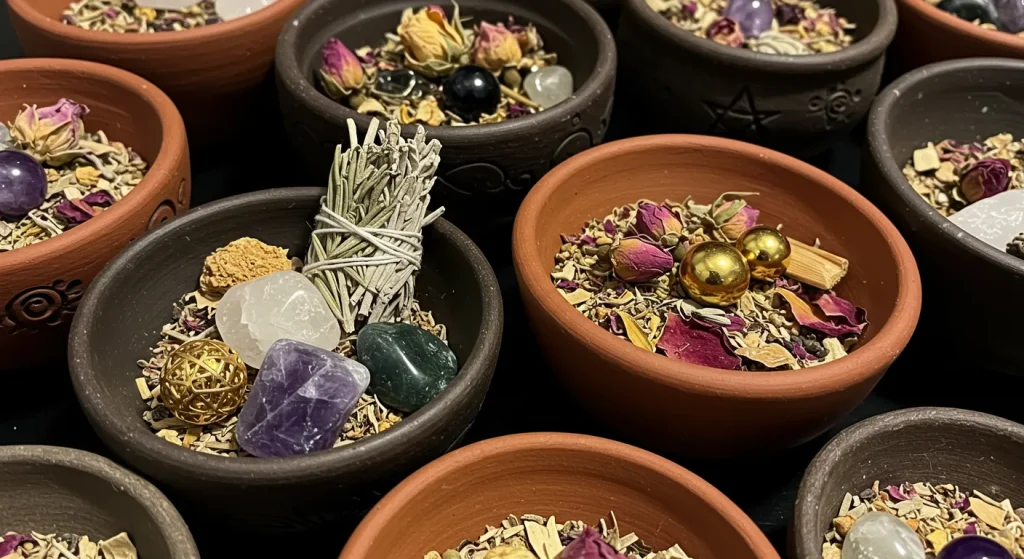
Gather Your Magickal Supplies:
- Air dry clay or small plain ceramic bowls.
- Acrylic paints.
- Paintbrushes.
- Optional: carving tools (if using clay), sealant.
Weaving Your Spell (Instructions):
- If using air dry clay, sculpt small bowls in your desired shapes. They can be simple pinch pots or more formed.
- Let the clay dry completely according to package instructions.
- If using plain ceramic bowls, ensure they are clean.
- Paint your bowls. You can paint them a solid color, or decorate them with symbols, patterns, or nature motifs.
- Consider colors and symbols that are meaningful to your practice or the entities you are offering to.
- Let the paint dry. Apply a sealant if desired, especially if they will hold liquids.
Witchy Wisdom & Embellishments:
- Create a set of bowls for different types of offerings (water, herbs, incense).
- Carve sigils or symbols into the clay while it is still wet.
- Place them on your altar or in a designated sacred space.
- Even simple, plain bowls can be made sacred through intention.
22. Miniature Witch Hat Decor
These tiny witch hats are adorable and versatile. Use them as ornaments, place card holders, or to adorn other crafts. They are a whimsical touch of witchery.
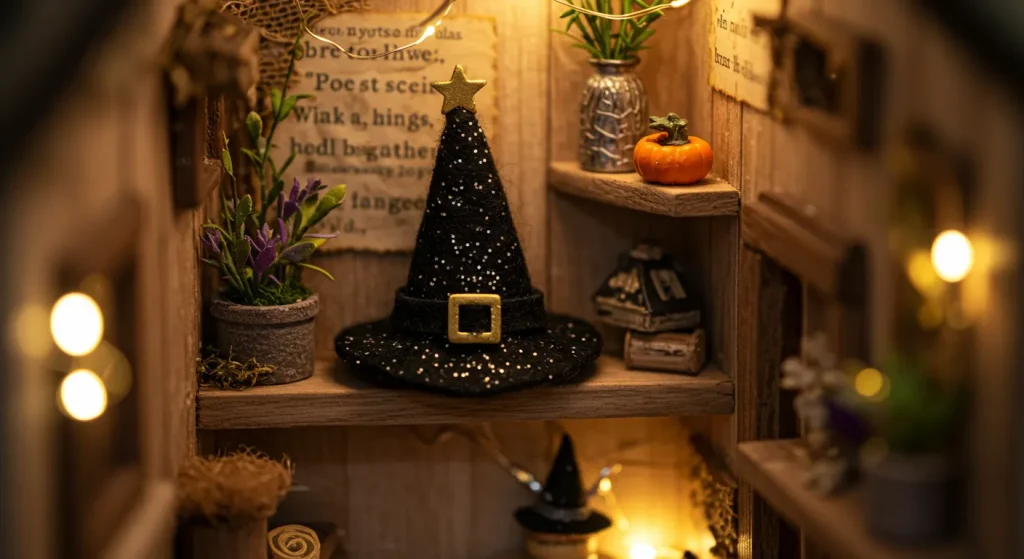
Gather Your Magickal Supplies:
- Black felt or stiff black paper.
- Cardboard (from a cereal box or similar).
- Hot glue gun.
- Scissors.
- Circular objects for tracing (one for the brim, one smaller for the cone base).
- Optional: mini buckles, ribbon, glitter.
Weaving Your Spell (Instructions):
- Trace and cut a large circle from black felt or paper for the brim.
- Trace and cut a smaller circle from cardboard. Then cut this circle in half to make a semicircle for the cone.
- Roll the semicircle of cardboard into a cone shape and glue the edge. This is the hat’s structure.
- Cover this cone with black felt or paper, trimming any excess.
- Cut a small hole in the center of the brim circle, just large enough for the cone tip to poke through slightly if you want a very secure fit, or simply glue the cone base to the flat brim.
- Glue the base of the cone to the center of the brim.
- Decorate with a tiny ribbon band, a miniature buckle, or a sprinkle of glitter.
Witchy Wisdom & Embellishments:
- Make several and string them into a garland.
- Attach them to hair clips or headbands.
- Use different colored felt for varied hats (e.g., purple, green).
- These are fun to place on top of potion bottles or small statues.
23. Symbolic Poison Apple Decor
A nod to classic folklore, a “poison” apple can be a striking decorative piece. This craft is more symbolic than sinister. It represents hidden knowledge or temptation.
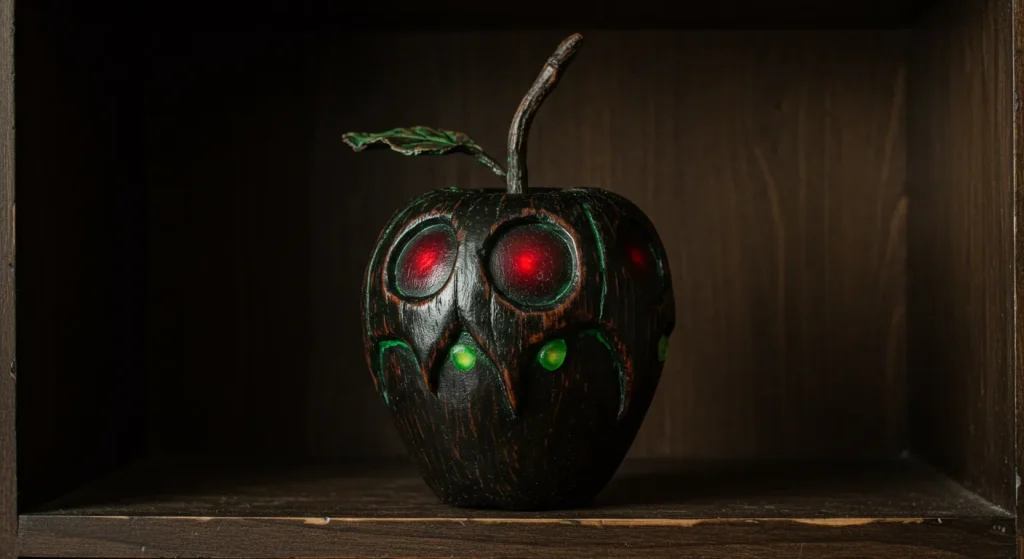
Gather Your Magickal Supplies:
- Faux apples (craft store apples).
- Black glossy acrylic paint or deep red paint.
- High gloss varnish (optional).
- Paintbrush.
- Optional: black glitter, dark twigs for stems.
Weaving Your Spell (Instructions):
- Clean the surface of the faux apple.
- If you want to replace the stem, remove the existing one.
- Paint the apple with several coats of black or very deep red paint. Allow each coat to dry thoroughly.
- For a “poison drip” effect, you can let some paint run down slightly and dry that way, or use a contrasting color like dark purple for drips.
- Once the paint is fully dry, apply a coat of high gloss varnish for a shiny, alluring look.
- If you removed the stem, insert a small, gnarled dark twig into the top for a more rustic, eerie stem.
- You can sprinkle fine black glitter onto the last coat of wet paint or varnish for extra drama.
Witchy Wisdom & Embellishments:
- Display a single poison apple under a cloche.
- Group several together in a dark bowl.
- Ensure it’s clear this is a decorative item, especially if there are children in the home.
- This looks particularly effective during Samhain or Halloween.
24. Eerie Bat Garland
Bats are creatures of the night, often associated with witchy aesthetics. A bat garland is simple to make and adds a spooky flair. It brings the twilight indoors.
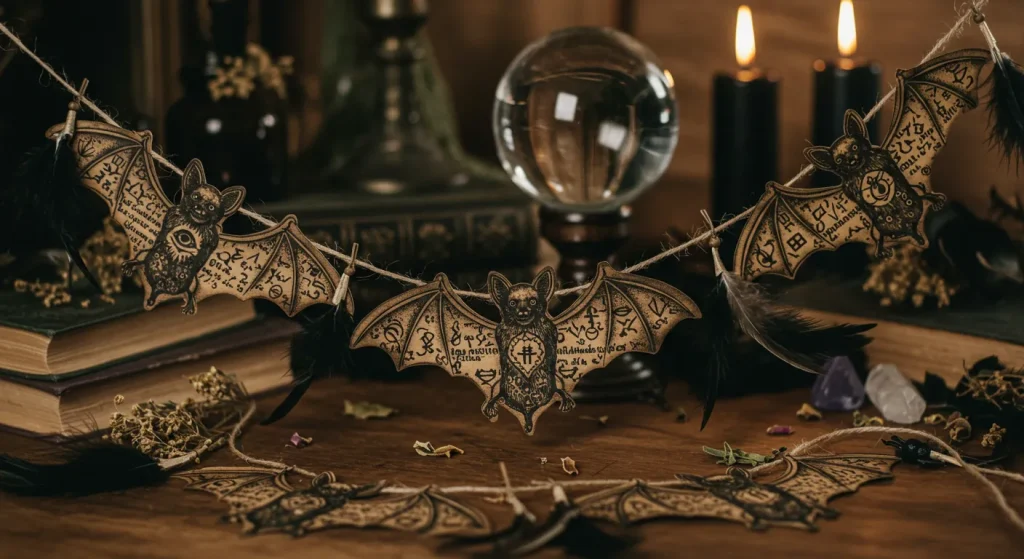
Gather Your Magickal Supplies:
- Black cardstock or craft foam.
- Bat template (search online or draw your own).
- Scissors or craft knife.
- Twine or black ribbon.
- Hole punch or needle.
Weaving Your Spell (Instructions):
- Trace your bat template onto the black cardstock or foam.
- Cut out multiple bat shapes. Aim for at least 10 to 15 for a decent length garland.
- Punch two small holes in the wings of each bat, or use a needle to thread the twine through the body.
- Thread the bats onto your twine or ribbon, spacing them evenly.
- You can tie small knots behind each bat to keep them in place if needed.
- Leave extra twine at each end for hanging.
Witchy Wisdom & Embellishments:
- Cut bats in slightly different sizes for variety.
- Add glitter to some of the bats for a touch of sparkle.
- Hang across a mantel, window, or doorway.
- This is a quick and impactful decoration.
25. Spirit Board Inspired Art
Create art inspired by the iconic Ouija or spirit board. This can be a decorative tray, wall art, or a tabletop piece. It captures the mystique of divination.
Gather Your Magickal Supplies:
- A wooden board, tray, or canvas.
- Paints (cream/beige for base, black for letters/details).
- Letter and number stencils (vintage style if possible).
- Fine paintbrushes.
- Optional: sun, moon, star stencils or stamps, clear varnish.
Weaving Your Spell (Instructions):
- Paint your board or canvas with a base coat of cream or light beige. Let it dry.
- Plan your layout: the alphabet, numbers 0-9, “Yes,” “No,” “Goodbye,” and decorative elements like sun, moon, stars.
- Carefully stencil or hand paint the letters, numbers, and words onto the board using black paint.
- Add your decorative celestial or mystical symbols.
- Let all paint dry completely.
- Apply a coat of clear varnish to protect your artwork.
Witchy Wisdom & Embellishments:
- Age the board by lightly sanding the edges or dry brushing with brown paint after the design is complete.
- If making a tray, ensure the varnish is food safe or use it only for decorative purposes.
- You can create a matching planchette from wood or clay, painted to match.
- This piece is a great conversation starter.
26. Sacred Crystal Grid Mat
A crystal grid mat provides a beautiful and intentional space for arranging your crystals. Create one with sacred geometry or personal symbols. It amplifies crystal energy.
Gather Your Magickal Supplies:
- A piece of fabric (felt, canvas, cotton) or a thin circular piece of wood.
- Fabric paint, permanent markers, or wood burning tool.
- Stencils for sacred geometry (Flower of Life, Metatron’s Cube, etc.) or draw freehand.
- Ruler.
Weaving Your Spell (Instructions):
- Cut your fabric or wood to the desired size and shape (circle or square is common).
- If using fabric, hem the edges.
- Plan your design. Choose a sacred geometry pattern or create your own arrangement of lines and points for crystal placement.
- Lightly sketch your design onto the mat.
- Carefully paint, draw, or burn the design onto your mat.
- Let it dry or cool completely.
Witchy Wisdom & Embellishments:
- Choose colors that resonate with your intentions for the grid.
- Embroider the design onto fabric for a more textured look.
- Keep the design simple enough that it doesn’t overshadow the crystals.
- Store it flat or rolled to protect the design.
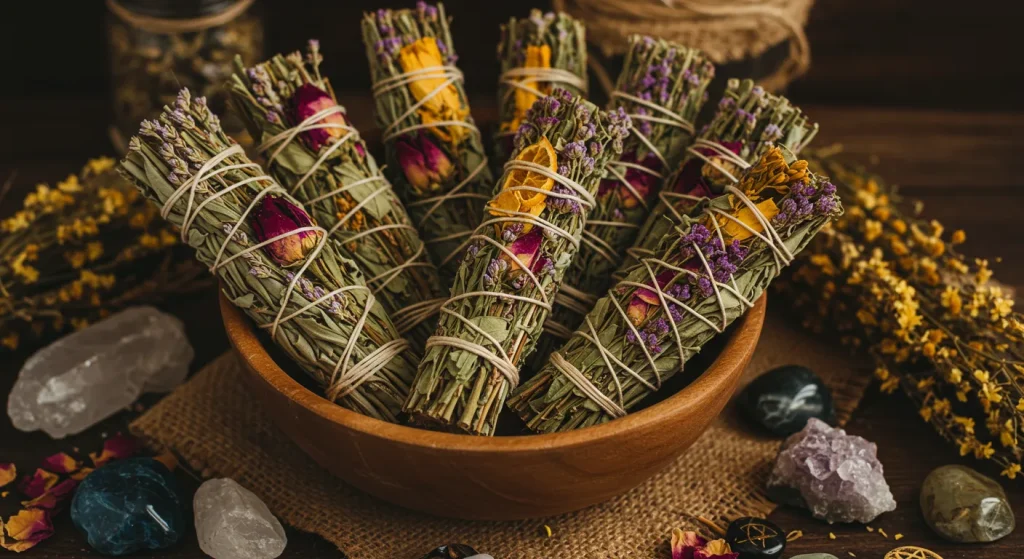
27. Hand Bundled Smudge Sticks
Craft your own smudge sticks using dried herbs for cleansing and ritual. This connects you deeply to the plant spirits. Their smoke purifies your space.
Gather Your Magickal Supplies:
- Dried herbs (sage, rosemary, lavender, cedar, mugwort).
- Cotton string or twine (natural fibers only).
- Scissors.
Weaving Your Spell (Instructions):
- Gather a bundle of your chosen dried herbs. Make the bundle about 1-2 inches thick.
- Align the stems at one end.
- Starting at the stem end, wrap the cotton string tightly around the herb bundle.
- Continue wrapping upwards towards the leafy end, then wrap back down towards the stems, crisscrossing the string to secure the herbs.
- Tie the string off securely at the stem end, leaving a small tail of string if desired.
- Trim any very loose pieces. The bundle should be firm.
- Store in a dry place until ready to use.
Witchy Wisdom & Embellishments:
- Combine different herbs for specific intentions. For example, lavender for peace, rosemary for remembrance.
- Add dried flower petals for color and aroma (ensure they are safe to burn).
- Always burn smudge sticks responsibly in a fireproof container and ensure they are fully extinguished.
- Making your own adds your personal energy to the cleansing ritual.
28. Protective Altar Pentacle
A pentacle is a powerful symbol of protection and the elements. Create one to place on your altar or hang on a wall. It serves as a focal point for energy work.
Gather Your Magickal Supplies:
- A flat, circular piece of wood, sturdy card, or air dry clay.
- Paint (black, silver, gold, or natural wood tones).
- Ruler and pencil (or a pentacle template).
- Optional: wood burning tool, carving tools, small crystals.
Weaving Your Spell (Instructions):
- Prepare your circular base. If using wood, sand it smooth. If clay, roll it flat and cut a circle.
- Draw a pentagram (five pointed star) within the circle. Ensure the points touch the edge of the circle if desired, or are contained within.
- Paint the entire base color first, if you are not leaving it natural. Let it dry.
- Carefully paint the pentagram lines in a contrasting color.
- Alternatively, use a wood burning tool to burn the pentacle into wood.
- Or carve the design into air dry clay while it’s still workable.
- You can glue small crystals at the points of the star or in the center.
Witchy Wisdom & Embellishments:
- Paint symbols for the elements at each point of the star.
- Decorate the circle surrounding the pentagram with vines, moons, or other symbols.
- If using clay, you can embed herbs or small stones into it before it dries.
- This is a central piece for any witch’s altar.
29. Verdant Mossy Wreath
Welcome nature’s magic to your door or wall with a lush, mossy wreath. This living or preserved wreath adds an earthy, mystical touch. It speaks of forest enchantments.
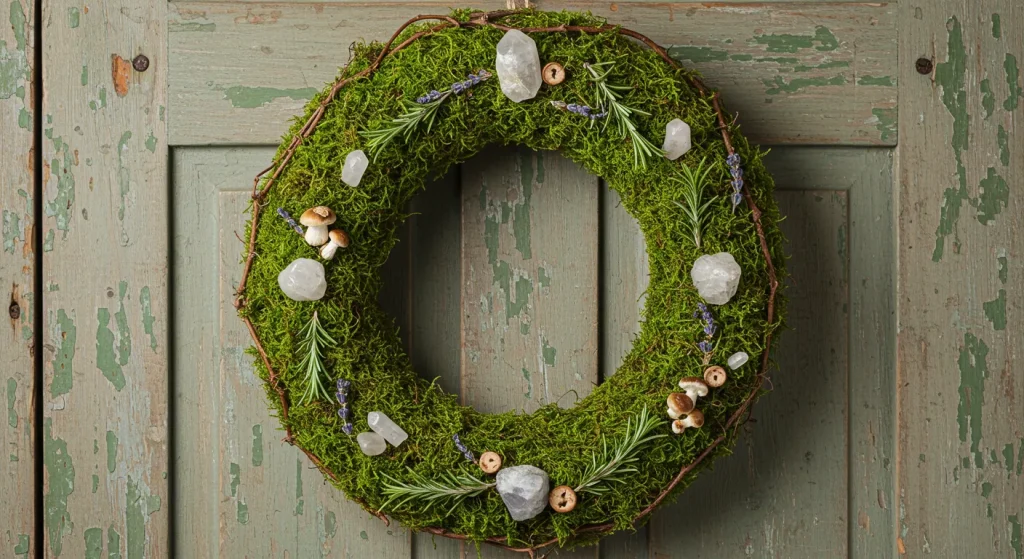
Gather Your Magickal Supplies:
- A wreath form (grapevine, wire, or foam).
- Preserved moss or live sheet moss.
- Hot glue gun or floral wire.
- Optional: twigs, dried flowers, faux mushrooms, crystals, ribbon.
Weaving Your Spell (Instructions):
- If using a grapevine wreath, you can tuck moss directly into the vines.
- For wire or foam forms, attach moss using hot glue or by wrapping it with floral wire. Cover the form completely.
- Layer different types of moss for texture and color variation.
- Once the base is covered, add your decorative elements.
- Secure twigs, dried flowers, or faux mushrooms with hot glue or wire.
- You can nestle small crystals into the moss or hang them with thin wire.
- Add a ribbon for hanging if desired.
Witchy Wisdom & Embellishments:
- Incorporate seasonal elements, like pinecones in autumn or dried berries in winter.
- A crescent moon shape can be formed using a section of a wreath form.
- Hang on your front door to welcome magical energies.
- If using live moss, it will need occasional misting and indirect light.
30. Protective Black Salt Jars
Black salt (witch’s salt) is used for protection and banishing negativity. Display it decoratively in small jars. These serve as subtle guardians of your space.
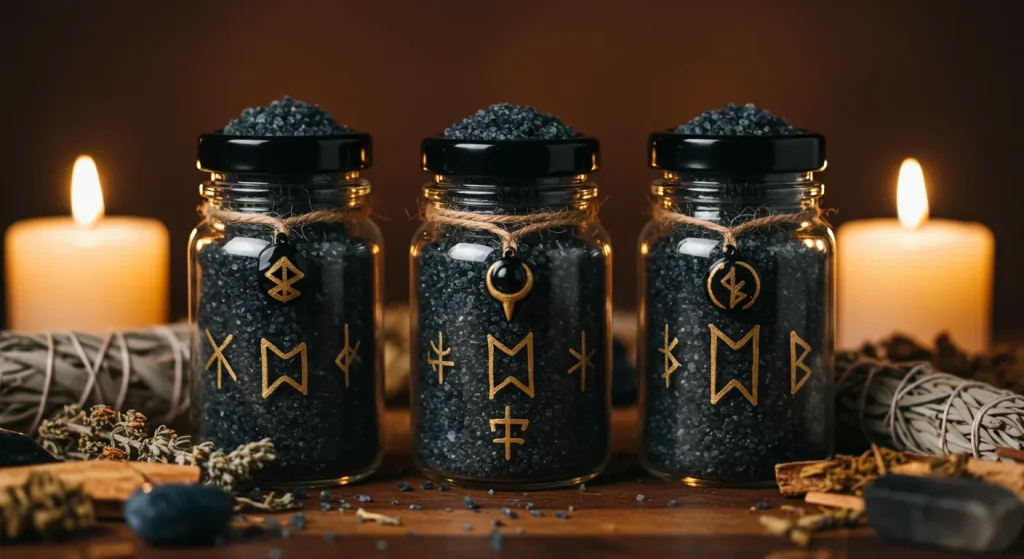
Gather Your Magickal Supplies:
- Small glass jars with lids or corks.
- Black salt (you can buy it or make it with sea salt and ashes from a ritual fire, or charcoal powder).
- Paper for labels (optional).
- Twine or black ribbon.
- Optional: small protective charms (e.g., evil eye, pentacle).
Weaving Your Spell (Instructions):
- Ensure your jars are clean and dry.
- Carefully fill the jars with black salt.
- Seal the jars with their lids or corks.
- If desired, create small labels that say “Protection” or a relevant symbol.
- Tie twine or black ribbon around the neck of the jar.
- You can attach a small protective charm to the twine.
Witchy Wisdom & Embellishments:
- Place these jars on windowsills, near doorways, or in the corners of rooms.
- You can layer black salt with white salt for a striped effect, though black salt is traditionally used alone for this purpose.
- Charge your black salt under the dark moon before jarring it.
- These are simple yet powerful additions to a witch’s home.
Conclusion
With these thirty DIY crafts, your home can truly begin to reflect the enchanting spirit of a witch. Each project is an opportunity to imbue your space with personal energy, intention, and a touch of magic. Remember, the true power lies in the act of creation itself.
Let your intuition guide you as you select materials and add your own unique flourishes. Your home is your sanctuary, your sacred space. May it now also be a testament to your creativity and your connection to the mystical arts. Happy crafting, and may your home always be filled with wonder.