Table of Contents
- Minimalist Speckled Egg Decorated Easter Sugar Cookies
- Elegant Watercolor Pastel Bunny Silhouettes
- Delicate Royal Icing Spring Florals for Sophisticated Platters
- Metallic Gold-Leaf Carrot Cookie Designs
- Modern Marble Dip-Dyed Easter Sugar Cookies
- The Architecture of Easter Confections
- Design Dilemmas Solved: Sugar Cookie Edition
Elevating holiday traditions requires a balance of structural precision and aesthetic restraint.
Much like drafting a well-proportioned floor plan, crafting the perfect sugar cookie starts with a reliable foundation of high-quality materials and precise techniques.
These minimalist designs prioritize clean lines and a curated color palette, ensuring each piece functions as both a treat and a sophisticated decorative element.
Successful execution relies on the right tools and a disciplined approach to application. Whether you are applying a protective finish to a hardwood floor or piping royal icing onto a chilled surface, consistency is vital to achieving a professional result.
This guide provides actionable steps for creating smooth, matte surfaces and refined textures that resonate with modern design sensibilities.
Integrating these artisanal creations into your seasonal display enhances the overall atmosphere of any environment, from a minimalist residential kitchen to a modern corporate lounge.
By focusing on understated elegance rather than excessive ornamentation, these cookies serve as a versatile accent for diverse professional and personal spaces.
This approach allows makers and designers alike to celebrate the season with a polished, contemporary flair.
Minimalist Speckled Egg Decorated Easter Sugar Cookies
Minimalist design principles elevate simple treats into sophisticated edible art.
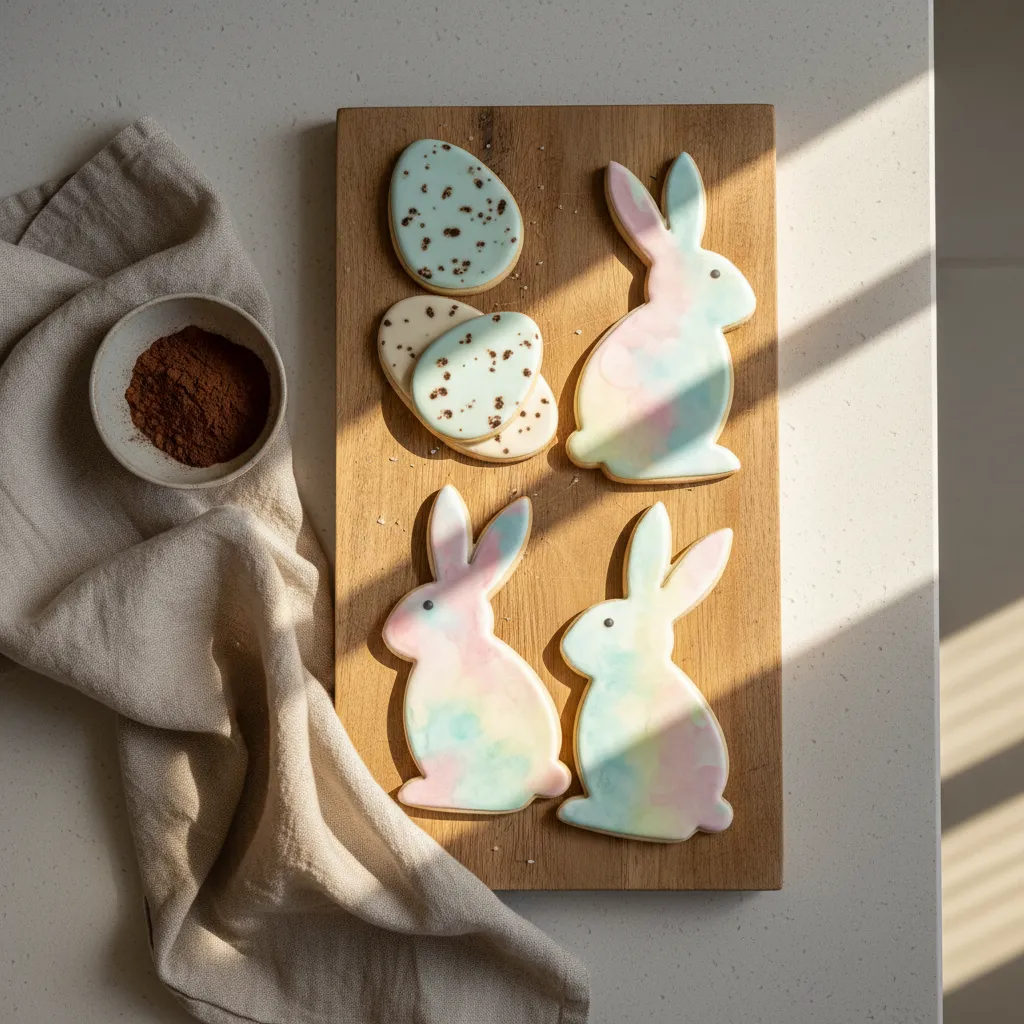
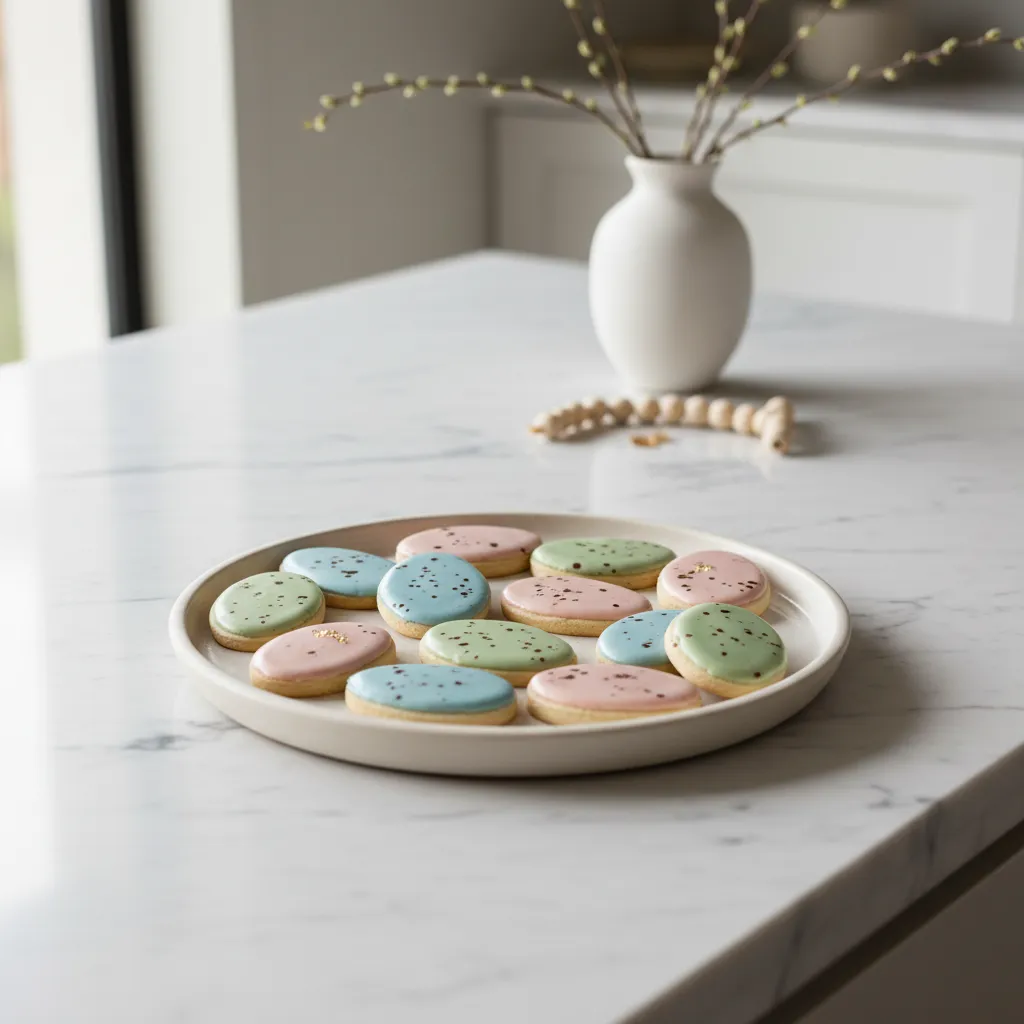
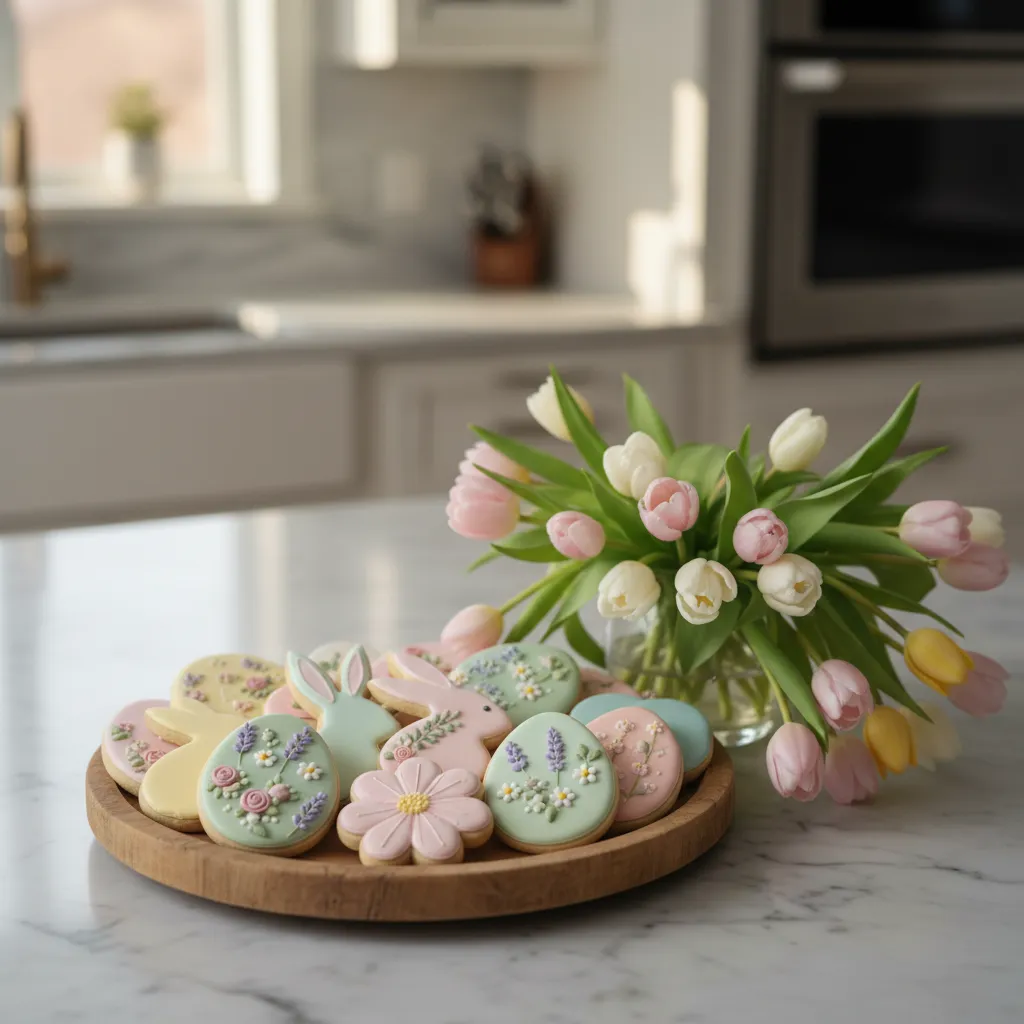
Speckled egg cookies bring a refined, organic texture to your spring tablescape.
The matte royal icing reflects ambient kitchen lighting with a soft, warm glow.
Minimalist speckled egg cookies bring an organic, refined elegance to your modern spring tablescape.
These elegant treats function perfectly as edible place cards for your guests.
A muted color palette ensures they complement modern tableware without clashing.
For a complete menu, explore our guide on elegant Easter sweet treats.
The details are not the details. They make the design.
Charles Eames, Eames Office
Techniques for the Perfect Speckle
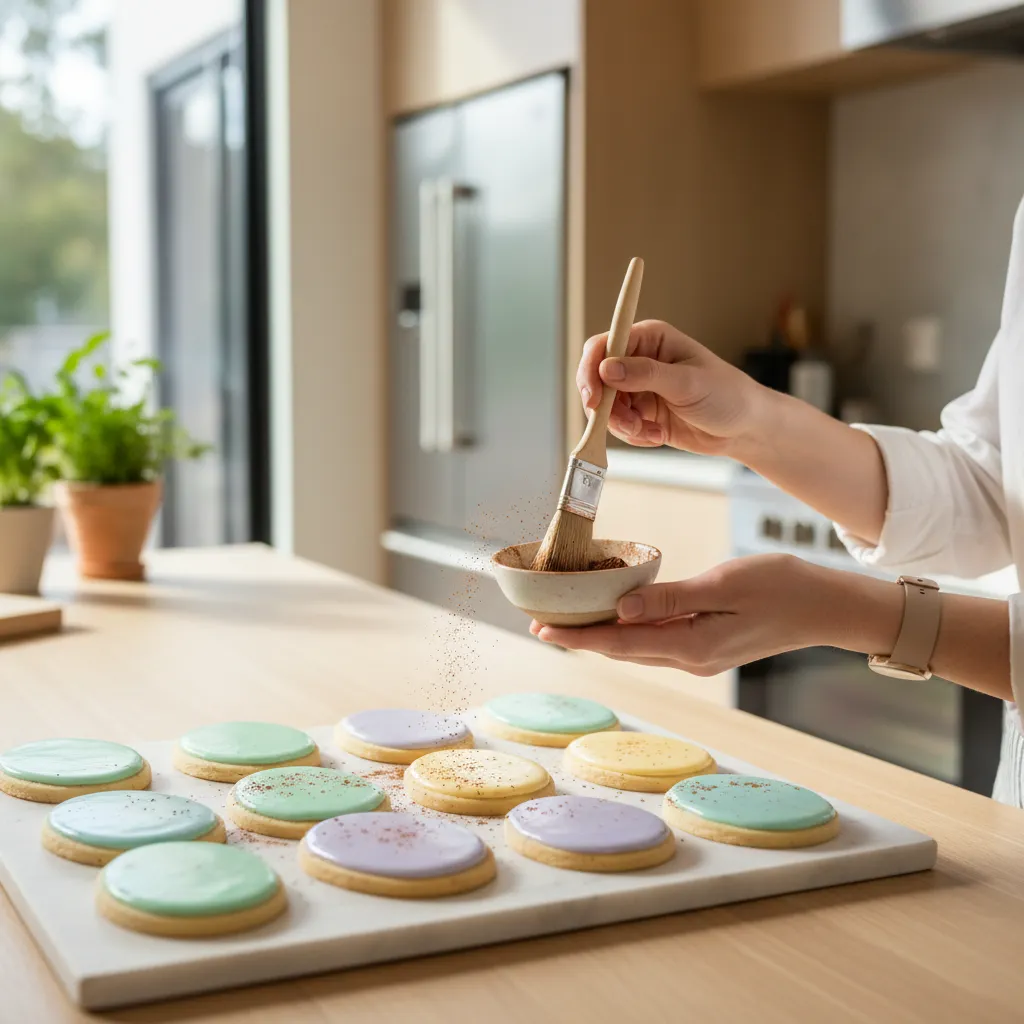
Achieving the perfect speckle requires precision and the right culinary tools.
A stiff bristle brush lets you flick diluted cocoa powder with controlled force.
This structural approach prevents large droplets from ruining the smooth finish.
| Speckling Medium | Visual Texture | Usability & Flow |
|---|---|---|
| Diluted Cocoa Powder | Earthy, matte finish | Dries quickly, easy to flick |
| Gel Food Coloring | Vibrant, glossy drops | Slower dry time, high contrast |
| Vanilla Bean Paste | Subtle, organic flecks | Mixes directly into the icing |
Place these cookies on a raw wood serving board to highlight delicate details.
This arrangement improves the visual flow of your dining room grazing station.
Pair them with linen napkins to enhance the tactile experience of your table.
Review our spring cookies design guide to master seasonal aesthetics.
Designer Styling Secrets
- Practice your flicking motion on parchment paper first to perfect the speckle size and prevent large droplets from ruining your smooth matte icing.
- Transform these cookies into chic, edible place cards by carefully writing guest names on the dried icing with a fine-tip edible marker.
- Enhance the organic aesthetic by displaying your finished cookies on a raw wood serving board alongside soft, neutral linen napkins.
Elegant Watercolor Pastel Bunny Silhouettes
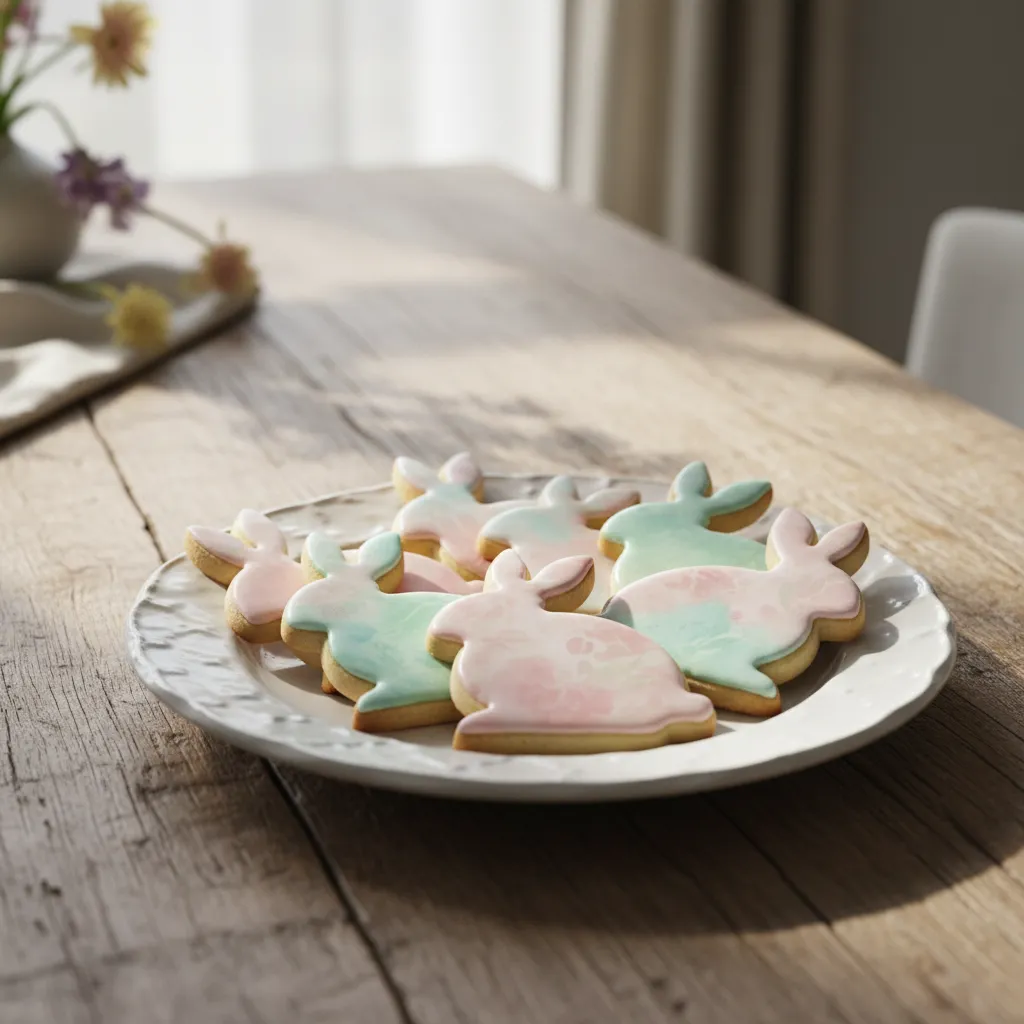
Integrating these edible masterpieces into your dining room elevates the entire spring aesthetic. Soft pastel hues mirror natural sunlight filtering through sheer linen curtains.
The gentle gradients of a watercolor finish add sophisticated visual depth to your dessert presentation. This artistic approach turns simple baked goods into captivating focal points.
Watercolor techniques transform ordinary royal icing into miniature, edible canvases of spring elegance.
Achieving this look requires a flawless structural base. A smooth royal icing foundation acts much like a freshly primed wall, ready to absorb and reflect delicate color washes.
Following a robust Easter dessert design guide ensures your table maintains an elegant spatial flow. Guests naturally gravitate toward these delicate treats.
Balancing these edible accents against a raw wood dining table highlights their refined texture. The juxtaposition of rustic grains and delicate sugar art brings warmth to the room.
For a house to be successful, the objects in it must communicate with one another, respond and balance one another.
Andrée Putman, Architectural Digest
To achieve this sophisticated aesthetic, you must treat your royal icing like a master painter. Proper layering ensures both structural integrity and a visually striking finish.
Curating the Watercolor Effect

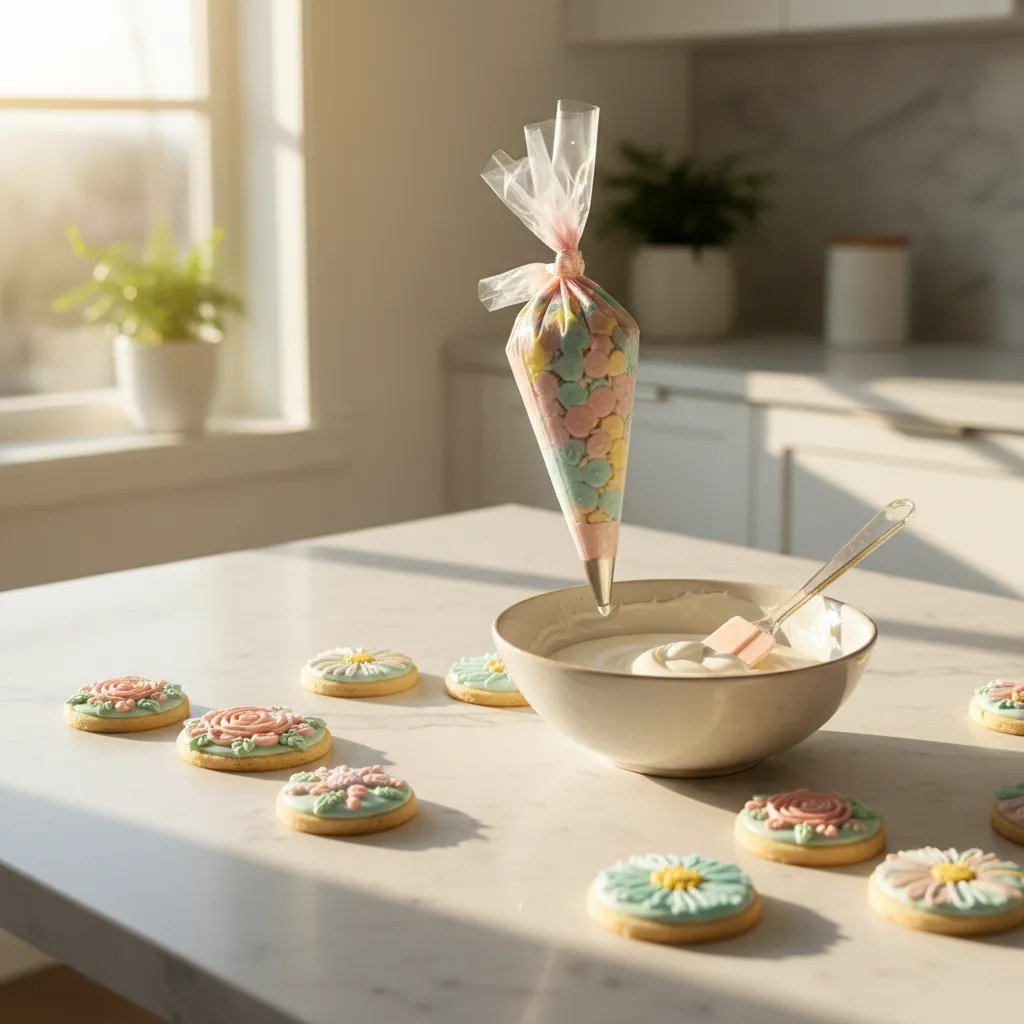
Setting up a functional decorating station is key to mastering this look. Proper lighting and ergonomic placement of your tools will streamline the entire creative process.
- Create the Canvas: Flood the cookies with stiff royal icing, allowing them to dry completely to prevent color bleeding.
- Dilute the Palette: Mix gel food coloring with a clear extract or high-proof spirit to create a fast-evaporating wash.
- Layer the Tones: Apply the lightest shades first, building depth gradually to mimic the fluid dynamics of a watercolor painting.
This method ensures the moisture evaporates quickly without compromising the base icing. It protects crisp edges and maintains the cookie’s satisfying crunch for your guests.
Pairing these hand-painted treats with other elegant styles for cute Easter desserts establishes a cohesive and highly curated event space.
Serve these elegant silhouettes on textured ceramic platters to catch the ambient light. The subtle gloss of the dried watercolor wash will glow beautifully under warm dining fixtures.
Designer Hack: Perfecting the Edible Watercolor Wash
- Always ensure your royal icing foundation is bone-dry before painting; a completely cured base prevents the moisture from pitting the surface and stops colors from bleeding.
- Dilute your gel food coloring with a clear extract or high-proof spirit rather than water, as the rapid evaporation protects the delicate icing structure and maintains the cookie’s crispness.
- Display your hand-painted pastel silhouettes on raw wood or matte ceramic platters to create a sophisticated textural contrast that allows the watercolor gloss to truly shine.
Delicate Royal Icing Spring Florals for Sophisticated Platters
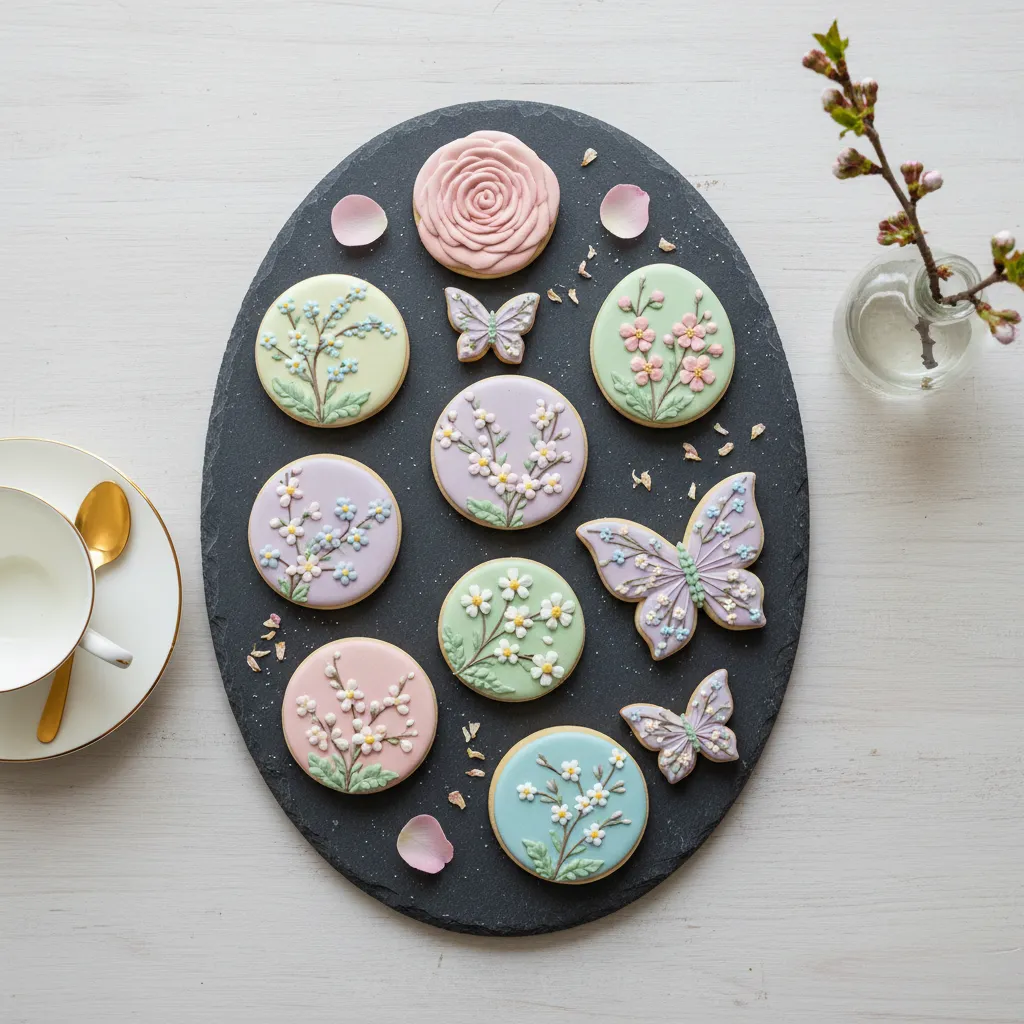
Elevating your dessert table requires a focus on both texture and lighting. Delicate royal icing florals provide a matte finish that catches warm overhead light beautifully.
Arranging these meticulously piped cookies on a raw ceramic platter improves the visual flow of your dining room. The contrasting textures create a natural focal point for guests.
When planning a cohesive menu, these floral designs pair seamlessly with other elegant Easter sweet treats. This thoughtful zoning keeps the dessert station organized and inviting.
Mastering the Icing Consistency
The structural integrity of a sugar cookie relies entirely on the royal icing consistency. A perfectly mixed batch acts like plaster, holding detailed botanical shapes without collapsing.
Texture is the key to creating a home that looks and feels beautiful. It adds depth, dimension, and a tactile quality to any space.
Kelly Hoppen, Kelly Hoppen Interiors
Industry research indicates that visual presentation impacts guest satisfaction by over 60 percent. This makes your decorated dessert platter a vital component of the tablescape.
- Classic Roses: Piped with a stiff consistency, these provide significant vertical height and cast elegant shadows across the platter.
- Delicate Hydrangeas: Crafted using a cluster technique, they add a soft, voluminous texture that mimics luxury dining textiles.
- Spring Daisies: Featuring a flat profile, these minimalist blooms ensure structural stability when stacking cookies on tiered stands.
Color Palettes and Spatial Dynamics
Selecting the right color palette enhances the spatial dynamics of your entertaining area. Soft sage greens and muted lavender tones create a calming, expansive atmosphere.
A meticulously decorated cookie is not just a dessert; it is a temporary piece of art that elevates the entire dining room aesthetic.
Placing these sophisticated treats on a polished marble island establishes a clear zoning boundary. This guides guests naturally through the space while protecting traffic flow.
Pair this dessert station with elegant spring appetizers on adjacent tables. Distributing food thoughtfully prevents room congestion and ensures a seamless hosting experience.
Platter Styling Secrets
- Test your royal icing consistency by pulling up a peak with a spatula; if it holds its shape without drooping, it is stiff enough for piping structured florals like roses.
- Display your matte-finished cookies on a raw ceramic platter to create a striking textural contrast that instantly elevates your dessert station.
- Use muted color palettes like sage green and soft lavender to decorate your cookies, seamlessly tying your treats into a sophisticated spring tablescape.
Metallic Gold-Leaf Carrot Cookie Designs

Incorporating metallic accents into baking mimics the impact of brushed brass hardware in a neutral kitchen. It establishes a premium visual hierarchy.
Edible 24-karat gold flakes layered over matte orange icing create a striking contrast. This warm ambient glow immediately draws the eye to your table.
Functionally, this metallic layer improves the handling of the dessert. The thin gold sheets subtly seal the royal icing, reducing minor scuffs during transit.
Edible gold leaf acts as the jewelry of the culinary world, transforming simple cookies into architectural masterpieces.
When planning your spring tablescape, pairing these treats with elegant styles for cute Easter desserts adds cohesive spatial dynamics.
Proper application requires a craftsman approach. Applying these fragile sheets demands specific environmental controls and ergonomic tools.
- Surface Preparation: Ensure the royal icing is completely dry and matte. This creates a stable foundation, preventing the delicate foil from sinking.
- Ergonomic Handling: Use bamboo tweezers rather than metal. Wood prevents static electricity, allowing for precise placement without tearing the sheets.
- Strategic Zoning: Apply the gold leaf asymmetrically near the carrot tops. This mimics natural light reflection and establishes a dynamic visual flow.
Metallics bring a necessary layer of reflective light, breaking up matte surfaces and adding instant sophistication.
Thom Filicia, House Beautiful Design Guide
Displaying these gilded carrots on raw wood or slate serving boards emphasizes their refined texture. The earthy backdrop grounds the metallic finish perfectly.
A well-lit environment maximizes this aesthetic. Situate your dessert display near natural window light or under warm pendant fixtures to enhance the shine.
The Designer’s Gold Standard
- Use a soft, dry fan brush to burnish the gold leaf onto the icing for a seamless finish that mimics professional metalwork.
- If the surface is too dry, apply a micro-drop of high-proof clear spirits to create a tacky base that secures the leaf without dissolving the icing.
- Store your gilded creations in a low-humidity environment to prevent the metallic luster from dulling or losing its reflective quality before the event.
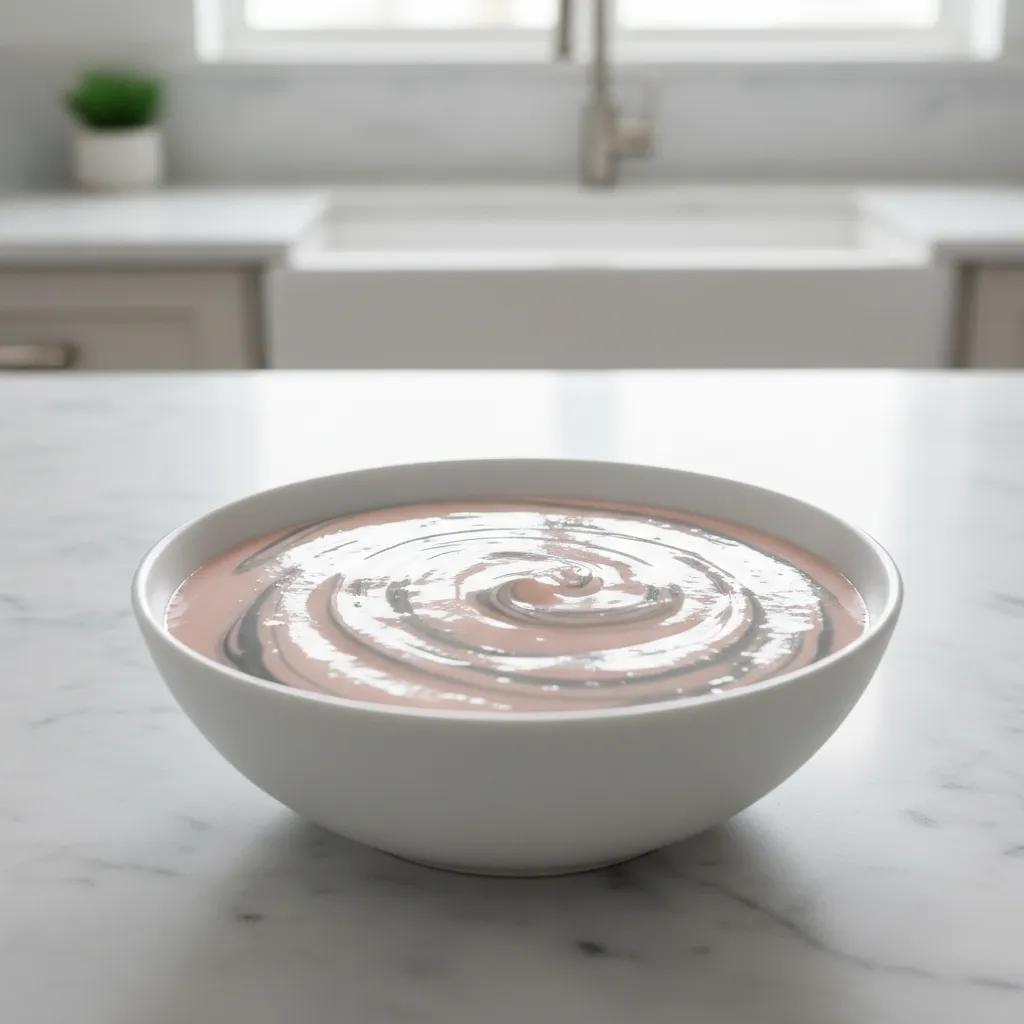
Modern Marble Dip-Dyed Easter Sugar Cookies
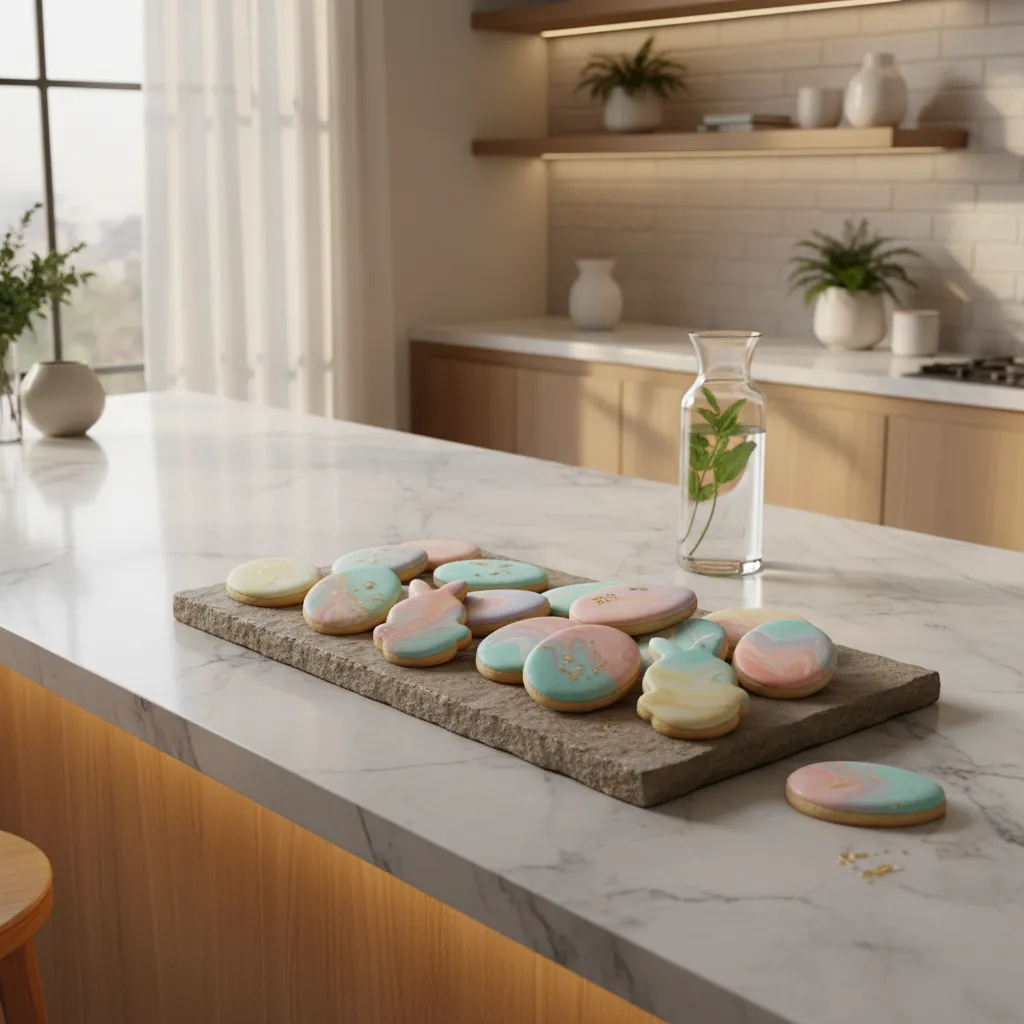
The marble dip-dye technique transforms basic treats into luxurious edible art. This sleek finish mimics natural stone, bringing a highly refined aesthetic directly to your dessert table.
Beyond aesthetics, the dipping method is incredibly functional. It creates a perfectly level surface that dries quickly, making stacking and storing in busy home kitchens much easier.
A marbled finish instantly elevates a simple sugar cookie into a modern architectural masterpiece.
Pair these treats with rustic Easter strawberries in egg carton designs. The visual contrast between sleek, glossy marble and raw cardboard texture is absolutely stunning.
Mastering the Marbled Finish
Achieving this sophisticated look requires precision and an organized workspace. Follow these streamlined steps to ensure a flawless, high-end result with minimal structural mess.
- Prepare the Base: Mix flood-consistency royal icing until it flows smoothly.
- Swirl the Tones: Drop small dots of color and drag a scribe tool through them.
- The Dip Technique: Press the cookie face-down into the icing and lift straight up.
- Proper Curing: Let the glossy finish set on a wire rack for maximum durability.
Food, much like design, is about creating an experience that engages all the senses.
Athena Calderone, EyeSwoon
Recent data reveals that 58% of homeowners prioritize entertaining spaces during renovations. This makes elegant, table-ready food presentations a critical modern design element.
Display your marbled creations under warm ambient lighting. The gentle glow highlights the intricate swirls, while serving them on a raw wood platter grounds the polished aesthetic.
Artisan Finishes
- For a professional, bubble-free finish, gently tap the cookie on your work surface immediately after dipping to bring trapped air to the top, then pop any remaining tiny bubbles with a scribe tool.
- To maintain crisp, distinct marble lines rather than a muddy blend, use high-quality gel food coloring and limit your scribe tool swirls to just two or three passes through the icing.
- Ensure your royal icing is a 15-second consistency; it should be fluid enough to level out instantly but thick enough to hold the weight of the color droplets without bleeding too quickly.
The Architecture of Easter Confections
Designing the perfect Easter sugar cookie requires a balance of structural integrity and aesthetic finesse.
From the organic texture of speckled eggs to the fluid gradients of watercolor bunnies, these treats elevate your spring tablescape.
Apply these master techniques to transform simple royal icing into sophisticated, edible focal points.
Curate your dessert presentation with the same precision you apply to interior design, ensuring every detail shines.
Design Dilemmas Solved: Sugar Cookie Edition
Build a strong structural boundary. Let your base layer dry completely for 12 to 24 hours before applying wet watercolor details or speckles.
A stiff bristle brush or a dedicated culinary toothbrush offers the best tension. This provides controlled flicks of diluted cocoa powder.
Yes. The baked, undecorated foundation can be frozen in an airtight container for up to three months. Thaw at room temperature before decorating.
Use heavily diluted gel food coloring on a fully set matte icing base. Apply with a fine-tipped food-safe brush to blend colors seamlessly.