Table of Contents
- The Classic Cinnamon-Sugar and Cream Cheese Crescent Ring
- Decadent Pecan Praline Stuffed King Cake Variation
- Fruit-Infused Strawberry Cream Cheese Braids
- Mini Air-Fried King Cake Bites for Individual Servings
- Mastering the Traditional Three-Color Mardi Gras Glaze
- The Final Architectural Reveal
- Structural Design Inquiries
Constructing a culinary masterpiece requires a solid foundation and a clear structural plan. Much like a designer selects the finest materials for a high-end project, a baker must choose ingredients that ensure both stability and texture. This recipe transforms standard crescent rolls into a refined architectural feat through precise execution.
The design process prioritizes efficiency without sacrificing the aesthetic appeal of a traditional King Cake. By utilizing prepared dough as a structural base, you can focus on the intricate layering of cinnamon and the final decorative finishes. This approach mirrors the careful balance found in a well-planned interior renovation.
Homeowners and office managers will appreciate the reliability of this streamlined method. It provides a professional result that serves as a sophisticated centerpiece for any communal space. Follow these detailed steps to construct a flaky, golden pastry that satisfies the most discerning standards of craft.
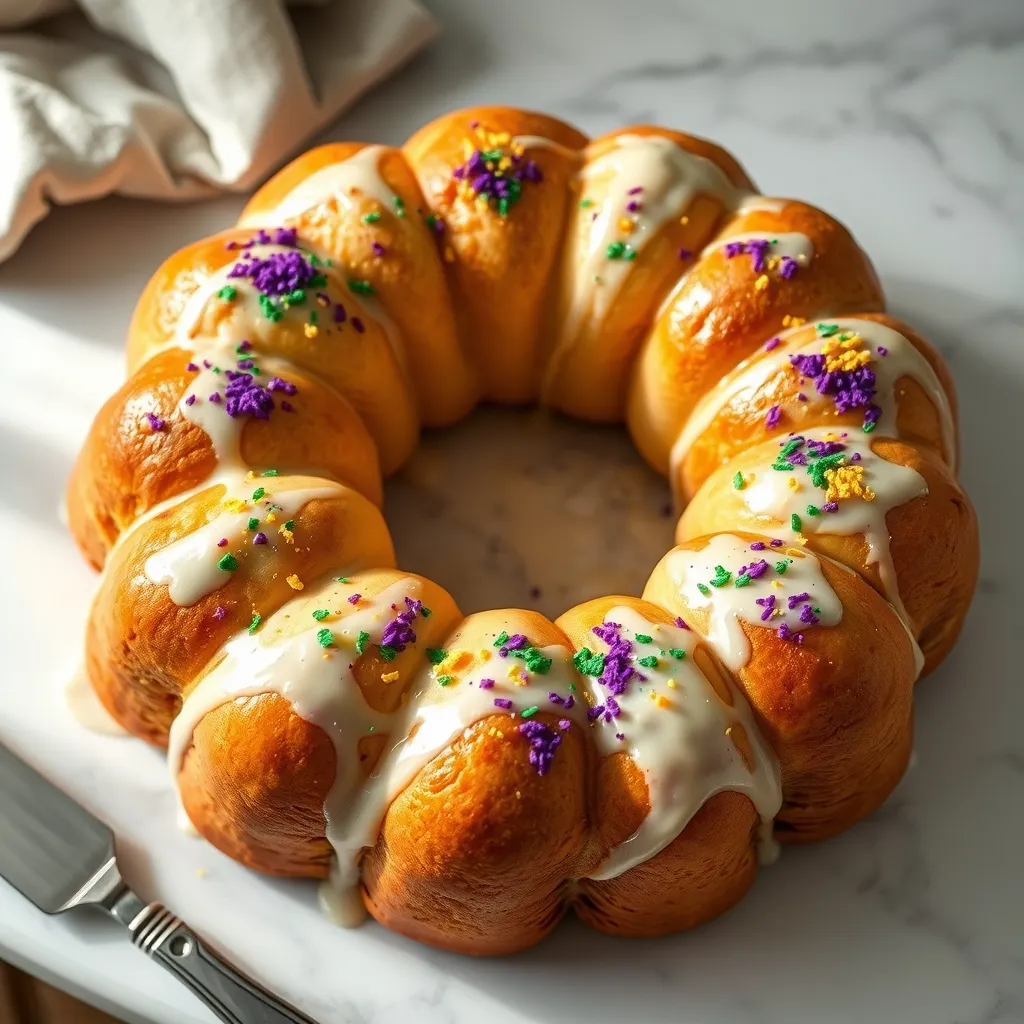
The Classic Cinnamon-Sugar and Cream Cheese Crescent Ring
Creating a festive atmosphere starts with the aroma of cinnamon and warm yeast. This approach to the traditional King Cake Recipe Easy Crescent Rolls prioritizes efficiency without sacrificing taste.
The design of this dessert relies on the contrast between the crisp exterior and the soft interior. The texture mimics a high-end brioche but requires a fraction of the labor intensity.
Visualizing the layout is similar to drafting a floor plan. You must arrange the dough triangles in a precise sunburst pattern to ensure structural integrity during the baking process.
True hospitality is found in the simple act of baking something warm and sharing it with those you love.
The filling acts as the binding agent for the pastry. A blend of softened cream cheese and brown sugar creates a velvety layer that anchors the dough strips when folded over.
For those who appreciate the sweet spice profile of this filling, exploring 40 Fluffy Cinnamon Roll Recipes Grandma Would Approve offers similar palate inspiration.
Constructing the Pastry Ring
The assembly process requires a flat, cool surface to maintain the dough’s elasticity. We recommend using a large round stone or a parchment-lined baking sheet for optimal heat distribution.
Functionality is key when working with pre-made dough. You must work quickly to prevent the oils from melting before they hit the oven, which ensures that coveted flaky finish.
For the smoothest cheesecake filling, ensure your cream cheese is completely at room temperature before mixing. This prevents lumps and ensures a silky mouthfeel.
Stella Parks, Serious Eats Baking Guide
Once the triangles are laid out, the filling provides a heavy, creamy focal point. It balances the airiness of the crescent rolls, much like weighted furniture grounds an open room.
If you are planning a seasonal gathering, this recipe pairs beautifully with other Elegant Easter Sweet Treats to Make for a Gourmet Brunch for a cohesive spring menu.
Material Comparison: Dough Types
Choosing the right base material determines the final architectural style of your dessert. Below is a breakdown of how the crescent method compares to traditional yeast doughs.
| Feature | Crescent Roll Method | Traditional Yeast Brioche |
|---|---|---|
| Prep Time | 10-15 Minutes | 3-4 Hours (includes rising) |
| Texture Profile | Flaky, buttery layers | Dense, cake-like crumb |
| Skill Required | Beginner / DIY Friendly | Advanced / Artisan |
| Structural Stability | High (Pre-formed gluten) | Variable (Depends on proofing) |
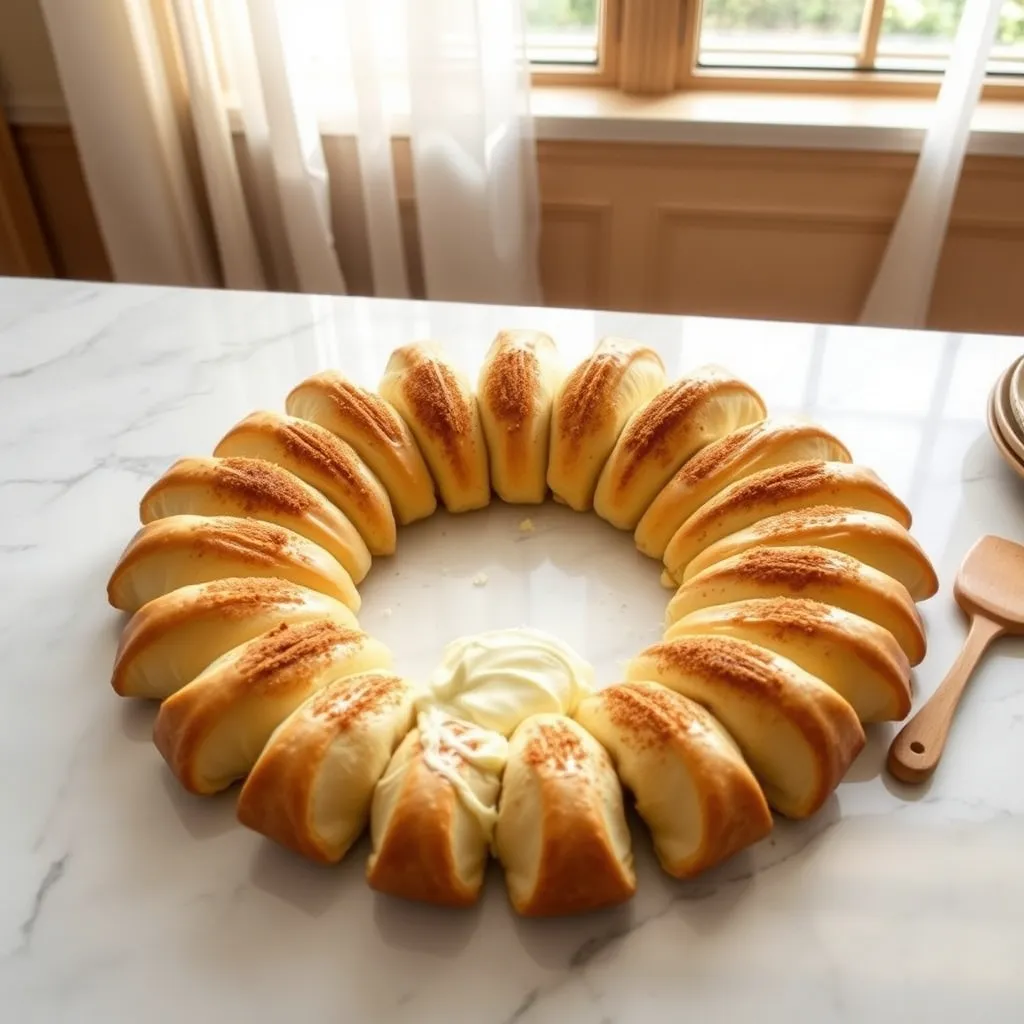
Step-by-Step Assembly Guide
Follow these steps to ensure your ring maintains its shape and holds the filling securely. Precision here prevents leaks and ensures a professional-looking finish.
- Surface Prep: Line a large baking sheet or pizza stone with parchment paper to prevent sticking and ensure an even bottom crust.
- The Sunburst: Unroll two cans of dough. Arrange triangles in a circle with wide ends overlapping in the center and points facing outward.
- The Filling Layer: Spread the cream cheese and cinnamon mixture evenly over the center ring where the wide ends of the dough overlap.
- The Enclosure: Fold the pointed ends of the triangles over the filling and tuck them under the center ring to seal the structure.
- The Bake: Bake at 350°F (175°C) for 20 to 25 minutes until the pastry achieves a deep, golden-brown hue.
Allowing the ring to cool completely is essential before glazing. This patience prevents the icing from melting into the pastry and disappearing, preserving the visual impact.
The Baker’s Blueprint
- Keep your crescent dough refrigerated until the exact moment of assembly; working with cold dough prevents the fat from melting too early, ensuring the crispest, flakiest architectural layers.
- To ensure structural integrity, firmly tuck the pointed ends of the dough under the main ring to seal the pastry, preventing the heavy cream cheese filling from leaking during the bake.
- Patience is a virtue in the finishing phase; allow the ring to cool completely to room temperature before glazing, or the icing will dissolve into the pastry rather than sitting beautifully on top.
Decadent Pecan Praline Stuffed King Cake Variation
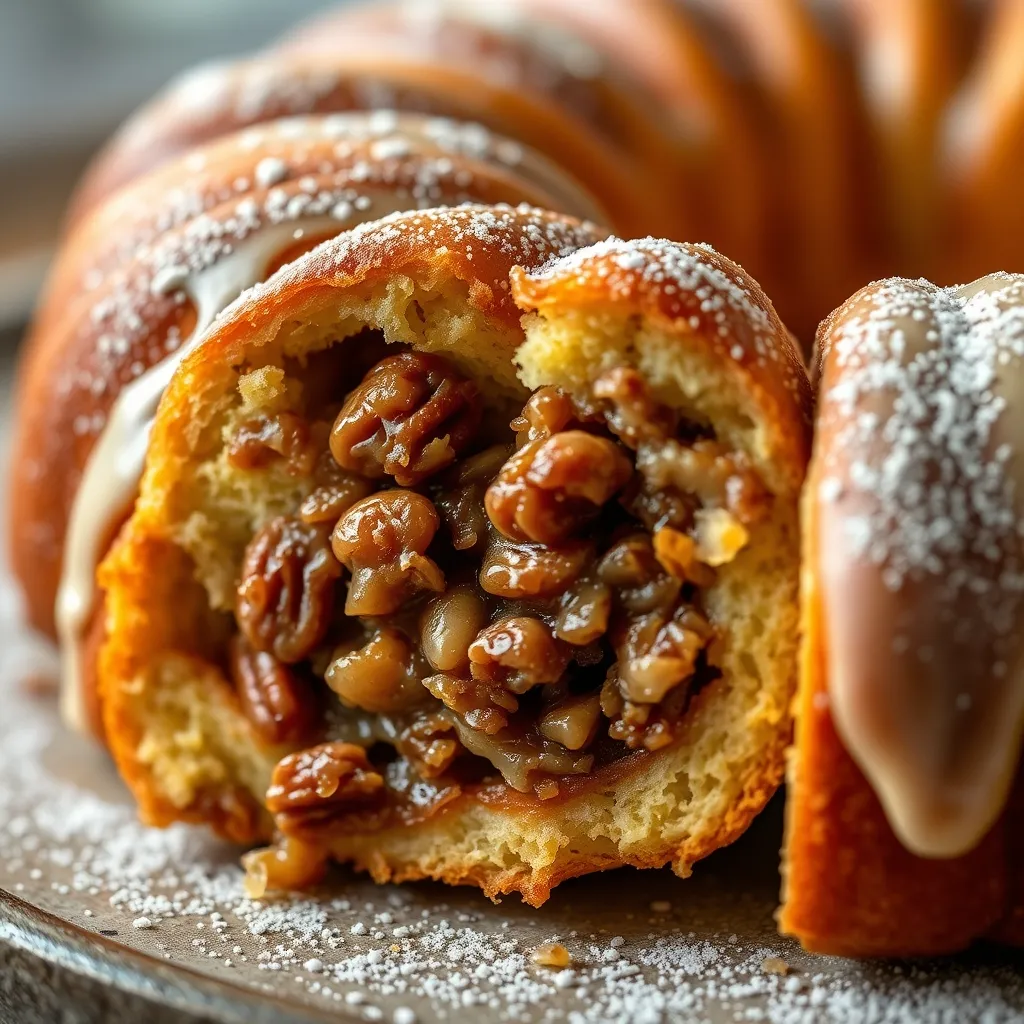
While the classic cinnamon filling is timeless, elevating your King Cake with a pecan praline stuffing brings a distinct Southern richness to the table. This variation adds a complex texture.
The filling mimics the density of New Orleans confections, creating a crunchy interior that contrasts beautifully with the soft crescent dough. It transforms a simple recipe into a gourmet event.
Texture is the secret language of baking; a praline crunch turns a simple pastry into an architectural masterpiece of flavor.
Praline Perfection
- Toast your pecans in a dry skillet for 3-5 minutes before adding them to the filling; this releases essential oils and amplifies the nutty flavor profile against the sweet dough.
- Chop the pecans into small, uniform pieces to prevent them from tearing the delicate crescent dough sheets during the rolling and shaping process.
- Add a pinch of flaky sea salt to your brown sugar and butter mixture to cut through the richness and enhance the caramel notes of the praline.
Constructing the Praline Filling
To achieve the correct structural integrity for the filling, you must balance the moisture of the butter with the coarseness of the nuts. A filling that is too wet will compromise the dough.
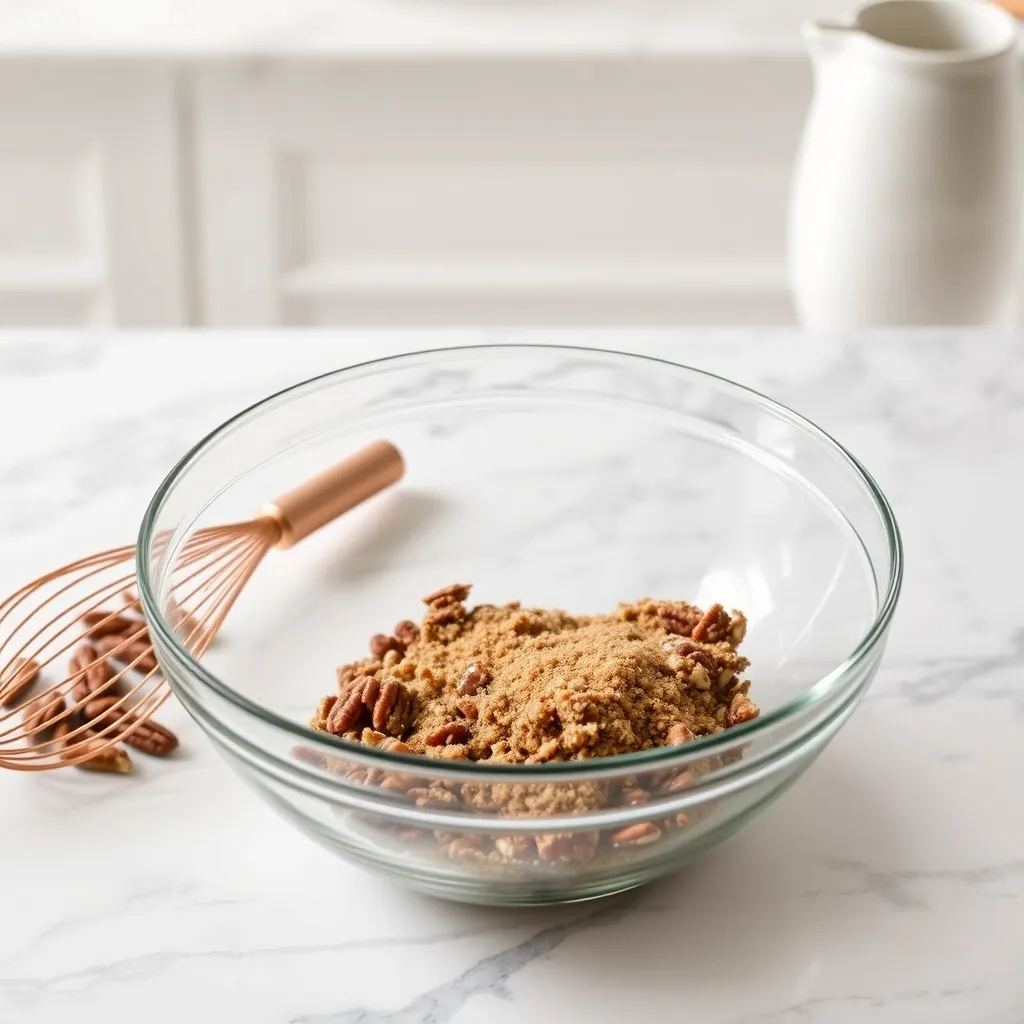
Start by toasting your pecans. This step releases essential oils and ensures the nuts remain crisp even after baking inside the moist dough. Mix them with dark brown sugar for depth.
If you appreciate the chemistry of caramelizing sugars, this process is similar to techniques used in Perfectly Easy Crème Brûlée. The goal is a slow melt.
Ingredient Ratios for Structural Success
Use this specific ratio to ensure the filling stays inside the pastry rather than leaking onto the baking sheet. Precision here guarantees a clean, professional finish.
- 1 cup chopped pecans: Toast these lightly in a dry skillet before mixing.
- 1/2 cup dark brown sugar: Pack firmly to ensure correct volume and sweetness.
- 1/4 cup unsalted butter: Melted and cooled slightly to avoid cooking the sugar.
- 1 tsp vanilla bean paste: Offers a better visual texture than extract.
- 1/2 tsp sea salt: Essential for cutting through the intense sweetness.
Always toast your nuts before adding them to a batter or filling. It wakes up the flavor and ensures they stay crunchy.
Claire Saffitz, Bon Appétit
Baker’s Secret Weapon
- Chill your filling for 10–15 minutes before spreading; this solidifies the butter slightly, preventing the mixture from oozing out while you shape and twist the dough.
- Keep the pecans roughly chopped rather than finely ground. Larger nut pieces provide the necessary structural framework to hold up the heavy dough.
- Leave a clean half-inch border around the perimeter of your dough sheet when spreading the filling to ensure the caramelizing sugars stay trapped inside the pastry.
Assembly and Baking Dynamics
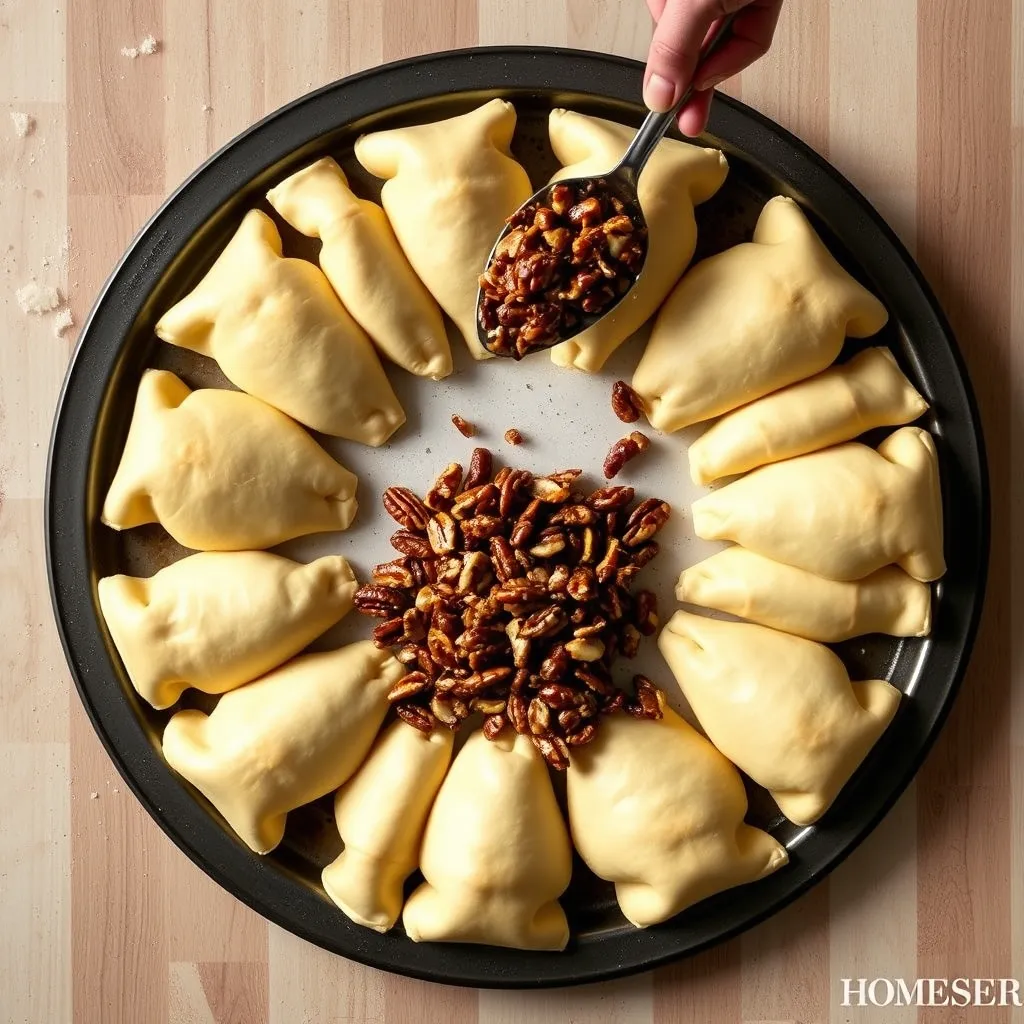
Spread the praline mixture evenly across the widest part of the crescent triangles. Leave a precise half-inch margin at the edges to allow the dough to seal properly during the rolling process.
The sugar will liquefy as it bakes. By sealing the edges tightly, you create a self-contained caramelization chamber within each roll. This preserves the moisture of the pastry.
This technique shares similarities with the rolling methods found in 40 Fluffy Cinnamon Roll Recipes Grandma Would Approve. The spatial flow of the spiral is key.
Once baked, the praline filling solidifies into a candy-like layer. This adds a delightful “snap” when cut, offering a sensory experience that rivals professional bakery versions.
The Perfect Spiral
- Use a small offset spatula to spread the praline mixture; it provides much better precision for maintaining that crucial half-inch margin than a standard spoon.
- If the dough becomes too warm or tacky while rolling, chill the triangles in the freezer for 5 minutes to ensure the spiral structure stays sharp and defined.
- Ensure your oven is fully preheated before the rolls go in; a consistent initial heat is vital for the sugar to liquefy and then set into that signature candy-like snap.
Fruit-Infused Strawberry Cream Cheese Braids

Elevating the standard King Cake recipe involves introducing vibrant, fresh elements that appeal to modern palates. The strawberry braid offers a visual richness.
The ruby tones of the fruit reduction create a striking contrast against the golden-baked crescent roll dough. This dish acts as a colorful focal point.
True hospitality consists of offering the best of yourself to your guests.
Preparing the Stabilized Filling
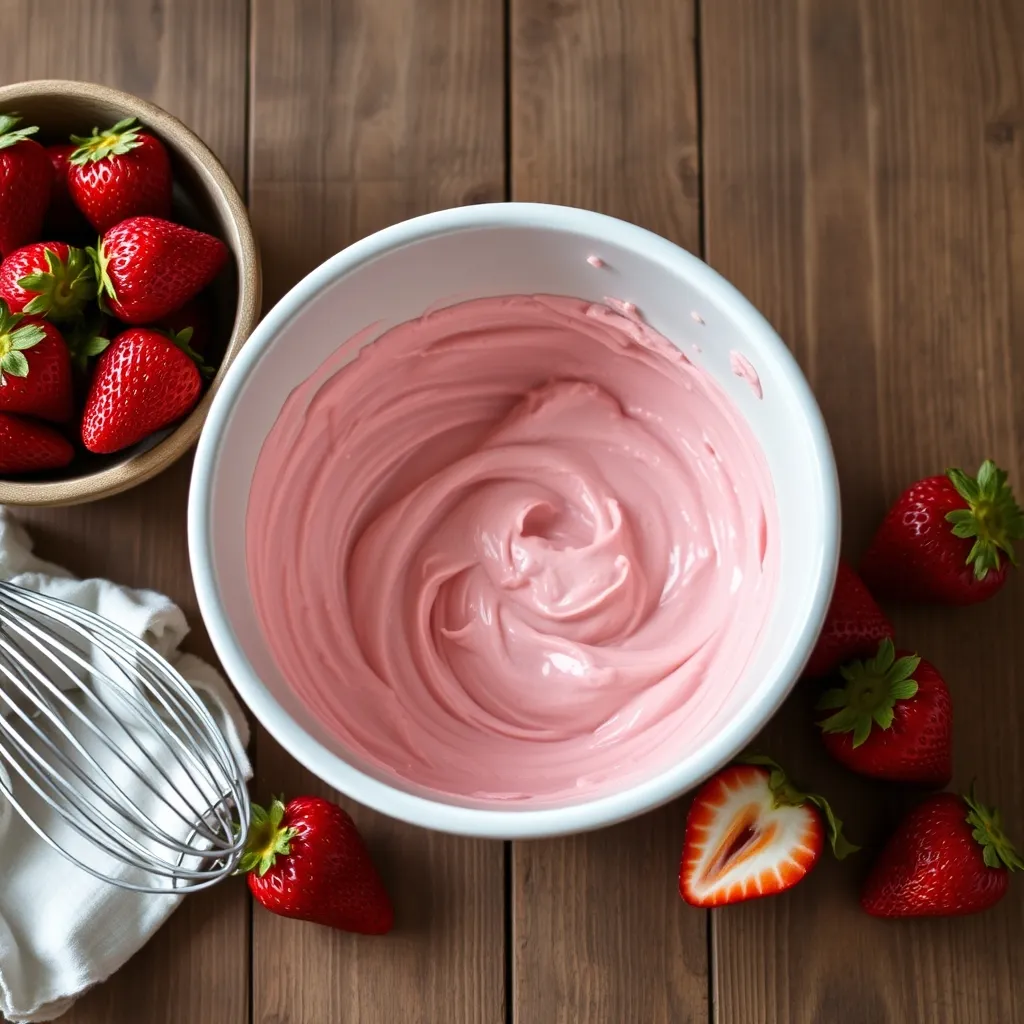
Texture is paramount when crafting a fruit-infused filling. The mixture must be thick enough to stay inside the braid during the baking process.
Combine softened cream cheese with a strawberry reduction rather than raw fruit. This prevents excess moisture from making the dough soggy.
If you have leftover fresh berries from this step, utilize them in Easter Strawberries in Egg Carton: Chic Tablescape Ideas to create a cohesive theme.
Ensure your cream cheese is at room temperature before mixing. This guarantees a smooth, lump-free consistency that spreads evenly across the dough.
The Braiding Technique
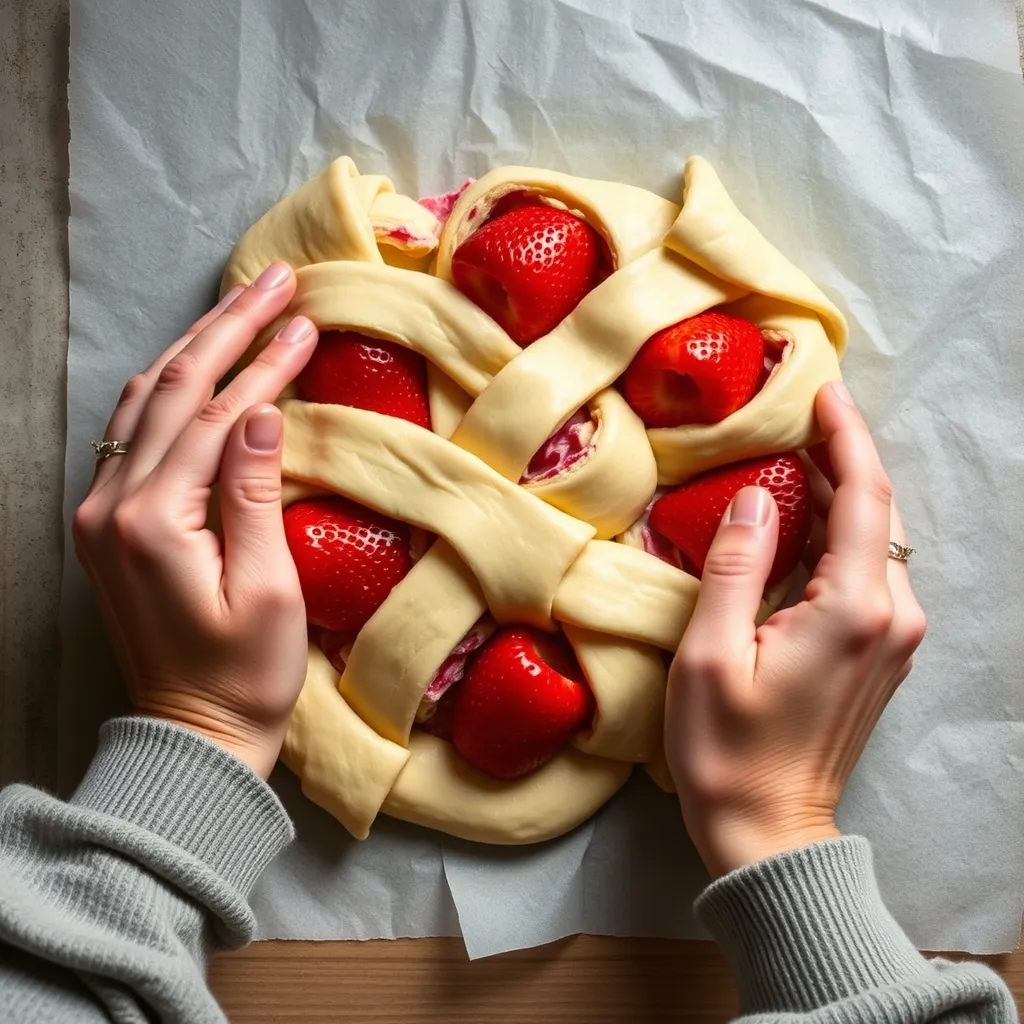
Structural integrity is key to a beautiful King Cake. Lay out the crescent roll triangles on parchment paper to form a cohesive rectangle.
Press the seams firmly to seal them. This creates a solid foundation that prevents the filling from leaking out onto the baking sheet.
When working with soft doughs like crescent rolls, keep the dough chilled until the very last moment. Warm dough loses its shape and becomes difficult to manipulate into intricate braids.
Martha Stewart, Puff Pastry Tips & Techniques
Cut diagonal strips along the sides of the rectangle, leaving the center intact for the filling. Fold the strips over in an alternating pattern.
This “plaiting” method not only looks professional but also ensures even heat distribution. The result is a consistent bake throughout the pastry.
Baking and Serving Atmosphere
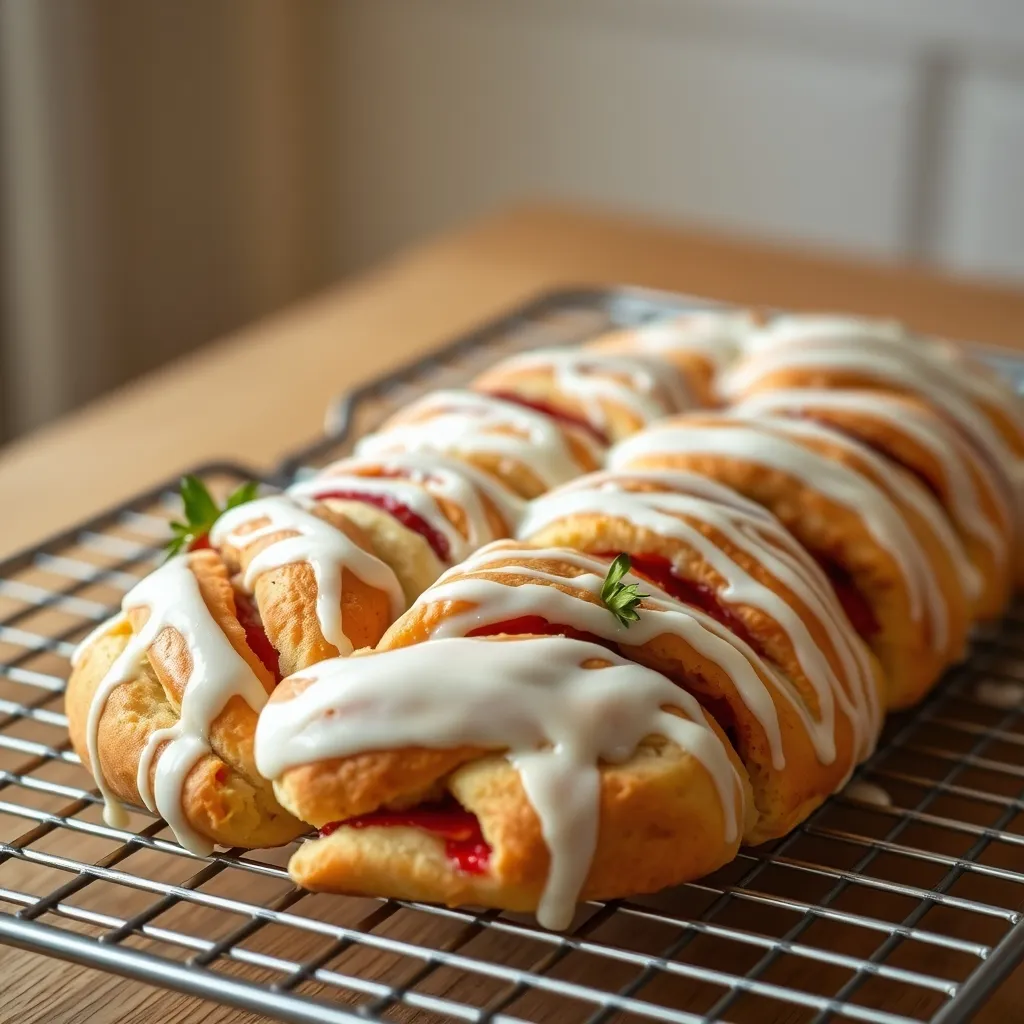
Bake until the crust achieves a deep, golden-brown hue. The aroma of toasted pastry and warm strawberries will define the room’s atmosphere.
Allow the braid to cool slightly before applying the glaze. This prevents the icing from melting completely and disappearing into the crust.
For a sophisticated brunch experience, pair a slice of this warm pastry with Professional At Home Coffee Recipes for a Daily Luxury.
The bitterness of a high-quality espresso balances the sweetness of the strawberry glaze perfectly. This pairing elevates the simple recipe.
Filling Consistency Troubleshooting
Getting the texture right is the difference between a messy leak and a perfect braid. Use this guide to adjust your filling.
| Issue | Visual Cue | Correction Technique |
|---|---|---|
| Too Runny | Spreads instantly on spoon | Add 1 tablespoon of cornstarch or powdered sugar. |
| Too Stiff | Clumps and tears dough | Whisk in 1 teaspoon of milk or heavy cream. |
| Separated | Liquid pooling at edges | Chill for 15 minutes, then re-whip vigorously. |
| Grainy | Visible sugar crystals | Let sit for 10 minutes to dissolve, then mix. |
The Pastry Pro’s Secret
- Prevent a soggy pastry by using a fruit reduction instead of fresh berries, which releases less moisture during the baking process.
- Keep your crescent dough chilled until the moment of assembly to ensure the strips hold their shape and create a clean, professional-looking braid.
- Wait until the braid is slightly cooled before glazing to achieve a thick, bakery-style finish that doesn’t melt into the crust.
Mini Air-Fried King Cake Bites for Individual Servings
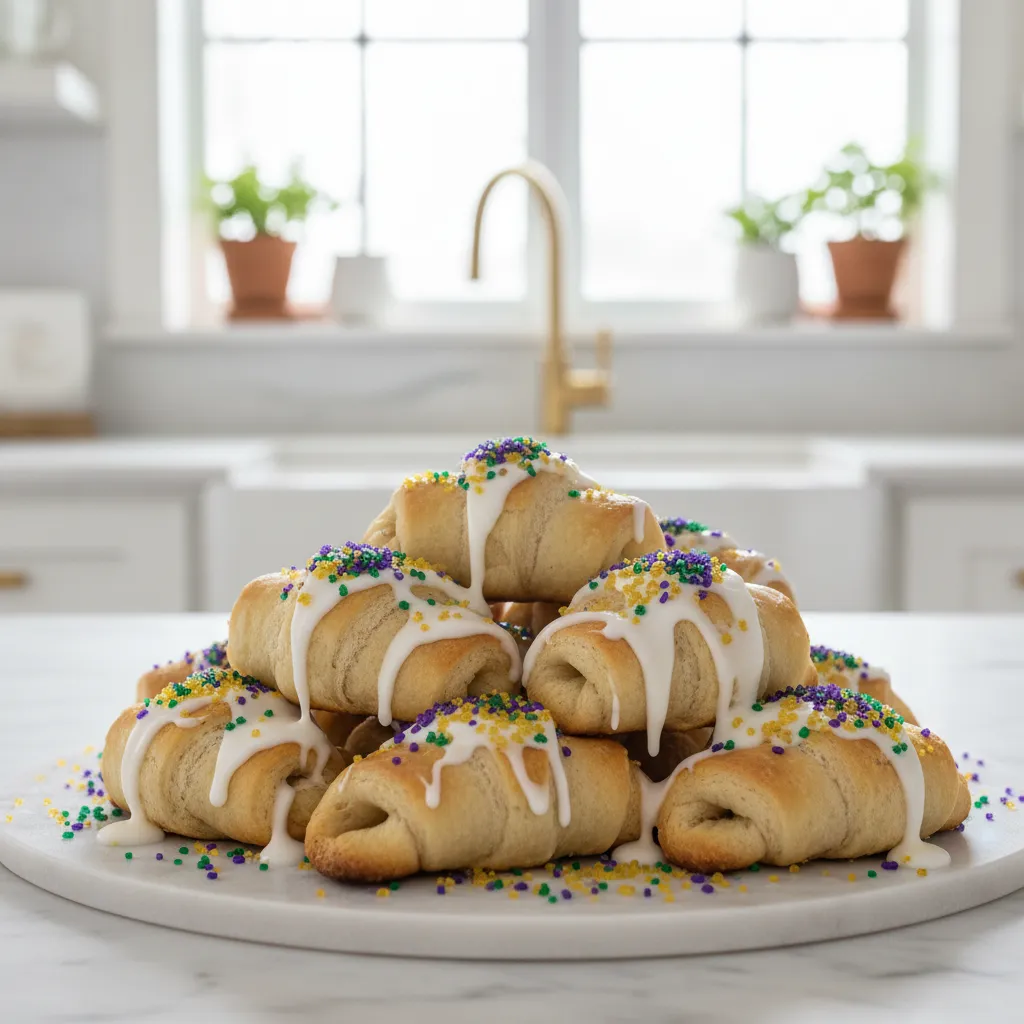
Transforming the traditional large ring into bite-sized morsels offers a modern twist on Mardi Gras festivity. These individual servings maintain the flaky texture of crescent rolls while ensuring portion control.
The aesthetic appeal of these mini cakes lies in their uniformity and the vibrant pop of colored sugar against the golden pastry. They function perfectly for open-concept gatherings where guests mingle freely.
Miniature desserts turn every guest into a VIP, offering a personalized experience of flavor and tradition without the mess of slicing.
Preparing the Pastry Dough
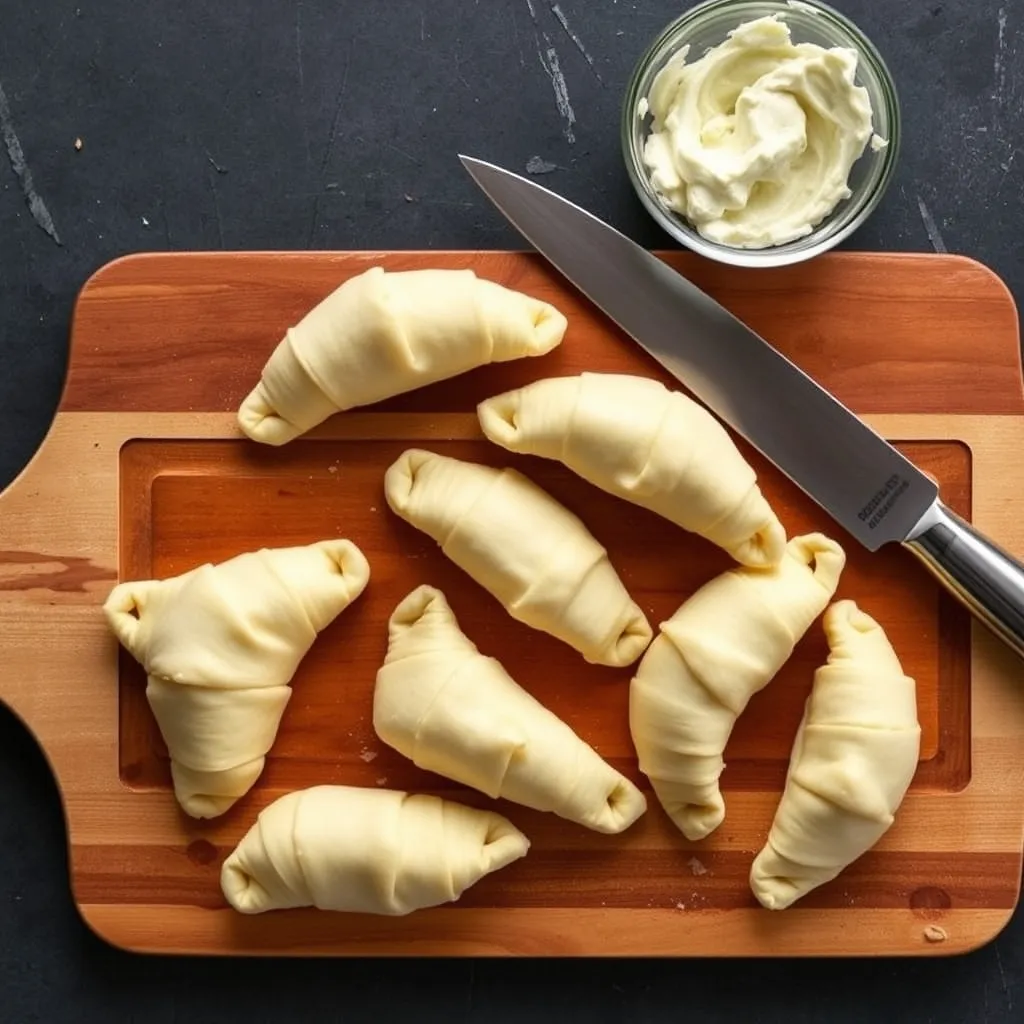
Start by unrolling your crescent dough sheet on a cool, clean surface like quartz or granite to prevent sticking. Slice the dough into uniform triangles or squares to ensure even cooking times.
Place a teaspoon of the cinnamon-sugar cream cheese filling in the center of each piece. Pinch the seams tightly to seal the rich filling inside, which prevents leaks that could burn in the air fryer basket.
Working with cold dough is essential for structural integrity. If the dough becomes too warm or pliable, refrigerate it for ten minutes to restore its firmness before air frying.
The Air Frying Process
Preheat your air fryer to 350°F to ensure an immediate crisping effect on the pastry exterior. Arrange the bites in a single layer with ample space between them to facilitate proper airflow.
Cook for roughly 5 to 7 minutes until the exterior turns a deep, golden brown. This rapid cooking method locks in moisture while creating a satisfying crunch on the outer shell.
Check the bites at the halfway mark to ensure they are browning evenly. If your appliance has hot spots, rotate the basket to maintain a consistent finish across all pieces.
When baking puff pastry or crescent dough, high heat is necessary to create steam quickly, which lifts the layers and creates that signature flake.
King Arthur Baking, Puff Pastry Tips
Glazing and Presentation
Whisk powdered sugar, milk, and vanilla into a thick glaze that clings to the warm pastry. Drizzle generously over the bites while they are hot to allow the icing to set into the crevices.
Immediately dust with purple, green, and gold sanding sugar before the glaze hardens. This tri-color palette creates a vibrant visual focal point against the neutral pastry tones.
Serve these bites on a tiered stand to add vertical interest to your dessert table. Pair them with a strong coffee using easy homemade coffee syrup recipes for a complete sensory experience.
Success Checklist for Air-Fried Bites
Achieving the perfect texture requires attention to detail. Follow these structural guidelines to ensure your bites are both durable and delicious.
- Temperature Control: Keep dough chilled until the moment it enters the basket to maximize puffiness.
- Sealing Technique: Use a fork or firm pinch to lock edges, preventing filling blowout during the high-heat cycle.
- Air Circulation: Avoid overcrowding the basket; touching pieces will result in soggy, undercooked sides.
- Cooling Rack: Transfer cooked bites to a wire rack immediately to prevent steam from softening the bottom crust.
The aroma of toasted cinnamon and warm vanilla creates an inviting atmosphere in the kitchen. These bites offer the structural integrity needed for standing receptions or casual brunches.
Carnival Pro Tips
- Use perforated parchment paper liners in your air fryer basket to prevent any escaping sugar from sticking while still allowing heat to circulate.
- To keep the tradition alive in mini-form, hide a single pecan or almond in just one bite per batch to designate the ‘King’ for the day.
- For the glossiest finish, let the bites cool for exactly two minutes before glazing; this ensures the icing sticks without melting completely off.
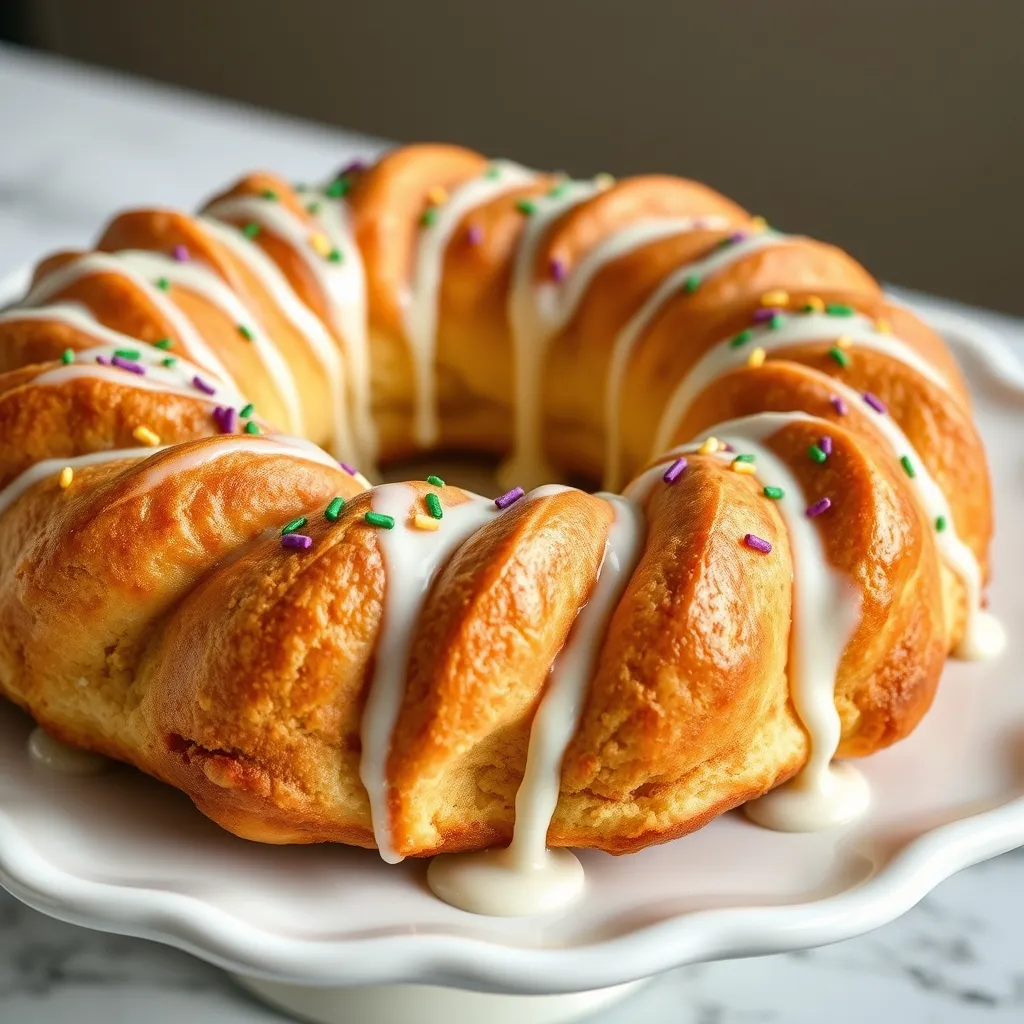
Mastering the Traditional Three-Color Mardi Gras Glaze

The glaze on a King Cake functions as the architectural finish of the piece. It must be viscous enough to cling to the pastry yet fluid enough to drape elegantly.
Visually, the white icing provides a high-contrast canvas for the vibrant sugars. This step transforms the rustic, golden-brown crescent roll structure into a festive focal point.
Functionality is paramount here. If the glaze is too thin, it absorbs into the porous dough. If it is too thick, it cracks upon drying and ruins the aesthetic flow.
Achieving the correct opacity ensures the colors pop against a clean background. Much like the final polish on elegant Easter appetizers and puff pastries, the glaze defines the professional look of the bake.
In design and baking alike, the finish is not just a detail. It is the element that defines the entire experience.
The Glaze Master’s Guide
- Test your glaze’s consistency by drizzling it over the back of a spoon; it should coat the metal completely without becoming translucent.
- Always allow your King Cake to cool completely before icing to prevent the glaze from melting and disappearing into the pastry layers.
- Apply the colored sugars immediately after drizzling the white glaze while it is still tacky to ensure they bond perfectly to the surface.
Creating the Perfect Viscosity
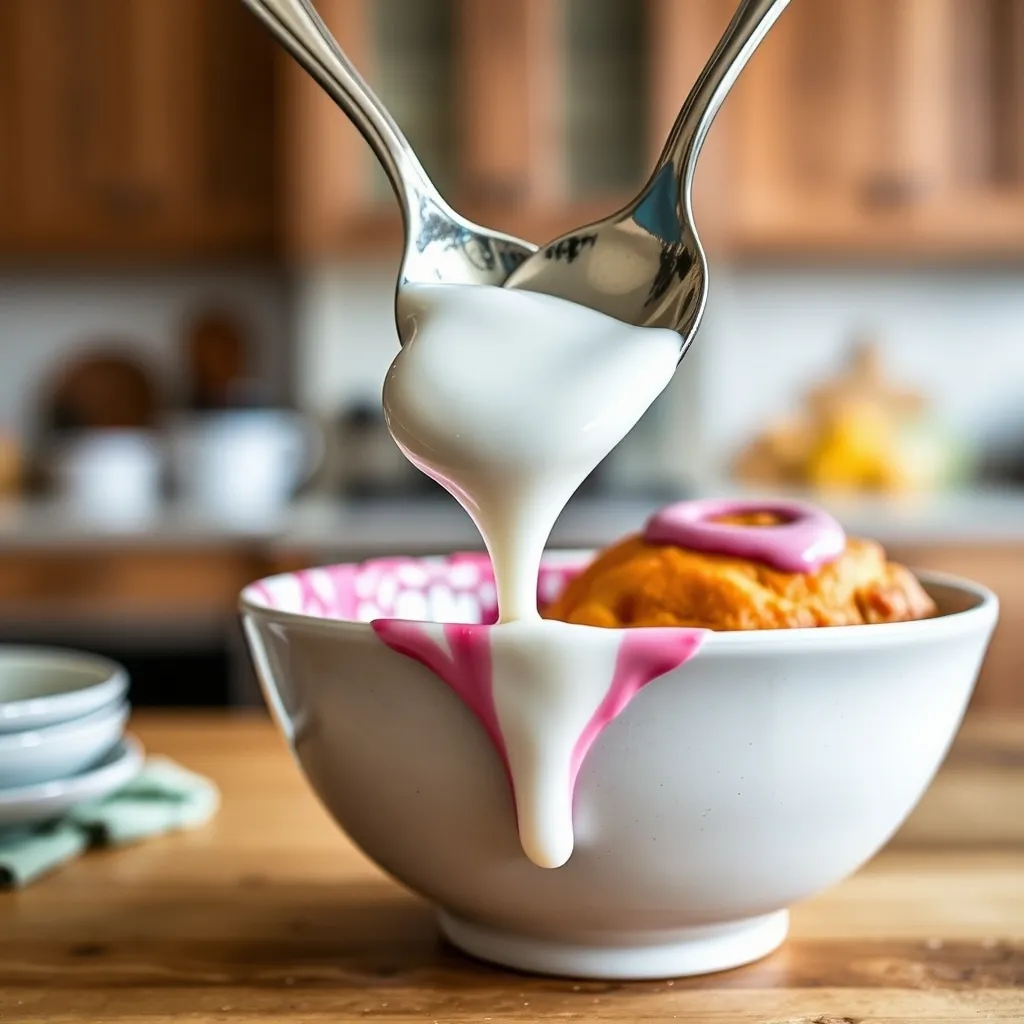
The base requires simple ingredients: powdered sugar, a splash of milk, and vanilla. However, the ratio dictates the structural integrity of the topping.
Mix the liquid into the sugar slowly. You are looking for a “magma-like” consistency that flows slowly off the spoon rather than dripping like water.
The consistency should be thick, like Elmer’s glue. If it’s too thin, it will run right off the cake and pool on the plate.
The Test Kitchen, Cook’s Illustrated
Temperature control is also critical during application. Never glaze a piping hot cake. The heat radiates outward and will melt your structural work immediately.
Wait until the ring is warm to the touch but not hot. This allows the icing to set slightly upon contact, creating a stable foundation for the heavy sanding sugar.
Glaze Troubleshooting Guide
Even seasoned bakers encounter texture issues. Use this architectural guide to correct your mixture before application.
| Problem | Structural Cause | Correction Technique |
|---|---|---|
| Translucent/Runny | Excess hydration breaks surface tension. | Add sifted powdered sugar, 1 tbsp at a time. |
| Cracking/Stiff | Low moisture content creates rigidity. | Add milk, 1/2 tsp at a time, to loosen. |
| Grainy Finish | Sugar crystals were not properly dissolved. | Whisk vigorously or let sit for 5 minutes. |
| Yellow Tint | Vanilla extract altered the color palette. | Use clear vanilla or almond extract instead. |
The Master’s Glaze Guide
- Sift your powdered sugar through a fine-mesh strainer before mixing to prevent stubborn lumps and ensure a perfectly smooth, professional finish.
- Perform the spoon test: dip a metal spoon into the mixture; it should coat the back evenly and hold its shape for several seconds before slowly sliding off.
- If your glaze develops a crust while you wait for the cake to cool, simply give it a quick whisk or add a single drop of milk to restore its glossy flow.
Applying the Tri-Color Zoning
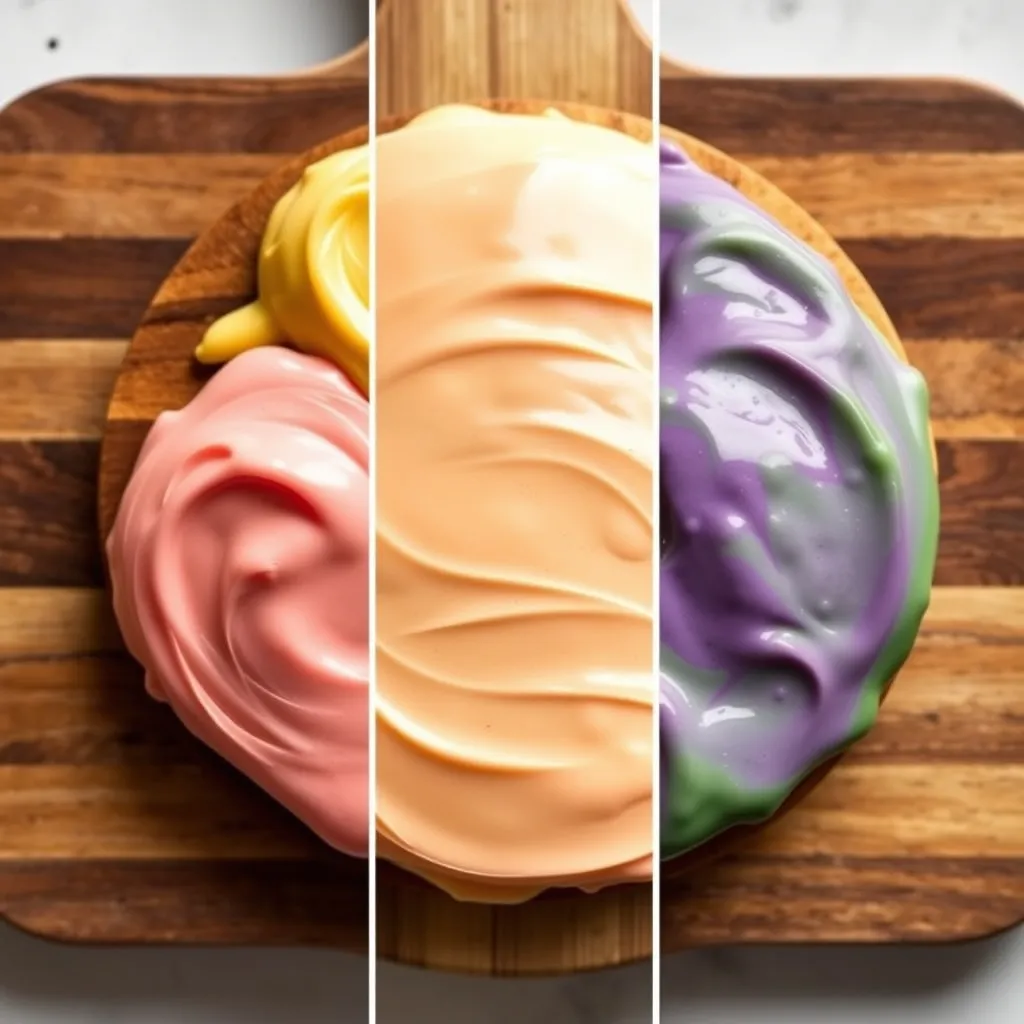
The application of color follows a specific zoning plan. The traditional palette includes purple (Justice), green (Faith), and gold (Power).
To achieve a designer look, avoid mixing the sugars randomly. Instead, apply them in distinct, alternating blocks around the ring to guide the eye.
Pour the glaze over the ring, ensuring it drips down the exterior and interior walls. While the glaze is wet, immediately sprinkle the sugars.
This timing is essential. If the glaze creates a “crust” before you sprinkle, the sugar will not adhere, similar to how elegant sweet treats rely on timing for their toppings.
Work in sections if necessary. This ensures maximum adhesion and prevents the colors from bleeding into a muddy grey mixture.
The Baker’s Palette
- For sharp, professional color boundaries, use a small piece of parchment paper as a temporary shield between sections as you sprinkle.
- Place your cake on a wire cooling rack over a baking sheet to catch excess sugar, keeping your workspace clean and preventing a messy countertop.
- If your kitchen is warm, glaze and sugar one-quarter of the ring at a time to guarantee the sugar sticks perfectly before the icing sets.
The Final Architectural Reveal
We have engineered a dessert that balances structural integrity with indulgent flavors. This method proves that sophisticated design does not require hours of labor.
By utilizing pre-fabricated dough, you achieve a reliable framework for your creativity. The result is a centerpiece that rivals artisan bakeries in aesthetic and taste.
As you apply the final glaze, remember that presentation is the façade of your edible architecture. Enjoy building a tradition that stands the test of time.
Structural Design Inquiries
Ideally, bake immediately to maintain the dough’s lift. If necessary, assemble the framework and refrigerate for up to two hours before baking to preserve stability.
Pinch the perforations firmly during assembly. Using a slightly moistened finger acts as a sealant, smoothing the joints to create a monolithic appearance.
Avoid overfilling the cavity. Excessive weight compromises the crescent integrity, leading to leaks. Stick to the specified ratios for a stable interior core.
Yes, puff pastry sheets offer a similar flaky elevation, though the assembly geometry will differ. Ensure you adjust your cutting template accordingly.