Table of Contents
- The Modern Tri-Fold: Aesthetic Photo Collage Layouts
- Beyond Photos: Styling Sports Jerseys and Musical Instruments
- Future Focused: Decorating with College Colors and Branding
- Engaging the Congregation: Advice Cards and Interactive Guest Books
- Downloadable Senior Sunday Toolkit: Printable Signs and Cards
- Optimizing Tight Spaces: Vertical Displays and Table Etiquette
- Illuminating the Journey: Battery-Operated Lighting Ideas
- Strategic Setup Timeline: A Guide for Parents and Grads
- A Curated Tribute to the Journey
- Design Dilemmas Solved
Creating a senior table display for church requires a precise understanding of spatial dynamics and structural integrity. Just as a professional architect approaches a floor plan, one must evaluate the physical dimensions and weight distribution of the designated display area. Selecting robust foundations and considering the surrounding flooring materials ensures that the final installation remains both stable and visually grounded within the sanctuary environment.
The integration of sophisticated lighting and material choice elevates a simple tribute into a professional gallery experience. Practitioners should focus on the interplay between light and shadow, using directional spotlights to highlight key milestones without overwhelming the viewer. By applying principles of interior design, such as balanced proportions and cohesive color palettes, the display serves as a refined bridge between the church architecture and the personal narratives of the graduates.
Finalizing the display involves a transition from structural planning to the delicate artistry of handmade decor. Attention to detail is paramount when blending high-end finishes with custom DIY elements that reflect the unique journey of each senior. This comprehensive approach ensures that the project remains authoritative in its execution while remaining deeply inspiring for the diverse community of homeowners and makers gathered to celebrate the occasion.
The Modern Tri-Fold: Aesthetic Photo Collage Layouts
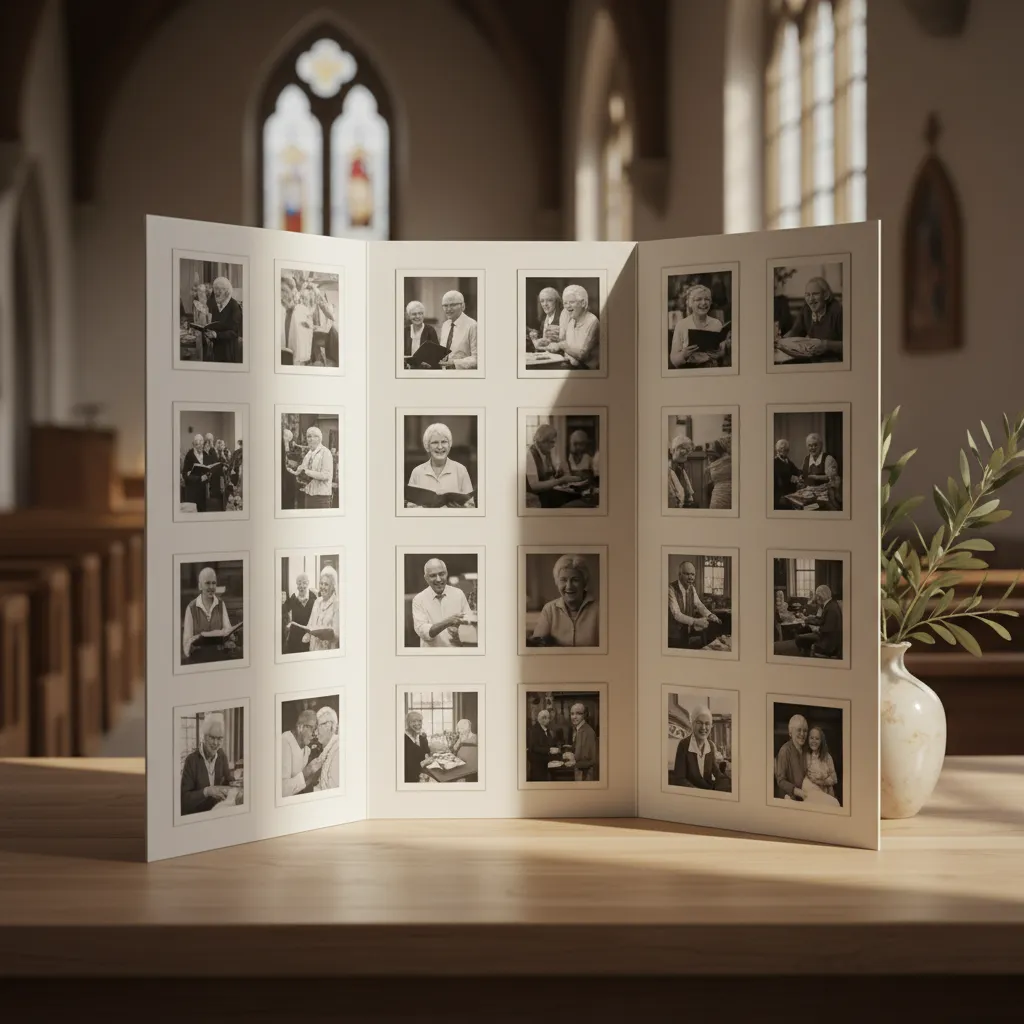
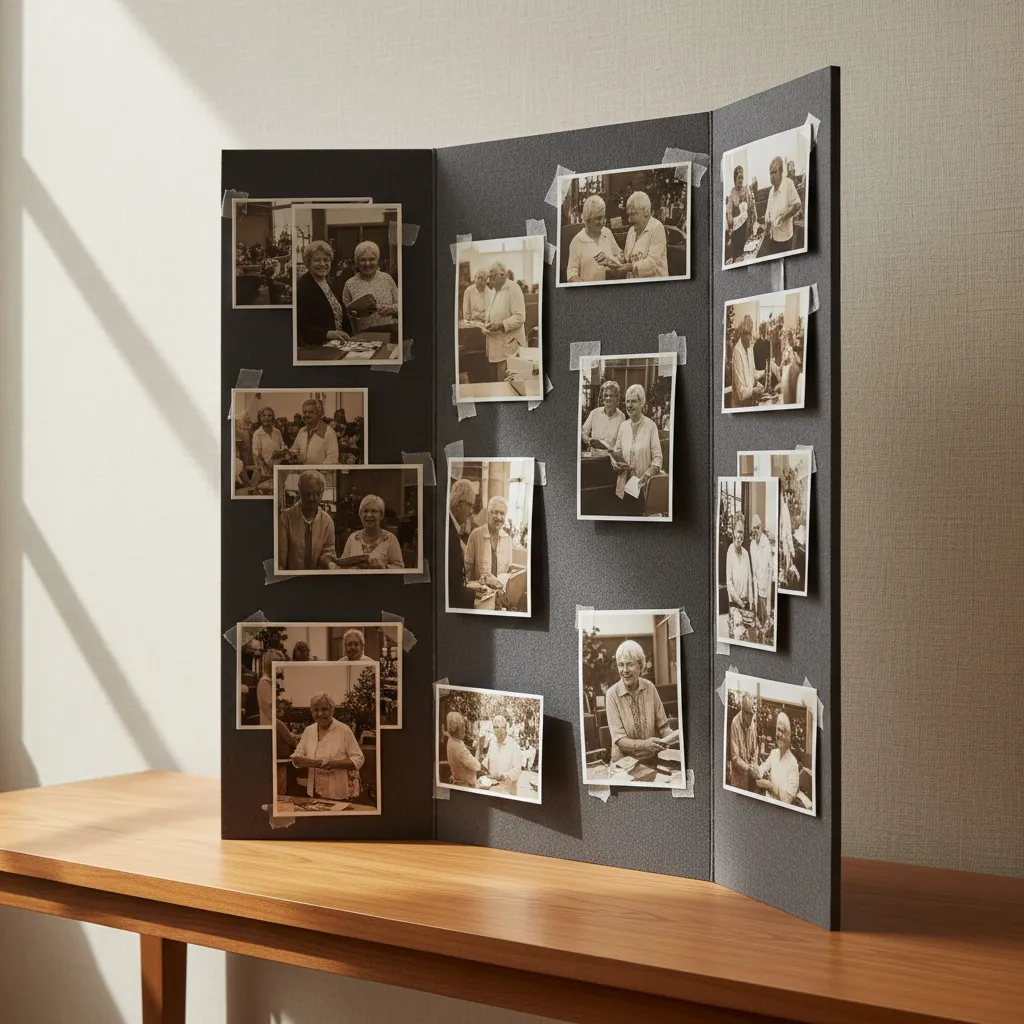
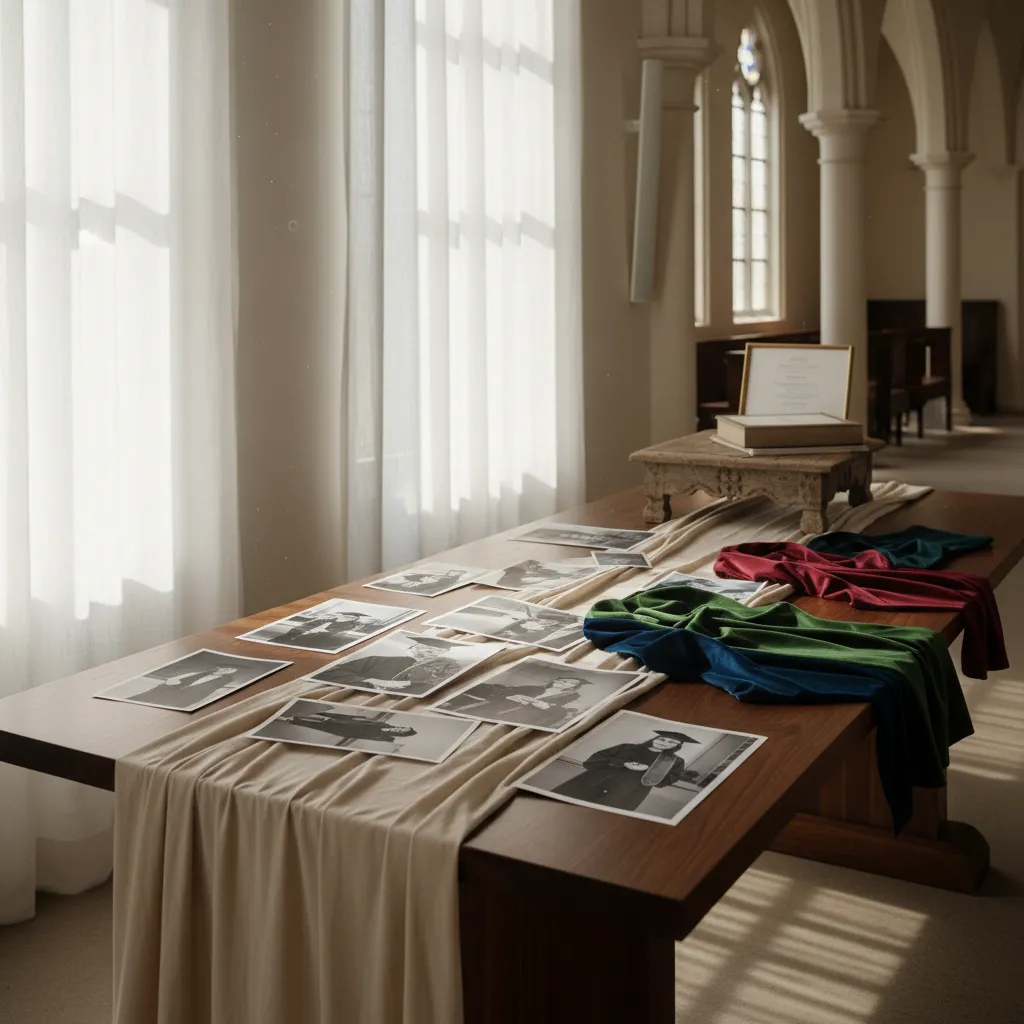
The tri-fold board serves as the architectural focal point of your display. It transforms a collection of snapshots into a cohesive visual narrative.
Modern aesthetics prioritize negative space over density. Allow distinct gaps between images to prevent visual fatigue for your guests.
A well-structured board acts like a gallery wall. It guides the viewer’s eye through the graduate’s timeline with intentional flow and precision.
Great design creates a pathway for the eye to travel, turning a simple display into a journey through time.
Avoid the temptation to fill every square inch. A clean background allows the most important photographs to command attention and respect.
Implementing the Grid System
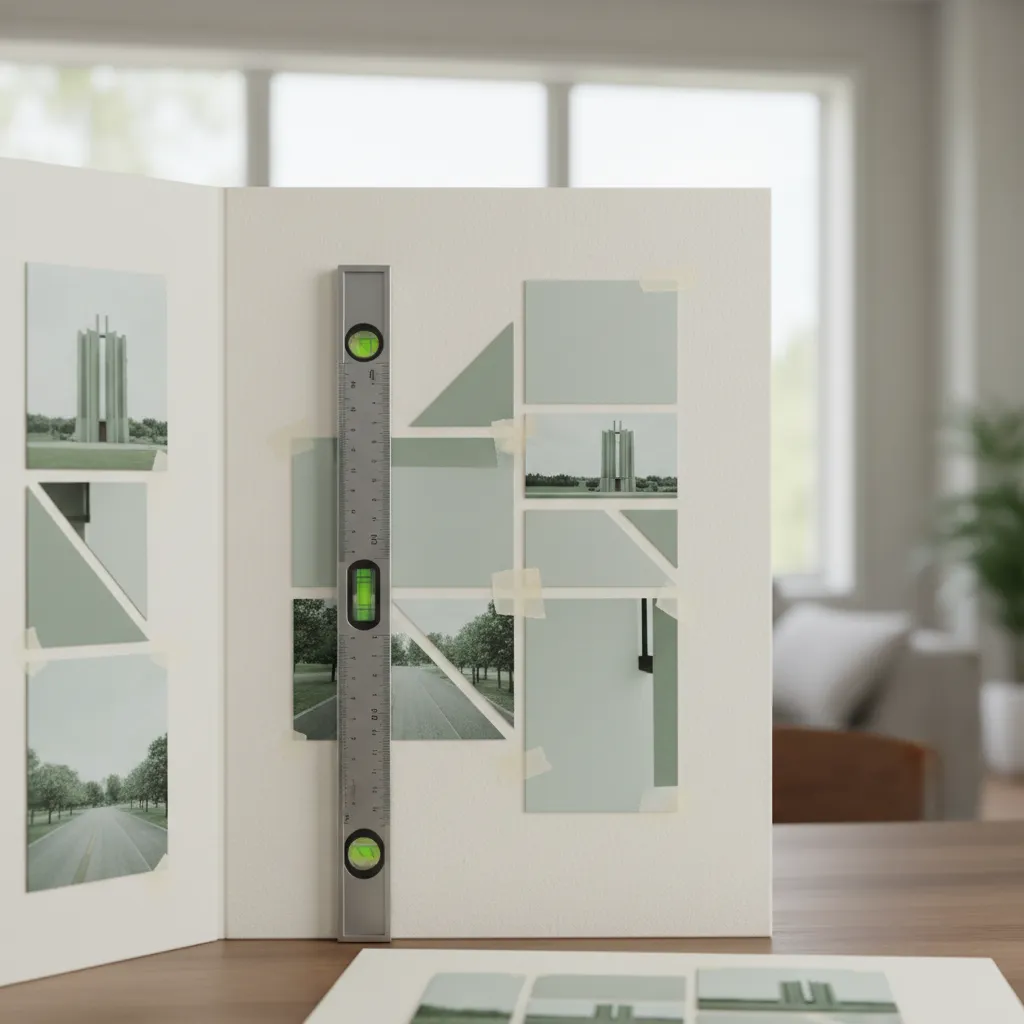
Treat your display board like an architectural blueprint. Align photographs using a strict grid system to create a sense of order and calm.
Uniform borders are essential for a polished look. Ensure the spacing between each photo is identical to achieve a professional finish.
Using a ruler and pencil markings is crucial. This precision elevates the project from a simple craft to a curated design piece.
If you enjoy hands-on assembly, similar precision techniques are used in elegant DIY teacher appreciation ideas.
The secret to a great gallery wall is balance and spacing. You want the collection to feel like one cohesive unit, not just a bunch of floating pictures.
Emily Henderson, Style by Emily Henderson
Consider the finish of your photographs carefully. The lighting in church halls can vary, often causing glare on standard glossy prints.
| Photo Finish | Visual Effect | Best Application |
|---|---|---|
| Matte | Flat, non-reflective surface that absorbs light. | Best for brightly lit rooms or direct spotlighting. |
| Glossy | High contrast and vibrancy, but prone to glare. | Suitable only for low-light areas or small accents. |
| Luster/Satin | Soft sheen with accurate color and low reflection. | The ideal compromise for professional displays. |
Adding Dimension and Texture
Flat displays can feel one-dimensional under overhead lighting. Use foam tape to elevate specific “hero” shots off the board surface.
This shadowing effect adds depth and complexity. It physically separates the focal points from the background elements.
Incorporate textured backing papers like linen or cardstock. These materials add warmth and tactile interest without overwhelming the imagery.
You can also use budget-friendly DIY techniques to create custom mounting squares.
Select a color palette that complements the church sanctuary. Neutral tones usually bridge the gap between the graduate’s style and the venue.
Designer Layout Secrets
- Use foam mounting tape on your ‘hero’ shots to create a 3D shadow effect that makes the most important moments pop.
- Opt for matte or luster photo finishes to prevent harsh glare from overhead church lighting and ensure clear visibility from every angle.
- Maintain a consistent 1/2-inch ‘gutter’ or gap between all images to give your layout a clean, professional gallery aesthetic.
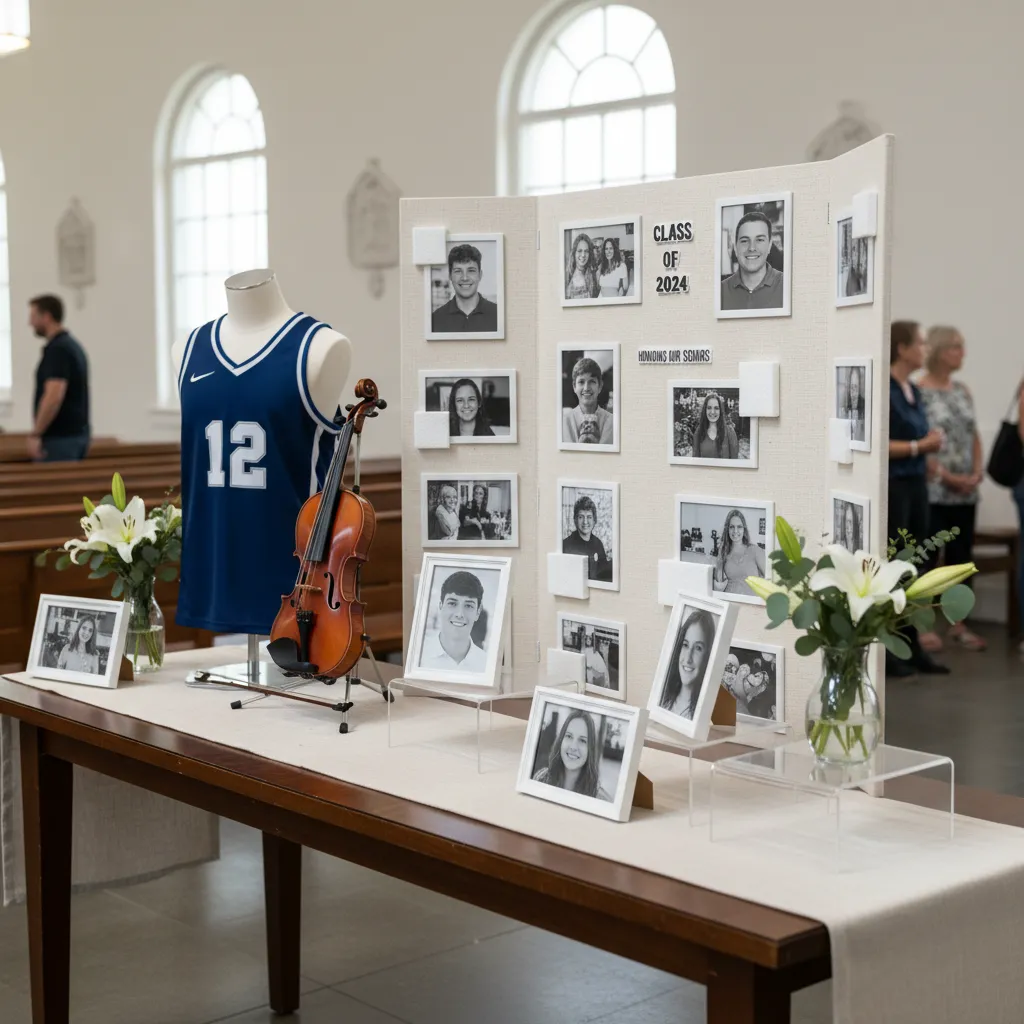
Beyond Photos: Styling Sports Jerseys and Musical Instruments

Photographs capture memories, but physical objects anchor them in reality. Adding tactile elements creates a richer visual narrative for guests.
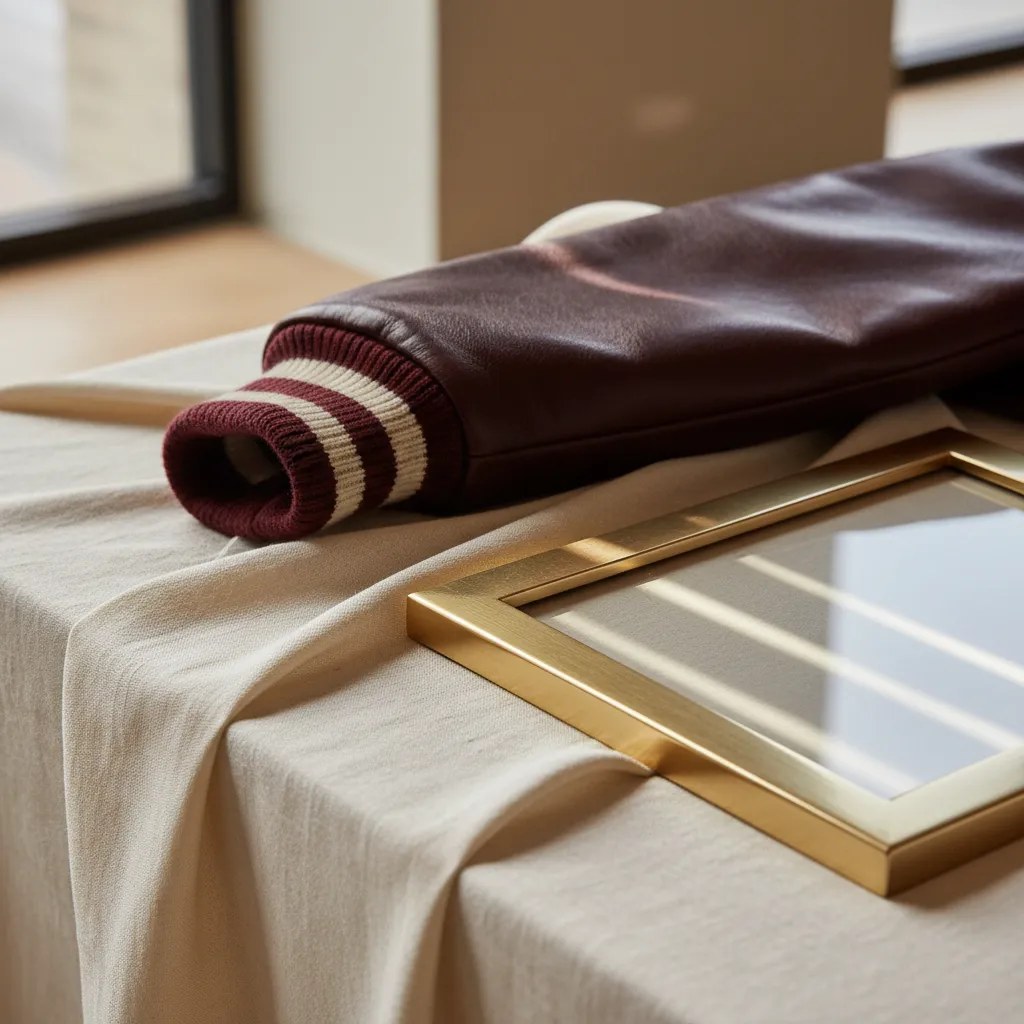
A folded jersey or a polished violin adds immediate texture and emotional weight to the display. These items transform a flat table into a story.
Including three-dimensional objects also improves the spatial dynamics of the layout. It breaks up the monotony of photo frames and albums.
Elevating Athletic Memorabilia
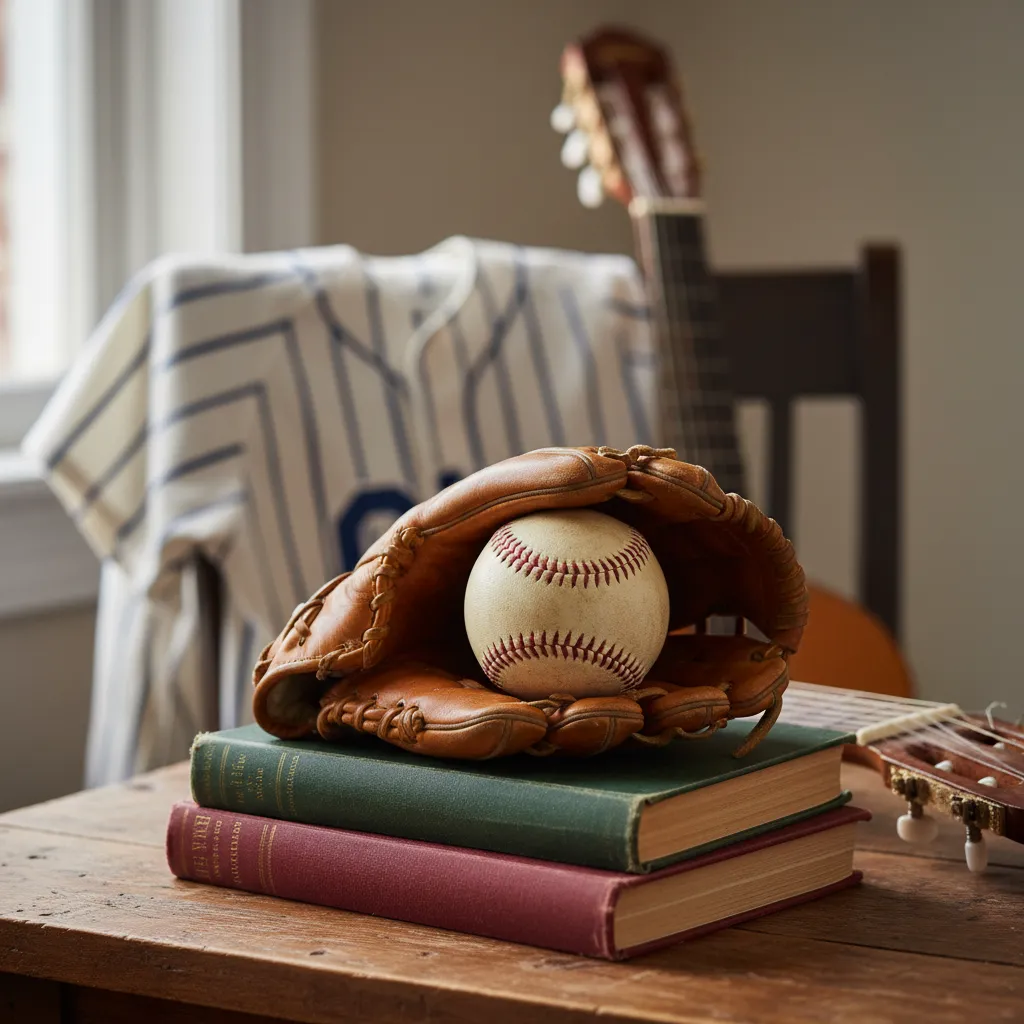
Athletic gear often looks cluttered when simply placed on a tablecloth. You must elevate these items to give them importance and structure.
Consider using a mannequin torso or a dedicated shadow box to display a jersey upright. This adds necessary height and prevents fabric wrinkles.
For smaller items like medals or balls, use acrylic risers or wooden crates. This creates distinct zones and keeps the focal point clear.
If you enjoy themed setups, similar principles apply when you design a Sports Teacher Appreciation Week: Styled Trail Mix Bar.
Great design isn’t just about what you see; it’s about the tangible history you can touch and feel.
Harmonizing Musical Instruments
Musical instruments possess an inherent sculptural beauty. The curve of a cello or the shine of a brass trumpet adds instant sophistication.
Always use a professional instrument stand rather than leaning a guitar against a wall or table edge. This ensures safety and highlights the shape.
Incorporate sheet music into the design by rolling it into scrolls or using it as a table runner. The paper texture softens the hard lines of metal.
Lighting is crucial here. Position a small battery-operated spotlight to catch the gleam of the instrument, creating a warm ambient glow.
The best design projects are the ones where people feel the most understood. Your home (or display) should tell the story of who you are.
Shea McGee, Studio McGee Design Philosophy
Strategic Mounting Techniques
Secure placement is vital for heavy or awkward items. You want to ensure the safety of the object while maintaining a clean visual flow.
Below is a guide to mounting common hobby items to maximize aesthetic impact and stability.
| Object Type | Recommended Mount | Visual Effect |
|---|---|---|
| Sports Jersey | Shadow Box or Torso Form | Creates a museum-quality look that highlights the team colors. |
| Instrument (Guitar/Violin) | A-Frame Floor Stand | Provides stability and treats the instrument as a piece of art. |
| Helmets or Hats | Acrylic Head Stand | Maintains the shape and allows 360-degree visibility. |
| Art Portfolio | Tabletop Easel | Invites guests to flip through work without bending over. |
By using these specific mounts, you protect the items from being knocked over in a busy fellowship hall. It also shows a high level of craftsmanship.
Integrating these personal artifacts requires a balance of hard and soft textures. Mix the rigid metal of a trophy with the softness of a table skirt.
Curated Gallery Secrets
- Create visual depth by layering memorabilia on acrylic risers or wooden crates to prevent a flat, cluttered look and give each artifact its own ‘zone’.
- Soften the hard textures of sports equipment or brass instruments by incorporating organic elements like rolled vintage sheet music or fabric table runners.
- Prioritize a museum-quality finish by using professional-grade stands or shadow boxes, which protect the integrity of the items while ensuring they remain the focal point.
Future Focused: Decorating with College Colors and Branding
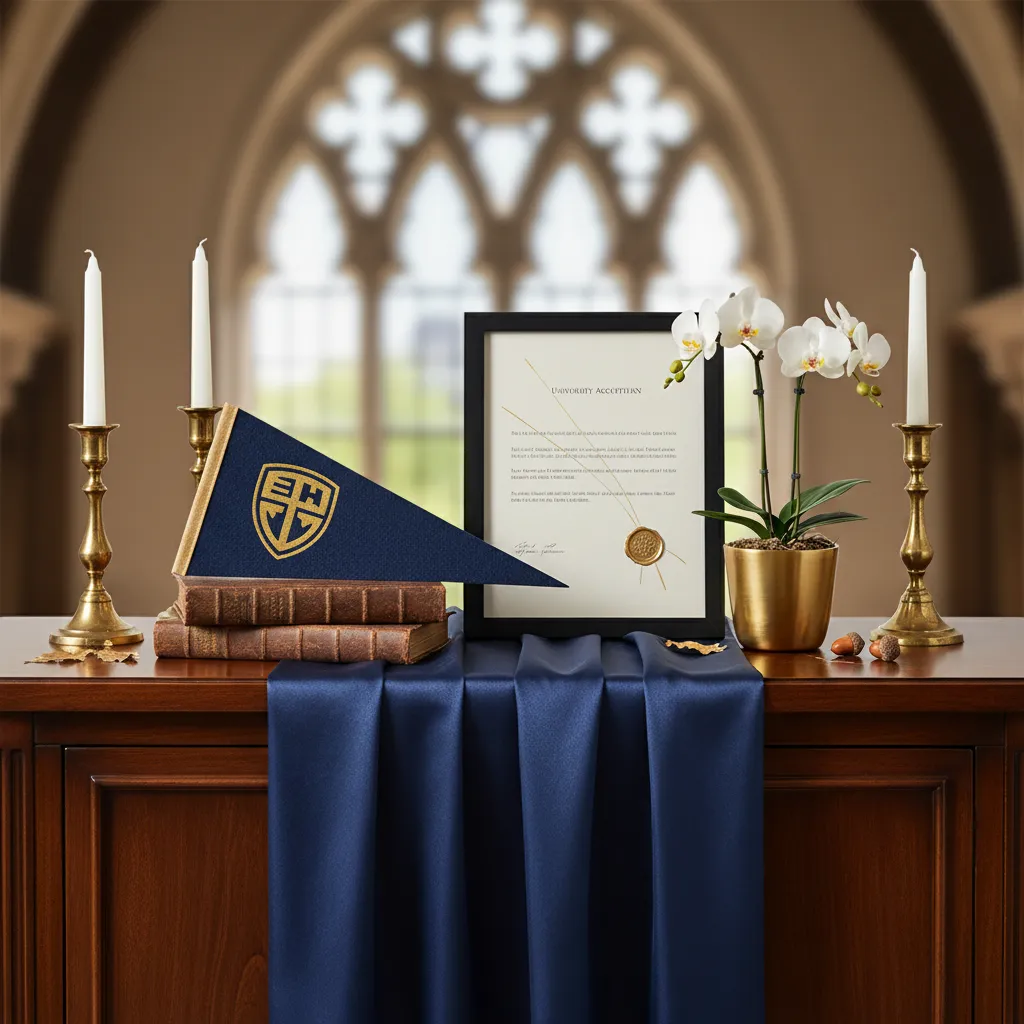
Transitioning from high school to the next chapter is a milestone deserving of a vibrant visual celebration. This display anchors the student’s future steps.
Incorporating college or trade school colors transforms a standard senior table into a personalized narrative. It signals future ambition immediately.
The key to success lies in sophisticated color blocking rather than overwhelming the space. You want a curated look, not a chaotic sports rally vibe.
Design is the silent ambassador of your future achievements.
Curating the Color Palette
Start by identifying the two primary colors of the future institution. Use the darker hue as your grounding element, such as a tablecloth or runner.
Use the secondary color for accents like frames, ribbons, or floral arrangements. This creates a cohesive palette that feels intentional and balanced.
If the school colors are incredibly bright, such as neon orange, temper them with neutrals. Cream or charcoal bases allow the brights to pop elegantly.
Just as you would plan spacing when considering 15 closet organization ideas, apply zoning to the table colors.
Group items by color families to create visual resting points. This prevents the display from looking cluttered or visually aggressive to guests.
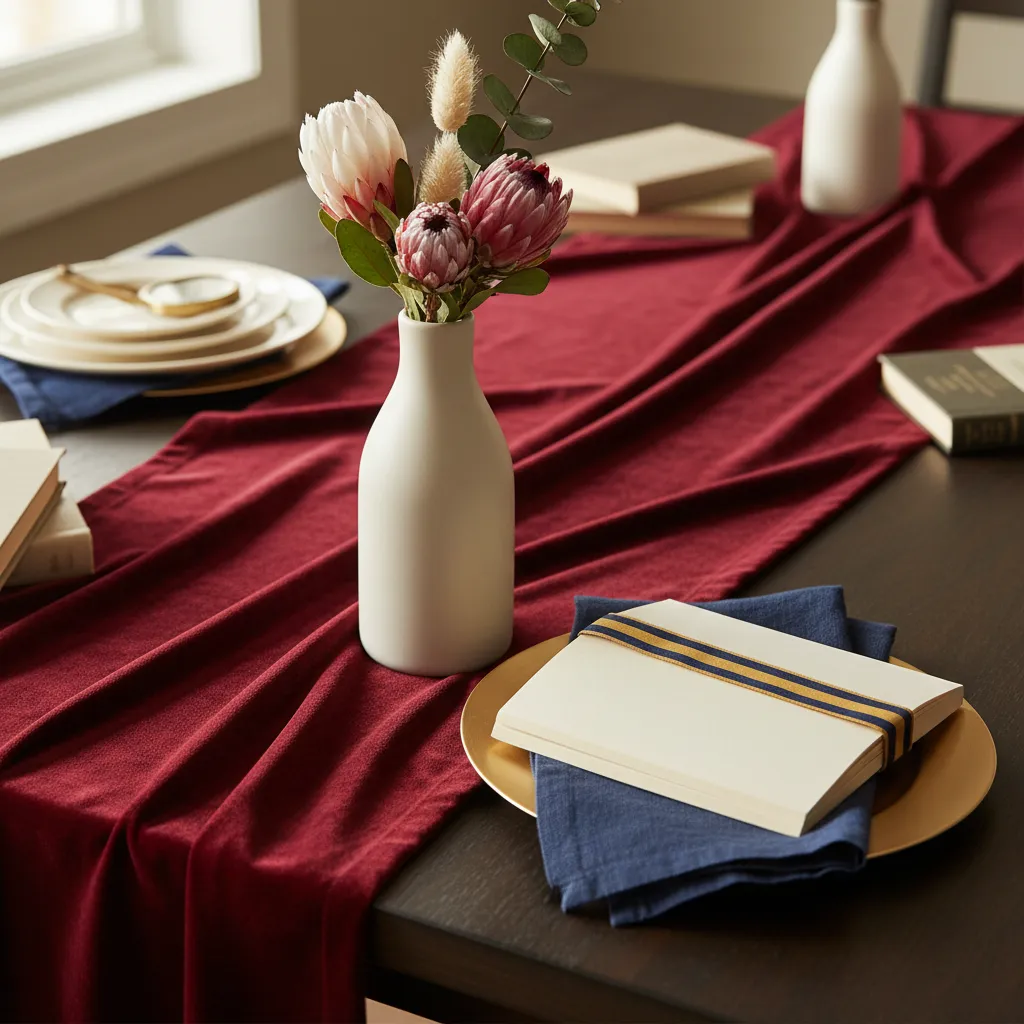
Texture and Material Selection
Elevate the branding by varying the textures used on the display. A mix of materials adds depth and prevents the setup from looking flat or cheap.
Consider a matte felt pennant paired with a glossy framed acceptance letter. The contrast between light-absorbing and light-reflecting surfaces is luxe.
Incorporating metallic elements, like a gold trophy or silver frame, adds a layer of sophistication. It bridges the gap between school spirit and decor.
The details are not the details. They make the design. Eventually, everything connects – people, ideas, objects.
Charles Eames, Eames Office
Strategic Branding Placement
Place the largest branded item, often a sign or flag, at the rear of the table. This establishes the focal point without obscuring smaller items.
Avoid using too many logos in one small area. One central logo is usually sufficient to convey the message without commercializing the sacred space.
For a subtle approach, use ribbon in the school’s colors to tie scrolls or wrap vases. This hints at the branding without shouting it.
Similar to the curated approach of a simple home coffee bar, every item should have a purpose. Remove anything that distracts from the student’s achievement.
Material Pairing Guide for Displays
Choosing the right combination of materials ensures your table looks professionally styled. Use this guide to balance weight and finish.
| Base Material | Accent Texture | Best Application |
|---|---|---|
| Heavy Velvet | Polished Brass | Use for winter graduations or traditional universities to evoke heritage. |
| Crisp Linen | Matte Paper | Ideal for spring events, creating a clean and modern aesthetic. |
| Raw Wood | Satin Ribbon | Perfect for trade schools or agricultural programs, blending rustic with refined. |
| Glass/Acrylic | Wool Felt | A contemporary look that works well for tech schools or arts programs. |
Lighting plays a crucial role in how these colors are perceived. Warm ambient lighting will soften harsh team colors, making them church-appropriate.
Ensure the school colors do not clash with the church’s existing carpet or wall color. If they do, use white linens as a buffer zone.
Senior Stylist Secret
- To ensure professional consistency, bring a physical item from the college store (like a hat or brochure) when shopping for decor to match the specific fabric dye lots perfectly.
- If the school’s colors are neon or harsh, use books wrapped in matte paper of those shades as risers; this adds height and color without the reflective glare of plastic decorations.
- Create a ‘visual island’ using a heavy, neutral rug or runner under the table if the venue’s carpet pattern clashes violently with the university’s branding colors.
Engaging the Congregation: Advice Cards and Interactive Guest Books
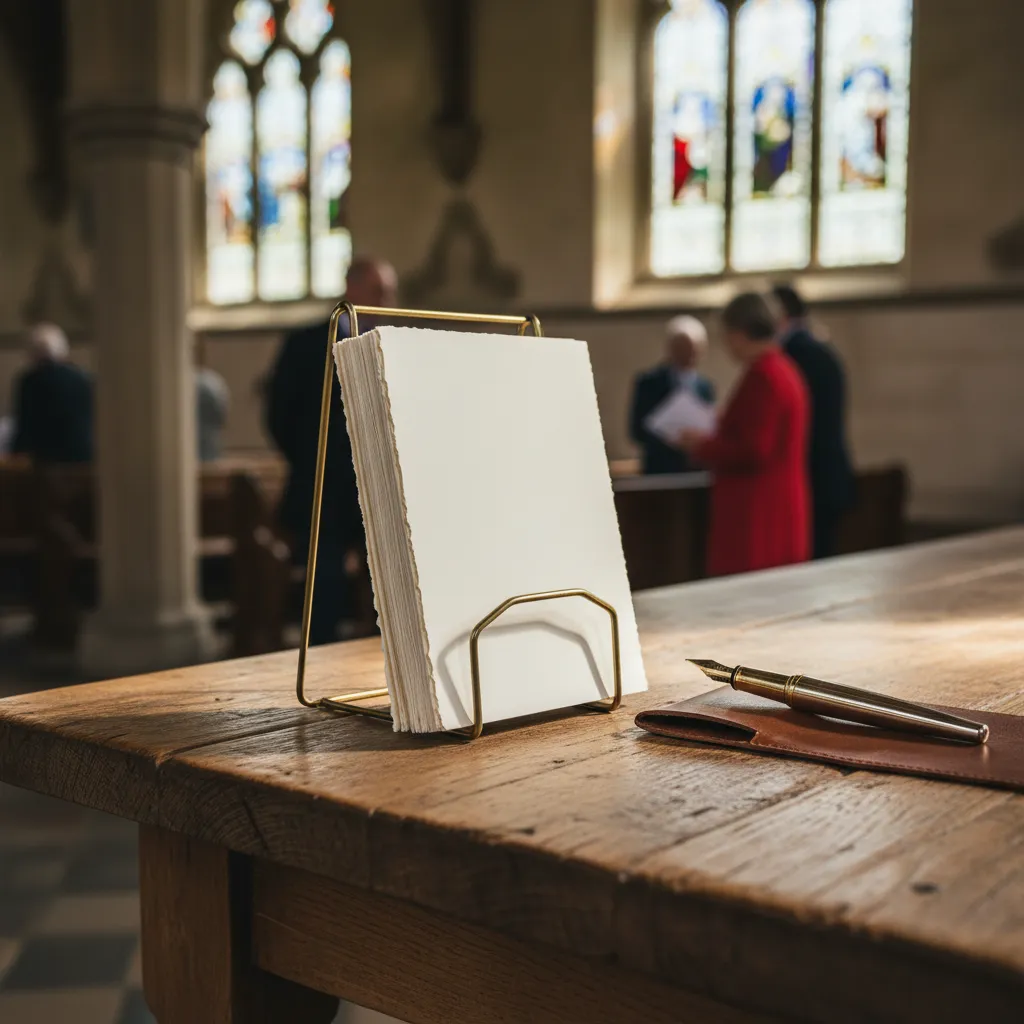
Interactive elements transform a static display into a living archive. A Senior Table Display for Church should invite participation. This encourages connection between generations.
The goal is to capture wisdom that might otherwise go unshared. By placing advice cards centrally, you create a focal point. This draws guests in with a promise of shared history.
Wisdom shared is a legacy preserved, turning simple paper into a bridge between generations.
Designing Accessible Advice Cards
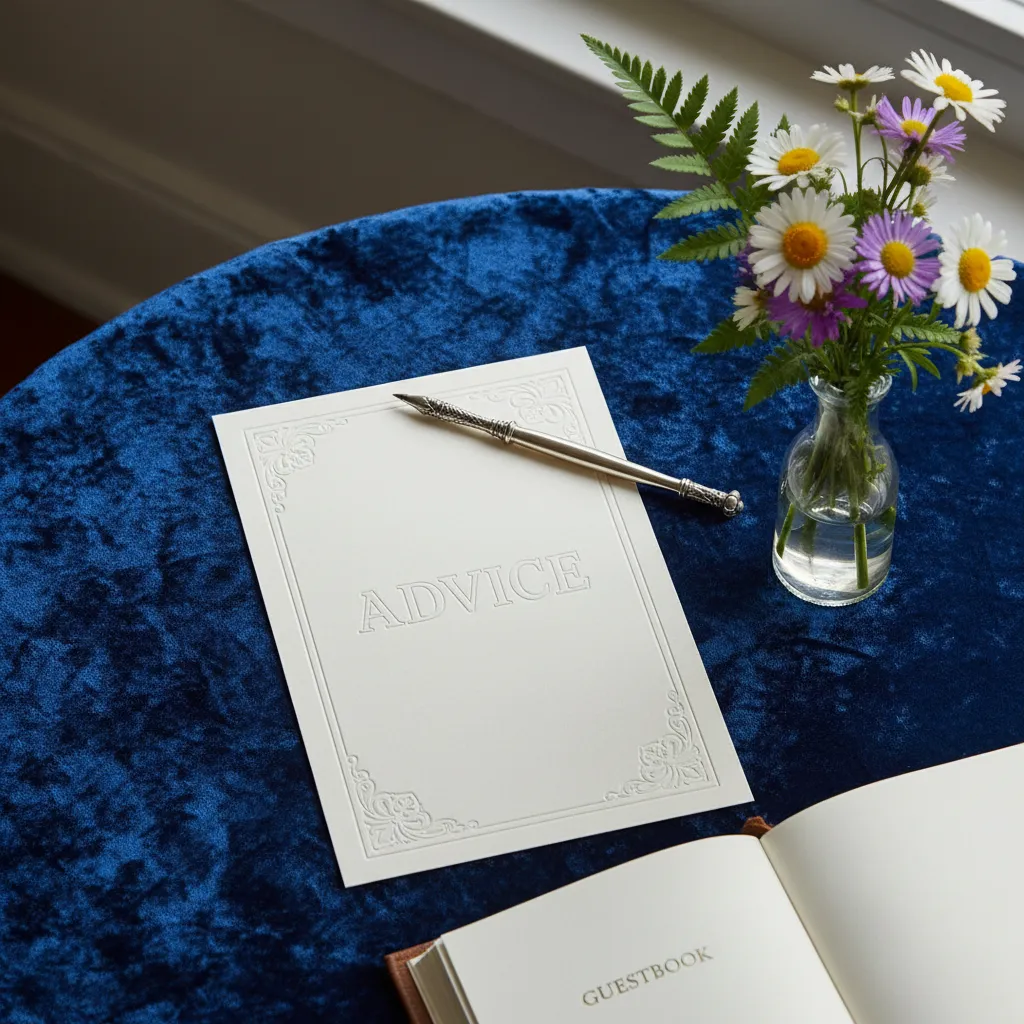
Legibility is paramount when designing for older eyes. Use a high-contrast serif font in a large size, such as 14-point or higher. This ensures the text is readable under ambient church lighting.
Select a heavyweight cardstock with a matte finish. Glossy papers can cause glare under overhead lights, making reading difficult. A matte texture also prevents ink from smudging.
Consider the physical placement of these cards. Create a quiet zone similar to cozy home library ideas found in residential design. This encourages thoughtful reflection while writing.
For a personal touch, involve the youth group in the creation process. This mirrors the charm of homemade gifts kids can help make. Hand-stamped borders add warmth and character.
Selecting the Right Writing Tools
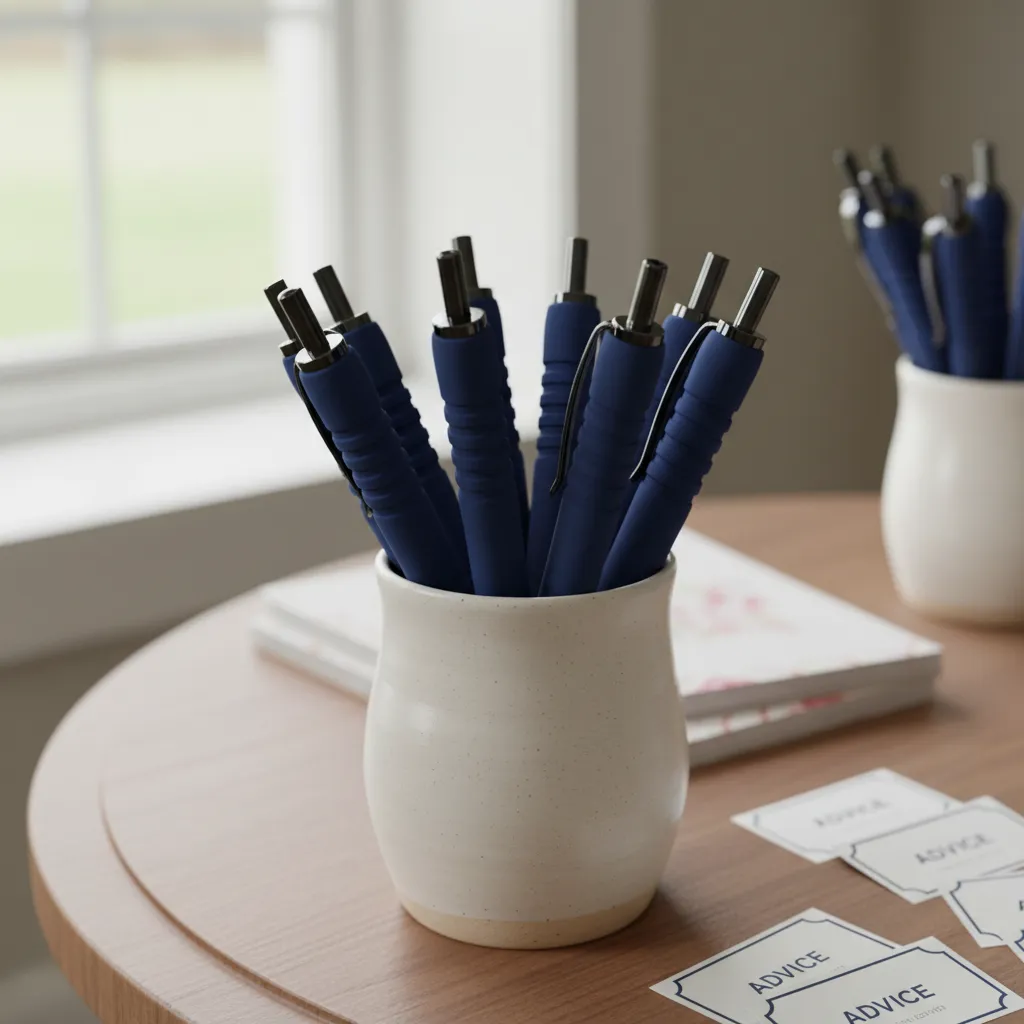
The writing instrument is a crucial functional detail. Arthritis or reduced grip strength can make standard ballpoint pens painful. Choose pens with a wider barrel and smooth ink flow.
Test the ink on your chosen cardstock before the event. You want an ink that dries instantly to prevent transfer. Smudged wisdom loses its impact and frustrates the writer.
Provide a dedicated writing surface with proper height. A small lap desk or a designated section of the table works well. Ensure the lighting is directed onto the paper, not the writer’s eyes.
| Tool Type | Grip Ergonomics | Ink Flow | Best Application |
|---|---|---|---|
| Gel Rollerball | Medium/Rubberized | High/Smooth | Best for low-pressure writing. |
| Felt Tip Pen | Standard/Plastic | Bold/High Contrast | Ideal for maximum visibility. |
| Wide-Body Ballpoint | Wide/Cushioned | Medium/Consistent | Best for guests with arthritis. |
| Stylus Pen | Variable | Digital Only | For tablet-based guest books. |
Collecting and Displaying the Responses
The collection method should be part of the decor. Use a vintage suitcase or a woven basket lined with linen. This adds texture and keeps the completed cards organized and respectful.
Avoid closed boxes that look like ballot bins. Open baskets invite others to read the shared wisdom. This openness sparks conversation and encourages more people to participate.
Gathering matters because it is through each other that we figure out what we believe and who we are.
Priya Parker, The Art of Gathering
Consider binding these cards into a book later. This turns the event into a lasting resource for the church. It honors the seniors by preserving their handwriting and thoughts permanently.
If space allows, pin select cards to a vertical board. Use a fabric-covered board with brass pins for an elegant look. This turns the advice into an evolving piece of art during the event.
Legacy Builder Hacks
- Use ‘sentence starter’ prompts like ‘A verse that guided me…’ or ‘My hope for the next generation is…’ to help guests overcome writer’s block and provide focused wisdom.
- Place a decorative basket of ‘loaner’ reading glasses or a handheld magnifying lens near the cards to ensure every guest can participate comfortably regardless of their vision.
- Invite a few youth group members to act as ‘scribes’ who can transcribe thoughts for seniors who may have difficulty writing due to arthritis or tremors, fostering intergenerational connection.
Downloadable Senior Sunday Toolkit: Printable Signs and Cards
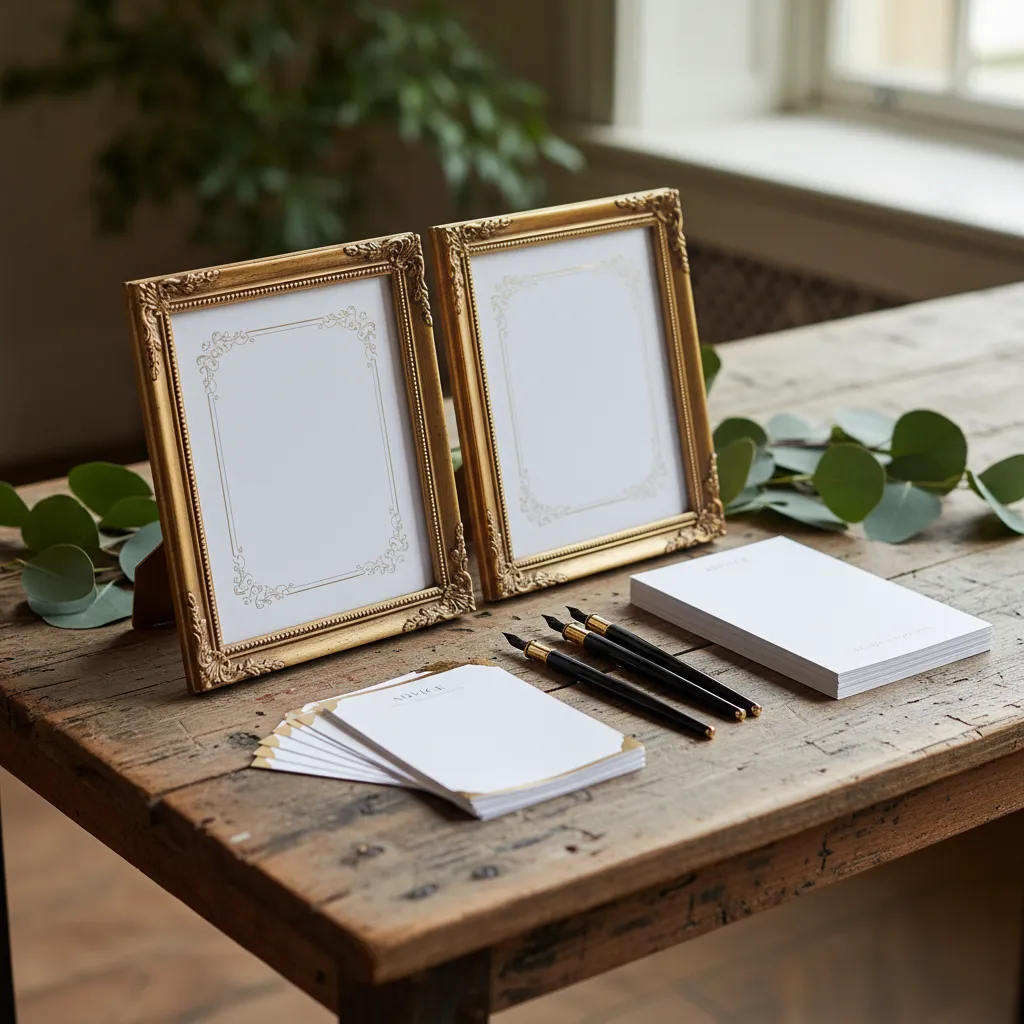
A cohesive visual identity transforms a scattered display into a curated gallery. Custom printables act as the architectural blueprint for your table, guiding the eye and establishing a theme.
Utilizing a toolkit of coordinated signs ensures that every element, from the biography to the advice jar, speaks the same design language. This elevates the perceived value of the presentation.
Much like the resources found in 40 Free Halloween Party Decor Printables to Download Today, these templates save time while offering a professional finish. You simply download, customize, and print.
Paper goods provide the tactile foundation of your event’s story, turning simple information into a design element.
Paper Perfection Hacks
- Print your toolkit items on heavyweight cardstock (65lb or higher) to prevent curling and ensure signs stand upright throughout the event.
- Place printed biography cards and advice signs in inexpensive frames to instantly elevate the look from paper to professional decor.
- Use a matte finish paper to avoid glare from venue lighting, making the text easily readable in photos and for guests.
Essential Components of the Toolkit
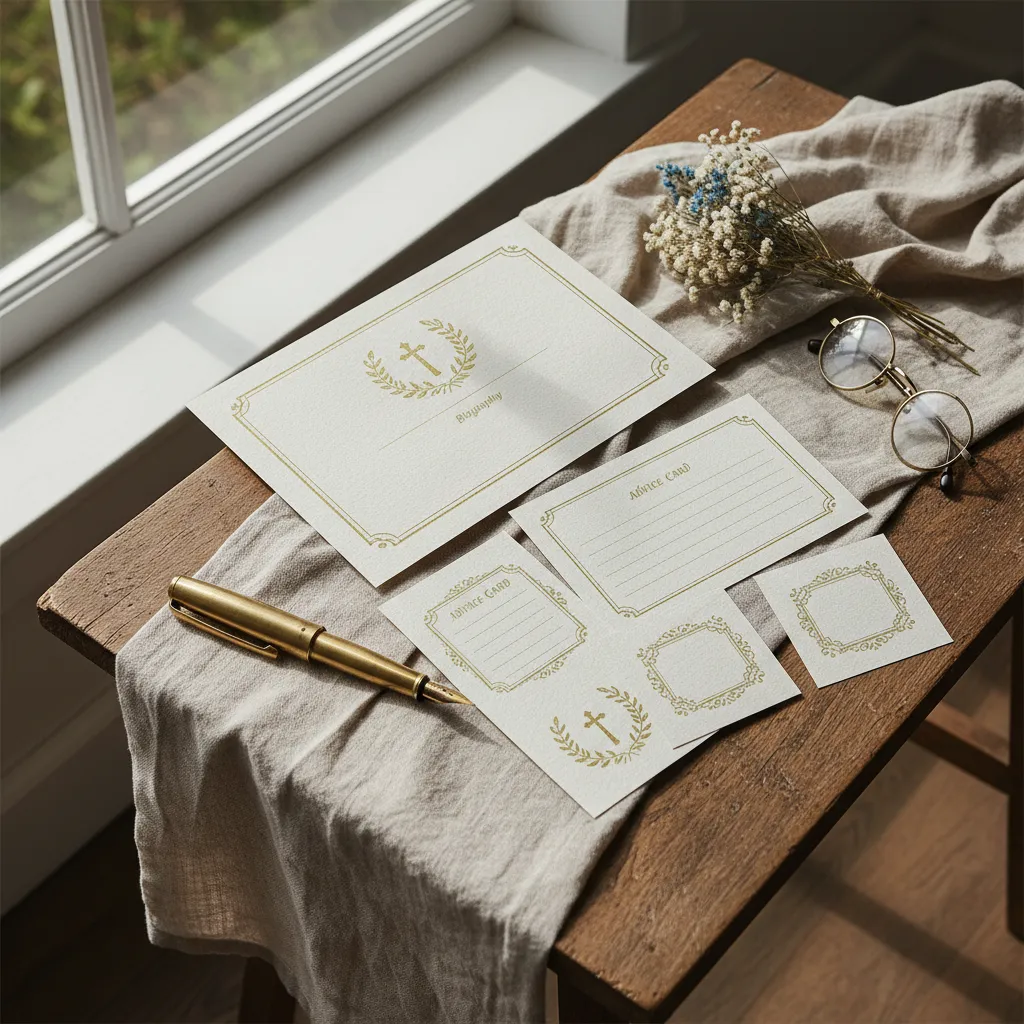
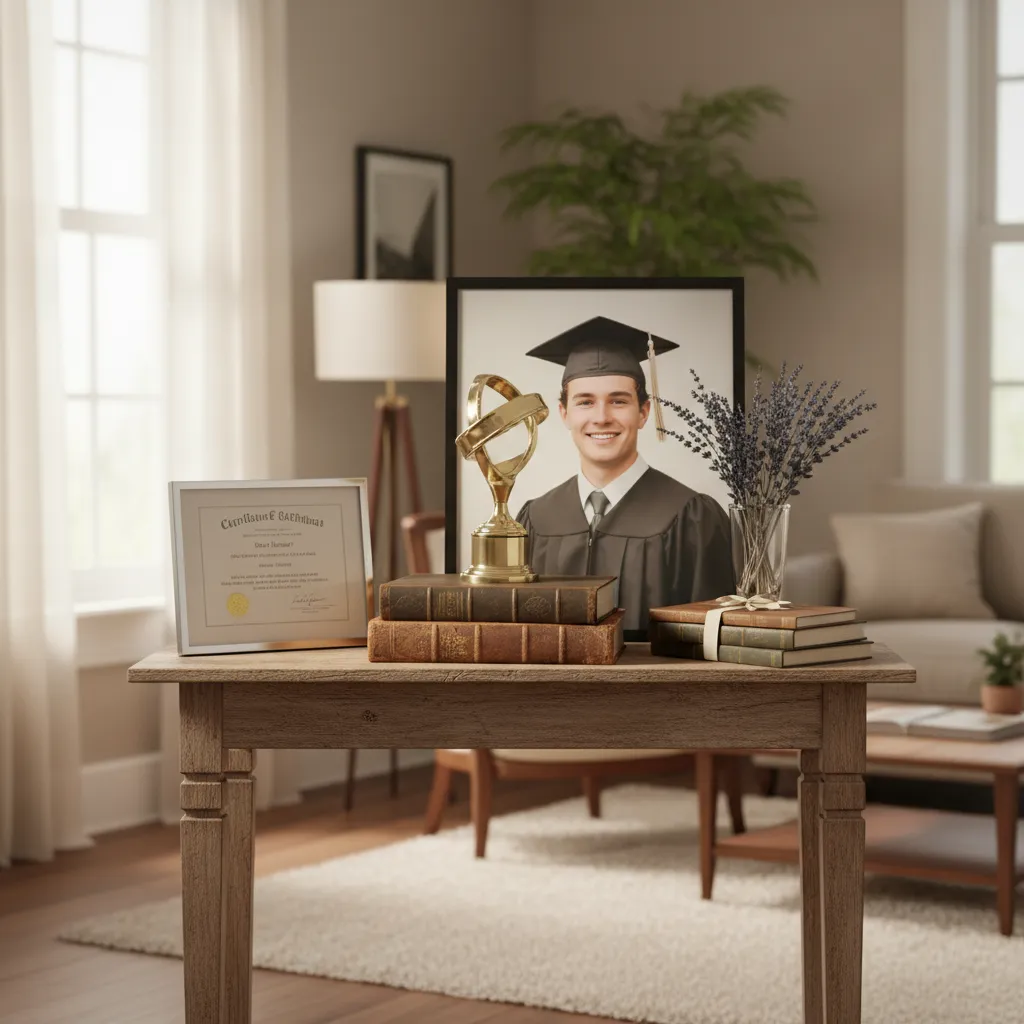
The core of your display relies on three primary documents. First is the “Senior Bio,” a 5×7 card detailing future plans, favorite scriptures, and high school achievements.
Second is the “Advice Card.” This interactive element encourages guests to leave wisdom for the graduate. Place these near pens and a collection vessel, similar to zoning used in Simple Home Coffee Bar Ideas Anyone Can Create Today.
Finally, utilize “Label Tents” for specific items. Whether marking a photo album or a basket of favors, small folded cards prevent confusion and add a layer of sophistication to the layout.
Personalization is what makes an event memorable. It shows you cared enough to make it your own.
Mindy Weiss, Mindy Weiss Party Consultants
Designer Hack
- Incorporate a QR code on the Senior Bio that links to a digital photo gallery or graduation video to provide guests with an interactive digital experience.
- To prevent Label Tents from blowing away at outdoor events, discreetly tape a small coin or washer inside the fold to add hidden weight.
- Use a cohesive color palette across all three documents to create a professional, high-end look that ties the entire display together effortlessly.
Paper Selection and Finish
The physical quality of your signs is just as critical as the graphic design. Standard printer paper often looks limp and allows light to bleed through, which ruins the aesthetic.
Opt for heavy cardstock, ideally between 80lb and 110lb cover weight. This thickness ensures the signs stand upright in frames or easels without curling at the corners over time.
Consider the finish based on your lighting. Matte paper absorbs light and is easy to read from any angle, whereas glossy finishes can create harsh glares under overhead church lights.
Recommended Paper Specifications
| Paper Type | Ideal Weight | Best Application | Visual Texture |
|---|---|---|---|
| Classic Cardstock | 100lb Cover | Bio Cards & Signs | Smooth, Matte |
| Linen Paper | 80lb Cover | Advice Cards | Woven, Tactile |
| Vellum Overlay | 40lb Bond | Decorative Accents | Translucent, Soft |
| Kraft Paper | 70lb Text | Rustic Labels | Raw, Natural |
Printing techniques also matter. For a modern look, stick to crisp black ink on white or cream stock. If your church has a specific color palette, incorporate subtle borders to match.
When cutting your printables, use a metal ruler and a craft knife rather than scissors. This guarantees straight, architectural lines that mimic professional print shop quality.
The Stationery Standard
- Before committing to a bulk pack, test a single sheet of 110lb cardstock in your printer to ensure the feed mechanism can handle the thickness without jamming.
- Score your cardstock using a bone folder and a ruler before folding to prevent the paper fibers from cracking and creating jagged edges.
- If your signs will be handled frequently, apply a quick spray of matte fixative to protect the ink from fingerprints and moisture.
Optimizing Tight Spaces: Vertical Displays and Table Etiquette
When organizing a display in a church narthex or fellowship hall, floor space is often at a premium. You must balance visual impact with the practical need for open walkways.
A cramped table can cause congestion, making it difficult for seniors to view items comfortably. The solution lies in utilizing vertical spatial dynamics rather than expanding horizontally.
The best design is one that supports the function of the space. If you can’t walk through it, it doesn’t matter how beautiful it is.
Nate Berkus, Nate Berkus Interiors
Elevating the Visual Plane
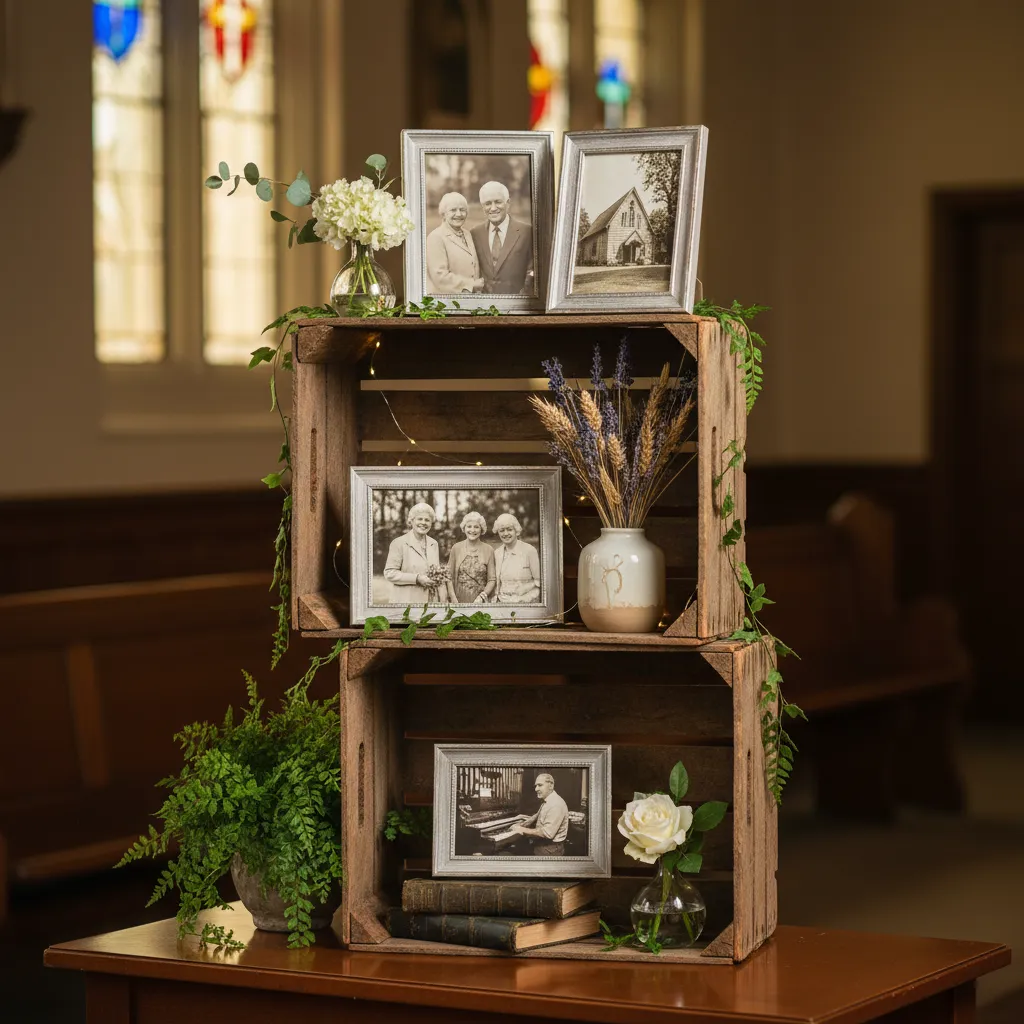
Building upward creates a focal point that draws the eye without encroaching on the room’s traffic flow. This technique is essential for maintaining a safe and accessible environment.
Use sturdy risers made of reclaimed wood or polished acrylic to create distinct levels. This allows you to showcase photos or memorabilia at varying heights, adding depth to the arrangement.
By lifting items off the table surface, you also improve visibility. Seniors can view cherished items at eye level without needing to hunch over, which improves the overall ergonomics.
For those familiar with maximizing restricted areas, similar principles apply here as they do when you explore 15 closet organization ideas for small closets and tight spaces.
Functional Table Etiquette and Safety
Table etiquette in a church setting goes beyond manners; it encompasses safety and logical placement. The front edge of the table should remain clear to serve as a resting place for handbags.
Avoid placing heavy or fragile items at the back of a deep table. Reaching across a display can be hazardous for seniors with limited balance or mobility issues.
Ensure that tablecloths do not pool on the floor where they could become a tripping hazard. A tailored drop or a pinned skirt offers a cleaner look and superior safety.
Creating an inviting atmosphere is key. Much like 30 traditional entryway decorating ideas with stairs that feel inviting, the goal is warmth and welcome.
Design is not just about how it looks, but how it welcomes every soul into the room.
Vertical Display Checklist
To ensure your vertical display is both beautiful and safe, consider these essential structural elements. This list prioritizes stability and visibility for senior attendees.
- Weighted Bases: Ensure all tall vases or stands have heavy bottoms to prevent tipping if bumped.
- Matte Finishes: Use matte photo frames to reduce glare from overhead church lighting.
- Battery Candles: Replace open flames with high-quality LED candles to eliminate fire risks.
- Clear Zoning: Group related items on specific tiers to tell a cohesive visual story.
- Contrast Textures: Mix smooth glass with rough burlap or velvet to help failing eyes distinguish objects.
Lighting plays a crucial role in these tight setups. Aim for a warm ambient glow using battery-operated uplights placed behind risers to silhouette the objects gently.
This lighting technique adds drama without the harshness of direct spotlights. It ensures that every detail of the senior table display is honored and easily seen by the congregation.
The Vertical Advantage
- Use museum putty or clear adhesive dots to secure items on risers, ensuring they stay put even if the table is bumped in a crowded fellowship hall.
- Designate the first 4-6 inches of table depth as a ‘clear zone’ to provide seniors a place to rest their hands or stabilize themselves while viewing the display.
- Utilize ‘stadium seating’ arrangements for photo frames, placing larger items at the back on tall risers so everything is visible without needing deep, bulky tables.
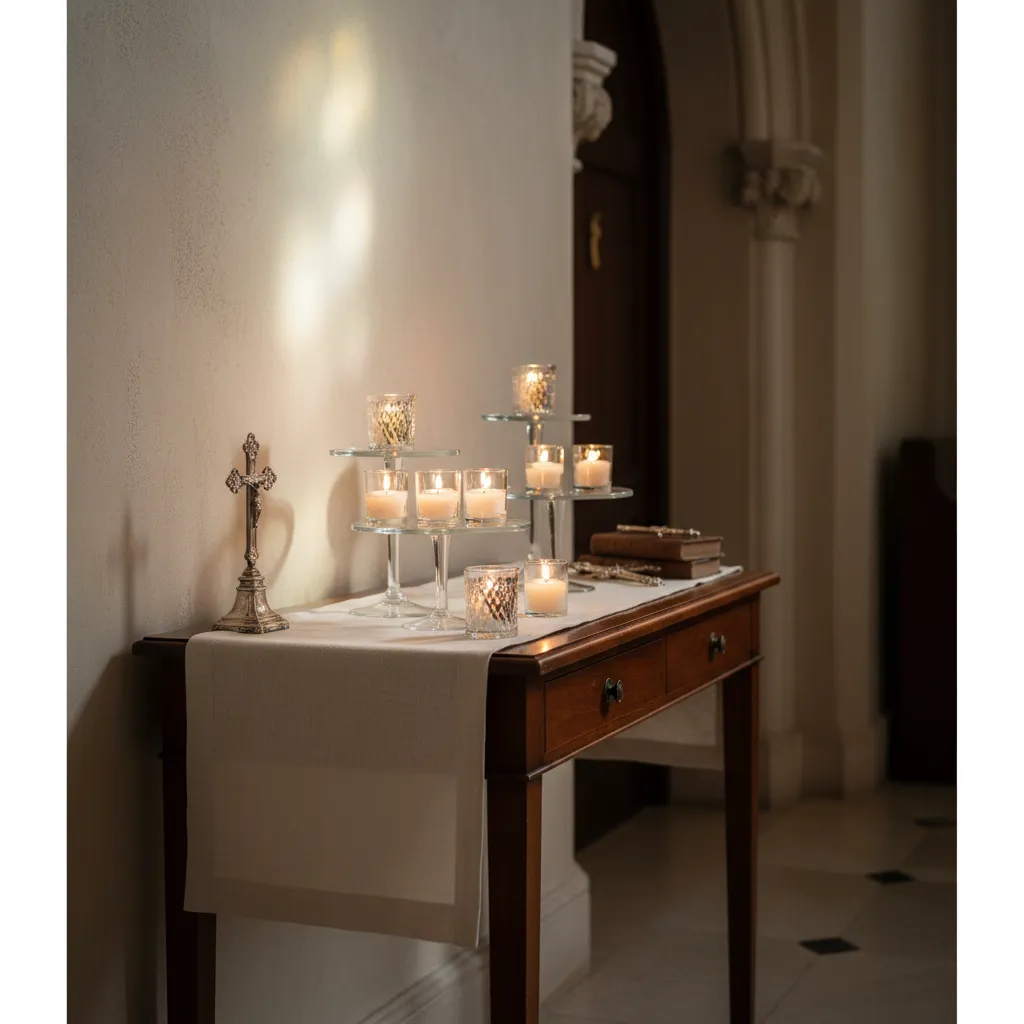
Illuminating the Journey: Battery-Operated Lighting Ideas
Lighting serves as the heartbeat of any memorial or celebratory display. It transforms a static arrangement into a living tribute.
For a senior table in a church setting, illumination requires a delicate balance between reverence and visibility. We must avoid harsh glares.
Battery-operated solutions are currently the gold standard for these setups. They eliminate the need for unsightly extension cords.
Removing cords also significantly improves safety. This prevents tripping hazards in high-traffic areas often frequented by elderly congregants.
Light is the visual language of memory; it guides the eye to what the heart holds dear.
Radiant Remembrance
- Use warm-toned LED puck lights tucked behind larger picture frames to create a soft, ethereal halo effect without visible hardware.
- Opt for battery-operated flickering candles of varying heights to add dynamic movement and warmth while maintaining a fire-safe environment.
- Conceal battery packs within small decorative baskets or floral arrangements to keep the focus entirely on the tribute rather than the tech.
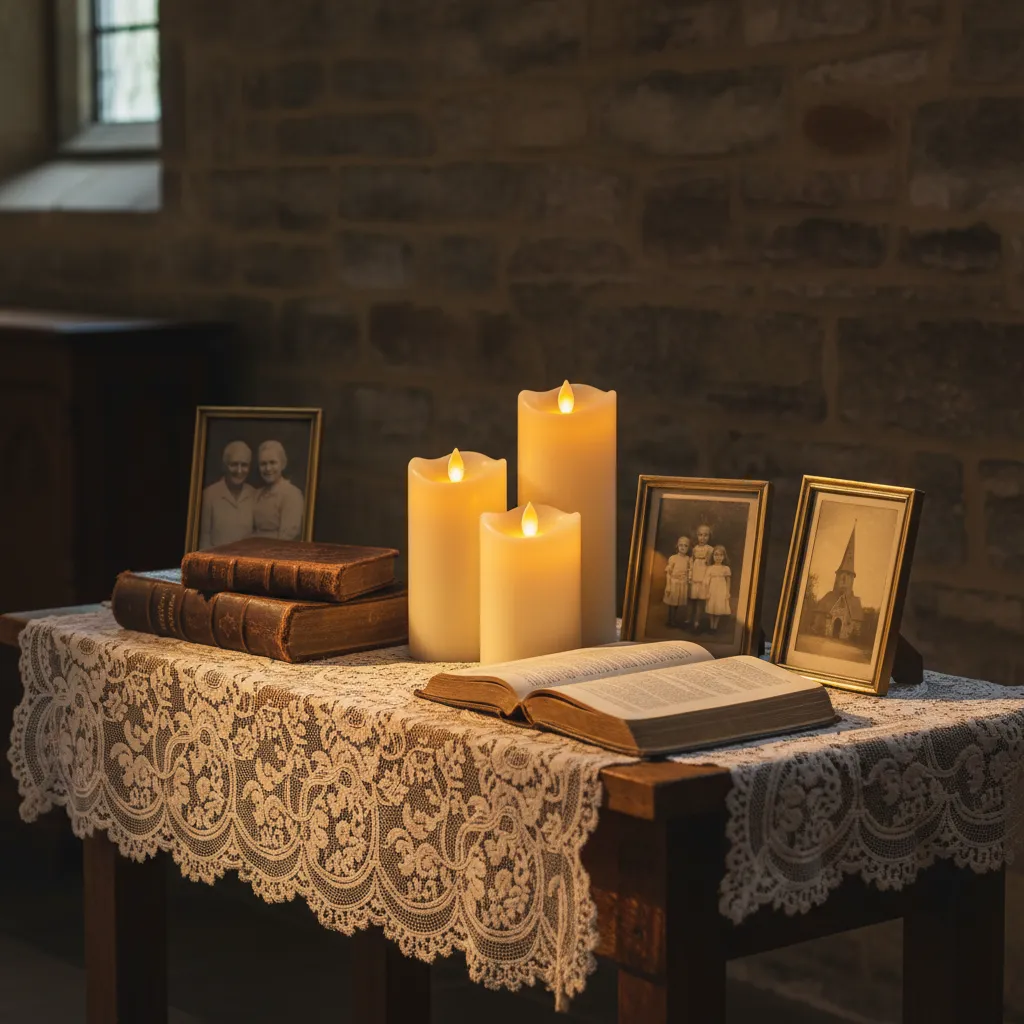
The Warmth of Flameless Pillars
Flameless candles have evolved significantly. Modern iterations feature real wax shells and flickering wicks that mimic genuine flames perfectly.
The texture of the wax adds an organic element to the table. This pairs beautifully with wood grain or linen tablecloths.
Group these pillars in odd numbers for visual interest. A cluster of three varied heights creates a natural focal point.
We recommend choosing candles with a built-in timer. This ensures the display illuminates automatically before service begins.
This creates a consistent ambiance without requiring manual attention. It allows the focus to remain on the honorees.
You can enhance this setup by incorporating elements of vintage living room decor to reflect a lifetime of memories.
Luminous Design Secrets
- Create depth by nesting pillars of three different heights within a wreath of seasonal greenery for a lush, layered look.
- Place your flameless candles on a mirrored surface or glass tray to amplify the warm glow and double the visual impact.
- Invest in remote-controlled versions to easily adjust brightness levels or turn off multiple clusters simultaneously at the end of the night.
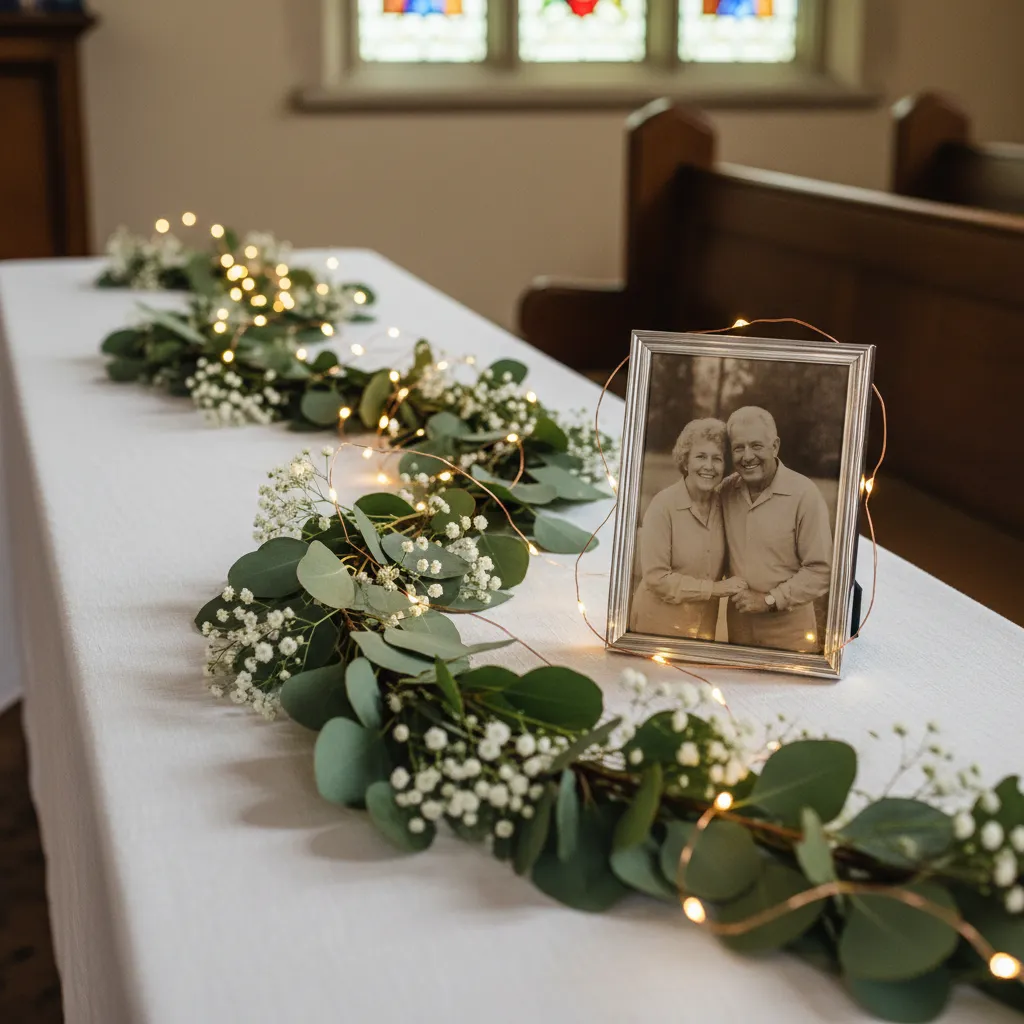
Weaving Magic with Fairy Lights
Micro-LED string lights, often called fairy lights, offer versatility that bulky lamps cannot match. Their thin wires disappear into the decor.
Choose copper or silver wire based on your color palette. Copper warms up gold accents, while silver complements cool tones.
Weave these strands through garlands or pool them inside glass apothecaries. This creates a contained “jar of fireflies” effect.
Ensure the light temperature matches your other sources. Mixing cool blue-white LEDs with warm yellow candles creates visual dissonance.
For a cohesive look, aim for a consistent color temperature. This attention to detail elevates the display from craft project to professional design.
If you are looking to create a specific mood, consider reviewing cozy room decor tips for inspiration on layering textures with light.
Glow Getter Secrets
- Opt for battery-operated strands with built-in timers to ensure your space glows automatically every evening without visible cords.
- Wrap micro-lights around mirror frames to double the reflection and instantly brighten a dimly lit corner.
- Drape fairy lights behind sheer white curtains to create a soft, diffused backdrop that feels like a starlit window.
Strategic Spotlighting
Sometimes a specific item requires direct attention. A battery-operated puck light can serve as a miniature spotlight.
Place these discrete lights behind a translucent vase or under a raised platform. This technique is known as uplighting.
Uplighting adds drama and depth to the table’s architecture. It draws the eye upward and highlights the dimensionality of the objects.
Lighting is everything. It creates atmosphere, drama, and intrigue in a room.
Martyn Lawrence Bullard, Architectural Digest
Choosing the Right Color Temperature
Lighting color is measured in Kelvin (K). Selecting the right temperature ensures photos look natural and the text is readable.
| Kelvin Rating | Visual Description | Best Application for Senior Tables |
|---|---|---|
| 2200K – 2500K | Candlelight / Deep Amber | Best for creating nostalgia. Use this for flameless pillars to mimic fire. |
| 2700K – 3000K | Soft Warm White | The standard for reading. Ideal for illuminating Bibles, letters, or guest books. |
| 3500K – 4100K | Neutral / Cool White | Bright and crisp. Use sparingly for modern decor, but avoid if the setting is rustic. |
| 5000K+ | Daylight / Blueish | Avoid. This light is too harsh and clinical for a warm, memorial atmosphere. |
Always test your lighting in the actual church sanctuary. The ambient light of the room will affect how your battery-operated lights perform.
The Designer Glow-Up
- Use a small piece of frosted tape or parchment paper over a puck light lens to diffuse the beam if the spotlighting feels too harsh on glass surfaces.
- Stick to warm white bulbs in the 2700K-3000K range to ensure that skin tones in family photos look natural and the atmosphere remains cozy.
- Secure your battery-operated lights with a small dab of museum putty to prevent them from shifting or sliding if the table is bumped.
Strategic Setup Timeline: A Guide for Parents and Grads
Creating a cohesive senior display requires foresight and orchestration. Start planning early to curate a narrative that flows visually and functionally.
Early preparation prevents the chaotic “cluttered scrapbook” aesthetic. It allows you to focus on zoning and spatial dynamics rather than last-minute panic.
Great design is a visual biography. Let every photo and texture tell the story of the journey.
Phase 1: Conceptualization and Curation (6 Weeks Out)
Begin by establishing a color palette that compliments the graduate’s school colors without overwhelming the eye. Subtle integration is key here.
Focus on the foundation of the display first. You might consider using DIY tips for table runner patterns to create a custom textile base.
Select a fabric that contrasts with your photos. A matte linen runner absorbs light and prevents glare on glossy prints, enhancing visibility.
Phase 2: The Mock-Up and Mechanics (2 Weeks Out)
Never wait until the church event to arrange your items. Clear a dining table at home and practice the physical layout of the memorabilia.
This “dress rehearsal” helps you identify gaps in the spatial flow. Ensure that tall items, like trophies or floral arrangements, do not block the view.
Experiment with lighting during this phase. Borrowing concepts from cozy room decor tips can help you create an inviting ambient glow.
The most important thing to remember is that you are not styling a photo shoot, you are styling a life.
Erin Gates, Elements of Style
Phase 3: The Execution Checklist (The Day Before)
Strategic packing is the final step in the timeline. Group items by their “zone” on the table rather than by item type to speed up the setup.
Use this final checklist to ensure the structural integrity and aesthetic finish of the display remains intact during transport.
- Steam Textiles: Iron or steam all tablecloths and banners to remove creases that catch harsh overhead lighting.
- Pack an Emergency Kit: Include clear fishing line, museum putty, and safety pins to secure unstable items.
- Check Stability: Ensure heavy frames have proper easel backs or stands to prevent domino-effect accidents.
- Layer Transport: Wrap fragile focal points in soft towels or bubble wrap to protect the finish.
- Lighting Check: Pack fresh batteries for any fairy lights or battery-operated candles used for ambiance.
The Designer’s Toolkit
- Snap a photo of your final mock-up layout on your phone to use as a visual blueprint during the actual setup.
- Use museum putty on the bottom of lightweight frames and decor to prevent them from shifting or falling if the table is bumped.
- Roll your steamed linens around a cardboard tube instead of folding them to prevent new creases during transport to the venue.
A Curated Tribute to the Journey
Crafting a senior display is more than a craft project; it is a curated architectural tribute. Precision and balance ensure your graduate’s milestones shine with professional elegance.
By focusing on texture, lighting, and layout, you transform a simple church table into an inspiring gallery. Let these design principles guide your final tribute to a life well-lived.
Design Dilemmas Solved
Choose a matte or luster finish for your prints. These surfaces absorb light, ensuring your memories remain visible under the bright, overhead lights typical of church sanctuary halls.
Focus on vertical dimension. Use tiered stands or elevate your tri-fold board with small risers. This adds architectural depth without expanding the table’s physical footprint significantly.
A blend of both is ideal. Pair your grid-aligned photos with tactile items like a graduation cap or a Bible. This adds structural variety and creates a rich, multisensory experience.