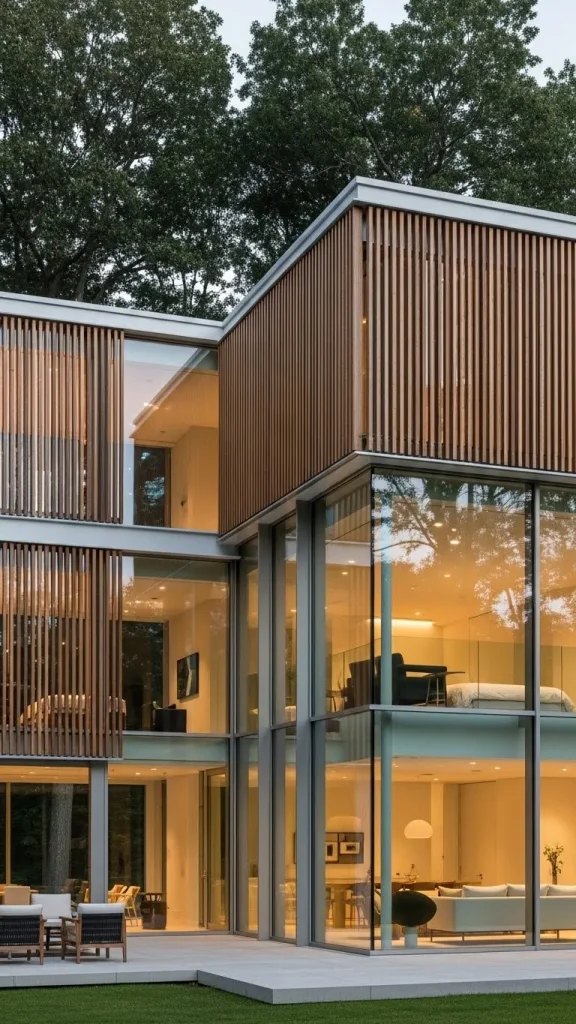
Modern architecture has embraced the use of natural materials to soften the sharp edges of contemporary design. Wooden slat facades have become a signature element for architects looking to balance privacy with natural light.
These structures utilize thin strips of timber arranged in rhythmic patterns to create a dynamic exterior. The interplay of light and shadow changes throughout the day as the sun moves across the sky.
A wooden slat facade provides a breathable skin for the building that helps regulate temperature. It allows for natural ventilation while shielding the interior from direct solar heat gain in summer.
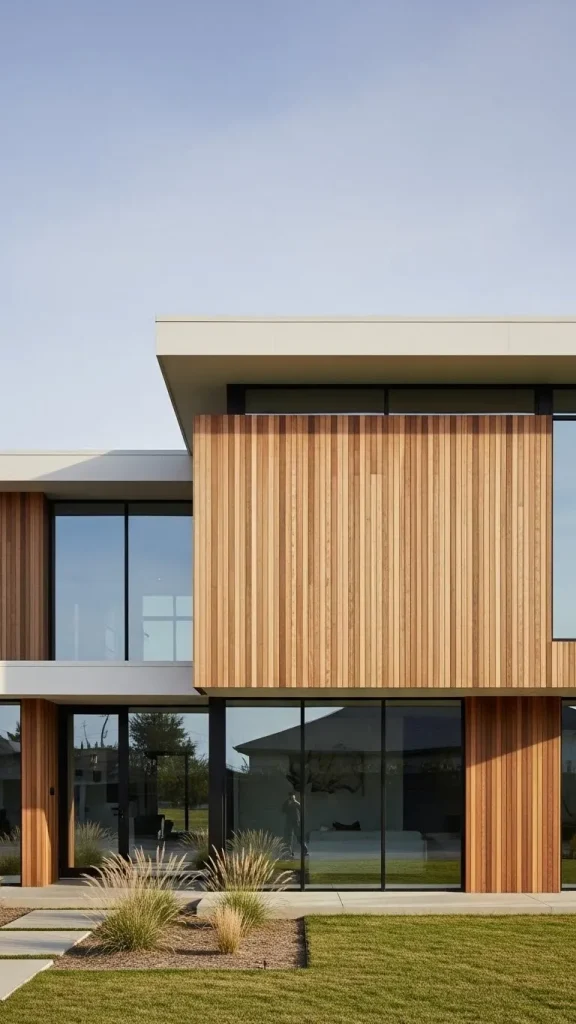
1. The Vertical Cedar Minimalist
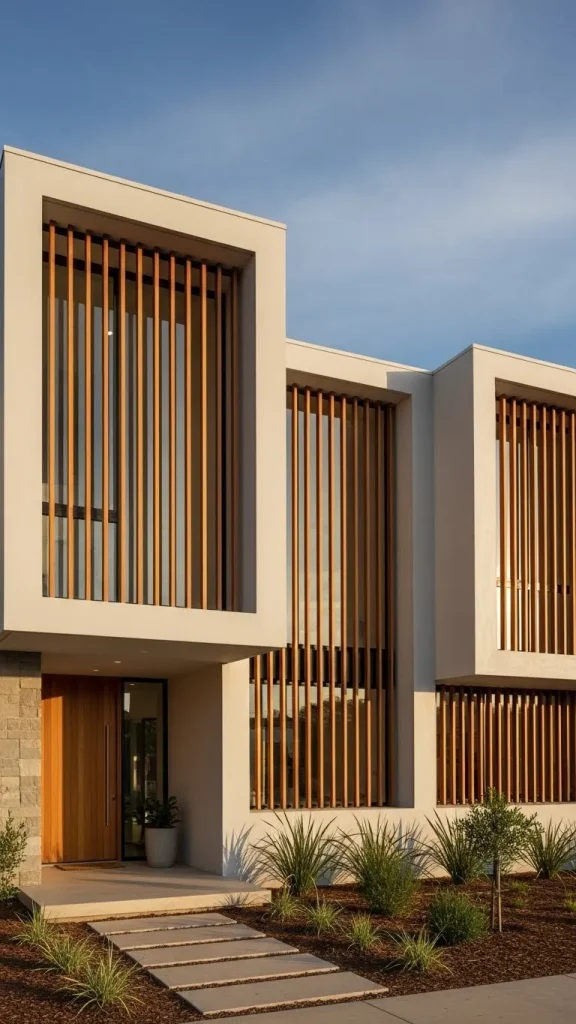
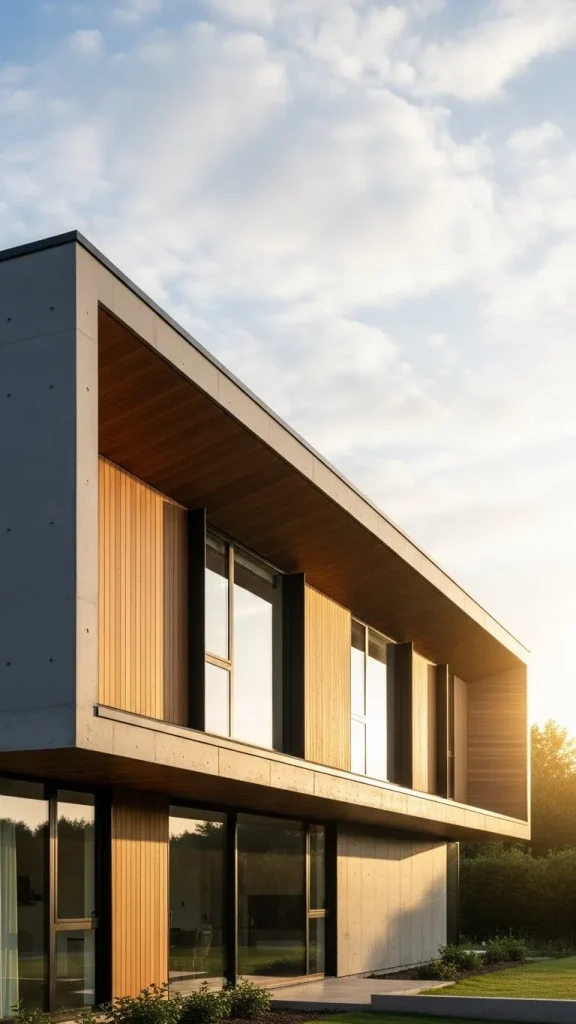
Vertical cedar slats are a classic choice for modern homes because they draw the eye upward and create height. Cedar is naturally resistant to moisture and insects making it ideal for exterior applications.
The vertical orientation allows rain to run off efficiently which prevents water from pooling in the grooves. This design looks best when paired with large floor to ceiling glass windows for contrast.
Architects often use a clear seal to preserve the natural golden hue of the cedar wood. Over time the wood will weather into a sophisticated silver gray if left untreated by the homeowner.
DIY Tips
- Use a plumb line to ensure every slat is perfectly vertical during the installation process.
- Apply a high quality UV resistant sealer to maintain the original color of the cedar.
- Space the slats using a consistent block of wood to keep the gaps uniform across the wall.
- Use stainless steel screws to prevent black streaks from forming on the wood surface.
- Leave a small gap at the bottom of the slats to prevent moisture from wicking up.
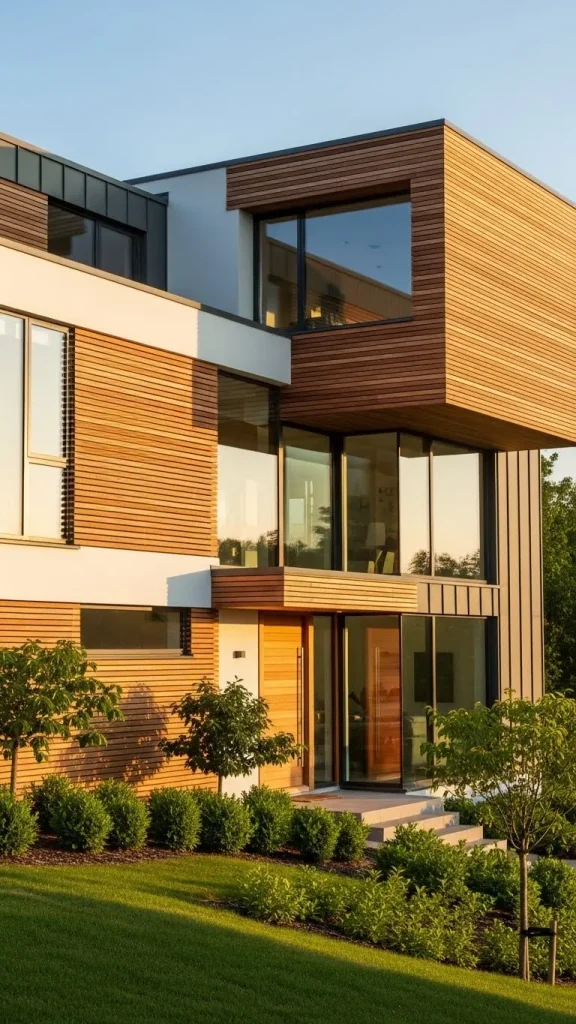
2. Horizontal Teak Accents
Horizontal teak slats provide a grounded and stable aesthetic that makes a house appear wider. Teak is a premium hardwood known for its high oil content and incredible durability in harsh weather.
This pattern is often used on specific sections of the house like the entrance or the garage. The horizontal lines create a sleek look that complements the low profile of mid century modern homes.
Teak develops a rich patina that adds character to the facade as it ages in the sun. It is a dense wood that requires pre drilling to ensure the boards do not split during fastening.
DIY Tips
- Pre drill all holes in the teak slats to prevent splitting when driving in the screws.
- Use a long spirit level to check the horizontal alignment every three rows of slats.
- Apply teak oil periodically to replenish the natural oils and keep the wood looking vibrant.
- Secure the slats to a pressure treated wooden frame to ensure a long lasting foundation.
- Seal the end grains of the teak boards to prevent cracking and moisture penetration.
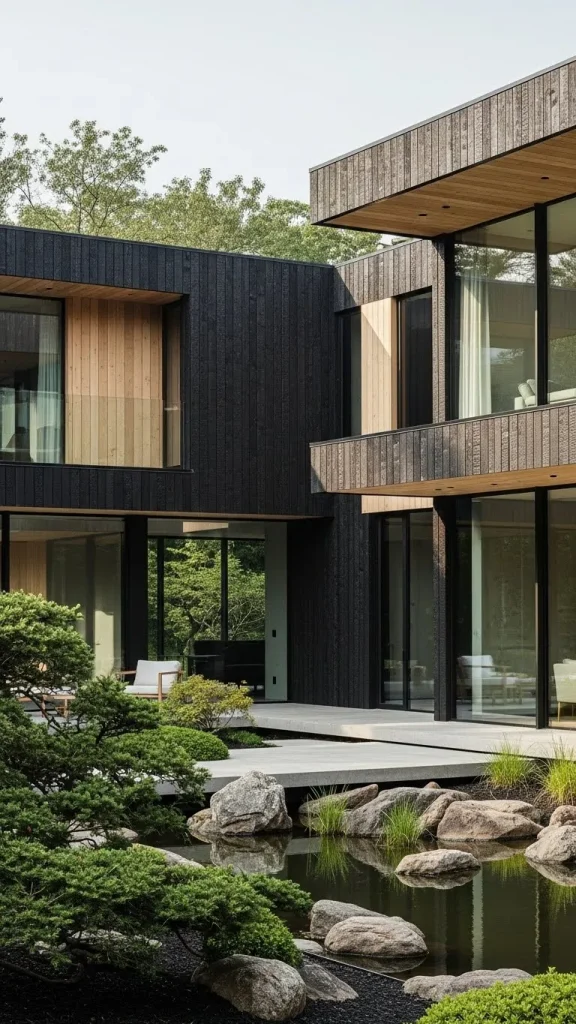
3. The Shou Sugi Ban Charred Aesthetic
Shou Sugi Ban is a traditional Japanese technique of charring wood to make it fire and rot resistant. The resulting black texture is incredibly popular in modern minimalist architecture across the globe.
The charred slats create a bold and dramatic look that contrasts beautifully with green landscapes. This process hardens the wood and creates a carbon layer that protects it from the elements.
This facade style requires very little maintenance once it is properly installed and sealed. The deep black color provides a sophisticated backdrop for architectural lighting at night.
DIY Tips
- Use a propane torch to char the surface of the wood evenly until it looks like alligator skin.
- Brush away the loose soot with a wire brush before applying a natural oil finish.
- Wear protective gear including a mask and goggles when handling charred wood and soot.
- Use blackened screws to ensure the hardware blends in perfectly with the dark wood.
- Apply a coat of linseed oil to seal the charred surface and prevent it from smudging.
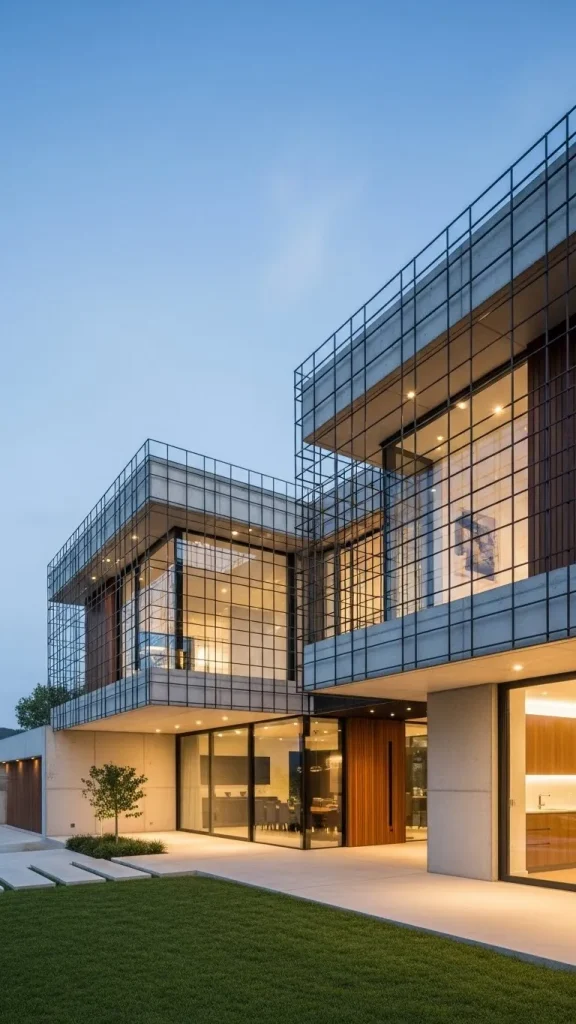
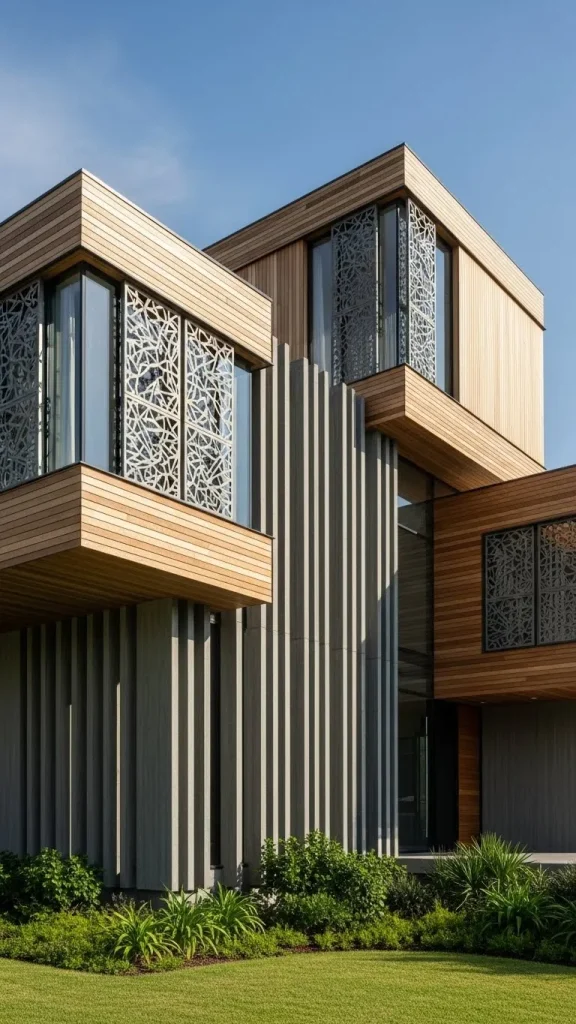
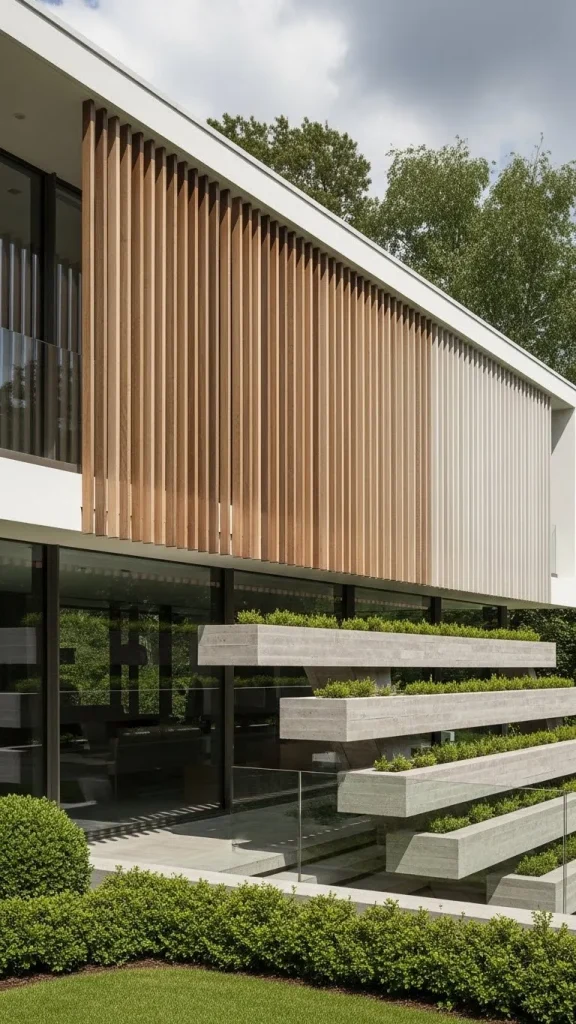
4. Geometric Grid Overlays
Geometric grid patterns using wooden slats add a layer of complexity and artistry to a flat facade. These grids can be square or rectangular and often vary in depth to create 3D effects.
This style is perfect for homeowners who want their house to stand out as a piece of sculpture. The grid acts as a secondary skin that provides excellent privacy for windows behind the wood.
The overlapping slats create a mesh that filters light into a soft glow inside the living areas. It is an effective way to hide structural elements while maintaining a clean and modern appearance.
DIY Tips
- Create a detailed drawing of the grid on paper before you start cutting any wood.
- Use a miter saw to ensure all the joints in the grid are perfectly square and tight.
- Use wood glue in addition to screws to strengthen the intersections of the grid.
- Sand all the edges of the slats before assembly to give the grid a professional finish.
- Paint the wall behind the grid a dark color to make the wooden pattern stand out.
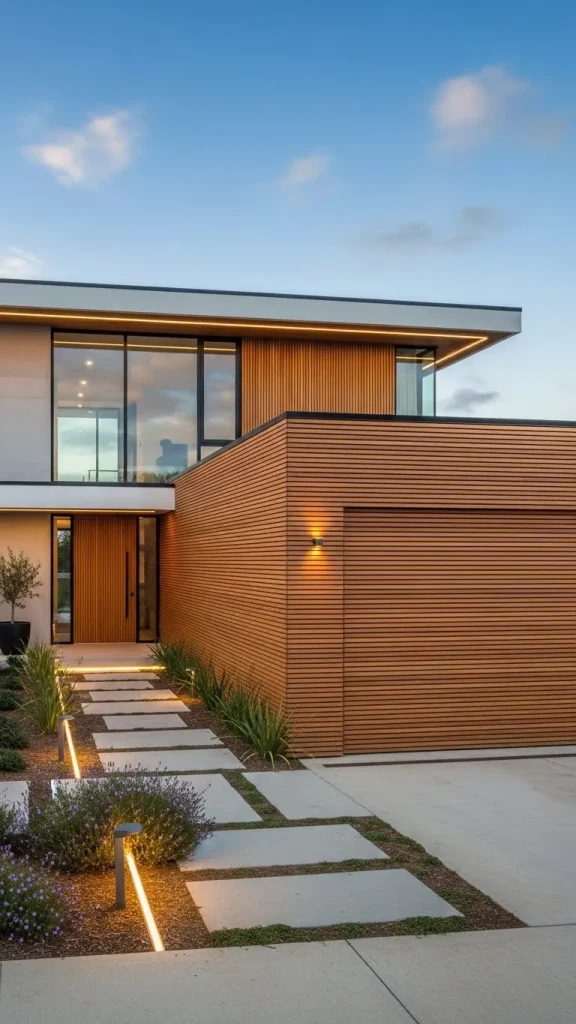
5. Integrated Garage Concealment
Wooden slats can be used to hide a garage door so it blends perfectly with the rest of the house. This creates a seamless look where the garage becomes an invisible part of the main facade.
The slats are mounted onto the garage door panels with careful consideration for the extra weight. When the door is closed the lines of the wood align with the stationary walls surrounding it.
This technique is excellent for modern homes where a prominent garage door might ruin the design. It emphasizes the architectural volume of the house rather than the utility of the driveway.
DIY Tips
- Check the weight capacity of your garage door motor before adding wooden slats to it.
- Use lightweight wood species like paulownia or thin cedar to minimize the load on the door.
- Ensure the slats do not interfere with the sensors or the movement of the door tracks.
- Use flexible construction adhesive to help bond the slats to the metal door surface.
- Balance the garage door springs after installation to compensate for the new weight.
6. The Floating Screen Pavilion
Floating slat screens are detached from the main walls to create a sense of lightness and depth. They are often used on balconies or overhanging sections of the roof to define the space.
The air gap between the screen and the house allows for maximum ventilation and light penetration. This design creates a pavilion like atmosphere that is perfect for indoor outdoor living.
These screens can be fixed or sliding depending on the privacy needs of the homeowner. They add a sophisticated layer to the building that makes it feel more integrated with nature.
DIY Tips
- Use a heavy duty metal frame to support the weight of the floating wooden screen.
- Anchor the frame deep into the structural beams of the house for safety and stability.
- Use hidden fasteners on the back of the slats to keep the front face looking clean.
- Apply a finish to all six sides of each slat before you mount them to the frame.
- Inspect the anchors every year to ensure the screen remains securely attached to the building.
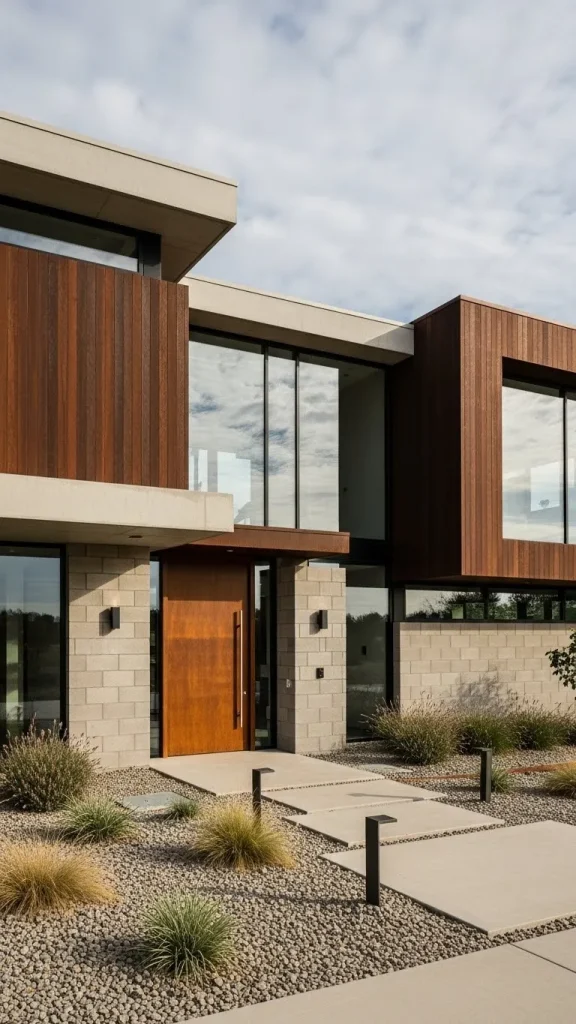
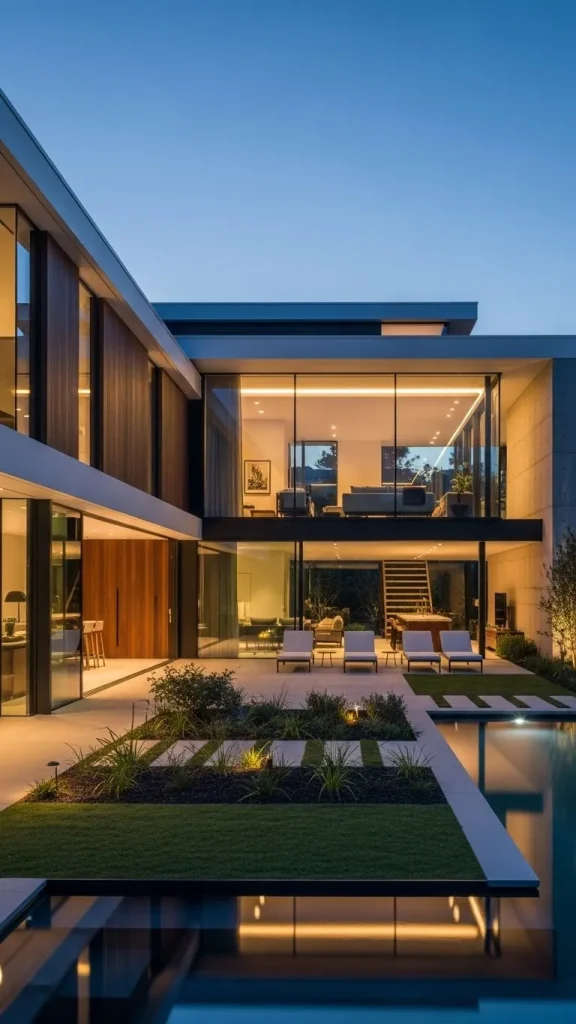
7. Mixed Material Industrial Fusion
Combining wooden slats with cold materials like steel and concrete creates an industrial modern look. The warmth of the timber balances the harshness of the metal and the gray concrete.
This style often uses dark stained slats set within black steel frames for a high contrast effect. It is a popular choice for urban infill projects and contemporary loft style residences.
The wood provides a tactile element that makes the industrial structure feel more like a home. This fusion of materials is durable and can withstand the wear and tear of city living.
DIY Tips
- Use a metal drill bit to create pilot holes in the steel frame for the wood screws.
- Paint the steel frame with a rust inhibitor before you attach the wooden slats.
- Choose a wood stain that complements the color of the metal for a cohesive look.
- Use rubber washers between the wood and metal to prevent rattling and moisture traps.
- Mix vertical and horizontal orientations to define different material zones on the facade.
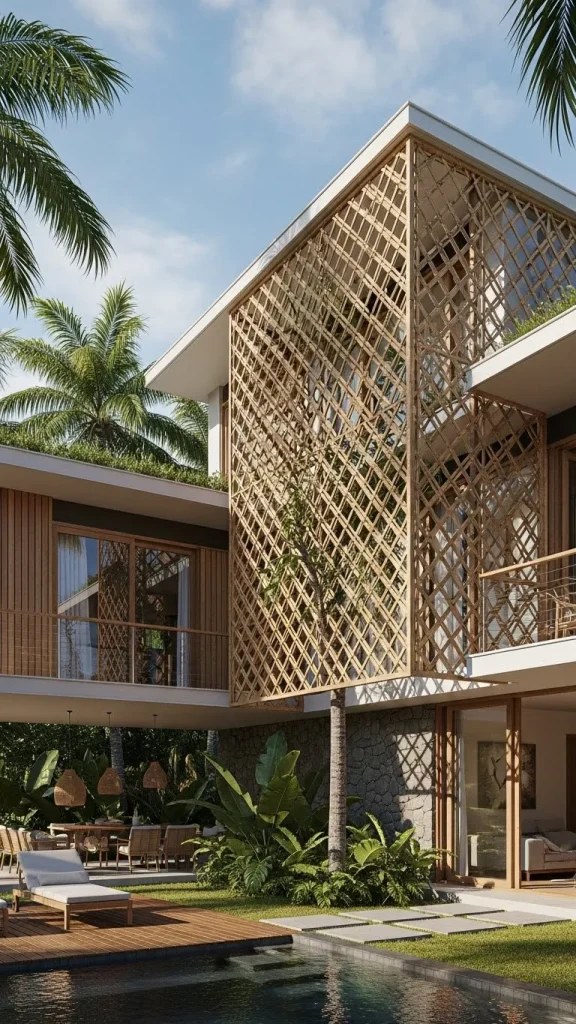
8. The Tropical Bamboo Lattice
Bamboo slats are an eco friendly alternative to traditional hardwoods for a modern tropical look. Bamboo grows extremely fast and offers a unique texture that is different from typical timber.
The slats are often narrower and placed closer together to create a fine lattice effect. This style is perfect for coastal homes where a light and breezy aesthetic is desired by the owner.
Modern bamboo products are treated to be highly resistant to rot and UV damage from the sun. The light tan color of the bamboo keeps the facade looking bright and inviting all year.
DIY Tips
- Purchase pre treated exterior grade bamboo to ensure it can handle the outdoor elements.
- Use a fine tooth saw blade to cut the bamboo to prevent splintering at the edges.
- Seal the ends of the bamboo slats with a clear epoxy to prevent cracking over time.
- Use nylon spacers to keep the bamboo slats from touching the ground or wet surfaces.
- Wash the bamboo lattice with a mild soap solution once a year to remove dust and dirt.
9. Cantilevered Slat Overhangs
Cantilevered sections of a house can be wrapped in wooden slats to emphasize their floating nature. The slats wrap around the bottom and sides of the overhang to create a wooden box effect.
This architectural trick makes the upper floors look like they are hovering over the landscape. The wood adds a layer of warmth to the underside of the building which is often neglected.
The slats also provide shading for the windows located beneath the cantilevered floor. It is a bold design choice that showcases the structural possibilities of modern home construction.
DIY Tips
- Use a scaffolding system to safely install slats on the underside of an overhang.
- Ensure the waterproof membrane behind the slats is properly installed before adding wood.
- Use lightweight slats to avoid putting too much stress on the cantilevered structure.
- Plan the slat layout so that the lines continue perfectly from the wall to the ceiling.
- Install recessed lighting between the slats to highlight the overhang during the night.
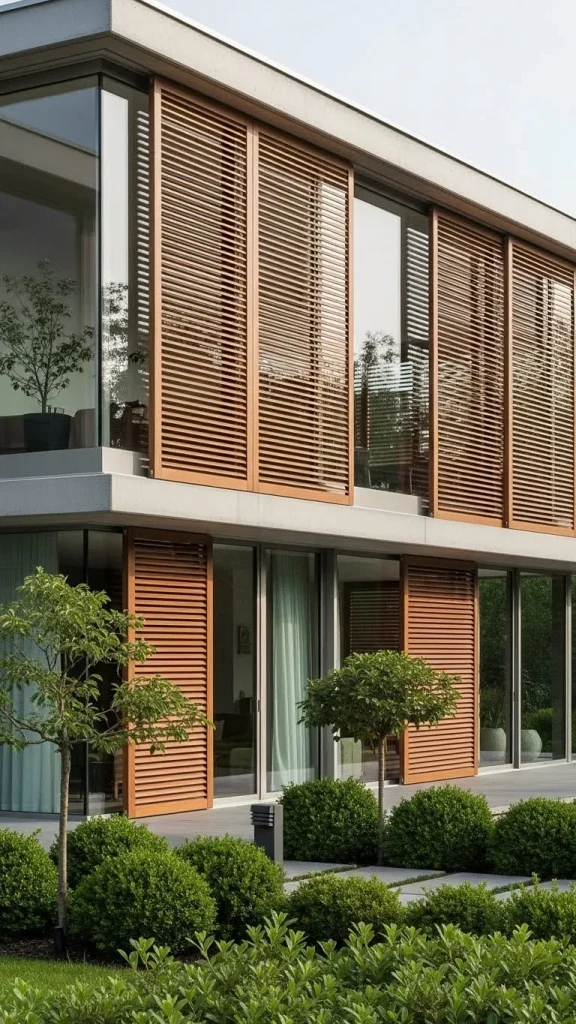
10. Sliding Privacy Shutters
Sliding shutters made of wooden slats allow the homeowner to change the facade on a whim. These panels move along tracks to block out the sun or provide privacy when needed.
The kinetic nature of these shutters means the house looks different every time you see it. It is a functional and interactive element that improves the energy efficiency of the home.
When the shutters are closed they create a solid wooden wall that protects the glass from storms. When they are open they reveal the interior and allow light to flood into the rooms.
DIY Tips
- Install high quality stainless steel tracks to ensure the shutters slide smoothly for years.
- Use rollers with ball bearings to reduce noise when moving the heavy wooden panels.
- Build a pocket into the facade where the shutters can hide when they are not in use.
- Ensure the slats are securely fastened to the shutter frame to prevent sagging over time.
- Clean the tracks regularly to remove debris that could cause the shutters to jam.
11. The Scandinavian Light Ash Look
Scandinavian design often uses light colored woods like ash or pine to create a clean aesthetic. The slats are usually very thin and spaced closely together for a refined and subtle texture.
This style emphasizes simplicity and the natural beauty of the wood grain without heavy stains. It works beautifully in northern climates where maximizing light is a priority for the architect.
The light wood reflects the sunlight and makes the house feel bright even on cloudy days. It is a minimalist approach that relies on high quality craftsmanship and perfect proportions.
DIY Tips
- Use a white tinted oil to keep the ash wood from yellowing over time in the sun.
- Sand the slats to a high grit finish to enhance the smooth feel of the Scandinavian style.
- Keep the hardware hidden or very minimal to maintain the clean lines of the design.
- Use a transparent sealer that does not change the natural color of the light wood.
- Match the interior flooring to the exterior slats for a seamless transition between spaces.
12. Multi-Directional Pattern Play
Using slats in multiple directions can define different architectural volumes of a modern house. One section might feature vertical slats while the adjacent section uses a horizontal layout.
This pattern play breaks up the monotony of a large house and adds visual interest to the facade. It can be used to distinguish between the main living area and the private sleeping quarters.
The transition between the patterns should be handled with clean mitered joints for a professional look. This technique allows for a custom design that feels tailored to the specific house shape.
DIY Tips
- Use a transition board or a metal trim at the junction where two slat directions meet.
- Ensure the slats are of the same thickness to maintain a flat surface across the change.
- Align the gaps between the slats if possible to create a sense of order in the design.
- Use a darker stain for one direction to further emphasize the change in the pattern.
- Sketch the house from several angles to decide where the pattern changes will look best.
13. Corner Wrapped Continuous Ribs
Wrapping wooden slats around the corners of a building creates a continuous ribbed effect. This softens the edges of the house and makes the structure feel more organic and less boxy.
This style requires precise miter cuts at the corners to ensure the lines continue without a break. It is a mark of high quality carpentry that adds significant value to the home exterior.
The continuous ribs make the house appear as a single sculpted object rather than a set of walls. It is a sophisticated way to handle corner transitions in modern residential architecture.
DIY Tips
- Use a miter box or a precision miter saw to get the corner angles exactly forty five degrees.
- Glue the mitered corners with a weather resistant wood glue to prevent them from opening.
- Sand the corner joints until they are perfectly smooth and the seam is almost invisible.
- Use a corner bracket on the inside of the slats to keep the joint tight during installation.
- Apply a bit of extra sealer to the corner joints as they are more prone to moisture.
14. Recessed Slat Window Portals
Wooden slats can be used to create deep recessed portals around the windows of a modern home. This adds depth to the facade and provides natural shading for the glass throughout the day.
The wood inside the portal reflects a warm light into the interior rooms of the house. It creates a framed view of the outside that feels more intimate and protected for the occupants.
These portals can be made of the same wood as the main facade or a contrasting species. It is a functional design element that improves the architectural quality of the window openings.
DIY Tips
- Build the wooden portals as separate boxes before installing them into the wall openings.
- Ensure the window flashing is installed behind the portal to prevent water leaks.
- Slant the bottom of the portal slightly outward to allow rainwater to drain away easily.
- Use a durable hardwood for the portal since it will be more exposed to the elements.
- Finish the inside of the portal with a lighter stain to maximize the light reflection.
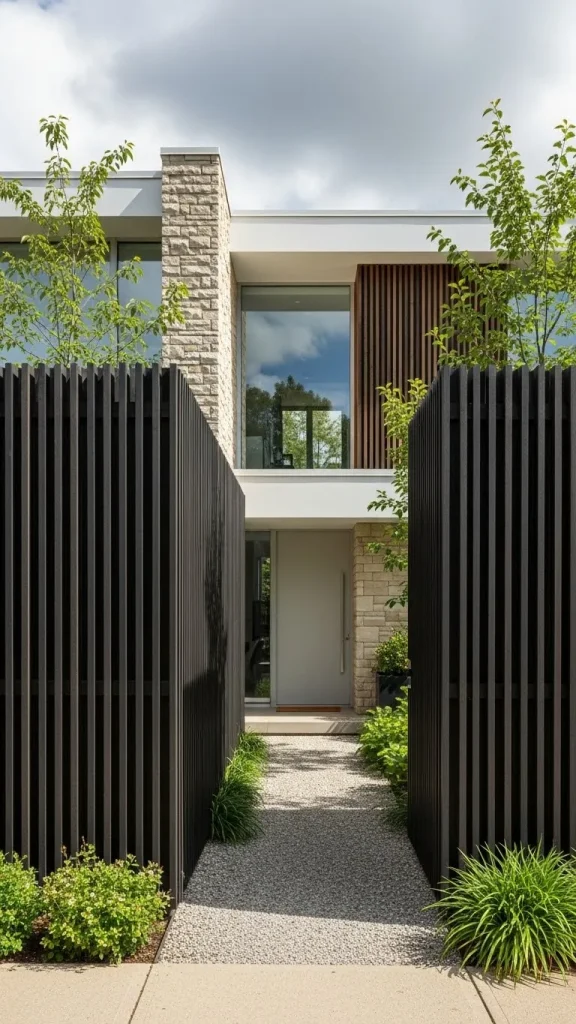
15. The Dense Privacy Palisade
A dense palisade of wooden slats is used to create a solid wall that still allows air to pass through. The slats are placed very close together with only a tiny gap between each board.
This style is ideal for houses located on busy streets where privacy is a major concern. It provides a beautiful wooden barricade that feels warm and welcoming rather than cold and closed.
The density of the wood also helps to dampen street noise for a quieter interior environment. It is a practical solution for urban living that does not sacrifice the modern aesthetic.
DIY Tips
- Use a thin metal shim as a spacer to keep the gaps between the slats very narrow.
- Check that the wall has enough structural support to handle the weight of the dense wood.
- Use a darker wood or stain to enhance the feeling of solidity in the privacy wall.
- Install a gate within the palisade that uses a hidden latch for a seamless look.
- Ensure the top of the slats are cut at an angle to allow water to shed off the end grain.
16. Gradient Spacing Transitions
Gradient spacing involves changing the distance between the slats as they move across the facade. They might start close together for privacy and gradually get wider to allow for more light.
This creates a visual transition that looks modern and purposeful on a large flat wall. It can be used to highlight specific areas of the house like the entrance or a balcony.
The gradient effect adds a sense of movement to the building that is very eye catching. It is a clever way to manipulate light and shadow using a simple and repetitive material.
DIY Tips
- Use a set of different sized spacer blocks to keep the gradient consistent across the wall.
- Mark the position of every slat on the support frame before you start the installation.
- Step back frequently to check the visual effect of the gradient from a distance.
- Keep the vertical alignment perfect so the only thing that changes is the horizontal gap.
- Use a laser level to ensure the slats remain perfectly straight as the spacing increases.
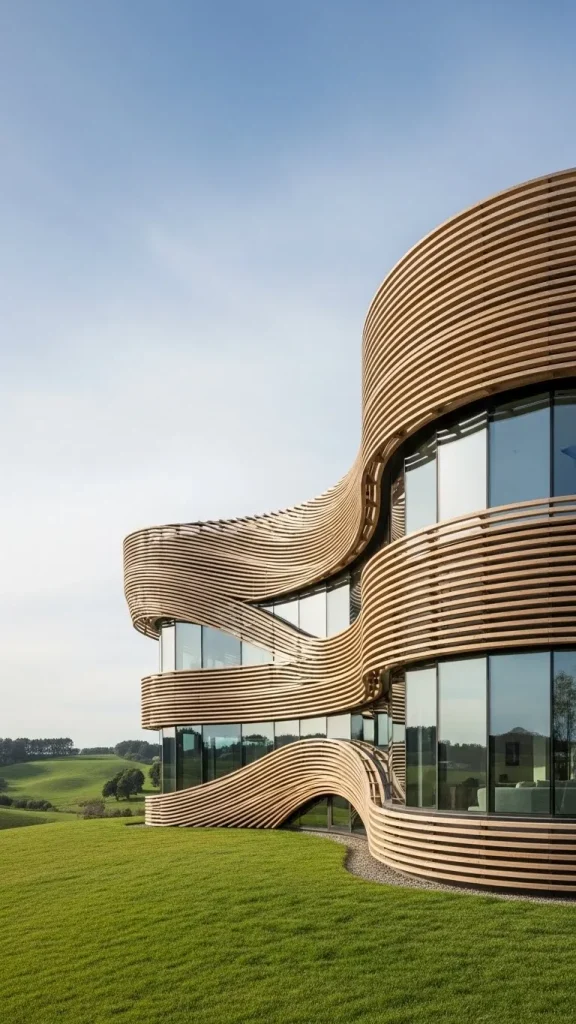
17. Curved Slat Facade Curves
While wood is naturally stiff it can be used to create curved facades by using many thin slats. These slats follow the curve of the building to create a soft and flowing exterior look.
This style is often used on modern houses with rounded corners or cylindrical room volumes. The vertical lines of the slats emphasize the curve and create a beautiful play of light.
Thin slats of cedar or larch are typically used because they are flexible and easy to work with. It is a stunning design choice that breaks the rigid geometry of standard modern homes.
DIY Tips
- Build a curved sub frame using flexible plywood or metal to support the wooden slats.
- Use many thin slats rather than a few wide ones to achieve a smoother curve profile.
- Soak the wood in water for a few hours if you need it to bend around a tight corner.
- Use more fasteners than usual to ensure the wood holds the curved shape over time.
- Sand the edges of the slats carefully to ensure they align perfectly along the curve.
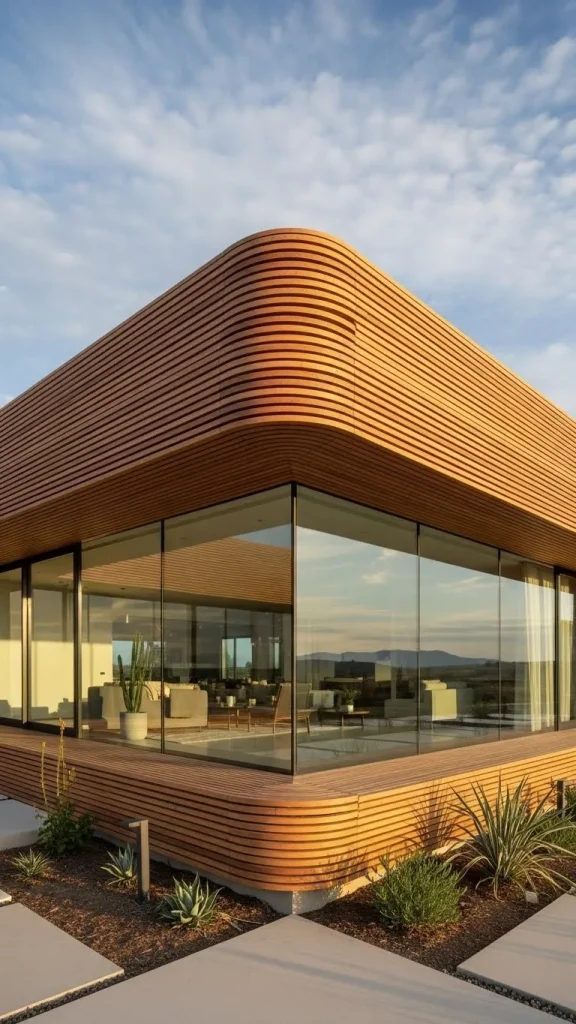
18. Roof-to-Wall Continuity
Modern designers often extend the wooden slats from the walls right up onto the roof. This creates a continuous skin that wraps the entire house in a single warm material.
The slats on the roof act as a rain screen that protects the waterproof membrane underneath. This design makes the house look like a solid wooden block that has been carved out.
It is a very high end look that requires careful engineering to ensure proper drainage and safety. The result is a monolithic structure that looks incredibly clean and sophisticated in any setting.
DIY Tips
- Work with a professional roofer to ensure the underlying waterproof layer is perfect.
- Use a high durability wood like ipe or black locust for the roof sections of the house.
- Leave a larger gap under the roof slats to allow for air circulation and drying.
- Install a gutter system that is hidden beneath the slats to maintain the clean lines.
- Check the roof slats every year for any signs of rot or loose hardware from the wind.
19. Backlit Night Facades
Architectural lighting can be placed behind wooden slats to create a glowing facade at night. The light filters through the gaps in the wood to create a soft and dramatic effect.
This highlights the texture of the timber and makes the house look like a glowing lantern. It is an excellent way to improve the curb appeal of a modern home after the sun sets.
LED strips are usually used for this purpose because they are thin and easy to hide. The homeowner can choose different colors or brightness levels to change the mood of the house.
DIY Tips
- Use waterproof LED strips that are rated for exterior use to ensure they last a long time.
- Place the lights in a recessed channel behind the slats to prevent them from being seen.
- Choose a warm white light to enhance the natural color and warmth of the wood.
- Connect the lights to a smart timer or a light sensor for automatic operation at night.
- Test the light placement before permanently installing the slats to get the perfect glow.
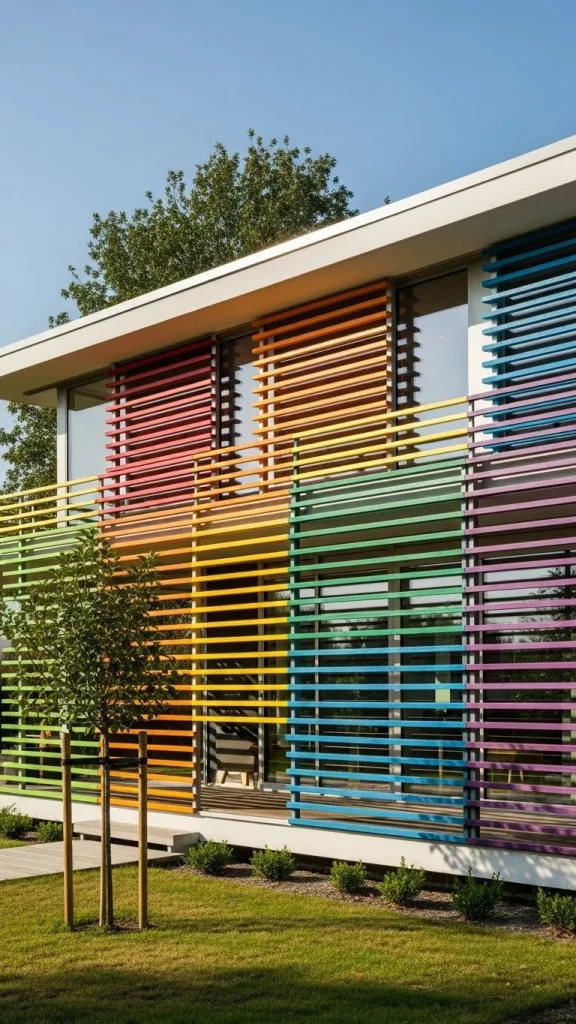
20. Stained Rainbow Slat Variations
Using different stains on the wooden slats can create a multicolored or ombre effect on the facade. This adds a playful and artistic touch to a modern house that might otherwise feel too serious.
The colors are usually kept in a natural palette like browns grays and tans for a subtle look. Some designers use bold colors to make a statement or to reflect the personality of the owner.
The variations in color help to break up large surfaces and add depth to the wooden pattern. It is a creative way to use a traditional material in a very contemporary and fun way.
DIY Tips
- Test your stains on scrap wood from the same batch to see how the colors react.
- Use a clear sealer over all the different stains to ensure they age at the same rate.
- Lay out the colored slats on the ground to finalize the pattern before you nail them up.
- Keep the colors organized in a logical sequence like a gradient or a random mix.
- Use a high quality brush to apply the stain to ensure the color is even and deep.
21. The Wide Plank Modernist
While thin slats are more common some modern houses use wide wooden planks for a bolder look. This style emphasizes the bulk and the grain of the wood rather than the rhythmic lines.
Wide planks provide a more rustic and grounded feel that works well in rural or mountainous areas. They are often placed with a small gap between them to maintain the slat aesthetic.
This design is very durable and can make a small house look more substantial and important. It is a great way to use local timber and celebrate the natural resources of the region.
DIY Tips
- Use two screws per board at every support point to prevent the wide planks from cupping.
- Check the moisture content of the wood before installation to minimize shrinking and gaps.
- Use a thicker spacer to match the larger scale of the wide planks for a balanced look.
- Sand the faces of the planks thoroughly to show off the beautiful natural wood grain.
- Apply a heavy duty exterior oil to protect the large surface area of the wide boards.
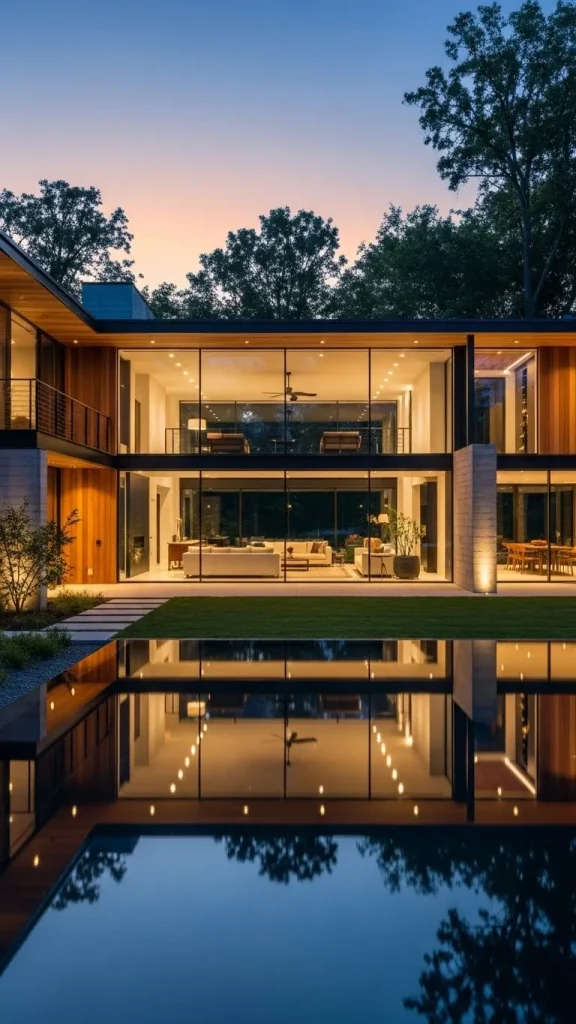
22. Glass and Slat Transparency
Combining large glass walls with wooden slats allows for a play between transparency and solidity. The slats can be placed directly in front of the windows to act as a permanent screen.
This allows the people inside to see out while preventing people on the street from seeing in. It creates a private and cozy interior that still feels connected to the outside world.
The shadow lines of the slats are projected into the house creating a beautiful effect on the floors. It is a sophisticated way to handle privacy in modern homes with a lot of glass.
DIY Tips
- Align the slats with the window frames to create a clean and organized visual appearance.
- Use a slat width that provides enough privacy without completely blocking the light.
- Ensure there is enough space to clean the glass behind the slats after they are installed.
- Use a dark colored wood to reduce the glare on the glass from the outside sun.
- Mount the slats on a frame that can be easily removed if the glass ever needs repair.
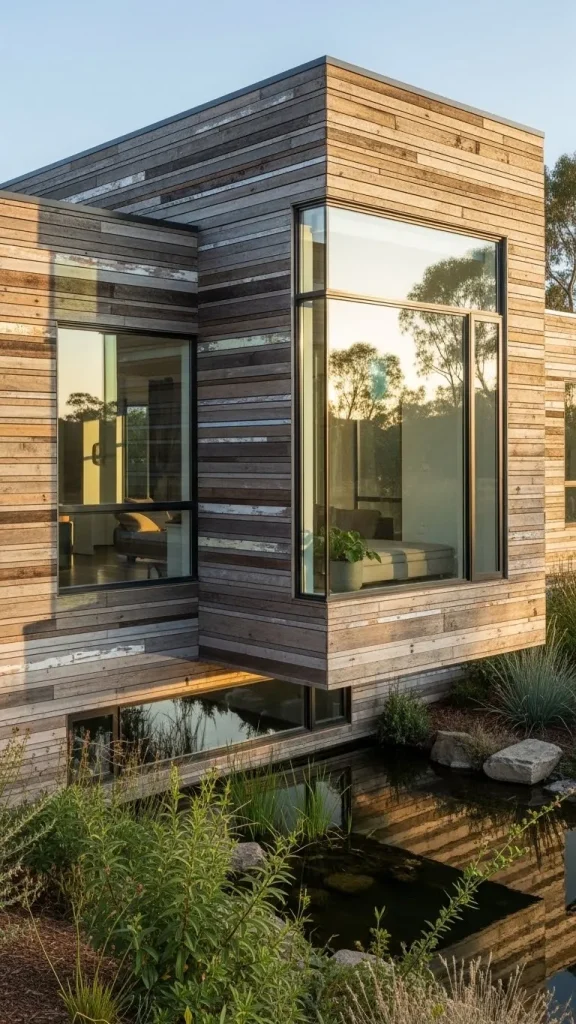
23. The Rustic Reclaimed Slat Look
Reclaimed wood can be cut into slats to create a rustic modern facade with a lot of history. Each piece of wood has a unique color and texture that adds character to the house.
This style is very sustainable as it gives a new life to old timber from barns or factories. The weathered look of the reclaimed wood provides a nice contrast to the clean modern shapes.
Homeowners love this look because it feels warm and lived in from the very first day. It is an environmentally friendly choice that tells a story through the architecture of the home.
DIY Tips
- Inspect all reclaimed wood for old nails or pests before you start cutting it into slats.
- Kiln dry the reclaimed wood if possible to ensure it is stable and will not warp on the wall.
- Use a wire brush to clean the surface of the wood without removing the beautiful patina.
- Mix different lengths of wood to emphasize the reclaimed nature of the material.
- Apply a clear matte sealer to protect the wood while keeping the original rustic look.

24. Kinetic Slat Systems
Kinetic slat systems are the peak of modern house technology where the facade can move. These slats are connected to motors that allow them to tilt or rotate like giant blinds.
The system can be controlled by a computer to track the sun and provide the best shading at all times. This dramatically reduces the energy needed to cool the house in the summer.
It is a futuristic look that turns the entire house into a living machine that reacts to the environment. While expensive it offers the ultimate in comfort and architectural innovation for the owner.
DIY Tips
- Consult with an automation expert to design the control system for the kinetic slats.
- Use high torque motors that are rated for outdoor use and can handle the wind loads.
- Ensure all the moving parts are easily accessible for maintenance and lubrication.
- Install a manual override system in case of a power failure or a motor malfunction.
- Use a lightweight and very stable wood species like Accoya for the moving slats.
Conclusion
Wooden slat facades represent a perfect harmony between nature and modern industrial design. They offer a versatile solution for architects and homeowners who want beauty and function.
Whether you choose the drama of charred wood or the simplicity of vertical cedar the results are stunning. These structures prove that natural materials will always have a place in our modern world.
The 24 styles explored in this article show that there is a slat pattern for every type of home. From privacy to energy efficiency these facades provide benefits that go far beyond their good looks.
Building or renovating with wooden slats is a rewarding project that can transform the look of any house. We hope these designs and tips inspire you to bring the warmth of wood to your next project.